
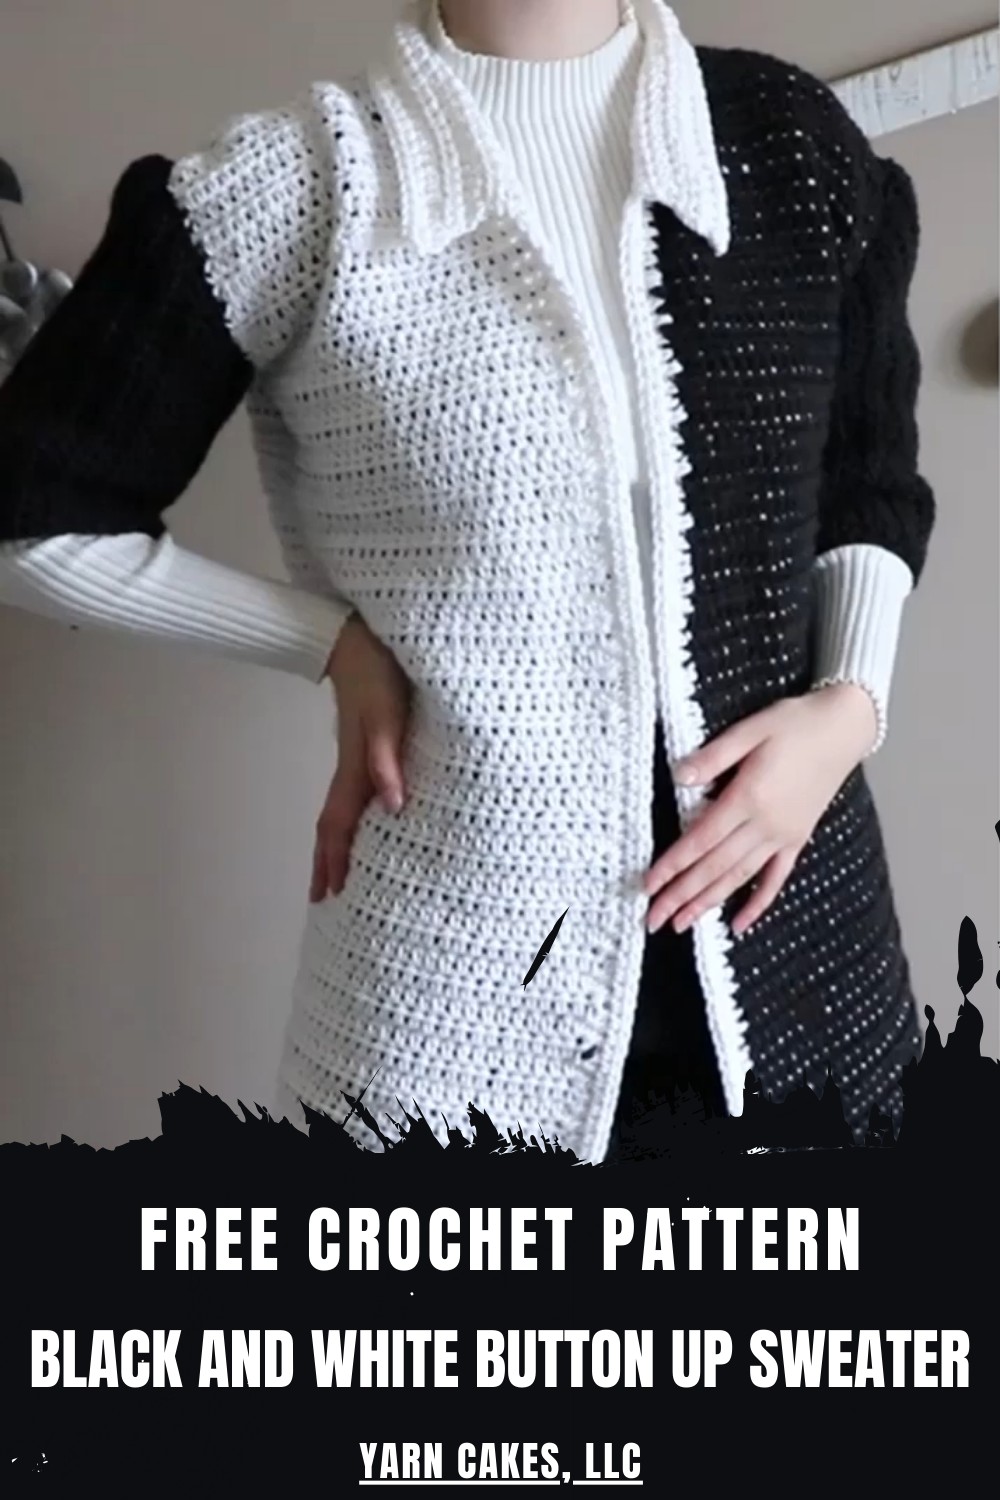
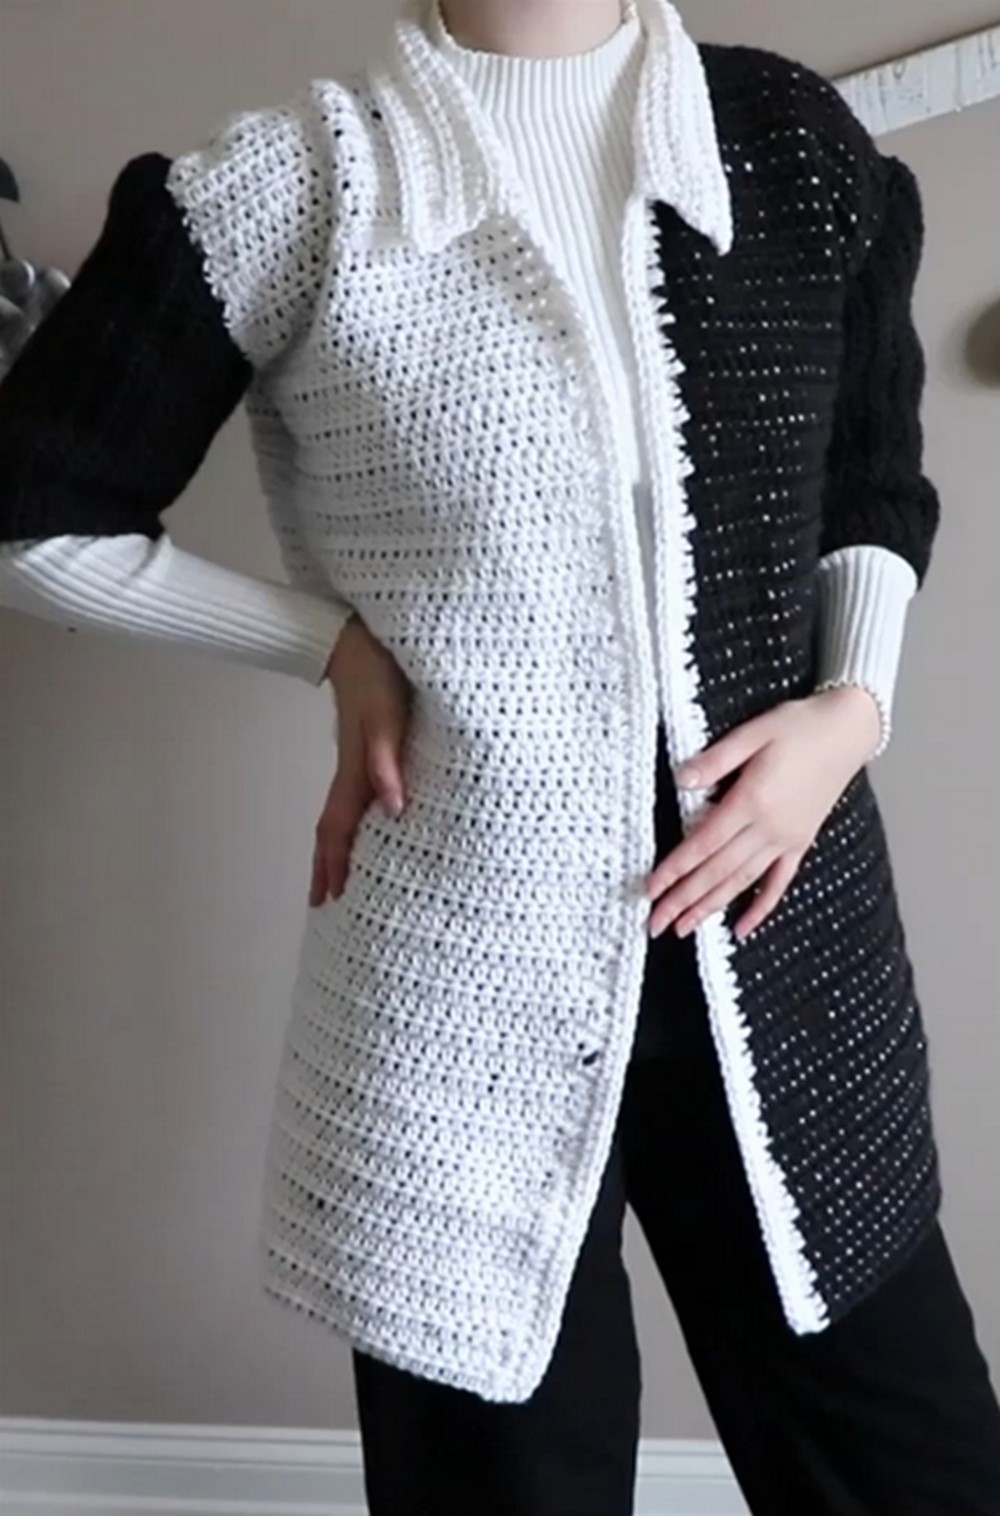
Achieve timeless style with a Crochet Button Up Sweater Pattern that offers comfort, versatility, and a personalized touch for any occasion.
A handmade sweater with button closures offers unmatched versatility and timeless charm. The crochet technique allows for intricate textures and stitch details that give the sweater a unique character, perfect for wardrobe essentials during all seasons. You can wear it fully buttoned for warmth or keep it open for a more casual, layered style.
Crochet Button Up Sweater Perfect for Every Season
One of its biggest advantages is the ability to customize it in terms of size and color, ensuring a sweater that fits perfectly and matches personal preferences. The lightweight yet comfortable feel of crochet makes it suitable for transitional weather while still being cozy during cooler days.
What sets this sweater apart is its aesthetic appeal—detailed stitchwork and button accents make it both functional and stylish. It’s ideal for a variety of settings, from casual outings to relaxing evenings. Incorporating one into your wardrobe brings both practicality and timeless elegance.
Materials Needed
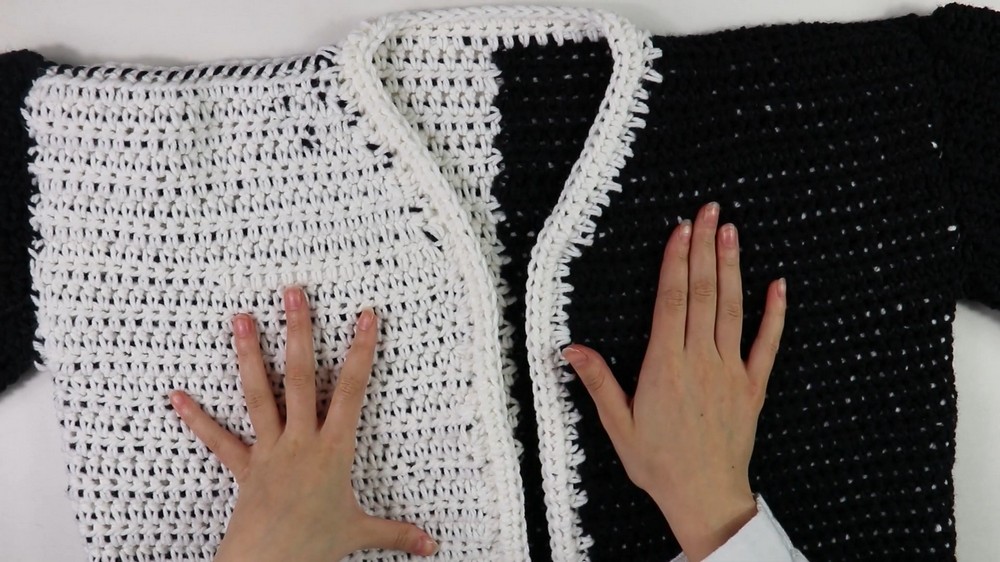
- Category 4 Yarn: White and black yarn are used alternately throughout the project.
- 5mm Crochet Hook: Ideal for achieving the correct tension and smooth stitches.
- Tapestry Needle: For whip stitching the seams and weaving in loose ends.
Special Features
- Customizable Design: Includes instructions for sizes Small through 3XL.
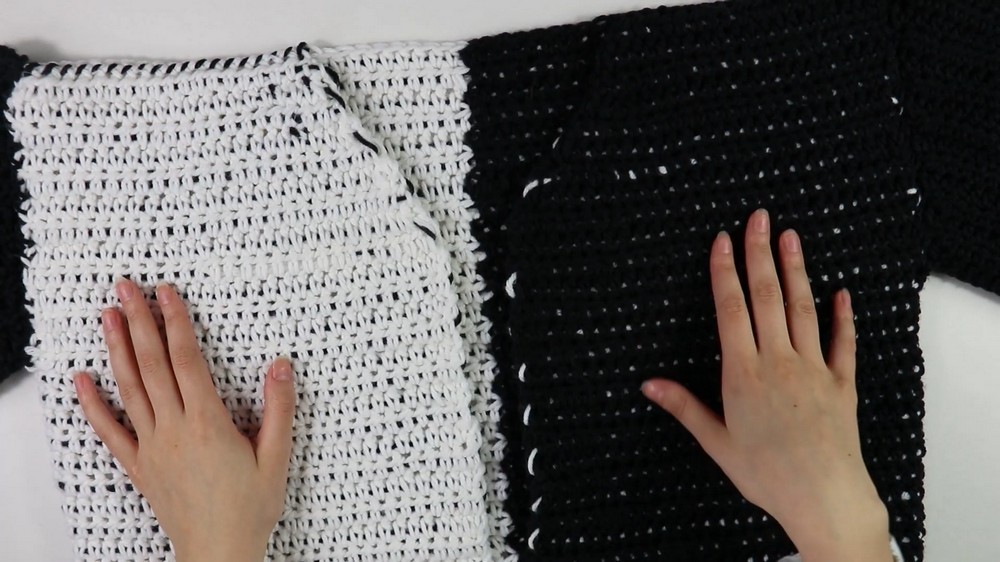
- Stylish Color Blocking: Alternates between white and black yarn to create a striking design.
- Versatile and Wearable: Perfect for layering during cooler months, combining comfort with style.
- Detailed Instructions: Anne provides clear step-by-step guidance for beginners and beyond.
Level of Difficulty
Beginner-friendly to Intermediate: While the stitch techniques (half double crochets) are simple and accessible, color changes may require a bit of patience and focus, especially for new crocheters.
Tutor's Suggestions
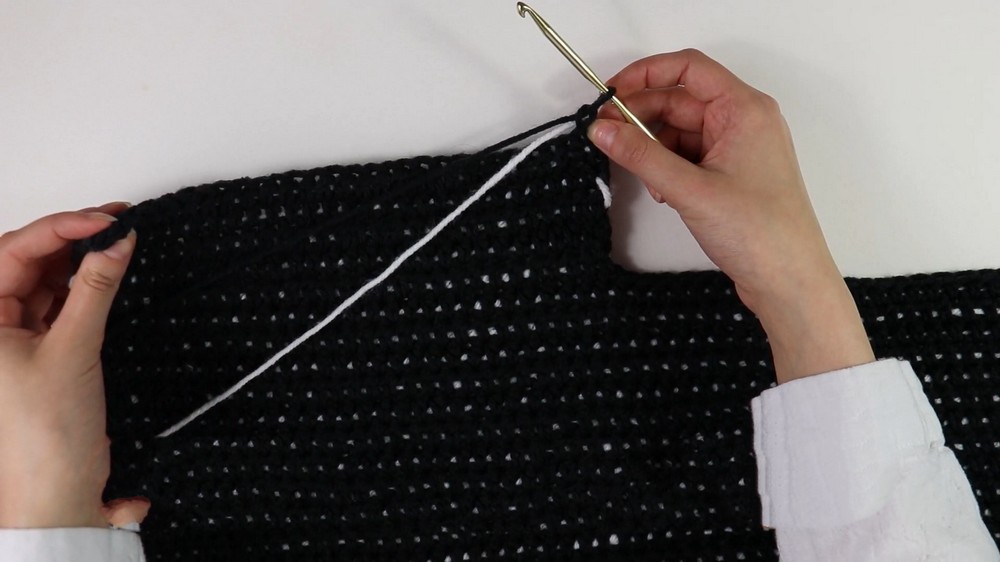
- Carrying Yarn: Anne recommends carrying and weaving in the unused yarn throughout the project to ensure a smooth and seamless color change.
- Adjusting Length: You can customize the sweater by adding or reducing rows in the bodice section to achieve your desired fit.
- Written Pattern: If you're unsure, refer to the written pattern linked below the video for enhanced clarity.
Step-by-Step Instructions
1. Create the Bodice
- Start with White Yarn:
- Make a slip knot and chain 55 stitches.
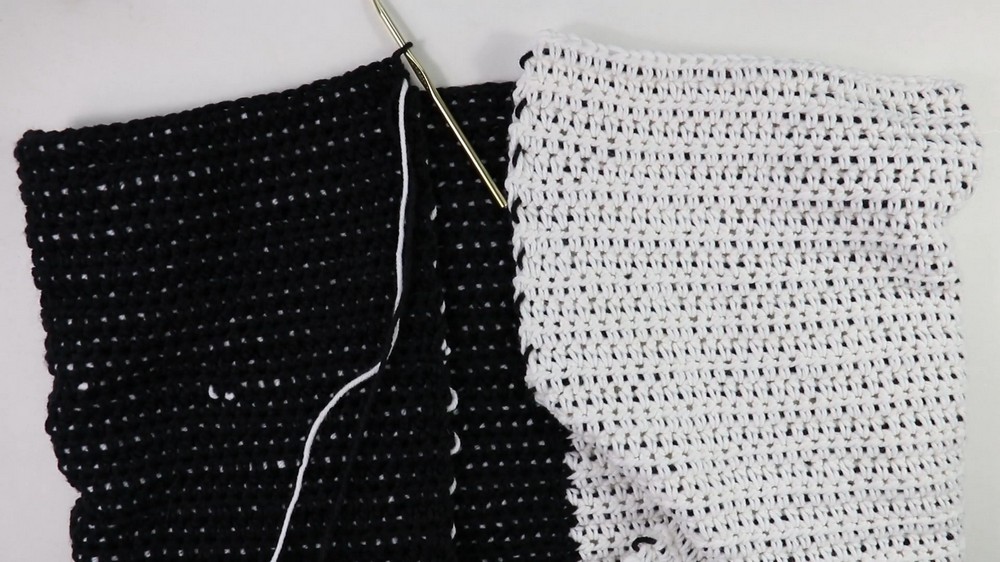
- Switch to Black Yarn:
- Yarn over and pull through the last loop to switch colors.
- Create 57 black chains.
- Row 1:
- Skip the first chain and insert the hook into the second chain.
- Use half-double crochet (HDC), working across until one stitch remains for the black yarn.
- Switch back to white yarn for the rest of the row.
- Chain one and turn your work.
2. Repeat Row Patterns
- Alternate between Row 2 (starting with white) and Row 3 (starting with black).
- Repeat this pattern until you complete 58 rows for the bodice.
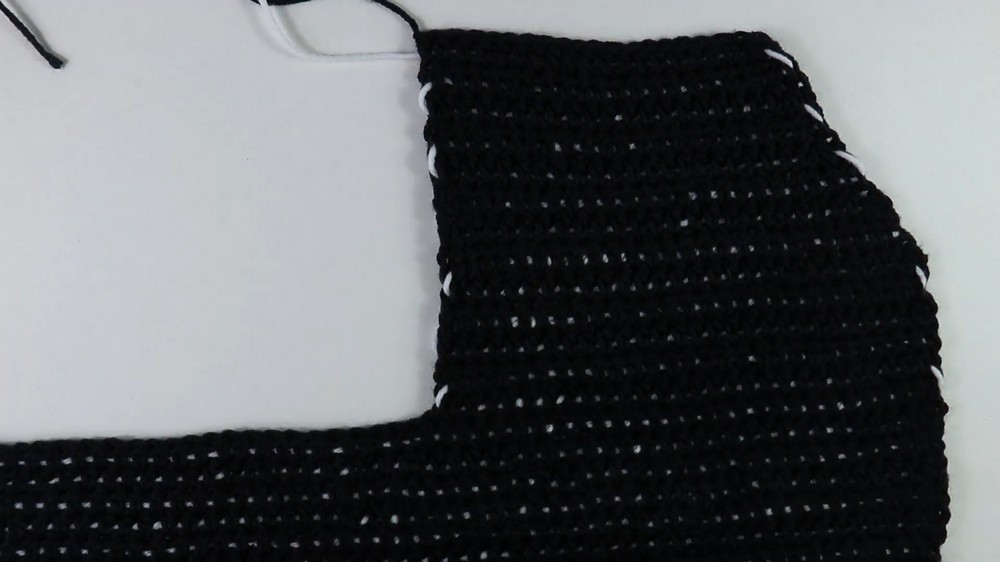
3. Create the Front Panels
- Divide the front into two symmetrical panels:
- Panel 1: Work 28 stitches across for 5 rows using black yarn, then begin decreases for shaping the neckline.
- Panel 2: Follow the same steps as Panel 1, alternating between regular HDC rows and decrease rows.
- Panel 1: Work 28 stitches across for 5 rows using black yarn, then begin decreases for shaping the neckline.
- Complete 13 rows total and fasten off for both panels.
4. Create and Attach the Back Panel
- Work the back panel using regular HDC rows without any decreases for shaping.
- Repeat for 13 rows, alternating black and white yarn, and fasten off.
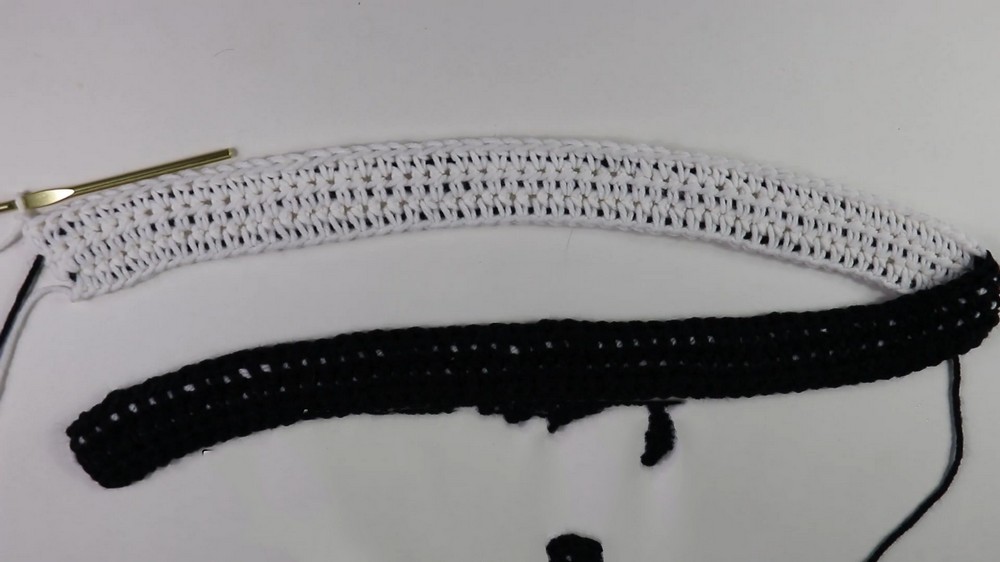
5. Crochet the Sleeves
- Begin with a chain of 21 stitches using black yarn.
- Work increase rows:
- Add two half double crochets into the first and last stitches for the first 15 rows.
- Shift to decrease rows for shaping:
- Subtract two stitches per row for another 15 rows.
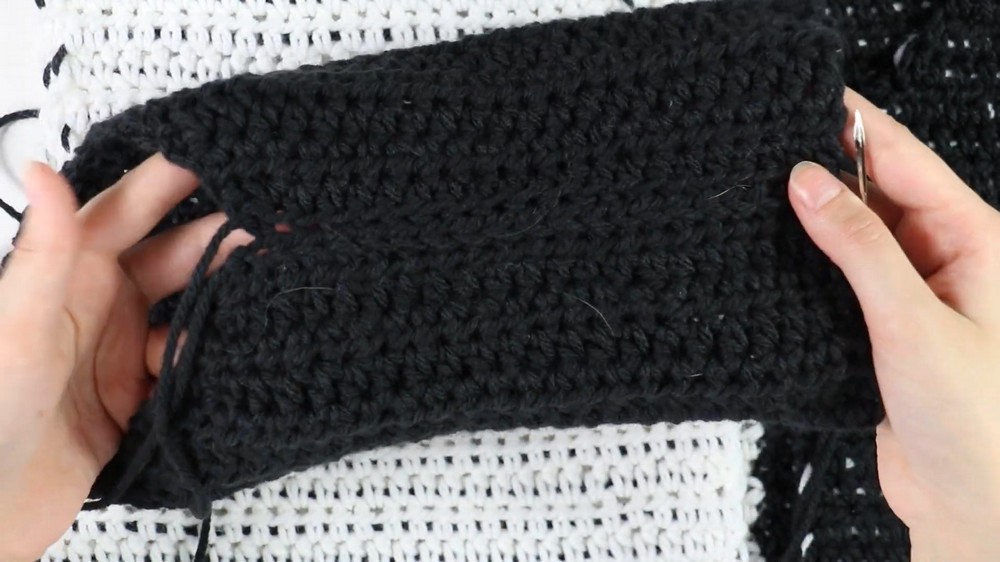
- Subtract two stitches per row for another 15 rows.
- Complete 30 rows total for both sleeves and fasten off.
6. Assemble the Sweater
- Whip Stitch Seams:
- Fold the sleeves in half and whip stitch along the edges.
- Attach each sleeve to the bodice’s armholes.
- Whip stitch the shoulder straps for a clean finish.
Adding Borders
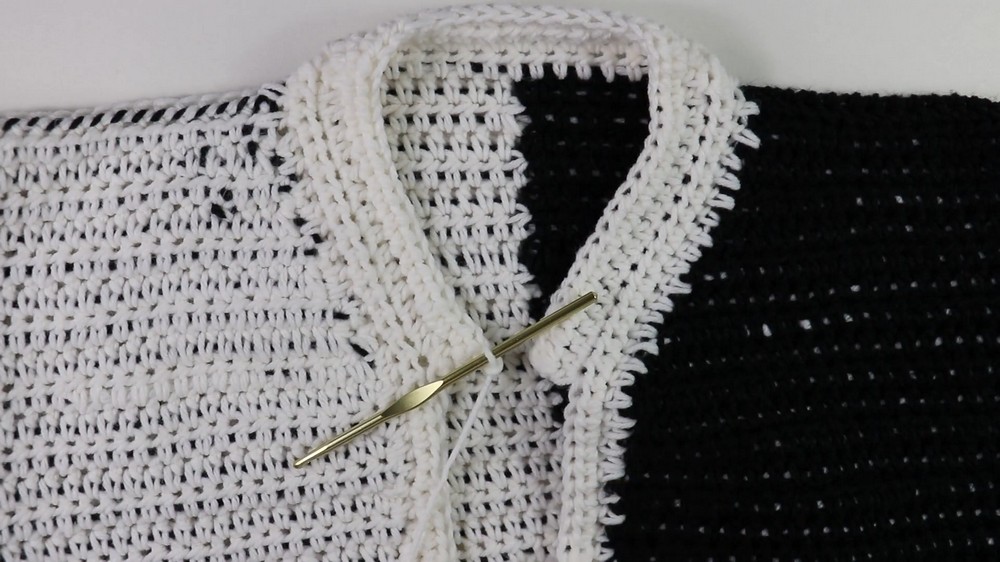
Front Border
- Use white yarn to crochet along the edge of the bodice:
- Alternate between one and two half double crochets for side rows.
- Work two full rows of HDC, cut, and fasten off.
Collar
- Use white yarn to crochet a collar by inserting the hook where the neckline begins:
- Add increases into the first and last stitches of each row.
- Work 5 rows total for the collar to ensure a comfortable and stylish fit.
Uses
This sweater is ideal for colder months, layering over tank tops, dresses, or long-sleeve shirts. The black-and-white color combination makes it timeless and versatile for casual or semi-formal occasions.
Tip
When switching between colors, keep your tension consistent and gently tug the carried yarn to prevent any gaps in your stitches. This will ensure a neat and polished finish for the color-blocked design.
Conclusion
Anne’s step-by-step tutorial makes it easy to crochet a stylish and customizable sweater with intricate yet approachable techniques. The project combines fashionable design with practical warmth, making it a fun and rewarding challenge for any crocheter. Whether you're creating the sweater for yourself or as a gift, the color-blocked pattern will undoubtedly stand out.


