
Shine like royalty with the Free crochet princess crown Pattern and add charm, fun, and magic to every special moment.
Add a touch of magic to any outfit with this adorable handmade crown that instantly turns playtime into a royal adventure! This crochet princess crown pattern brings charm and sparkle to birthdays, dress-up parties, or even just a fun day at home. Each stitch builds a delightful, pointed design that looks elegant yet playful, making anyone who wears it feel like true royalty. You can pick vibrant colors for a bold look or soft pastels for a sweet, dreamy vibe.
Royal Fun Crochet Princess Crown Pattern for Kids
Uses
-
Create a princess crown or headband for dress-up, holidays, or costumes.
-
The base section (before the lace points) can be used as a simple, thick headband or turban.
Materials
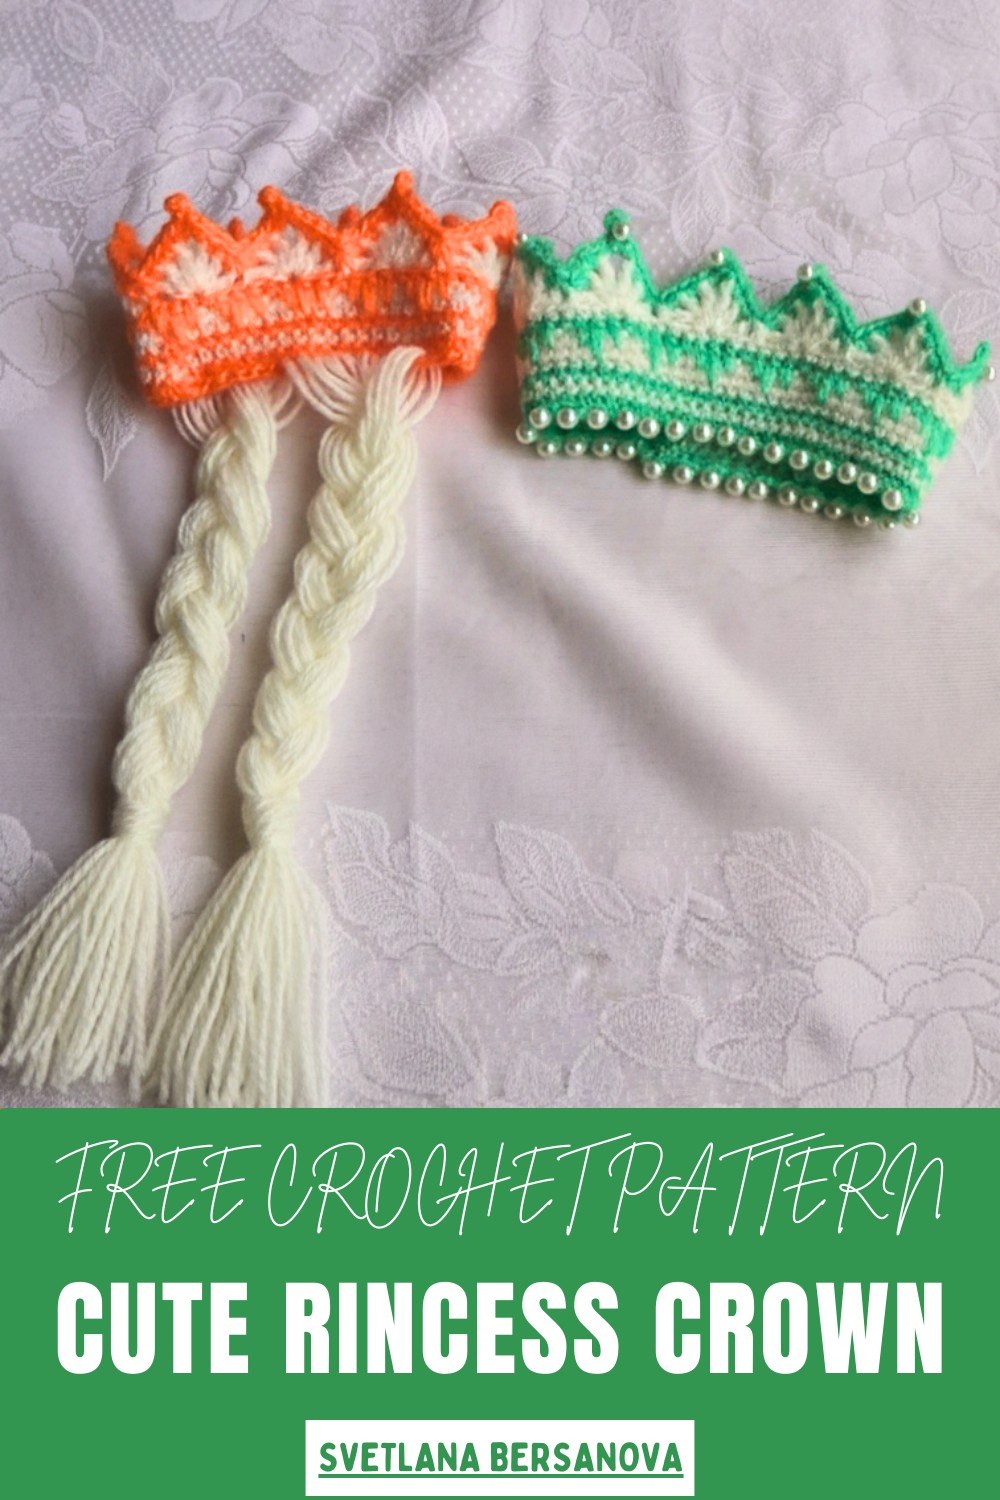
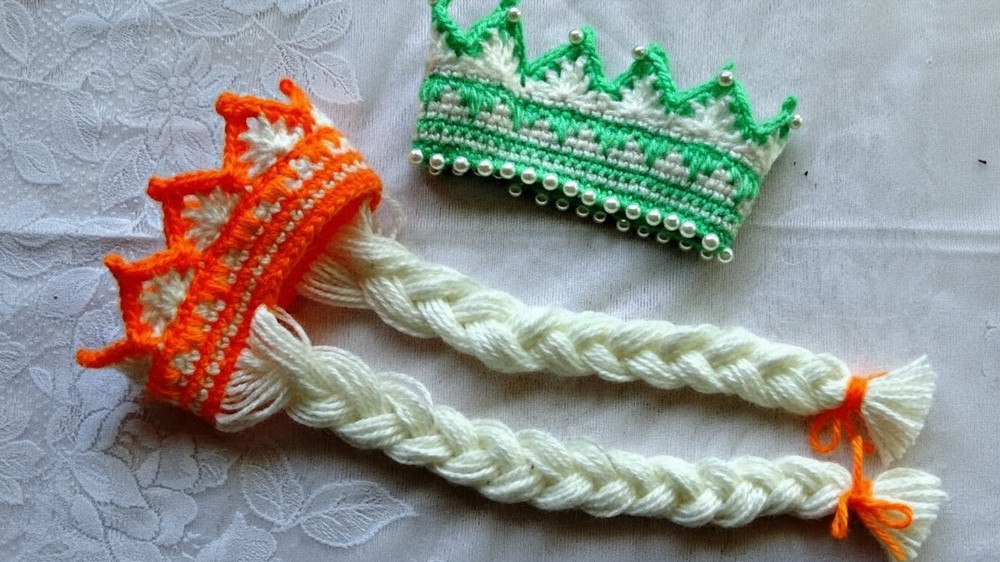
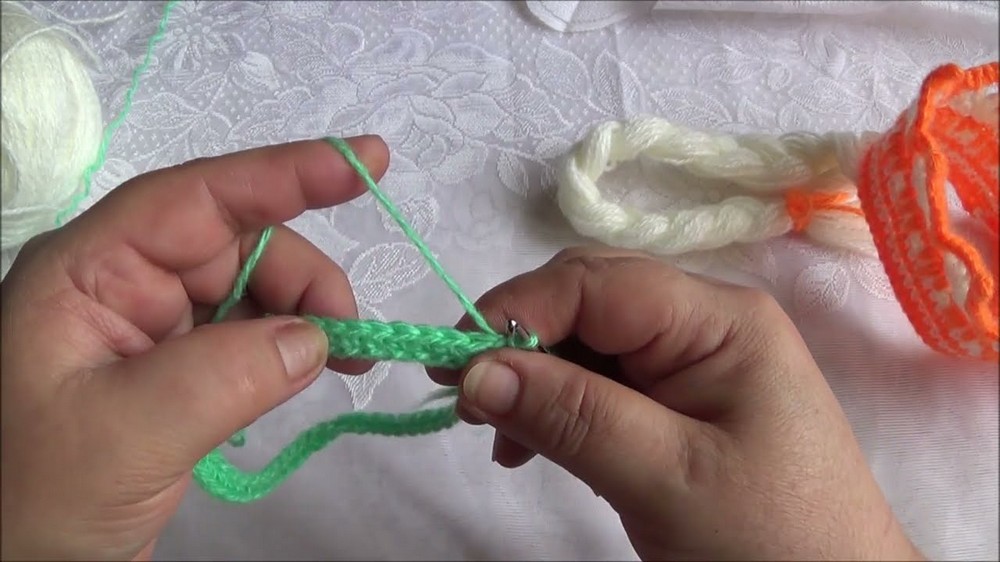
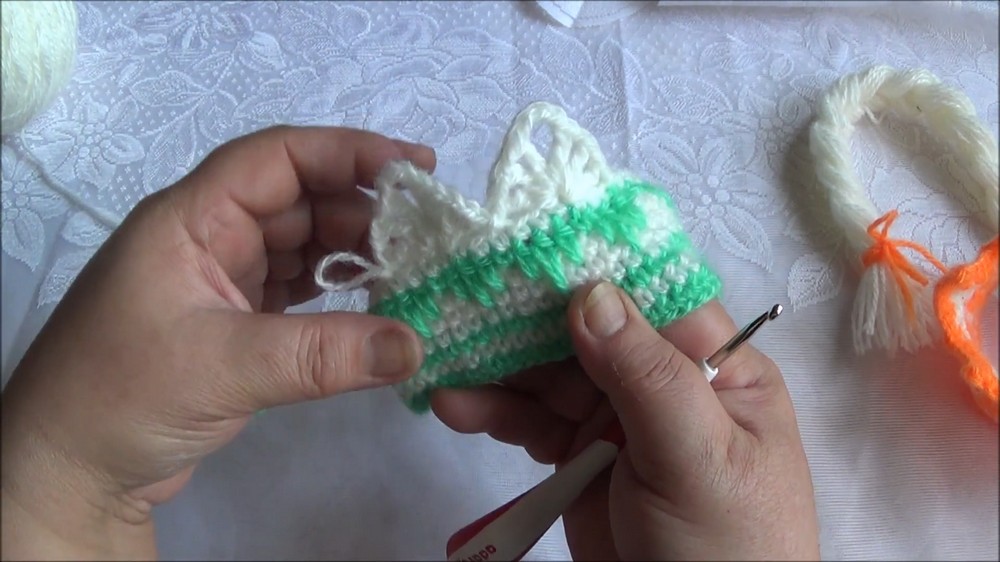
Yarn Thick, dense yarn (like Caucasian Troika/Dvoyka in the original video). If using thin yarn, use multiple strands (double or triple) to achieve the necessary thickness for rigidity.
Colors Two contrasting colors (e.g., a dark color for the base/texture and a light color for stripes/lace).
Hook Size to match your thick yarn (the tutor used a 3.5 mm hook).
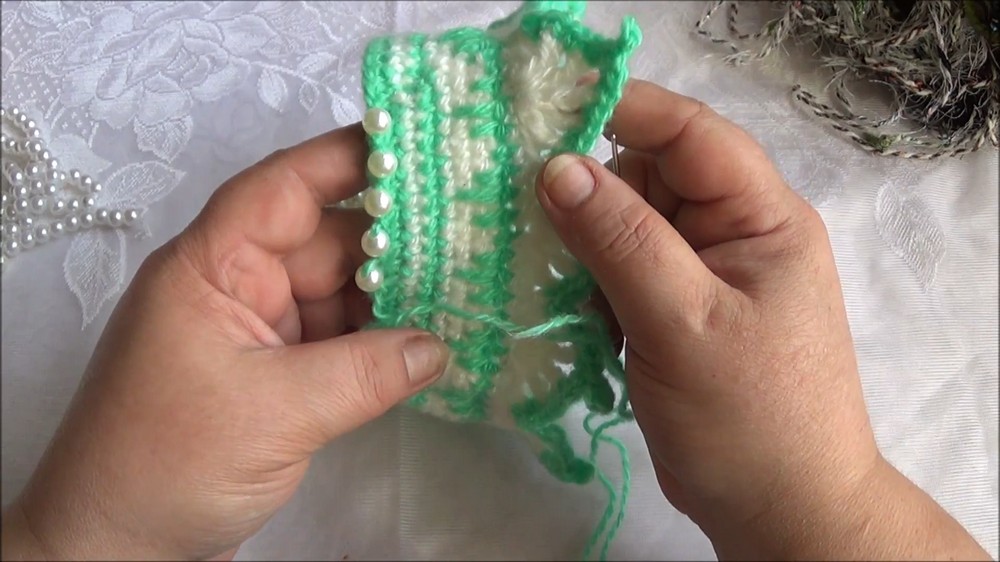
Optional Beads for decoration, sewing needle and thread for beading, wire (from an electrical cord) to insert into the base for maximum rigidity, and extra yarn for a decorative braided tie.
Special Features
-
Self-Supporting Structure: The design and yarn choice prioritize a stiff fabric, minimizing the need for starching.
-
Simple Color Blocking: Uses contrasting colors to easily create stripes and highlight the decorative pattern.
-
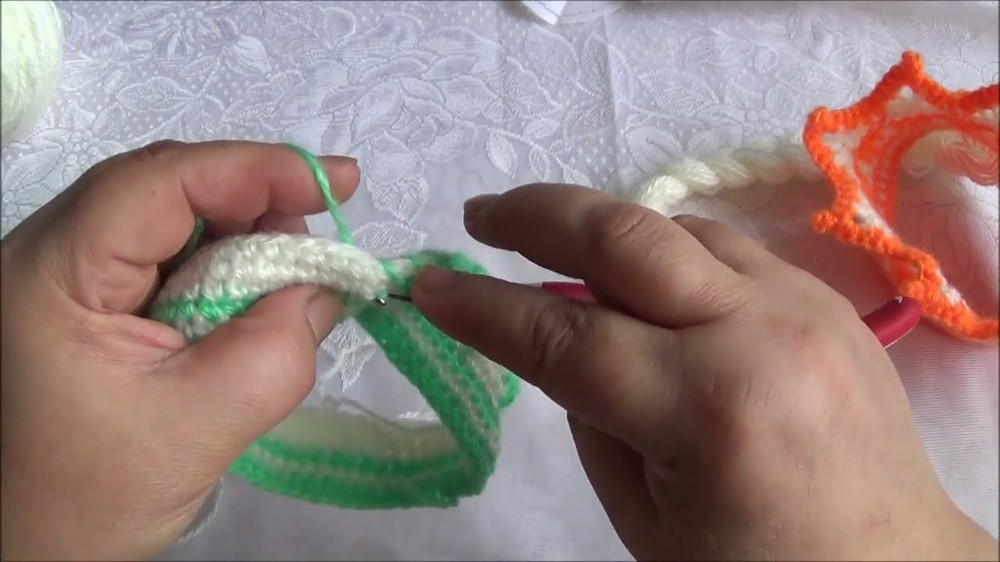
Elongated DC Texture: Features a unique row of elongated double crochet stitches that dip into the foundation rows, creating a defined V-shape pattern.
-
Customizable Edges: The crown can be finished with a braided tie attached at the sides and embellished with beads on the band and points.
Level of Difficulty
This pattern is Intermediate. You must manage color changes, maintain a consistent and tight tension, and execute a patterned row involving elongated stitches that reach down into previous rows, followed by a specific lace border pattern.
Tutor's Suggestions
-
Prioritize Thickness: Use yarn that is already thick, or hold two to three strands together, so the crown naturally stands up.
-
Stitch Tightly: Work the single crochet (SC) rows, especially the base, with tight tension (туго) to create a firm, dense foundation.
-
Pre-Planning: If you plan to add the decorative braided ties and beads, attach the braided ties first. Beading after the ties are attached is much easier.
-
Finishing Alternatives: If the crown fabric is still too soft, you can slightly starch it, or glue the bottom band onto a piece of firm cardboard for a very stable edge.
-
Headband Option: If you stop after the solid rows and before the lace points (after the white SC row following the textured dark row), you will have a wide, textured headband.
Crochet Princess Crown
Adding tiny beads, ribbons, or glitter makes it even more enchanting and personal. Lightweight and comfy, this crown is perfect for little hands to wear without fuss, while adults can enjoy creating it as a thoughtful gift or cute photo prop.
Beyond its beauty, it’s a creative way to practice crochet skills, turning simple yarn into something magical with every loop and stitch.
Whether it’s for imaginative play, party fun, or just adding a whimsical touch to a costume, this crown brings joy, smiles, and a sprinkle of royal charm wherever it goes. With just a bit of patience and creativity, anyone can make this stunning accessory and watch it transform ordinary moments into unforgettable memories.
Conclusion
Your elegant, self-supporting crochet princess crown is complete! This thick, sturdy design provides a beautiful accessory ready for any royal occasion.
Tip
When working the lacy top points (Part 5), remember to insert your hook into the base of the DC stitch of the previous row when creating the elongated DC stitches. This is a crucial detail that ensures the points stand tall and stable, rather than collapsing like normal crochet points.


