
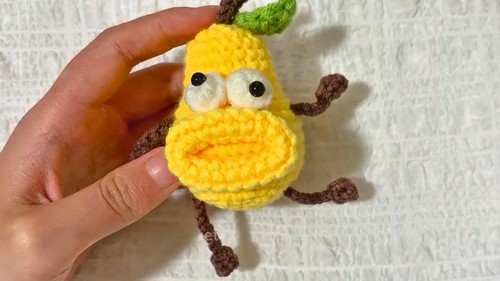
Brighten your space with this Free Crochet Pear Amigurumi Pattern that forms a soft adorable pear perfect for décor play or gifting.
A cheerful amigurumi adds a playful and charming touch to any display or collection. The Crochet Pear Amigurumi Pattern offers a creative way to make a lively piece that works wonderfully as a decorative accent, a cuddly toy, or a thoughtful handmade gift. Its gentle curves and thoughtful detailing give it a polished and appealing appearance, while the whimsical design adds warmth and personality.
Playful Crochet Pear Amigurumi Pattern Everyone Will Adore

Following the pattern enhances patience, attention to detail, and hand coordination, creating a satisfying and enjoyable experience. The design allows freedom in color choices, sizes, and textures, making each pear unique and expressive.
Perfect for nurseries, cozy shelves, or heartfelt presents, the finished amigurumi balances charm, elegance, and functionality. Every stitch contributes to a delightful creation that brightens spaces and brings joy, making it a memorable piece cherished by both the maker and the recipient.
Step-by-Step Instructions
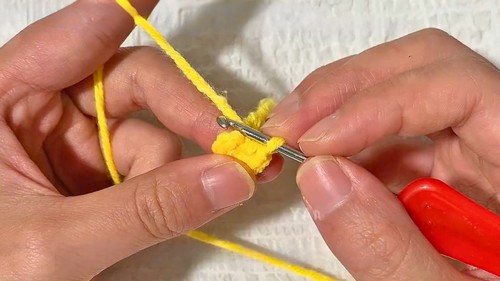
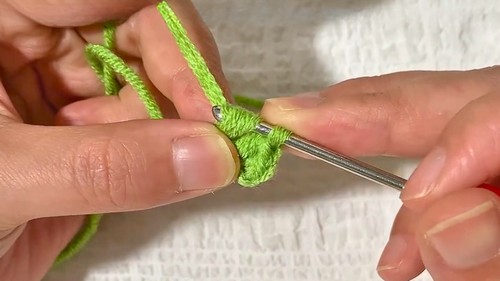
Step 1: Starting with the Magic Ring
- Wrap the yarn around your fingers to form a loop on your middle finger.
- Grab the crossing point and insert the crochet hook through the center of the loop.
- Pull the thread through and hook a chain stitch to secure the magic ring.
- Crochet six single crochets (SC) into the center of the ring. Pull the yarn tail to tighten the loop, forming the base of the pear.
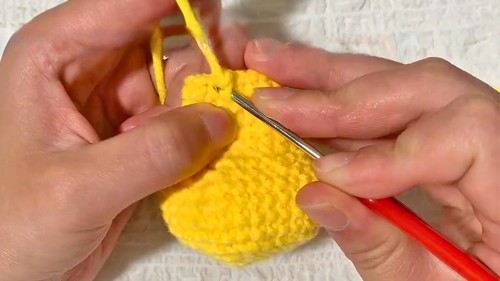
Step 2: Forming the Body
- Round 2: Begin each round with a slip stitch. Insert the hook into the back loop only to secure it, and pull the yarn through to complete the slip stitch. Chain one to continue.
- Crochet six increases in the second round. Each increase consists of two single crochets (SC) stitched into the same stitch.

- Round 3: Alternate between one single crochet and one increase (SC + increase) around the round. Repeat this pattern six times, forming six groups.
- Round 4: Work one single crochet, one increase, and one single crochet per group. Repeat for six total groups, creating a slightly larger shape.
- Round 5: Continue working three single crochets followed by an increase per group. Repeat this set six times.
- Round 6: Stitch two single crochets, one increase, and two single crochets per group, crocheting a total of six groups.

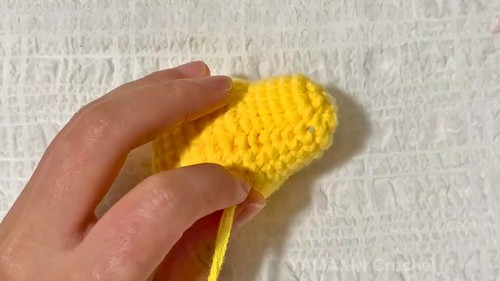
- Rounds 7 to 10: Crochet 36 single crochets per round without increases. This creates a steady body for the pear.
3: Shaping the Body
- Round 11: Alternate between two single crochets (SC) and one decrease (DEC) per group for nine total groups. A decrease is achieved by wrapping the yarn around two adjacent stitches and pulling through both loops.
- Round 12: Crochet a total of 27 single crochets across the round.
- Round 13: Alternate one single crochet (SC) and one decrease (DEC) per group for nine groups.
- Rounds 14 to 18: Continue crocheting 18 single crochets (SC) per round. This decreases the shape consistently.
- Round 19: Make nine decreases to close the top of the pear shape. Cut the yarn and weave in the ends securely.
4: Stuffing the Pear
Fill the pear with cotton stuffing in small amounts. Work in layers to ensure the body is evenly stuffed, firm, and holds its shape.
5: Closing the Body
- Insert the hook into the last stitch using the flow method.
- Sew the opening closed by stitching into consecutive loops around the edge. Tighten the thread, weave it through securely, and hide any loose yarn ends.
6: Crochet the Face
- Mouth:
- Use yellow yarn to outline the mouth.
- Chain 18 stitches (CH), then connect the ends with a slip stitch.
- Crochet 18 single crochets around for three rounds.
- Connect the first stitch to the last stitch and sew it into place on the pear.
- Eyes:
- Use white yarn to form a magic ring.
- Crochet eight single crochets (SC) into the center.
- Tighten the loop and sew each eye onto the pear in the desired position. Use the same method to make the second eye.

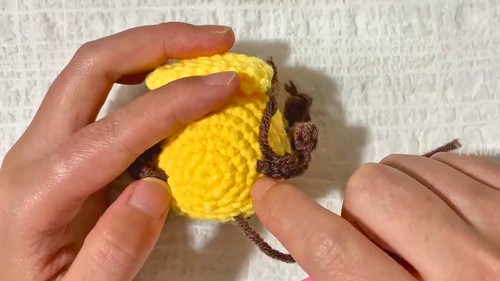
7: Adding Stem, Hands, Feet, and Leaves
- Stem:
- Use brown yarn to chain six stitches (CH).
- Crochet five slip stitches into the chain. Cut the yarn and sew the stem onto the top of the pear.
- Hands & Feet:
- Use brown yarn to chain 10 stitches (CH).
- Crochet six single crochets (SC) into the chain. Cut and sew carefully. Repeat this step to create two hands and two feet.
- Leaves:
- Use green yarn to chain six stitches (CH).
- Crochet one single crochet (SC), one half double crochet (HDC), one double crochet (DC), another HDC, and one SC along the chain. Chain one after completing each leaf.
- Repeat to create and attach multiple leaves.
8: Sewing and Assembly
- Facial Features: Attach the mouth, eyes, and leaves, sewing and hiding the thread ends.
- Hands and Feet: Securely sew them onto the body, positioning them evenly.
- Stem: Sew the stem securely onto the top of the pear using the same sewing method.
Special Features
- Cute Design: Features like the stem, leaves, and quirky face give this pear a fun personality.
- Skill Advancement: Includes magic rings, increases, decreases, slip stitches, and shaping techniques.
- Customizable: You can experiment with yarn colors and facial expressions to make each pear unique.
Level of Difficulty
This project is beginner to intermediate level. While many elements involve basic stitches like single crochets, the assembly and shaping require attention to detail and precision.
Tutor's Suggestions
- Use a Stitch Marker: Mark the first stitch of each round, especially when working on the pear's body, to keep track of your progress.
- Control Tension: Maintain consistent yarn tension for a smooth and even pear shape.
- Take Breaks: Crocheting multiple small elements can be tiring, so pace yourself.
- Experiment with Colors: Try different shades for the body, facial features, and leaves.
Uses
- Home Décor: Display this quirky pear as a decorative plushie.
- Gift: Perfect for gifting to kids or crafting enthusiasts.
- Personal Collection: Add to your handmade collection as a keepsake.
Materials Needed
- Yarn: Green (pear body), yellow (mouth), white (eyes), brown (stem/hands/feet), and green (leaves).
- Crochet Hook: Select a size compatible with your yarn.
- Stuffing: Cotton or polyester stuffing for filling the body.
- Yarn Needle: For sewing and hiding thread ends.
- Scissors: To cut yarn neatly.
Tip
When crocheting the facial details (eyes and mouth), use a marker or illustration for reference to ensure symmetry and consistency in size and placement.
Conclusion
The quirky pear plushie pattern is a delightful crochet project that combines essential skills with creative design, resulting in a unique and adorable project. This gives crocheters the freedom to experiment with colors, facial expressions, and additional features. With step-by-step instructions, even beginners can gain confidence in creating pear-shaped plushies while more experienced crocheters can further refine their skills in detail work and assembly.


