
Cozy up your space with this Free Crochet Waffle Stitch Pillow Pattern, adding texture and charm to any room with a handmade touch.
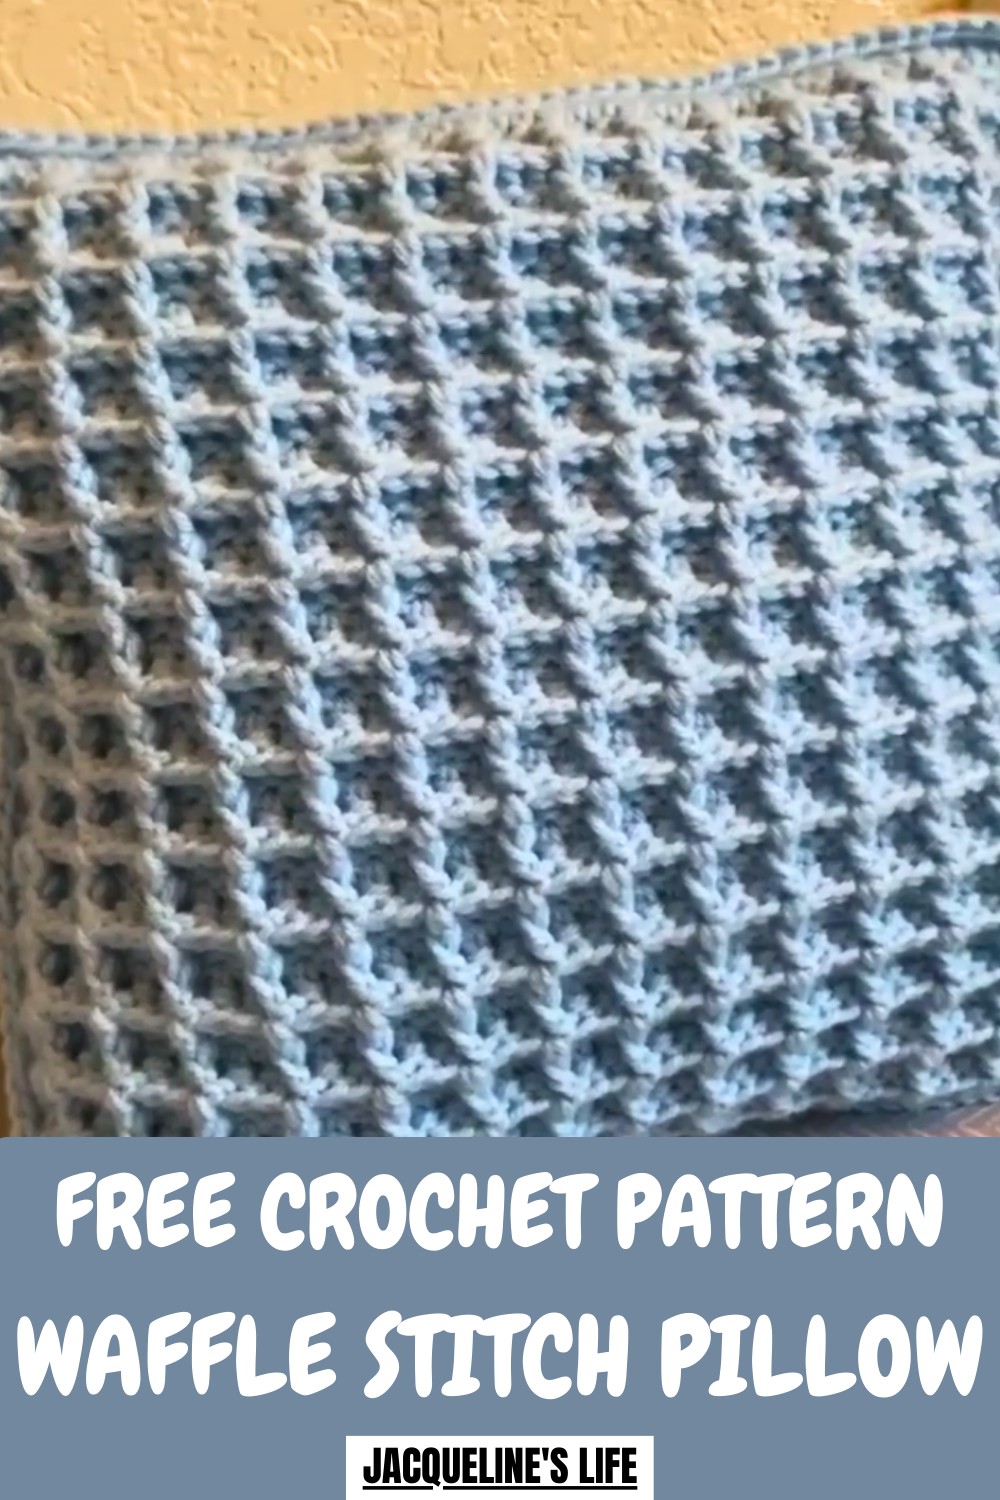
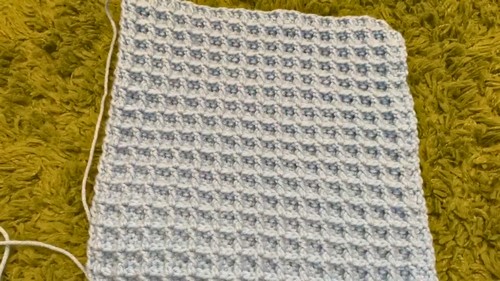
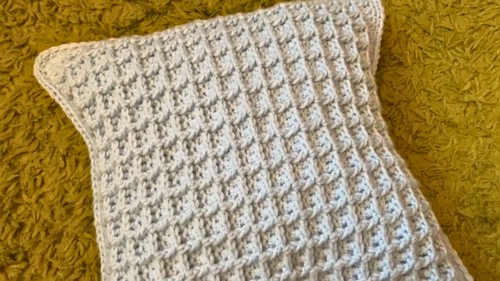
Add texture and coziness to any space with this charming pillow featuring a rich, waffle-like pattern that instantly catches the eye. Its structured yet soft surface creates a visually appealing depth, making it a standout accessory for sofas, beds, or reading nooks. The Crochet Waffle Stitch Pillow Pattern combines classic style with a touch of handmade charm, blending seamlessly into both modern and traditional décor.
Elegant Crochet Waffle Stitch Pillow Pattern to Add Cozy Vibes
It offers practical benefits: the thick, textured stitches provide comfort and durability, while the generous size makes it perfect for leaning on or snuggling. Lightweight and versatile, it can easily be moved around to enhance different areas of a room or serve as a thoughtful, handcrafted gift.
This pillow delivers a combination of visual interest, tactile satisfaction, and functional use, transforming ordinary spaces into cozy, inviting corners with a unique, textured flair that celebrates both style and comfort.
How to Crochet a Waffle Stitch Pillow – Step-By-Step Guide
Materials Used
To crochet the waffle stitch pillow, you will need:
- Yarn:
- You can use any yarn weight you prefer, but a medium-weight yarn works best for this project. The instructor uses green yarn for illustration purposes.
- Crochet Hook: 5.5mm hook.
- Fiberfill/Stuffing: To fill the pillow.
- Scissors: For cutting yarn and trimming excess pieces.
- Optional: Threaded needle for sewing edges.
- Optional Fabric: If you want to add an inner fabric lining for more durability.
Uses for the Waffle Stitch Pillow
- Decor: Elevate your living room, bedroom, or workspace with this textured pillow.
- Gift Idea: Handmade, stylish gifts perfect for holidays such as Christmas or birthdays.
- Practice Project: A great way to master the waffle stitch while creating a useful item.
- Customizable Accessory: Adapt the size or color to suit specific themes or preferences.
Special Features
- Unique Textured Stitch: The waffle stitch adds a visually appealing and tactile texture to the pillow.
- Versatility: This project is customizable to make pillows of any size, depending on your preference.
- Beginner-Friendly Craft: The tutorial uses simple stitches and provides clear guidance, making it accessible to beginners.
- No Sew Option: Instead of using a needle for seams, the pieces can be single crocheted together for ease.
- Quick and Fun: The project takes about two days to complete, even when working at a relaxed pace.
Level of Difficulty
Beginner to Intermediate
- The waffle stitch is easy to pick up with practice and mainly uses double crochets and post stitches.
- Beginners may need extra practice to consistently crochet around the posts for the waffle design, but the repetitive pattern becomes intuitive over time.
- Some assembly at the end (like sewing or single-crocheting edges) may also require light attention to detail.
Tutor’s Suggestions
The instructor shares several great suggestions to make the process easier:
- Focus on Even Chains: Start with an even chain count to properly achieve the waffle effect in the later rows.
- Customize Your Size: Determine how large or small you want your pillow, as you can easily adjust the number of chains and rows.
- Perfect the Stitching Positions: Pay attention to working behind posts to create the raised waffle texture.
- Take Your Time: The waffle stitch looks complicated but isn’t. The instructor emphasizes patience while working through the texture.
- Edge for Neatness: Add a single crochet border to clean up rough edges and give a polished look to your pillow panels.
- Assembly Options: Choose between sewing, single crocheting, or slip-stitching the panels together. Pick what works best for your style.
Step-by-Step Instructions
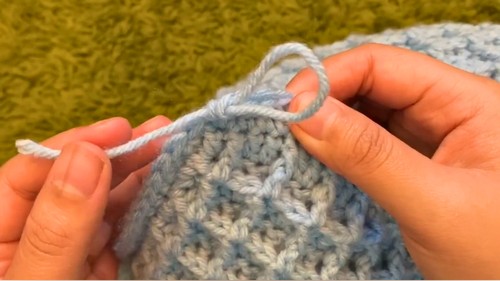
Step 1: Prepare and Create a Slipknot
- Begin with a slipknot. To do this:
- Twist your yarn, pull a loop through, and tighten it securely onto your 5.5mm crochet hook.
Step 2: Chain Foundation
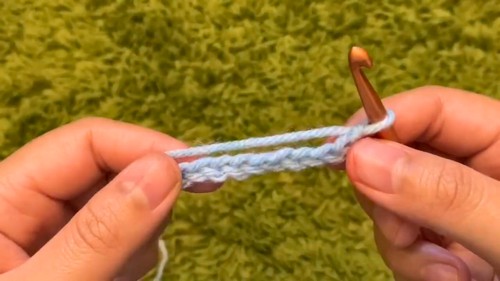 Determine how wide you want the pillow. For the demo, the instructor chains 46 stitches.
- The chain number must be even to maintain the waffle texture.
- Yarn over to create each chain until you reach the desired width.
- The chain number must be even to maintain the waffle texture.
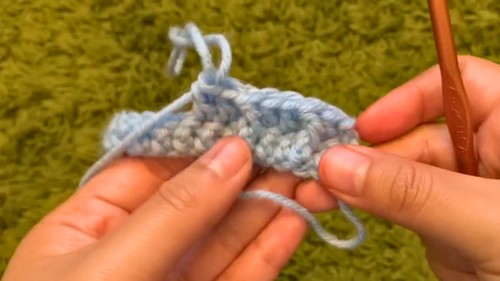
Step 3: First Row (Double Crochet Row)
- Work Double Crochets:
- Yarn over and insert the hook into the second chain from the hook (skipping the first).
- Pull yarn through the stitch, giving you three loops on the hook.
- Yarn over again, pull through the first two loops, yarn over once more, and pull through the remaining two loops to complete the stitch.
- Repeat double crochet into each chain along the row.
- At the end of the row, chain 1 and turn your work.
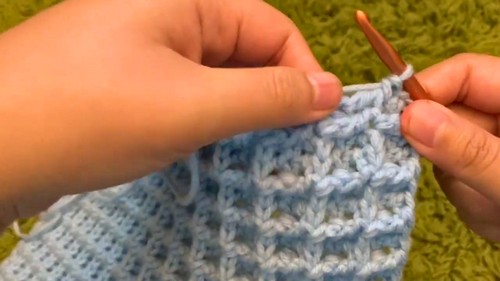
Step 4: Second Row (Begin the Waffle Stitch)
- Combination of Normal and Post Double Crochets:
- Start with a standard double crochet in the first stitch for edging.
- Yarn over, then double crochet around the post in the next stitch. To do this, insert your hook behind the stitch post instead of the top loops. Complete the double crochet as usual.
- Alternate back to two normal double crochets before doing a double crochet behind the next stitch post. This creates the waffle-like raised texture.
- Repeat the alternating pattern (post, two normal) across the row.
- End with a normal double crochet, chain 1, and turn.
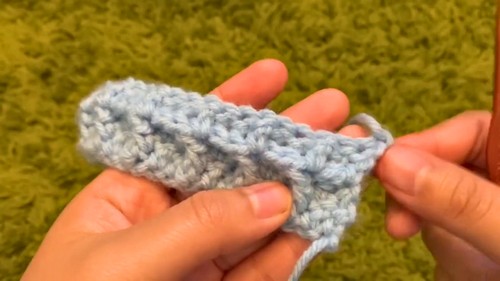
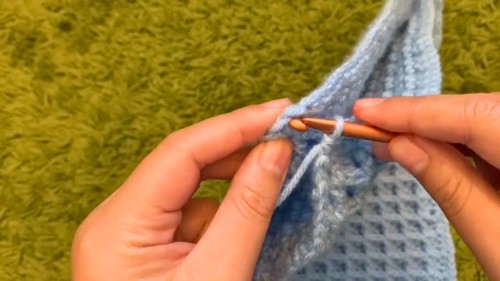
Step 5: Third Row and Beyond
- Alternate rows following the pattern:
- For raised posts visible from the front: Work double crochets around them to emphasize their texture.
- For normal flat stitches: Just work normal double crochets into these stitches.
- For raised posts visible from the front: Work double crochets around them to emphasize their texture.
- Repeat until you reach the desired length for the pillow.
Step 6: Add Single Crochet Border
- After creating two waffle stitch panels, add a neat border to each.
- Single crochet evenly along the edges, even in areas without clear stitches.
- Add one chain when turning corners to keep the border square.
- This step ensures the edges look clean and prepares the panels for assembly.
Step 7: Assemble the Pillow
- Place the two panels back-to-back with the waffle stitch side facing outward.
- Choose an assembly method:
- Single Crochet the Edges: Align edges, single crochet through both panels, and chain 1 at corners.
- Slip Stitch: Insert your hook and pull yarn through panels for a flatter seam.
- Sew Edges: Use a yarn needle and thread to stitch panels together.
- Leave one edge open for stuffing.
Step 8: Stuff and Finish
- Stuff the pillow with fiberfill stuffing, ensuring even distribution.
- Close the opening using your chosen edge-stitching method.
- Fasten off, hide any yarn tails, and secure the seam.
Conclusion
Your waffle stitch pillow is complete! This gorgeous, textured pillow is a stylish addition to any room and a thoughtful, handmade gift option. The waffle stitch adds depth and character to the design, while the flexibility to customize the size and color ensures it fits your needs. This project showcases how simple techniques can create something stunning and practical!
Pro Tip
For cleaner-looking stitches and even-sized squares, maintain consistent tension while crocheting. If this is your first attempt at the waffle stitch, practice the post technique on a small swatch before starting the full project!


