
Enjoy sunny style with this Free Crochet Daisy Bucket Hat Pattern for airy, textured hats that add playful charm and casual summer flair.
Embrace the charm of handmade fashion with a design that perfectly captures the whimsical essence of a sun-drenched meadow. This Crochet Daisy Bucket Hat Pattern merges retro 90s nostalgia with a modern, boho-chic aesthetic, featuring vibrant floral motifs that "pop" against a structured yet breathable fabric. Ideal for spring outings or summer festivals, the headwear offers more than just style; it provides a soft, packable shield against the sun that remains comfortable even on the warmest days.
Fun Crochet Daisy Bucket Hat Pattern Ideal for Summer Outfits
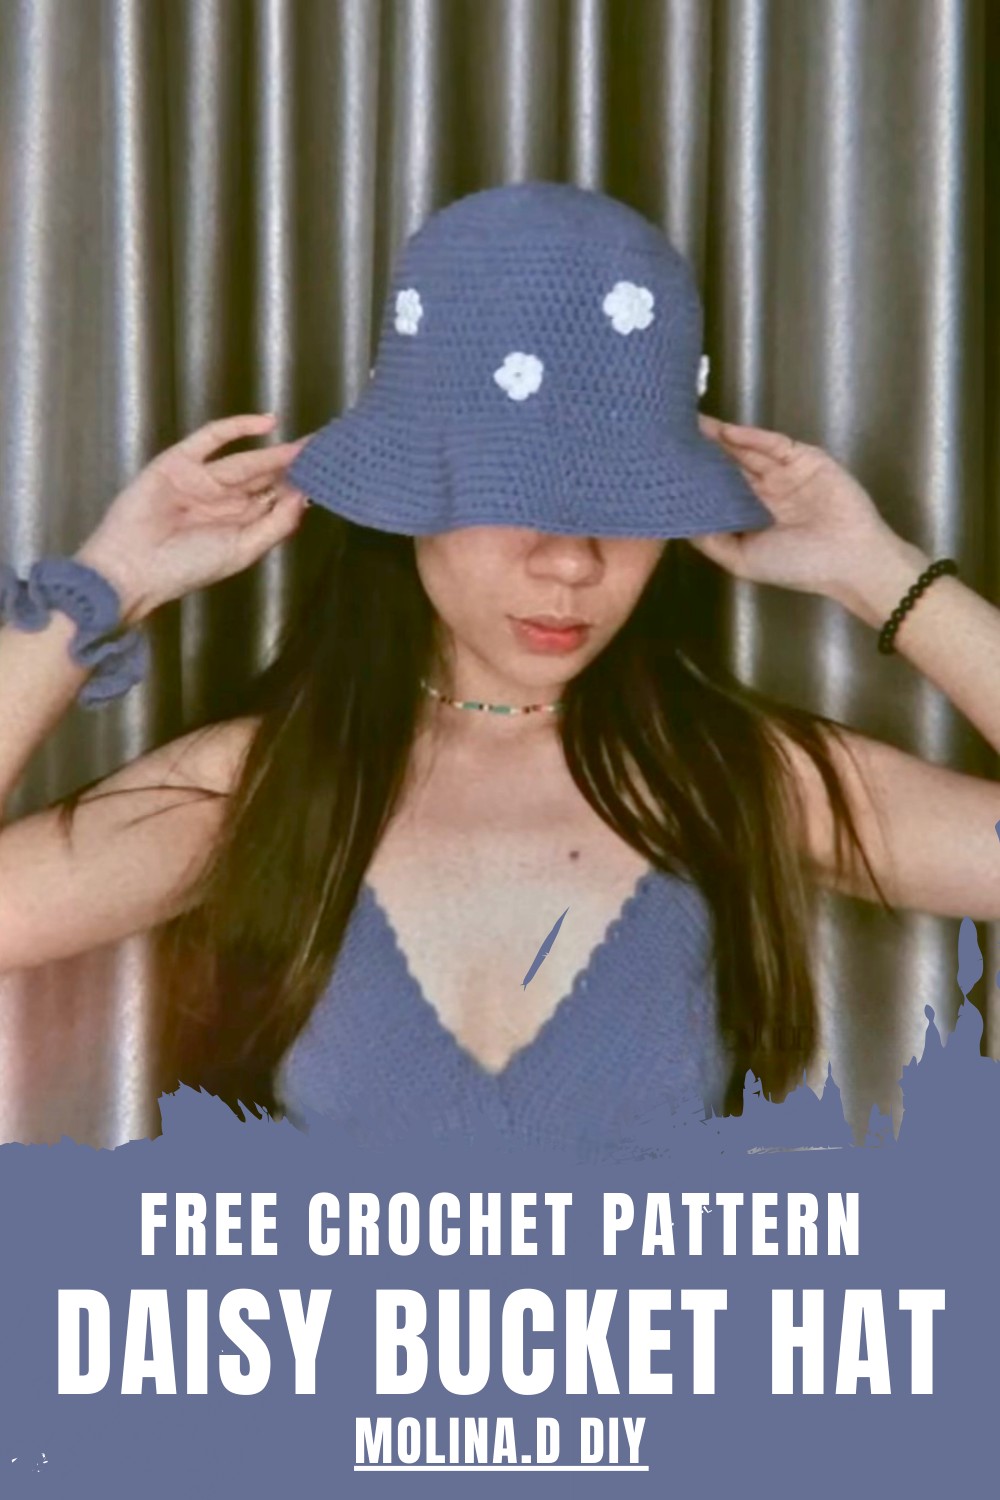
The intricate petal details and centered textures create a three-dimensional visual appeal, making it a standout piece for any wardrobe. Crocheters appreciate the versatility of this project, as it allows for endless color customization to match specific outfits or seasonal palettes.

Beyond its aesthetic allure, the finished piece serves as a durable, eco-friendly alternative to mass-produced hats. Its lightweight construction ensures it fits snugly without losing its iconic silhouette, blending functional sun protection with an air of effortless elegance.
Step-by-Step How to Crochet a Daisy Bucket Hat
1. Materials Needed
- Yarn (120g): Main yarn for the hat.
- Crochet Hook: 4mm for the hat.
- Small Sized Yarn for Daisy: Yarn suitable for a 2mm hook.
- Darning Needle: For sewing loose ends and attaching daisies.
- Scissors: To cut and manage yarn ends.
2. Crochet the Base of the Hat
Round 1:
- Make a magic ring.
- Chain 1 and crochet 8 Half Double Crochets (HDC) into the ring.
- Slip Stitch at the end to secure the round.
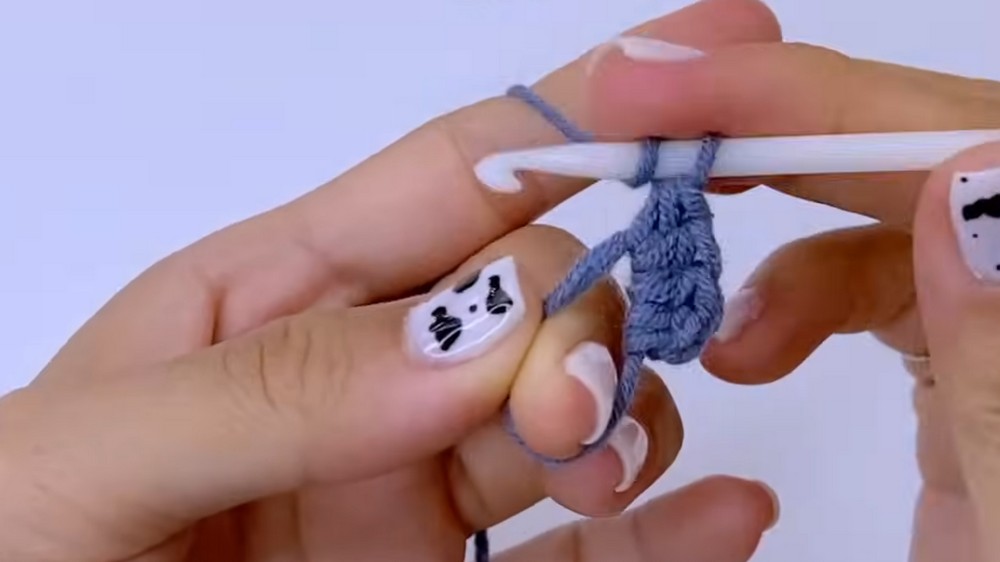
Round 2:
- Chain 1, and increase HDC in all stitches (crochet 2 HDC into each stitch of the previous round).
- Slip Stitch to finish the round.
3:
- Chain 1, and alternate 1 HDC, 1 increase HDC in each stitch. Repeat this sequence a total of 8 times.
- Slip Stitch to join.
4:
- Chain 1, and alternate 2 HDC, 1 increase HDC in each stitch. Repeat this 8 times.
- Slip Stitch to join.
Continue the process of increasing for the rounds (as shown in the video) until Round 12.
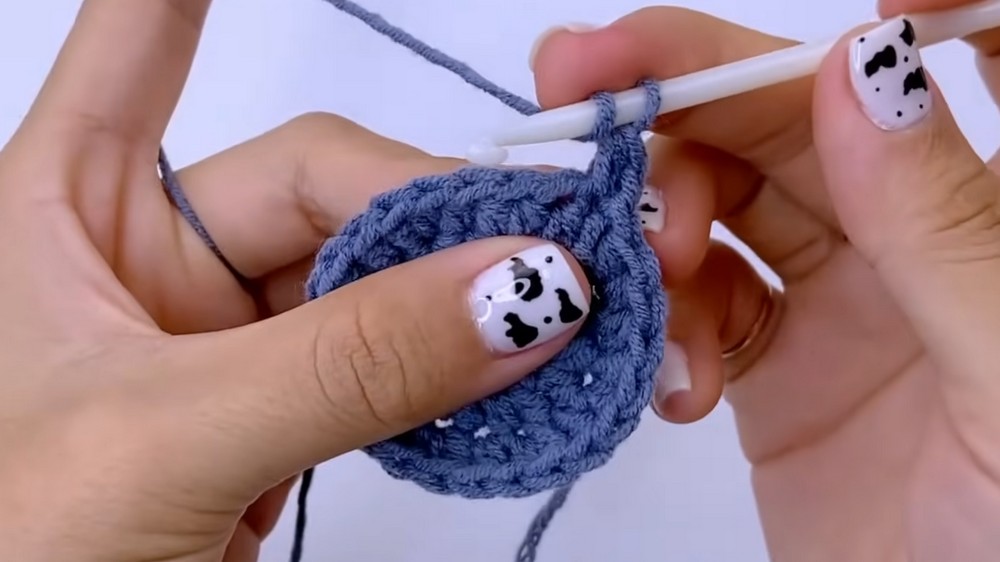
3. Form the Body of the Bucket Hat
Round 12:
- Chain 1, and work HDC in the back loop only for the entire round.
- Slip Stitch to join.
13–21:
- Chain 1, and work HDC across each stitch (no increases).
- Slip Stitch at the end of each round.
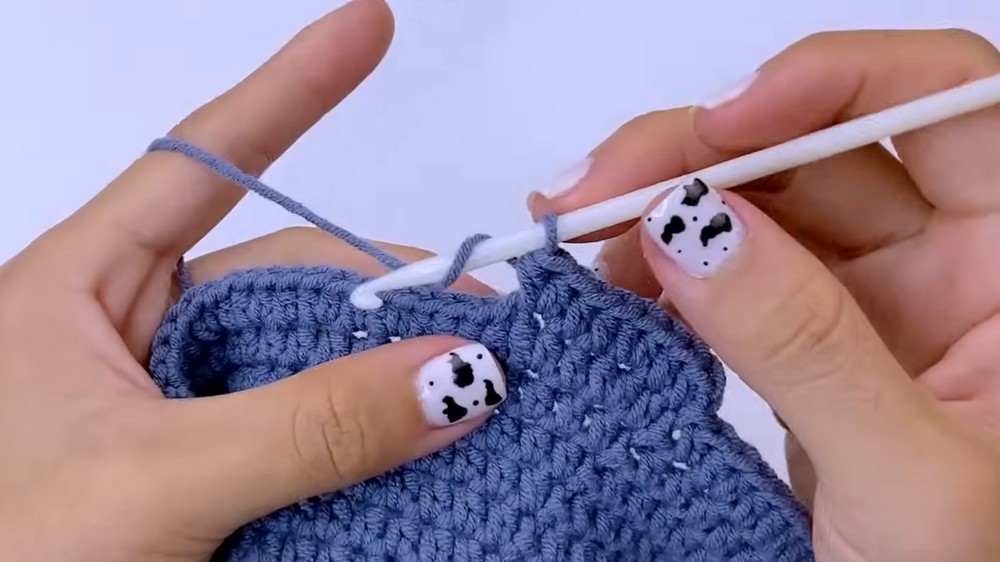
4. Form the Brim of the Hat
Round 22:
- Chain 1, and alternate 1 HDC, 1 increase HDC across all stitches.
- Slip Stitch to join.
23:
- Chain 1, and alternate 2 HDC, 1 increase HDC across all stitches.
- Slip Stitch to join.
24–33:
- Chain 1, and work HDC across all stitches for the brim.
- Slip Stitch at the end of each round.
After completing Round 33, cut the yarn. Use the darning needle to sew and hide the tail neatly.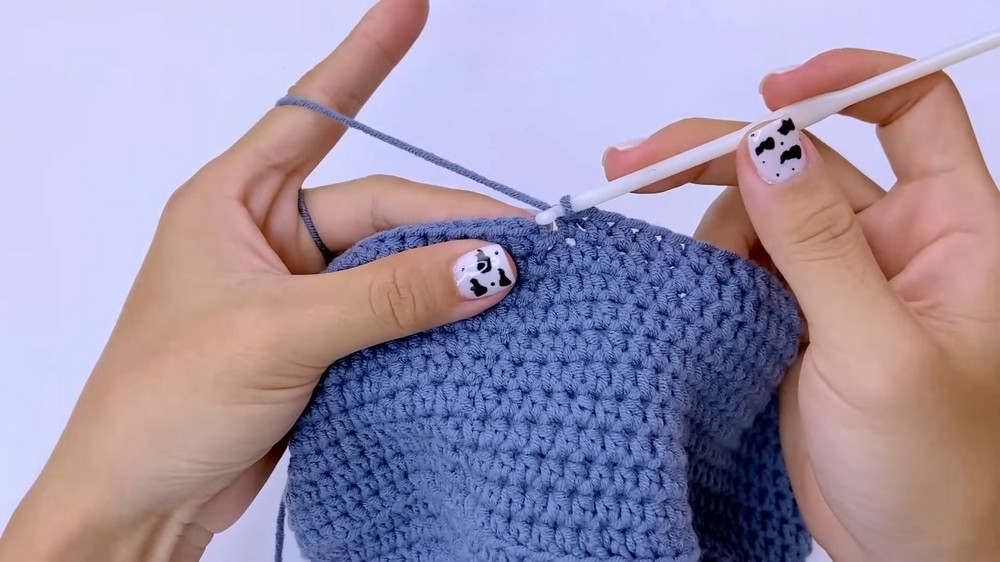
5. Add Daisy Embellishments
Daisy Flower:
- Use small-sized yarn with a 2mm hook.
- Make a slip knot and chain 5.
- Connect to the first chain with a Slip Stitch to form a ring.
- In the ring:
- Work (Chain 3, 2 Double Crochet Decrease, Slip Stitch, Chain 3, Slip Stitch) 5 times to create 5 petals.
Repeat the process to make as many flowers as you'd like.
Use the darning needle to sew the flowers onto the bucket hat. Arrange and attach them in any style and design you prefer.
Special Features
- Reversible Design: The hat is wearable on both sides, making it versatile for styling.
- Customizable Size: You can adjust the size by making the top bigger or smaller depending on your head’s circumference.
- Daisy Embellishments: Crocheted daisy flowers add a charming, handmade touch to the hat.
- Sustainable Craft: Simple materials and an easy method allow for eco-friendly crafting.
Level of Difficulty
The project is beginner-friendly as it primarily uses Half Double Crochet stitches, which are easy to execute. The tutorial walks through every step clearly, making it accessible to crocheters at all skill levels.
Tutor's Suggestions
- Adjust Size Accordingly: Use more or fewer rounds to make the hat fit your head.
- Choose Colors Creatively: Select colors for the daisies and hat that complement your style.
- Keep Slip Stitches Neat: Make tight and even Slip Stitches to ensure the hat looks polished.
- Take Your Time with Placement: Carefully arrange the daisies before sewing them to achieve a visually appealing design.
Uses and Materials
Uses:
- Wear the hat for outdoor activities such as picnics, walks, and casual outings.
- Style it with summer dresses or outfits for a fun, playful look.
- Gift it to friends and loved ones for a handmade touch.
Materials:
- Main yarn for the hat (approx. 120g).
- Small yarn for flowers (appropriate for 2mm hooks).
- Tools: 4mm crochet hook, 2mm hook, scissors, darning needle.
Pro Tip
To keep the daisies consistent, use a stitch marker or guide while creating the petals to make sure they are evenly spaced and symmetrical.
Conclusion
The Daisy Bucket Hat is an enjoyable and rewarding crochet project that combines functionality and style. The reversible design and daisy embellishments make it stand out as a unique accessory. With clear guidance from the tutorial, along with basic materials, beginners can create a fashionable and customizable hat in no time.


