
Adorable holiday table settings look wonderful using this Free Crochet Easter Bunny Egg Holder Pattern for festive spring morning brunches.
Enhancing the spirit of spring, this Crochet Easter Bunny Egg Holder Pattern introduces a sophisticated way to present holiday symbols with grace and style. These whimsical forms provide a practical yet artistic housing for both chocolate delights and traditionally dyed eggs, making them indispensable for curated gift sets or high-end brunch tablescapes.
Cuddly Crochet Easter Bunny Egg Holder Pattern with Floppy Ear
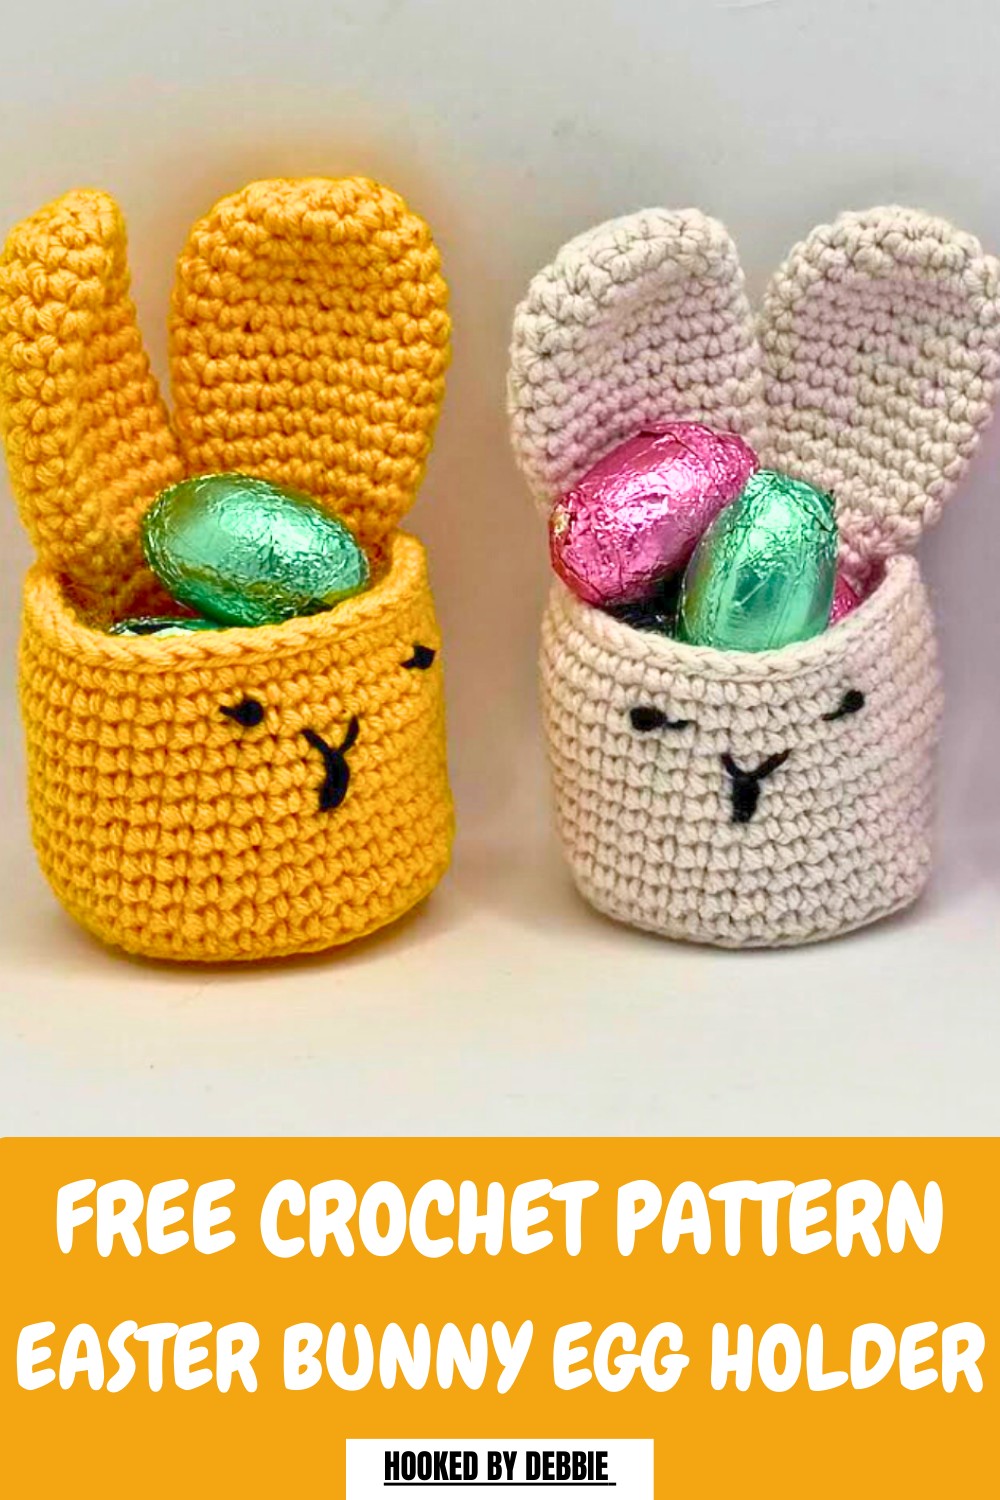
Choosing this design allows for a seamless blend of utility and beauty, as these petite protectors keep fragile items secure while radiating a warm, inviting atmosphere. Their timeless appeal ensures they remain a staple in holiday traditions, fitting perfectly into diverse decor styles from rustic chic to modern minimalism.
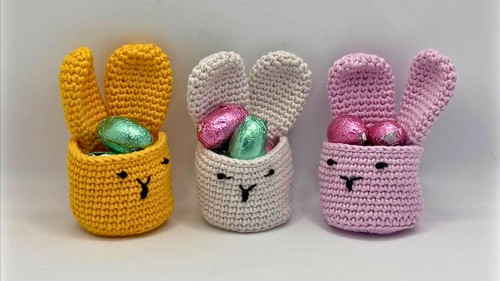
By following this pattern, you produce a collection of charming accents that offer a sense of luxury and personal care, making every Easter morning feel significantly more special and thoughtfully arranged. The design emphasizes a structured silhouette and refined stitch definition, ensuring that each finished piece stands as a durable and stylish seasonal accessory.
Step-by-Step Details
Materials Needed
- Yarn: Small amounts of scrap yarn in your chosen colors (e.g., tan or cream for the basket, black for facial details, cotton yarn for firmness).
- Crochet hook: 2.5 mm.
- Stitch marker (or an alternative like a safety pin or scrap yarn).
- Scissors.
- Needle for sewing the ears and working in yarn ends.
Steps to Make the Basket
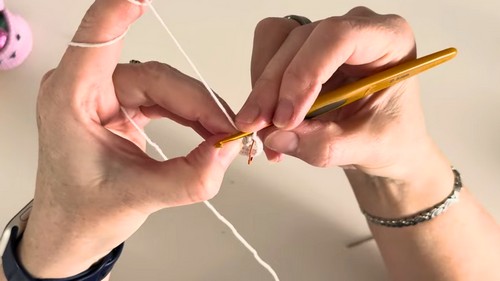
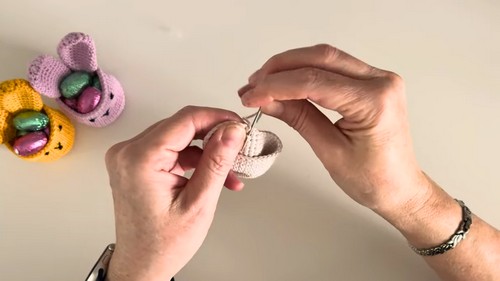
- Create the Base:
- Begin with a magic circle. Wrap yarn around two fingers to form a cross, pull the yarn through, and make six single crochets into the circle.
- Tighten the circle by pulling the tail. Mark the last stitch with a stitch marker.
- Increase Rounds:
- Round 2: Perform an increase in each stitch by making two single crochets into every stitch (12 stitches total).
- Round 3: Alternate making one single crochet in the first stitch, followed by an increase in the next stitch. Repeat this pattern (18 stitches total).
- Round 4: Make two single crochets in the first and second stitches, then increase in the third stitch. Repeat all around (24 stitches total).
- Round 5: Follow the pattern of three single crochets and an increase. Repeat around (30 stitches total).
- Round 6 (Final Increase Round): Make four single crochets followed by an increase. Continue this sequence until complete (36 stitches total).
- Start Building the Basket Sides:
- Row 7: Work single crochets into the back loops only all around. This creates a base that helps the sides curve upward.
- Rows 8-17: Work regular single crochet stitches through both loops in each row. This builds the height of the basket's sides. Adjust the height by adding more rows if desired.
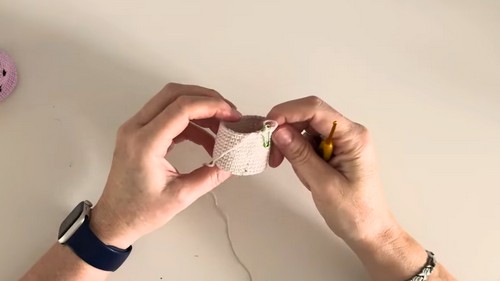
- Finishing Touch:
- For row 18, work a round of slip stitches for a neat, defined edge. Pull the yarn through and finish it off invisibly. Weave in any loose ends.
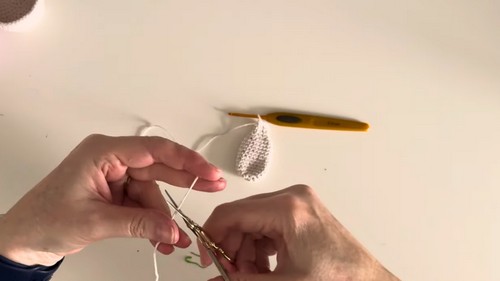
Steps to Make the Ears
- Start with a magic circle, just like the basket's base, and add six single crochets.
- Work one increase round to double the stitches to 12.
- Add one single crochet followed by an increase in the next stitch. Repeat this for the final increase round.
- Build the ears by making 10 rounds of single crochet with 18 stitches in each row, which will naturally flatten to shape the ear.
- Decreasing for Closure: Perform invisible decreases by picking up the front loops of two stitches at a time, reducing from 18 stitches to 9.
- Work 3 more rounds of single crochets over the 9 stitches and finish off. Leave a long tail to sew the ears onto the basket.
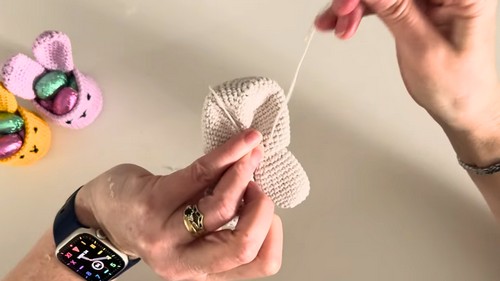
Adding the Ears
- Position the ears evenly on the basket and sew them on securely. Keep the bottom three rows of the ears below the top of the basket for a clean finish.
- Hide the ends of the yarn neatly inside the basket.
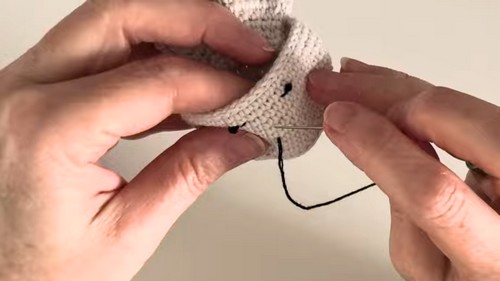
Adding Features (Eyes and Nose)
- Use black cotton yarn to create features. For the eyes, sew French knots where you want them, using five wraps of yarn around your needle for each knot.
- Use a simple "Y" shape to stitch the nose and add small whisker-like details. Thread the yarn at the back to hide it neatly.
Special Features
- Beginner-Friendly: The project uses simple stitches (magic circle, single crochet, increases, and slip stitches) with clear guidance for every step.
- Scrap Yarn Project: You can use leftover yarn, making it budget-friendly and a great way to reduce waste.
- Decorative and Functional: The basket is perfect for Easter treats, small gifts, or even as a decorative piece around the house.
- Customizable: You can adjust the size of the basket or the height of the ears as per your preference.
Level of Difficulty
The project is suitable for advanced beginners to intermediate crocheters. Although the technique is simple, skills like working in the round, using a magic circle, and invisible decreasing may require practice.
Tutor’s Suggestions
- Use cotton yarn for the basket and features as it helps hold stitches tightly and gives the end product a neat appearance.
- For beginners, the tutor recommends practicing the magic circle and single crochet stitches beforehand.
- Use a stitch marker or a substitute to keep track of rows while working in the round.
- Don’t pull the yarn too tight when working on back loops and slip stitches; this keeps the basket even and neat.
Uses and Materials
- Uses:
- A festive Easter decoration.
- A creative and cute way to showcase and hold mini eggs or small candies.
- A lovely handmade gift for children or friends.
- Materials:
- Scrap yarn in neutral or festive colors (tan or cream for the basket, black for the details).
- A 2.5 mm crochet hook.
- Scissors, a sewing needle, and a stitch marker.
Tip
When creating the basket base and sides, check your stitch count at the end of each round to ensure the shape stays even, avoiding accidental increases or decreases.
Conclusion
This step-by-step pattern makes creating an adorable Easter basket with ears both fun and easy. With minimal materials and guidance, you can crochet a beautiful festive item that’s sure to delight. Whether for decoration, holding treats, or gifting, this project is a creative way to showcase your crochet skills while making something charming and practical.


