
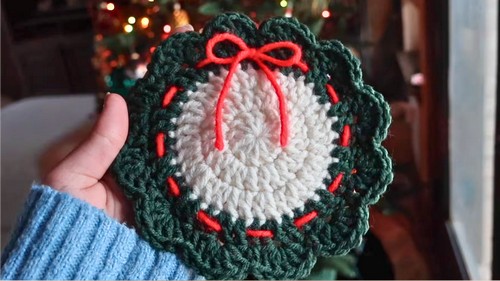
Celebrate the holidays in style with this Crochet Christmas Wreath Coaster Pattern, a charming addition to your festive décor and gifts.
Missing a festive touch can make holiday tables feel plain, but a Crochet Christmas Wreath Coasters Pattern instantly adds charm and color while keeping surfaces protected. Its vibrant red, green, and white hues bring warmth and cheer to coffee tables, dining setups, or holiday parties, making every setting feel special. The textured, handmade design adds a cozy, artisanal feel, while its compact size makes it versatile for everyday use or seasonal décor.
Durable Crochet Christmas Wreath Coaster Pattern for Every Home
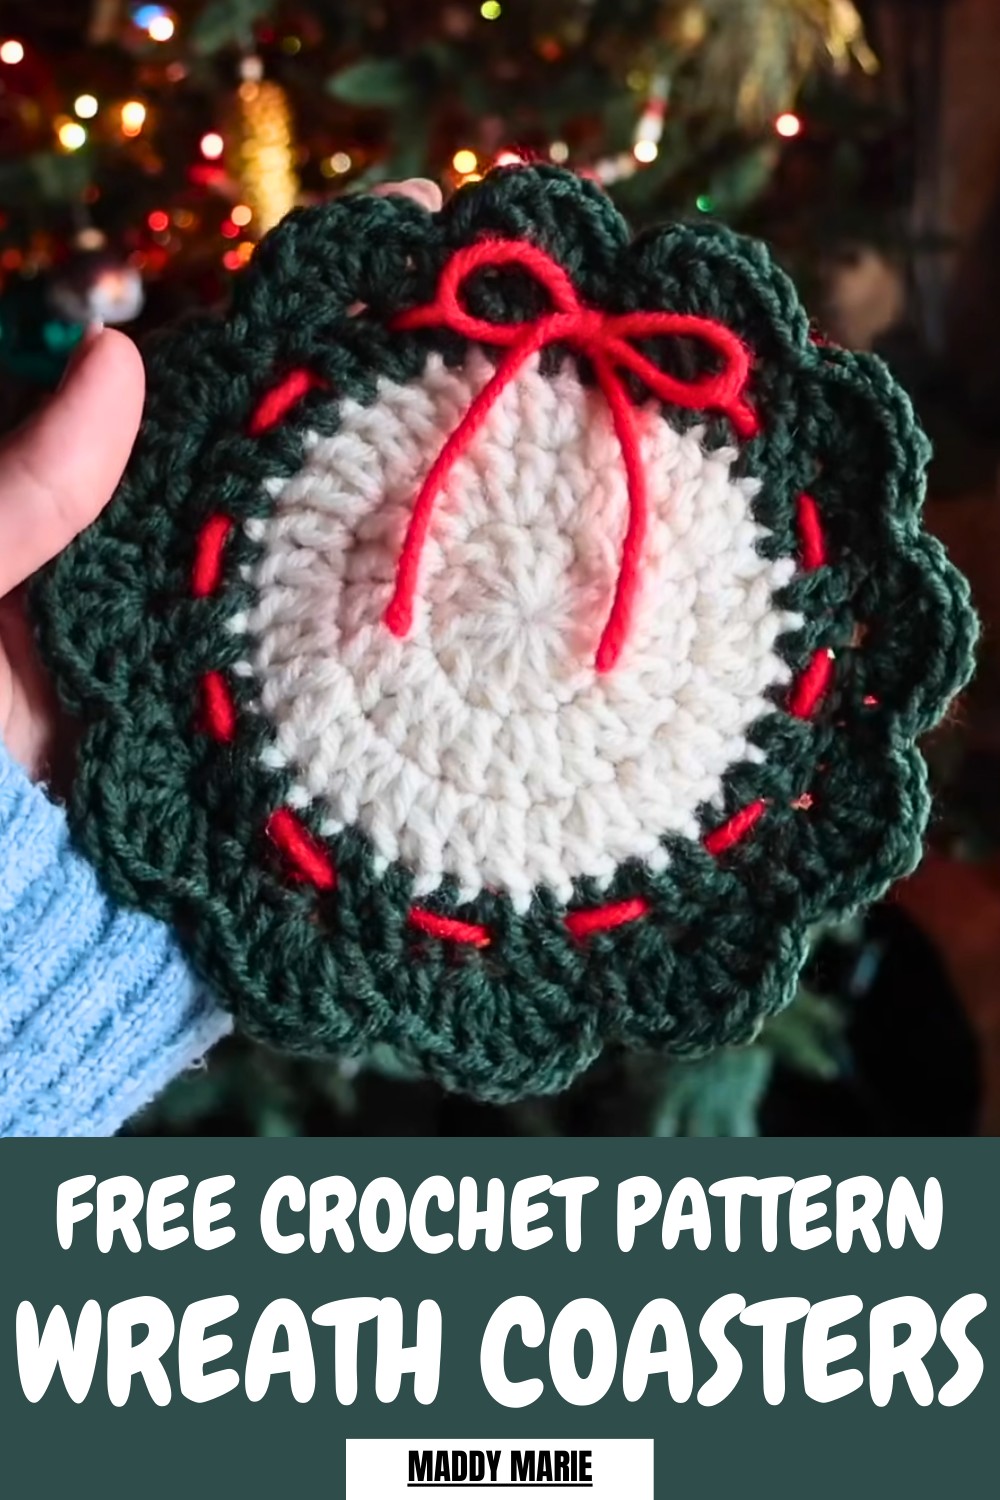
This coaster is simple to crochet using basic stitches like chain (ch), single crochet (sc), and double crochet (dc), making them beginner-friendly and ideal for using leftover yarn. Cotton yarn ensures durability, absorbency, and easy care, keeping your tables safe while remaining visually appealing.
Beyond their practicality, they make delightful handmade gifts, holiday décor additions, or fun crochet projects with friends and family. Combining festive beauty, functionality, and creative satisfaction, these coasters bring warmth and charm to every holiday celebration.
Crochet Christmas Wreath Coaster – Step-by-Step Guide
Special Features
- Beginner-Friendly Design: This project uses simple stitches, making it accessible for beginners.
- Festive and Functional: The coasters not only look beautiful as Christmas decorations but also serve a practical purpose around the house.
- Customizable: You can use different yarn types and colors to create a personalized look, such as cotton yarn for a more structured coaster or acrylic yarn for softness.
- Attention to Detail: The tutorial covers every step clearly, including making the magic ring, adding the bow, and weaving in ends for a polished final product.
Level of Difficulty
- Skill Level: Beginner.
- Techniques Used: The coaster requires skills such as:
- Magic ring.
- Double crochet (DC).
- Slip stitch (SS).
- Stacked single crochet (SSC).
- Chain stitches (CH).
- Learning Curve: The most challenging part for beginners might be mastering the magic ring, but Maddie offers a link to a detailed tutorial if you need extra help. The stacked single crochet may also need close attention but is explained thoroughly.
Tutor's Suggestions
- Take Your Time with the Magic Ring: The magic ring can be a bit tricky if you're a new crocheter. Maddie advises patience and offers an additional tutorial link.
- Practice Stacked Single Crochet: Introduced to replace the usual chain three, this technique blends smoothly into the pattern and avoids gaps in your work.
- Cotton vs. Acrylic Yarn: Maddie suggests that cotton yarn produces a more structured coaster, while acrylic yarn is softer and easier to work with. Either works fine for this project.
- Consistency Matters: Maintain even tension throughout, especially when creating the ruffled edges for the wreath.
- Bow Placement: Maddie highlights options for placing the bow – either at the top or bottom of the wreath – to suit your personal style.
Materials Needed
- Yarn:
- Medium-weight acrylic yarn in cream (for the coaster base), green (for the wreath design), and red (for the bow).
- Cotton yarn can also be used for a sturdier result.
- Crochet Hook: 5 mm (H-8) crochet hook.
- Additional Tools:
- Yarn needle (for weaving in ends and attaching the bow).
- Scissors.
- Optional: Glue to hold the bow in place for added security.
Step-by-Step Instructions
Step 1: Create the Base with Cream Yarn
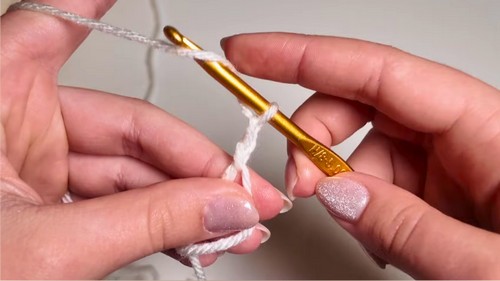
- Start with a Magic Ring:
- Wrap the yarn around your fingers and create a loop (Maddie covers this step slowly for beginners).
- Insert your hook under the loop, grab the working yarn, and pull through to create a slip knot.
- Chain 3 (CH):
- Yarn over and pull through the loop on your hook three times to create the foundation for round one.
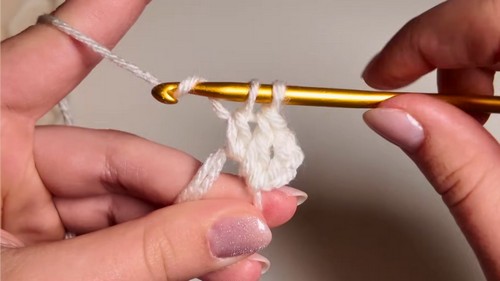
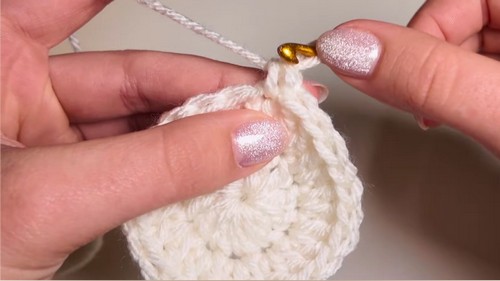
- Double Crochet into the Magic Ring:
- Make 11 double crochets (DC) into the magic ring.
- This, along with the chains, will create a total of 12 stitches in the ring.
- Tighten the Ring and Slip Stitch to Finish the Round:
- Pull the tail of the yarn to close the magic ring tightly.
- Join the last stitch to the first chain with a slip stitch (SS).
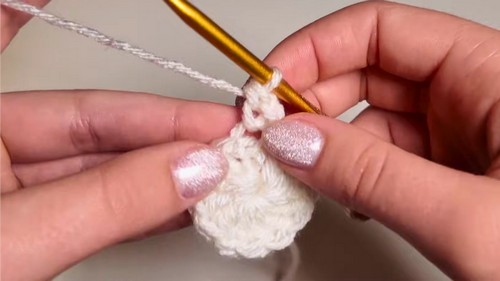
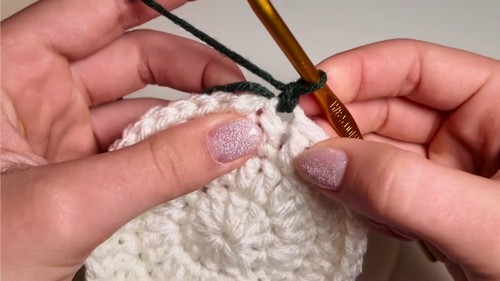
Step 2: Build Up Rounds for the Coaster
- Round Two: Increase the Stitches.
- Start with a stacked single crochet (SSC) in the chain space from the first round instead of chaining three.
- Add one double crochet into the same stitch.
- Place two double crochets into each stitch of the round.
- Repeat until the round is complete, slip stitch to the stacked single crochet to close the round.
- Round Three: Alternate Increases and Single DCs.
- Begin with a stacked single crochet.
- Work one double crochet in the next stitch and two double crochets in the stitch after that.
- Repeat the pattern (1 DC, 2 DC) around the coaster. Slip stitch to join.
- Fasten Off the Cream Yarn:
- Cut your yarn, leaving a tail. Pull the tail through the stitch to secure it.
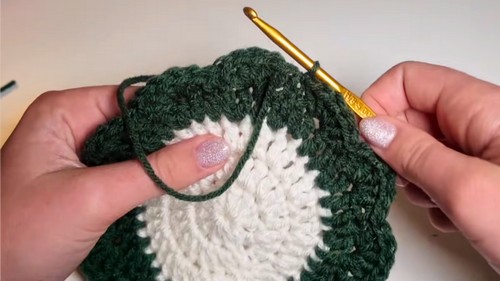
3: Add the Green Wreath Layer
- Attach Green Yarn:
- Insert your hook into any double crochet from the previous round and pull the green yarn through.
- Secure with a knot.
- Work the Ruffled Edges:
- Chain 1 and begin with a stacked single crochet in the first stitch. Skip the next stitch.
- In the following stitch, add five double crochets.
- Skip the next stitch and single crochet into the one after.
- Repeat this pattern (5 DC, skip 1, SC) all the way around.
- Fasten Off the Green Yarn:
- Slip stitch into the first SC from the round, trim the yarn, and pull through.
4: Add the Red Bow
- Thread Red Yarn Through the Wreath:
- Using a yarn needle, weave the red yarn into the fourth row of the coaster, skipping every two double crochets.
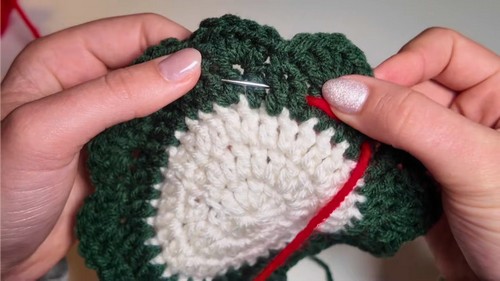
- Tie the Bow:
- Tie the red yarn into a bow, similar to tying shoelaces, either at the top or bottom of the wreath.
- Secure tightly, and optionally, use glue to keep it in place.
5: Finishing Touches
- Weave in Loose Ends:
- Use your yarn needle to hide all yarn tails by sewing them into the back of your stitches. Maddie recommends weaving them into the tight parts of the coaster to ensure they don’t unravel later.
- Trim Excess Yarn:
- Give your project a neat “haircut” by snipping any excess yarn hanging out.
Uses
- Festive Decor: Perfect for adding a Christmas touch to your home decor.
- Gifts: Handmade coasters make thoughtful and personal holiday gifts for friends and family.
- Table Protectors: Functional coasters that keep your table safe from scratches and spills while looking adorable.
A Helpful Tip
If your bow isn’t staying in place or you have concerns about it unraveling, secure it with a small amount of Elmer's glue or fabric glue. This will keep your project looking perfect for years to come.
Conclusion
Creator's pattern for the Christmas Wreath Coaster is a delightful project that blends holiday charm with a fun and easy crochet pattern. With simple stitches and a step-by-step walkthrough, even beginners can confidently create a festive coaster. These coasters make wonderful decorations or holiday gifts that everyone will love.


