
Keep little ones warm and stylish with this Free Crochet Baby Vest Pattern, offering comfort, charm, and easy-to-follow instructions.
Soft, cozy, and effortlessly charming, this handmade Crochet Baby Vest Pattern brings warmth and style to any baby’s wardrobe. Crocheted with gentle yarns, it ensures delicate skin remains comfortable while offering lightweight layering perfect for cooler days. The design features a harmonious mix of simple yet eye-catching stitches—such as the classic single crochet for durability and the airy shell stitch along the edges to add subtle texture.
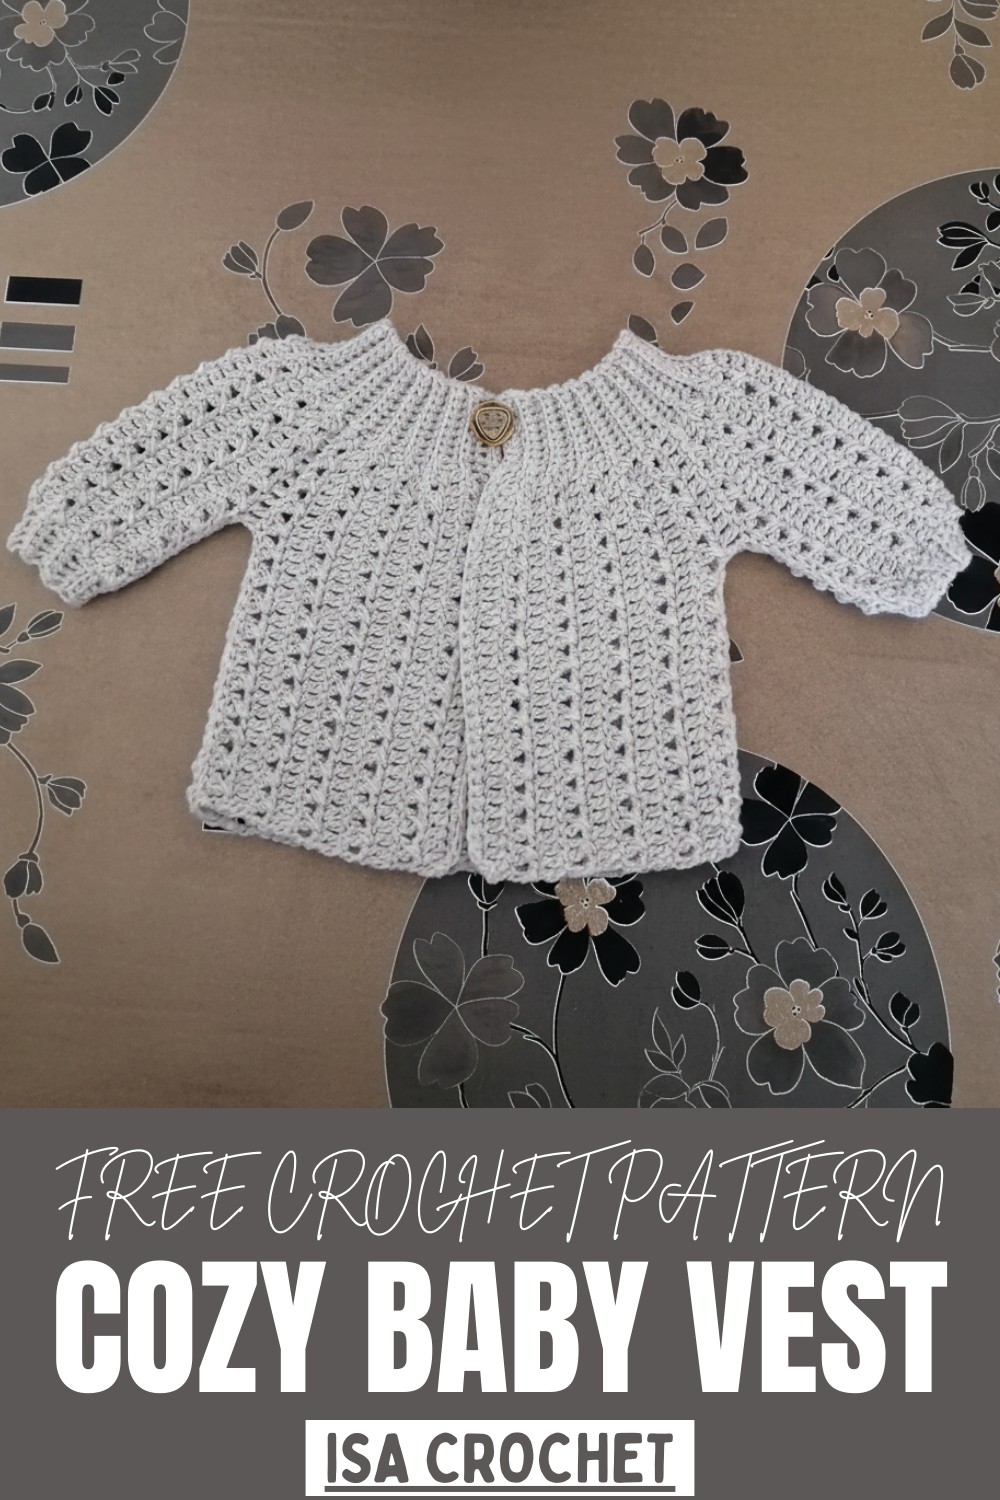
Cozy Crochet Baby Vest Pattern You’ll Love Making
Its construction is straightforward, starting with a foundation chain, followed by carefully increasing stitches at the sides to form a flattering shape, and finishing with neat buttoned closures that make dressing and undressing seamless. Each row builds a rhythmic pattern that is both fun to crochet and visually appealing, giving the vest a playful yet elegant character. Beyond its aesthetic charm, this piece is practical, providing warmth without bulk and allowing full range of movement for curious little ones.
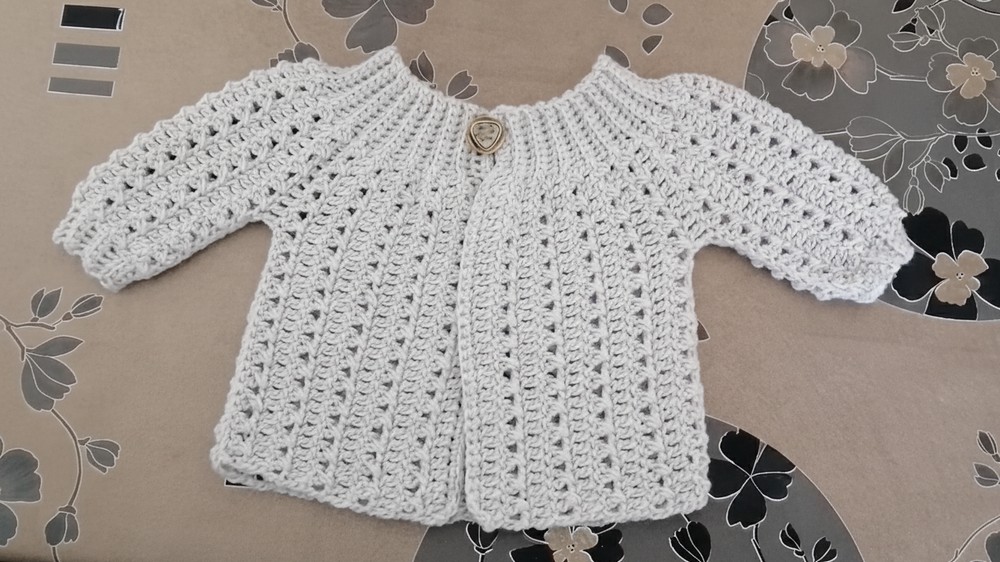
Its versatile style complements both casual outfits and more formal attire, making it a thoughtful handmade gift. The finished look is polished, with softly rounded armholes and a slightly textured front panel that catches the light beautifully. This pattern balances simplicity and intricate detail, inviting crocheters of various skill levels to create a wearable keepsake that combines comfort, functionality, and timeless appeal, perfect for every growing baby.
Step-by-Step Project Details
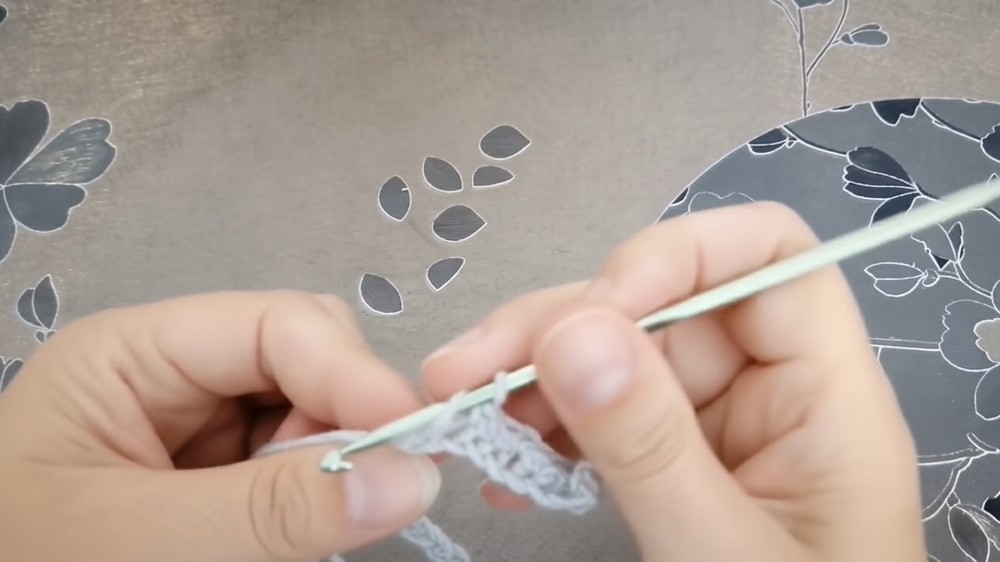
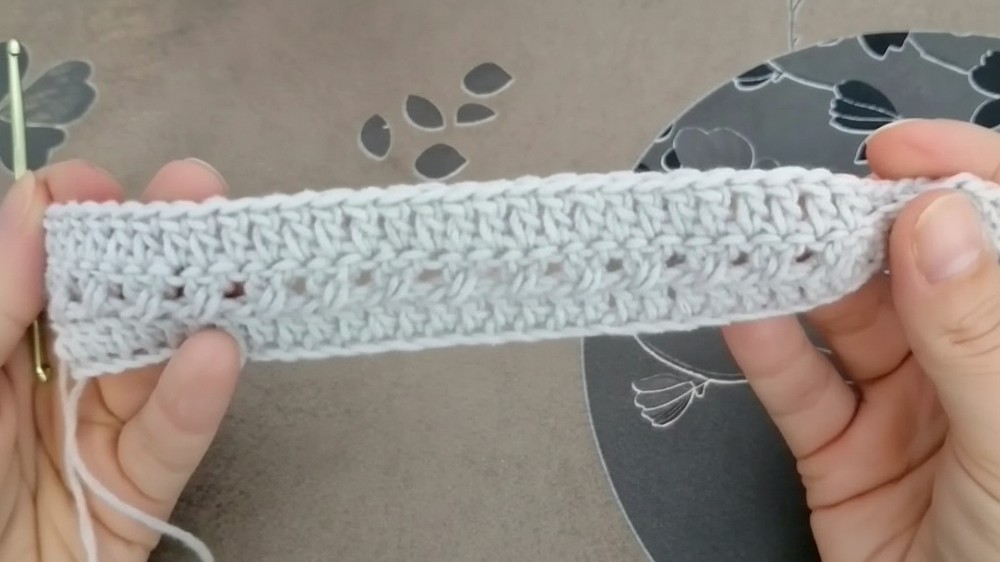
1. Starting the First Front Panel
-
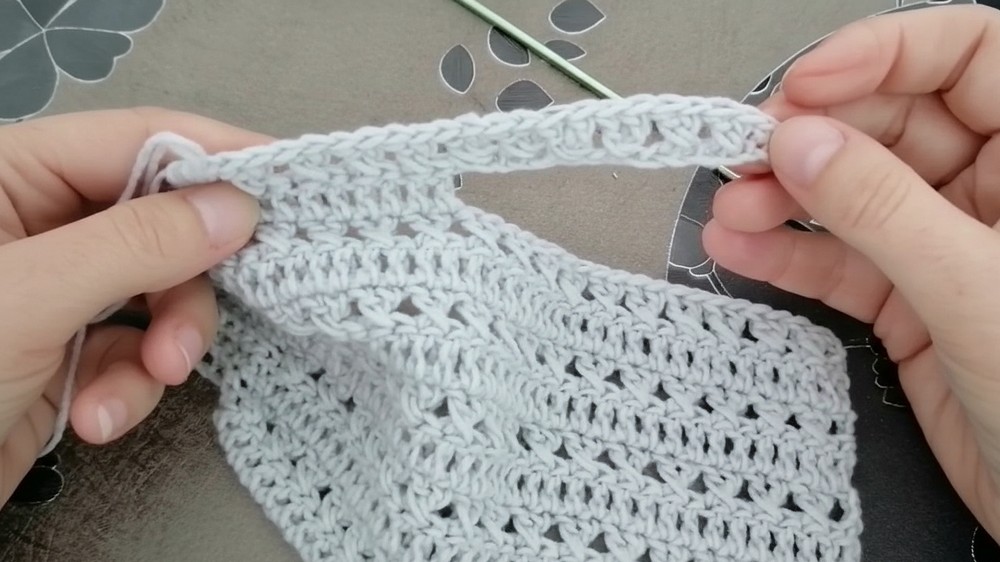
Foundation: Chain 40 stitches using a 3.5mm hook.
-
Row 1: Work 9 single crochets (for the collar/neck ribbing) and then 31 double crochets for the rest of the body.
-
The "Shortened Row" Effect: Always work the collar stitches in the back loop only to create an elastic, ribbed texture.
-
The Pattern: Implement the "crossed double crochet" (bride croisée) pattern. Skip one stitch, work a double crochet in the next, then go back to the skipped stitch and work a double crochet over the first. Repeat this to create 15 crossed pairs.
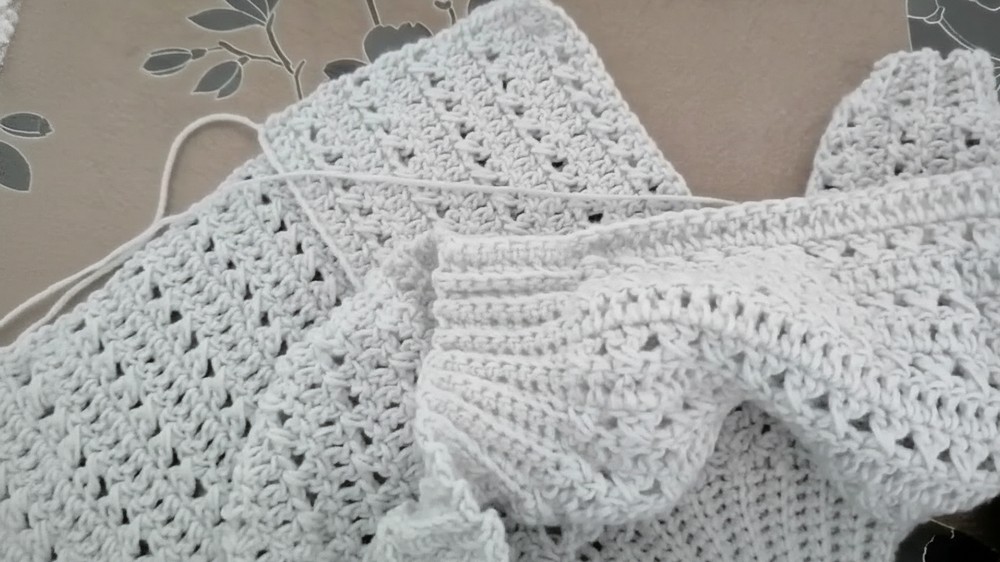
2. Forming the Sleeves
-
Panel Width: Crochet 10 rows for the first front panel.
-
Sleeve Extension: To start the sleeve, work the neck ribbing and a portion of the shoulder, then chain additional stitches to extend the row for the arm.
-
The Wrist: Dedicate 4 single crochets at the end of the sleeve extension for the wrist cuff.
-
Sleeve Length: Crochet 13 rows for the sleeve. Fold the work to verify the width; it should feel spacious for a newborn.
3. The Back and Second Sleeve
-
The Back: Chain another extension for the lower body and crochet approximately 20 to 21 rows. This forms the wide back section of the sweater.
-
The Second Sleeve: Repeat the sleeve extension process, ensuring you match the row count (13 rows) of the first sleeve.
4. Finishing the Second Front Panel
-
Crochet the final 10 rows to match the first front panel.
5. Assembly and Edging
-
Seaming: Fold the garment and sew the side seams and the underside of the sleeves together.
-
The Border: Work a round of single crochet along the vertical front edges and the bottom hem for a clean finish.
-
Buttonhole: On one side of the top collar, create a small chain loop (3 chains) to serve as a buttonhole. Sew a decorative button on the opposite side.
Project Specifications
-
Materials:
-
Yarn: Bamboo Baby Soft Fine (or any light baby-weight yarn).
-
Hook: 3.5 mm.
-
Hardware: One decorative button.
-
Tools: Tapestry needle and scissors.
-
-
Special Features:
-
Seamless Construction: The body and sleeves are worked in one continuous piece of fabric, reducing the amount of sewing required.
-
Elastic Ribbing: The back-loop-only technique for the collar and cuffs ensures the garment stretches comfortably over a baby's head and hands.
-
-
Level of Difficulty: Intermediate. While the stitches are basic, the logic of adding extensions for sleeves and managing shortened rows requires careful counting.
-
Uses: Newborn photography prop, luxury baby gift, or a warm layering piece for infants.
Tutor's Suggestions
-
Adjusting Size: To make the sweater larger (3–6 months), add stitches in multiples of 2. For the collar, increase the 4 wrist stitches to 5 or 6 for older babies.
-
Tension Control: Crochet the neck ribbing firmly to keep the collar snug, but work the crossed double crochets loosely so the body of the sweater remains soft and draped.
-
Counting: Always count your 9 neck stitches and your crossed pairs in every row; it is very easy to accidentally drop a stitch when transitioning between the ribbing and the pattern.
Conclusion
The "Lili" Brassière combines traditional crochet aesthetics with an innovative sideways construction. By working across the garment rather than bottom-up, you create vertical ridges that are both stylish and functional. The result is a soft, professional-looking baby sweater that provides warmth without the bulk of heavy seams.
Final Tip
When sewing the side and sleeve seams, use the "mattress stitch" or a very flat whipstitch. Because baby skin is highly sensitive, a bulky seam can cause irritation; keeping the join as flat as possible ensures the maximum comfort for the infant.


