
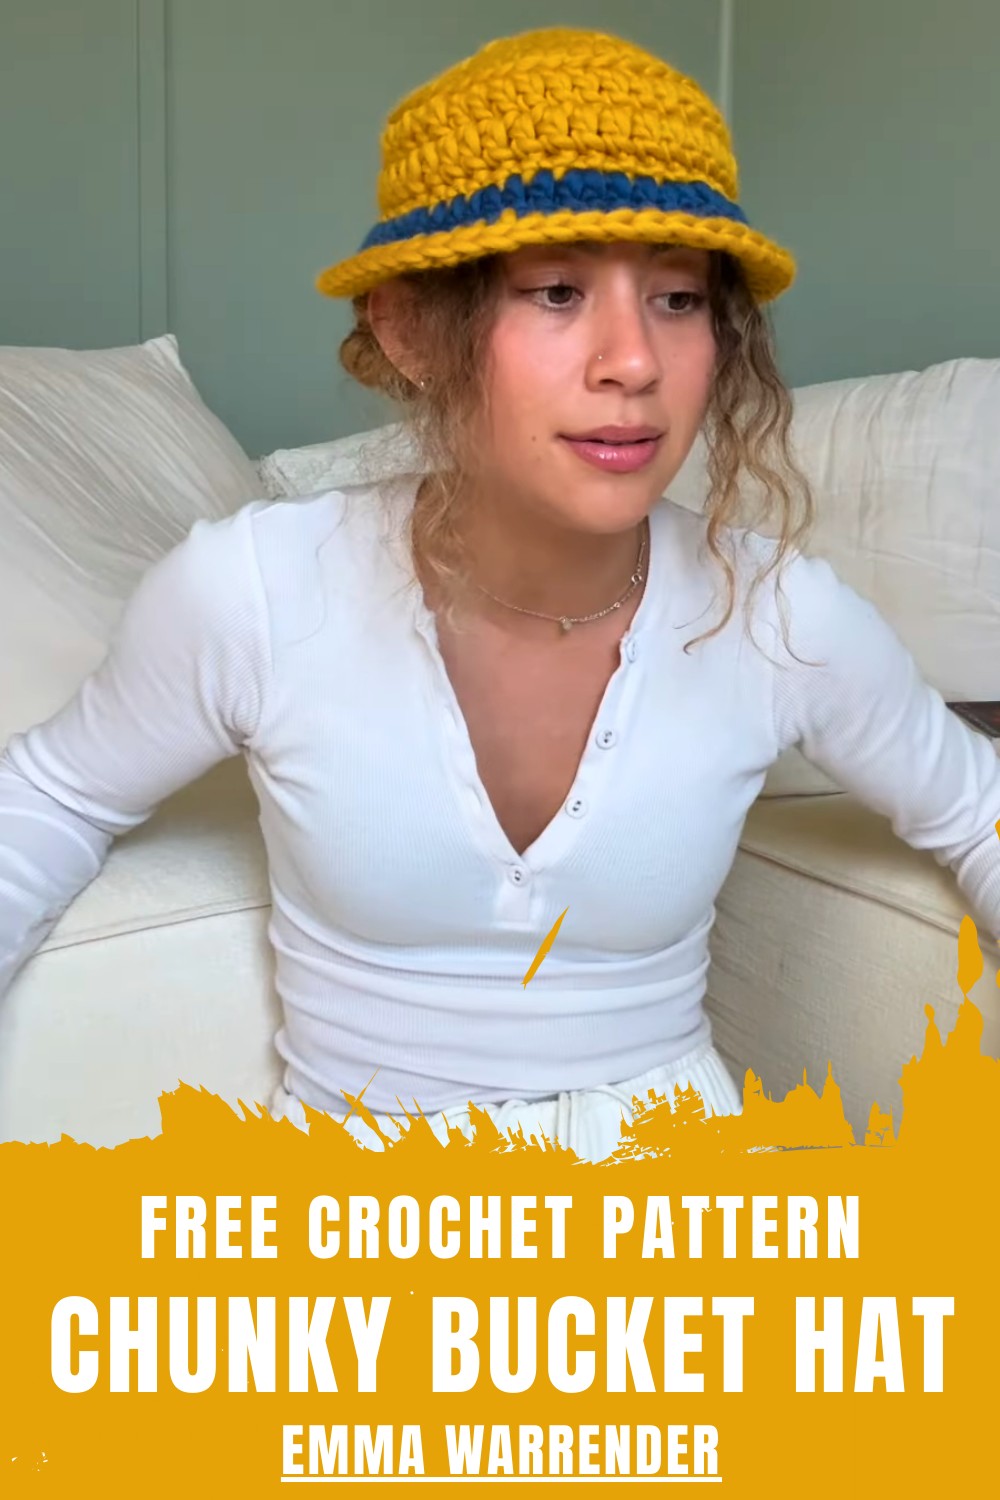
Step into relaxed street style with this Crochet Bucket Hat Pattern, offering a soft structure, comfy fit, and casual charm for sunny days.
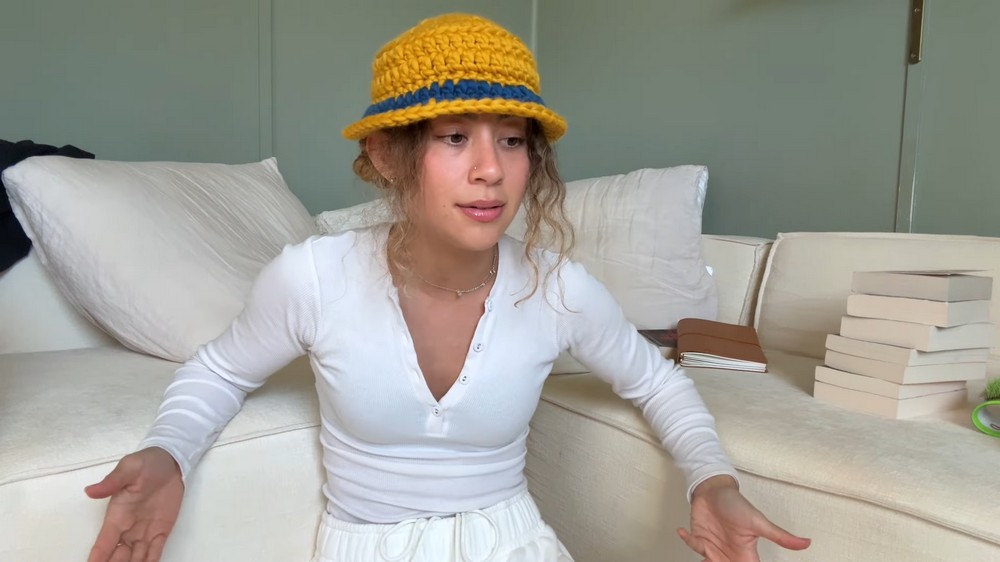
Refreshing your wardrobe with a personalized accessory is a fantastic way to blend street-style trends with the cozy charm of boutique goods. This trendy, rounded headpiece offers a relaxed and playful look that works perfectly for festival-goers, beach lovers, or anyone seeking a casual, everyday sun shield. One of the primary benefits of this Crochet Bucket Hat Pattern is its incredible speed; by using chunky yarn and a large hook, you can finish a complete piece in a single sitting, making it a go-to choice for satisfying, instant-gratification project.
Lightweight Crochet Bucket Hat Pattern for Warm Days
The true magic of this design lies in its creative versatility, as you can easily toss in bold color changes or contrasting stripes to achieve a unique aesthetic. Utilizing a thick, plush yarn ensures the finished product is not only soft and breathable but also maintains a high-end feel that rivals mass-produced alternatives. This project serves as an excellent playground for mastering circular construction and loop-specific techniques, resulting in a professional-looking accessory that is uniquely yours.
Materials
-
Yarn: Abbey Road "Born to be Wool" (a super chunky wool blend). Emma uses yellow and blue for a "sunflower" or "Paddington Bear" look.
-
Hook: 7 mm crochet hook.
-
Tools: A stitch marker (or a bobby pin), scissors, and a darning needle to weave in ends.
Whether you choose a classic neutral or a vibrant multicolor palette, this handmade treasure is a cheerful and functional testament to your personal style and skill. Its structured yet flexible design allows it to be easily tucked into a bag without losing its shape, serving as a durable and stylish staple for any outdoor adventure.

To begin this Crochet Bucket Hat pattern, start with a magic circle and work 10 double crochets into the center, pulling tight to close the gap.

For the top section, increase your stitch count in each subsequent round—doubling to 20, then increasing every second stitch for 30, and every third for 40—until the flat circle matches the crown of your head.
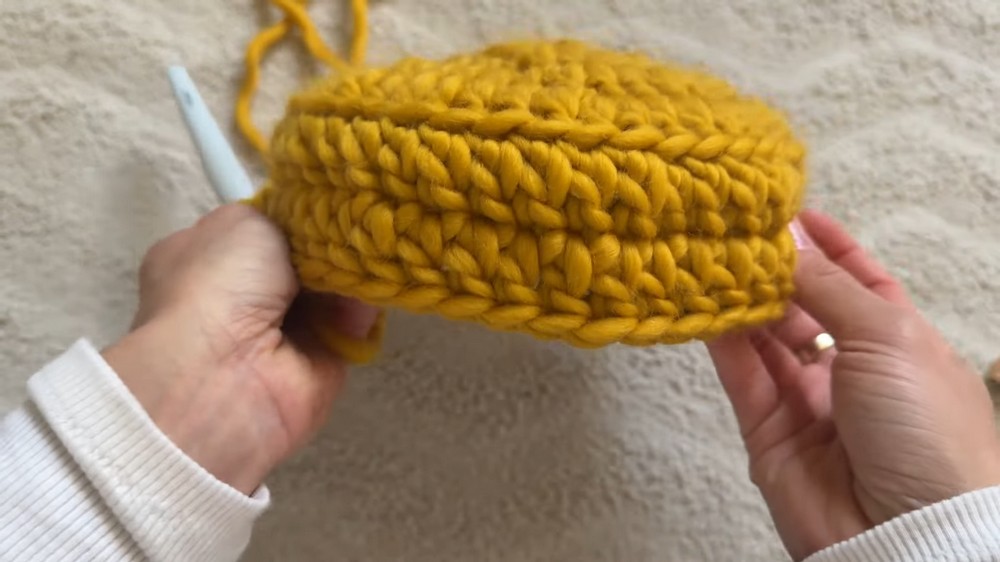
Transitioning to the sides is done by working double crochets into the back loops only, which creates a sharp ridge and allows the fabric to drop vertically.
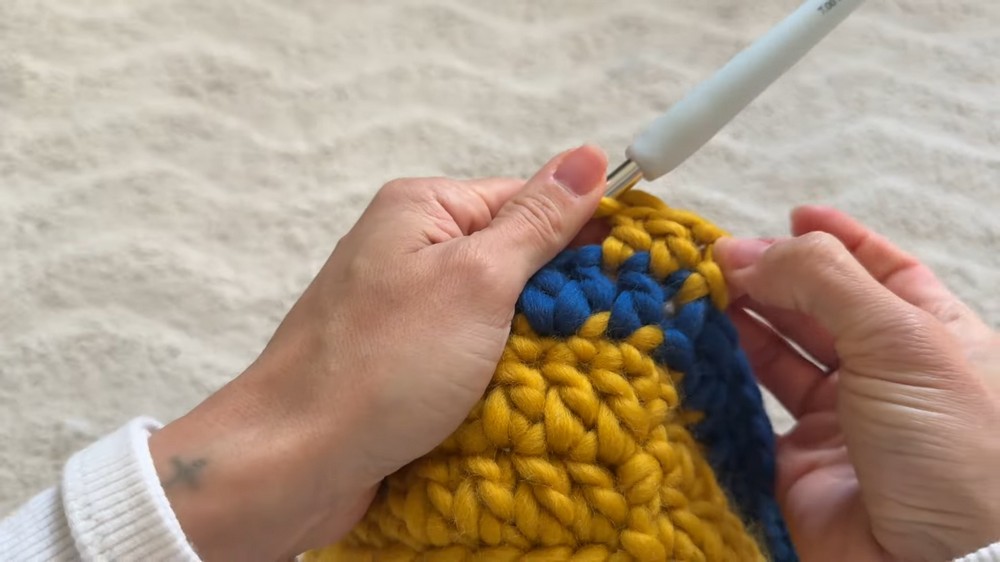
After a few standard rounds to build depth, the brim is formed by switching to the front loops and reintroducing increases, such as adding two stitches into every third space, to give the edge its classic flared silhouette.
FREE Crochet Bucket Hat Pattern
Special Features & Key Information
-
Special Features: The hat uses front and back loop techniques to create structural ridges that define where the top ends and the brim begins. The chunky yarn makes the project extremely fast.
-
Level of Difficulty: Very Easy/Beginner. It uses only basic stitches (DC, SC, and slip stitch) and simple geometric increases.
-
Uses: A stylish accessory for festivals, a warm winter hat, or a thoughtful handmade gift.
-
Tutor’s Suggestions: Emma recommends trying the hat on as you go. If you want a "wavy" or "ruffled" brim, continue adding increases in the final rows. If you want a shorter brim, use single crochets instead of double crochets for the color stripe.
Pro-Tip
When doing a color change, leave the last loop of your old color open on the hook. Pull the new color through those final two loops to ensure the transition between colors is perfectly seamless and doesn't leave a "step" in the pattern.
Conclusion
This chunky bucket hat is a perfect project for anyone looking for immediate gratification, as it can be completed in about 30 to 45 minutes. Whether you choose vibrant contrasting colors or a classic solid tone, pattern ensures a cute, cozy result every time. Happy crocheting!
Step-by-Step Details
Emma introduces this "cute and easy" chunky bucket hat as a versatile accessory. After a year-long hiatus—during which she signed a major book deal—she shares this pattern as a fun way to get back into creating. The tutorial specifically highlights how to handle color changes and how to shape the hat from the crown to the brim.


