
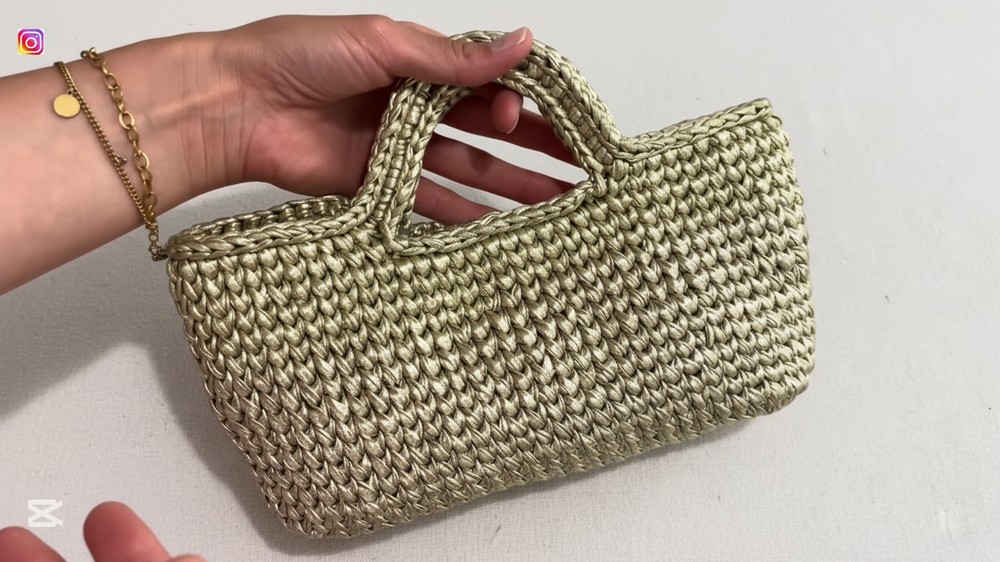
Upgrade your fashion with this crochet leather yarn bag pattern, which provides edgy textures remarkably suitable for modern urban outfits.
Merging the supple luxury of distinct textures with the rhythmic art of hook work yields a truly distinctive and modern accessory. Followers of this method find that a Crochet LEATHER YARN BAG Pattern serves as the blueprint for constructing durable carryalls that stand apart from traditional fiber projects. Unlike standard wool or cotton, leather tape or yarn offers a robust, structured form, making these totes ideal for daily rigors while retaining their shape perfectly.
Iconic Crochet Leather Yarn Bag Pattern Become A Trendsetter
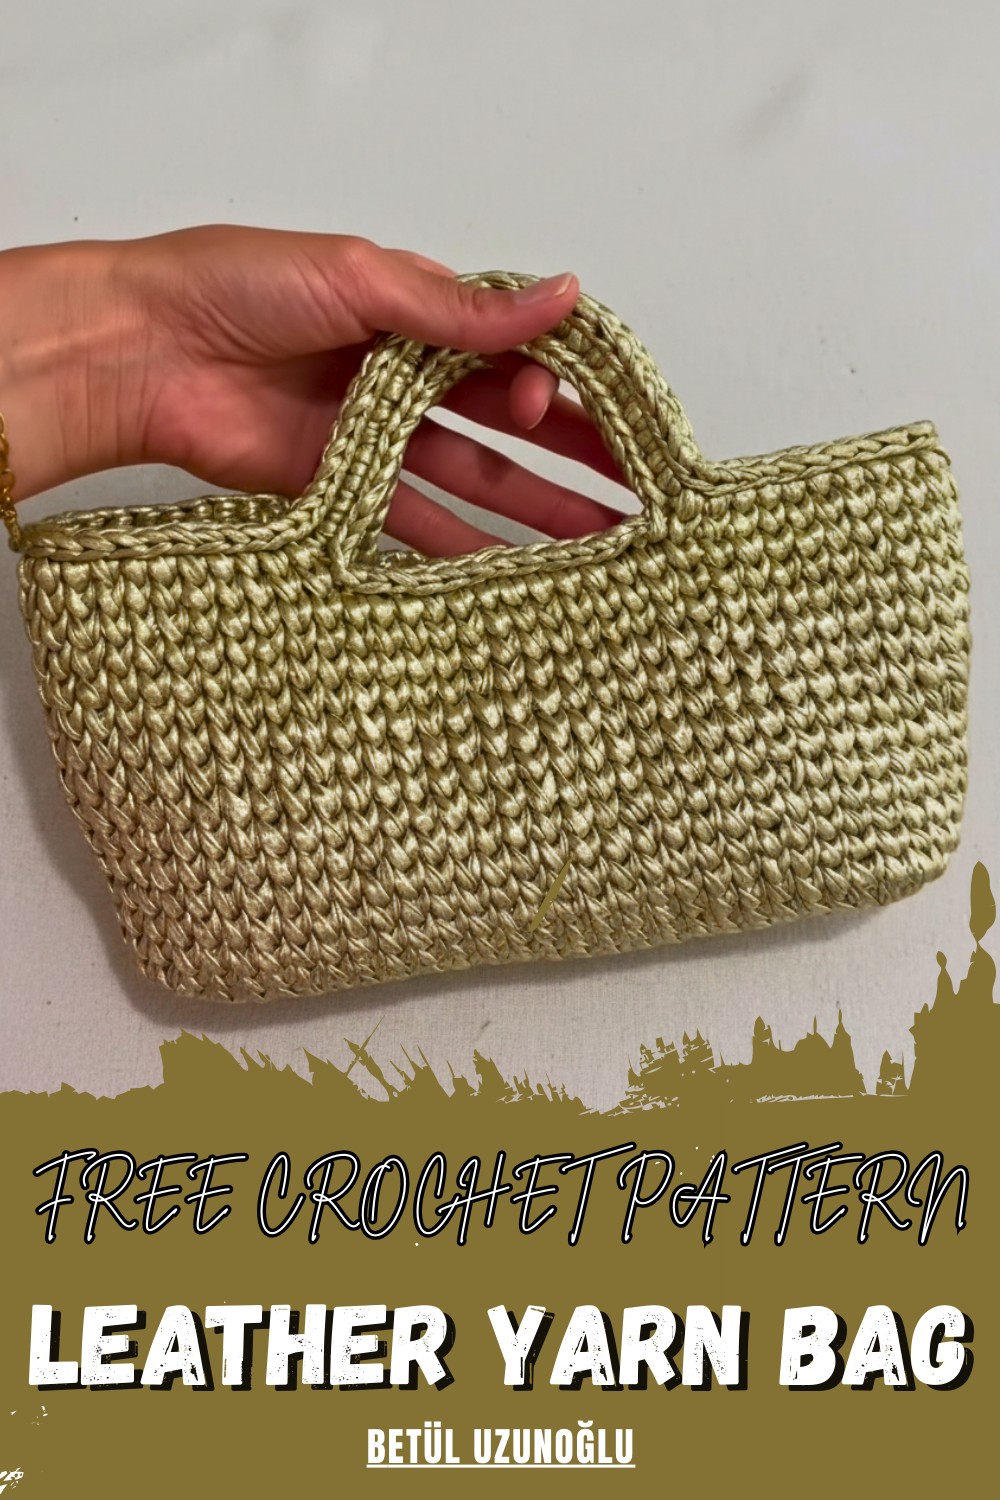
The resulting surface boasts a sleek sheen and a sophisticated, avant-garde edge, turning a functional item into a striking fashion statement. Visually, the stitch definition emerges with architectural clarity, lending the final piece a high-end, boutique appearance that mimics expensive designer wear.
Materials Required
To replicate Betül's stunning handbag, you need the following:
- Leather rope (Crazy Yarn by Balyargı): 3 balls, 100% polyester, each weighing 120-130g and 50 meters long. Both shiny and matte varieties are available.
- Crochet Hook: 3.5 mm.
- Baby Oil: To lubricate the hook for smoother crocheting with leather rope.
- Lining Fabric: Satin fabric for the lining (in your color of choice).
- Snaps or Magnetic Closure: For securing the bag opening.
- Sewing Thread and Needle: To attach the lining and closures.
- Scissors and Stitch Markers: For trimming and marking.
This material choice ensures the accessory remains water-resistant and simple to wipe down, blending immense practicality with undeniable glamour. Developing such an item produces a professional-grade masterpiece that elevates any ensemble with a touch of rugged refinement.
Step-by-Step Details
Step 2: Preparing the Base
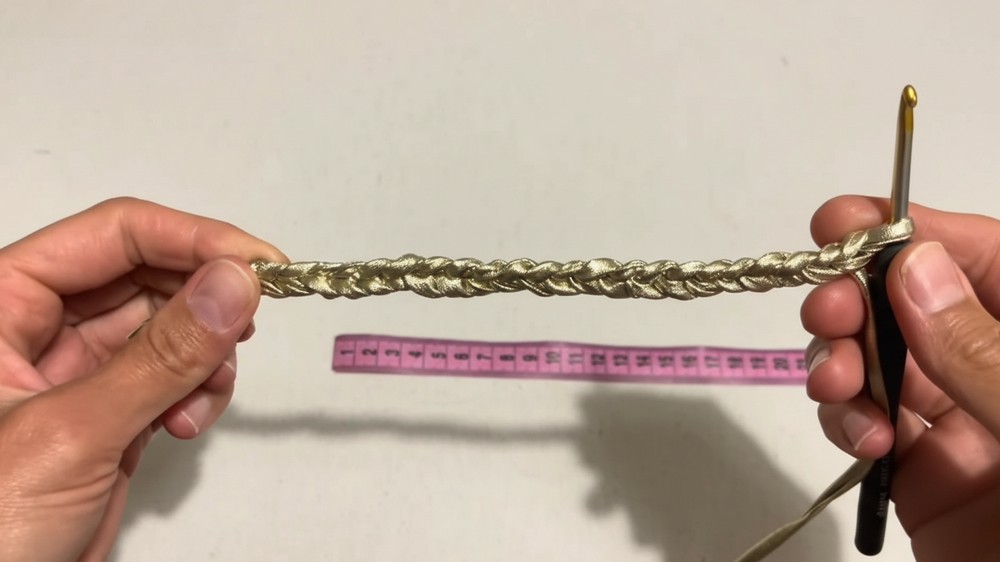
- Draw the Chain (Foundation):
- Start by dropping a small amount of baby oil onto a cotton ball and wipe your hook for smoother progress while working with leather rope.
- Create a 17 cm long foundation chain (approximately 22 chains, though the exact number may vary). Stretch and ensure the chain is the proper length without overstretching.
- Work Single Crochets (SC):
- Starting from the second chain from the hook, make single crochets along the chain, ensuring you don't tighten the stitches too much.
- At the last chain, crochet 3 single crochets into the last stitch to begin turning, ensuring enough room for smooth corners.
- Continue on the Opposite Side:
- Work single crochets on the opposite side of the chain foundation, enclosing any leftover yarn ends into your stitches.
- At the finishing corner, repeat 3 single crochets into the final chain to ensure the base doesn't pull or warp.
- Mark Increase Points:
- Use loop markers or wire hairpins to mark the base’s critical turning points as you add more rows with increases. Typically, 3 SC increases are added at each marked corner in subsequent curved rows.
- Complete a 24.5 cm x 7.5 cm rectangular base by repeating the process of single crochet increases at corner points and regular stitches in between.
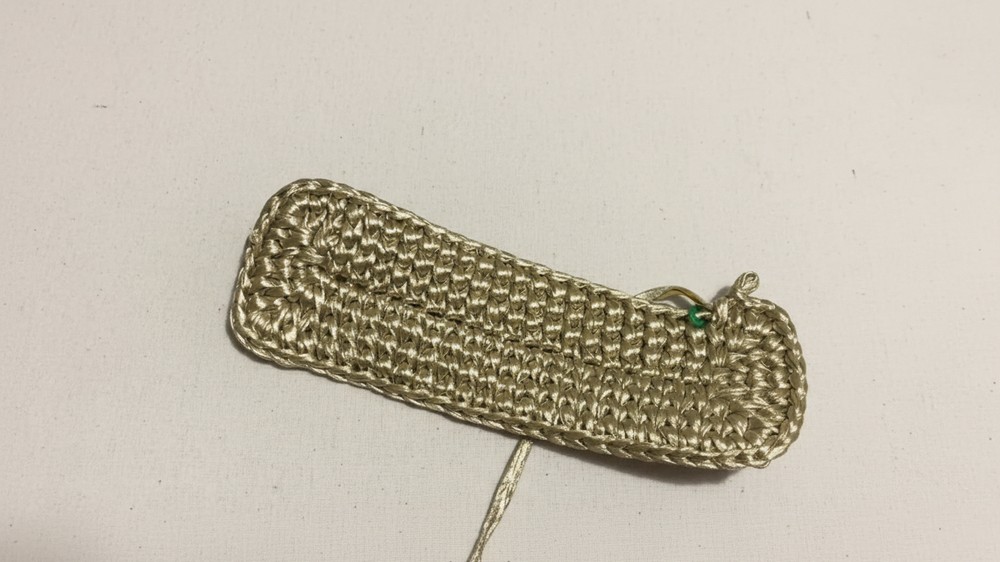
Step 3: Crochet the Bag Body
- Build Upright Rows:
- After completing the base, transition into upward rows for the body. Continue crocheting seamlessly in spiral rounds by working single crochets, but do not increase any further.
- Insert the hook into the lower section of the previous stitch (instead of the top loops) to create a slightly textured, “peanut-like” effect.
- Achieve the Desired Height:
- Crochet up to 11.5 cm in height for the bag body, working approximately 13 spiral rows after finishing the base.
- Periodically stretch and correct the body shape by hand to ensure symmetry.
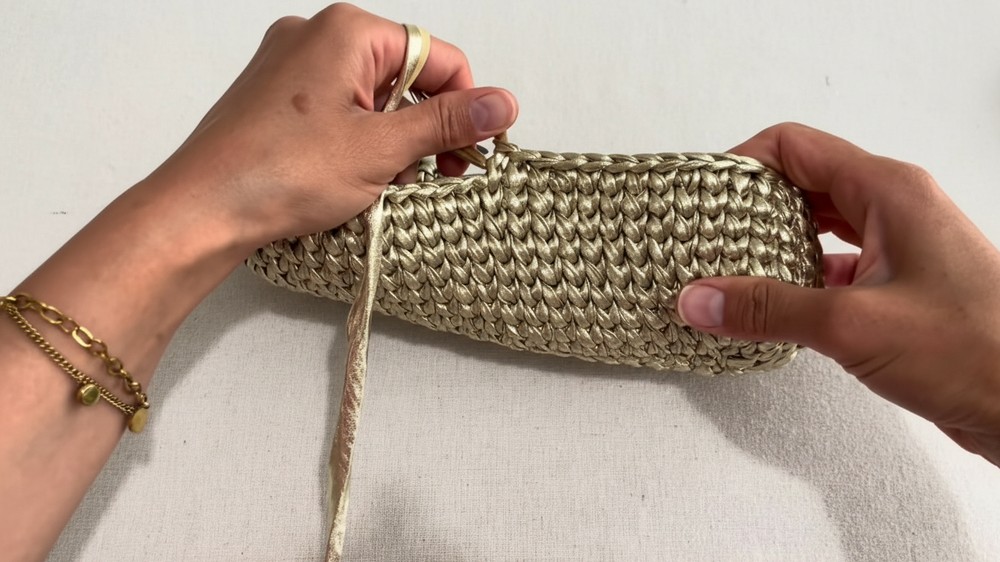
4: Add the Handles
- Prepare Handle Positions:
- Fold the bag in half to find even handle placement. Use a stitch marker to mark where the handles will attach. Leave about 3 stitches on either side for spacing.
- Fold the bag in half to find even handle placement. Use a stitch marker to mark where the handles will attach. Leave about 3 stitches on either side for spacing.
- Chain and Secure the Handles:
- Crochet 24 chains to create a handle strap. Secure the opposite end after skipping three stitches, forming a handle between the markers.
- Repeat the same process on the other side to finish the second handle.
- Strengthen the Handles:
- Work single crochets inside each chain of the handle and secure them tightly to ensure durability.
- As a finishing touch, work a slip stitch along the edges of the bag handle for a polished, clean look.
5: Adding a Lining
- Cut the Lining Fabric:
- Use thick satin fabric cut to match the bag’s measurements (7.5 cm x 24.5 cm base and sides with an extra 2 cm at the mouth for seam allowance).
- Draw straight guidelines for stitching using tailor’s chalk or soap.
- Shape the Lining:
- Sew the base flaps to the sides with a 7 cm-wide seam for a snug fit.
- Finish the raw edges with a neat fold and straight stitch along the mouth of the lining.
- Sew the Lining to the Bag:
- Insert the lining into the bag, aligning it with the top edge just below the slip-stitched section.
- Use a needle and thread to carefully attach the lining inside the bag by sewing along the folded edge of the fabric. Be sure to stitch from the inside to keep stitches hidden.
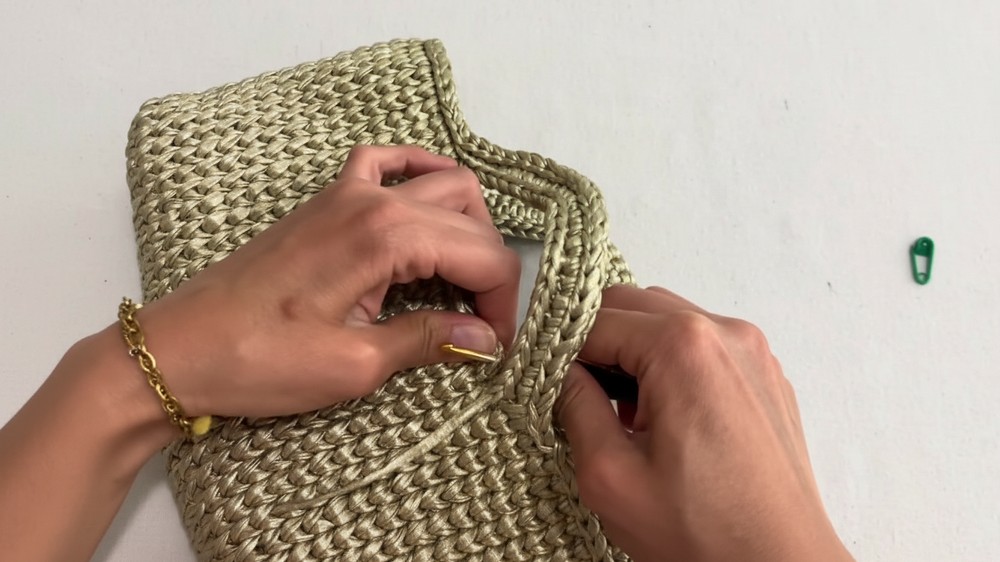
6: Attach Closures and Final Touches
- Install Snaps or Magnetic Closures:
- Position the snap/magnetic closure in the center of the bag handle and at the bag mouth for alignment. Sew them securely into place.
- Label and Adjust:
- If desired, sew a brand label or decorative tag onto the inner lining for a professional touch.
- Adjust and correct the shape of the bag by stretching gently if needed.
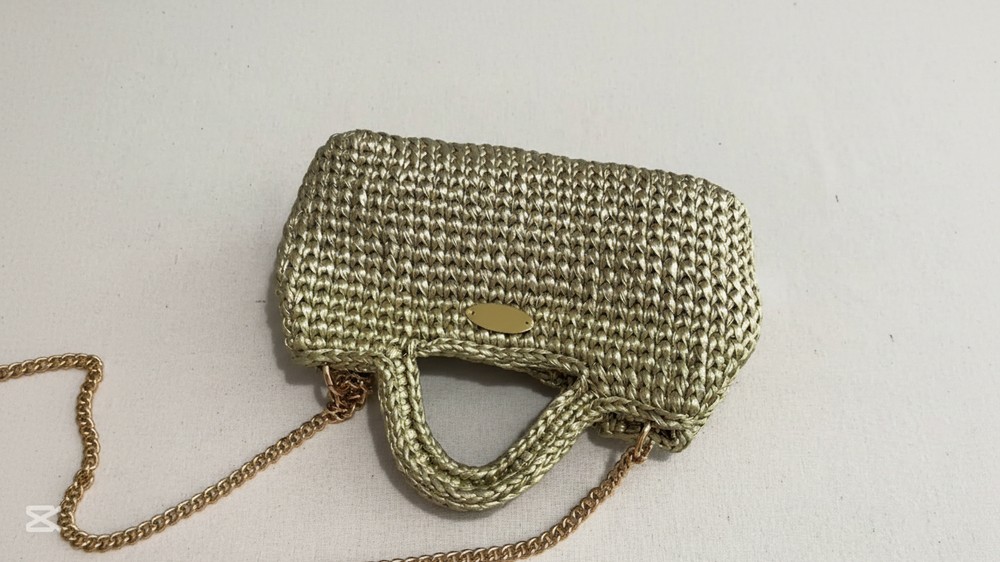
Special Features
- Unique Appearance: The use of leather rope creates a luxurious and flawless finish, offering both a matte and shiny texture.
- Structured Base: The rectangular base ensures stability and durability, making it suitable for various uses.
- Versatility: The bag pairs equally well with casual outfits, formal dresses, or eveningwear.
- Textured Body: The peanut-like stitch design adds a subtle yet stylish texture to the bag’s exterior.
- Customization: You can choose from various colors and finishes (shiny or matte leather rope) to make the bag your own.
Level of Difficulty
This project is best suited for confident beginners or intermediate crocheters. Basic skills such as crocheting a chain, single crochets, slip stitches, and increases are required. Beginners can find it slightly challenging because the leather rope is thicker and needs consistent tension.
Tutor’s Suggestions
- Use Baby Oil: To avoid difficulty while crocheting with leather rope, Betül suggests using baby oil on your hook after every few stitches to ensure smooth movements.
- Don’t Over-Tighten: Relax your grip while working with leather rope to avoid overly tight stitches that may cause difficulty and uneven texture.
- Practice Lining Sewing: If you are new to sewing linings, take your time to ensure the lining fits snugly and doesn’t sag.
- Use Markers: Mark critical points like the base increases and handle placements to ensure even shaping.
Uses
- Stylish casual bag for day-to-day use.
- Perfect as an accessory for holidays or dinner outings.
- Sophisticated option for weddings, evening dresses, or special events.
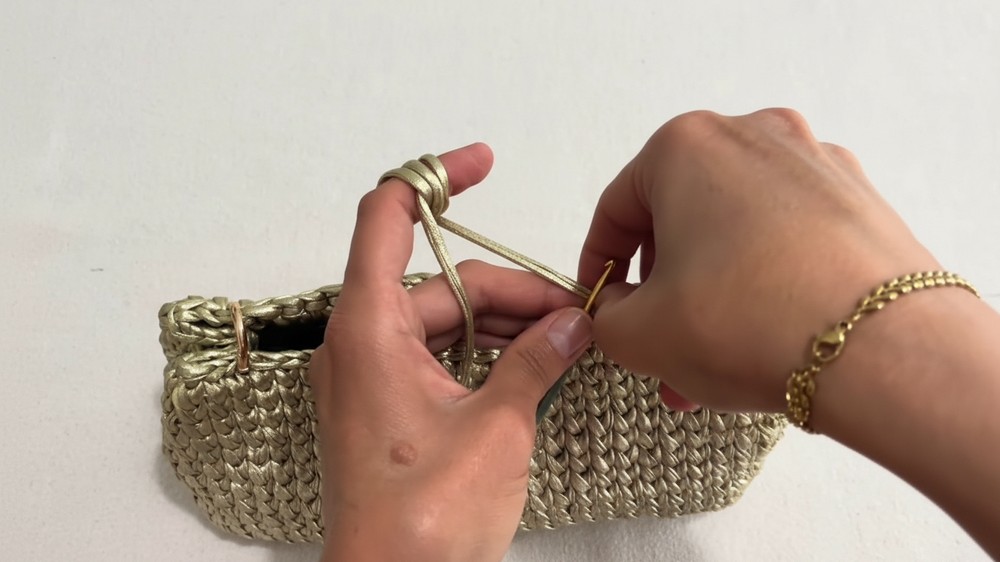
Quick Tip
When transitioning to a new ball of yarn, avoid tying knots. Instead, hold the ends of the new and old yarn together while crocheting to hide them seamlessly within your stitches. This ensures a clean and professional finish.
Conclusion
leather rope bag tutorial delivers a perfect balance of style and practicality. From the smooth texture of the leather rope to the thoughtfully lined interior, this bag makes an excellent addition to anyone’s accessory collection. Slip stitches and textured designs elevate its elegance, while the step-by-step guidance makes it achievable for intermediate crocheters.


