
Lovely holiday decor ideas come alive with the Free crochet Christmas Snowflake Pattern offering charming details and easy steps for festive creations.
A small winter-themed motif can turn an ordinary holiday setup into something calm and charming, and this Crochet Christmas Snowflake Pattern does exactly that. Its delicate shape, balanced form, and frosty look make it feel like a tiny piece of winter resting in your hands. Many people enjoy using it for tree ornaments, window garlands, festive coasters, or thoughtful handmade gifts. It also adds a soft handmade touch to table décor and gift wrapping.
Chic Crochet Christmas Snowflake Pattern for Holiday Decor Lovers
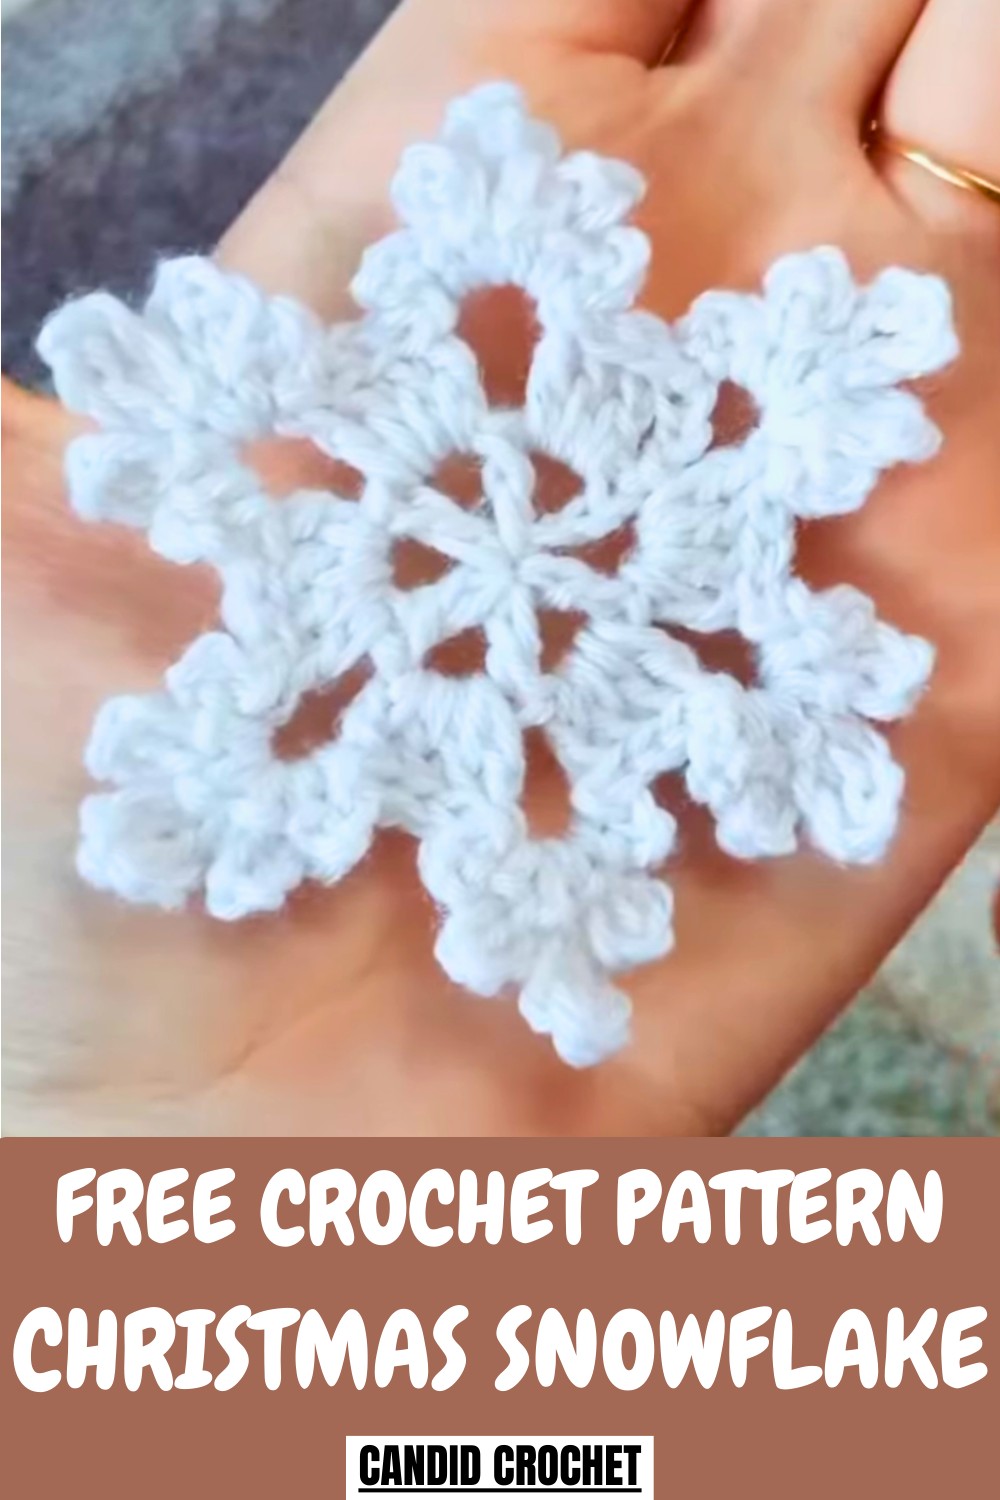
The pattern is simple enough for beginners while still offering a satisfying outcome for those who like adding personal touches to seasonal décor. Each finished snowflake has a lightweight, airy structure that captures the quiet mood of winter days. Whether it’s used to decorate a room or to add charm to a holiday project, this snowy motif helps set a warm, cheerful atmosphere during the festive season.
How to Make a Crochet Christmas Snowflake Ornament: Step-by-Step Guide
Materials Needed
- 100% acrylic yarn: A durable and elastic option, ideal for crochet snowflakes.
- 3mm crochet hook: Perfect for creating fine, detailed designs.
- Scissors: Used for cutting the yarn as needed.
- Additional yarn string: To attach the ornament to your tree.
Uses
- As a decorative Christmas tree ornament.
- To adorn holiday garlands, wreaths, or gift wrap.
- As handmade gifts for friends and family.
Special Features
- Magic Ring Base: This technique ensures a neat, gap-free center for the snowflake.
- Layered Design: The snowflake is crafted in rows, building elegant details on each round.
- Petal Formation: The ornament features intricate petals with varying chain lengths for a snowflake-like appearance.
Step-by-Step Instructions
Step 1: Making the Magic Ring
- Wrap the yarn around your fingers to form an "X."
- Create a loop with the working yarn and pull it through to form a magic ring.
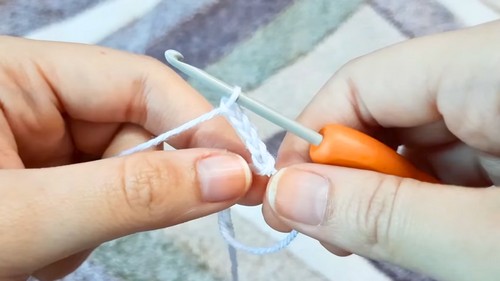
- Follow the tutorial link provided in the video description for further guidance, if needed.
Step 2: Forming the Base of the Snowflake
- Chain 4 after creating the magic ring. This counts as the first double crochet and chain 2.
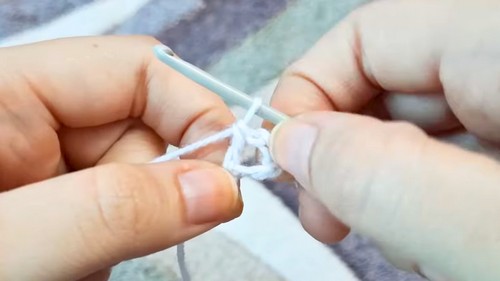
- Make 6 double crochet stitches, separated by chain 2 spaces, all into the magic ring.
- Pull the yarn string tightly to close the ring and eliminate gaps.
- Slip stitch in the top chain to secure the base. You now have the foundation for the snowflake.

Step 3: Row 2 – Creating the Double Crochet Sections
- Begin Row 2 by chaining 3. This counts as the first double crochet.

- In the space between chains on the base, make 3 additional double crochet stitches. Combine with the initial chain 3 to form a group of 4 double crochets.
- Chain three and create another group of 4 double crochets in the next chain 2 space.
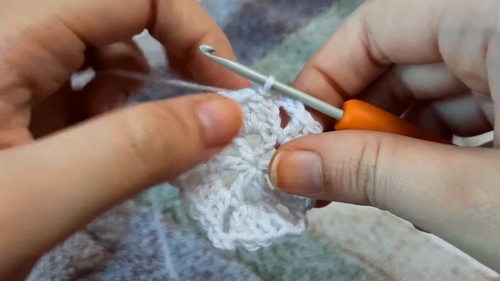
- Repeat this process for all chain spaces around the circle.
- Secure the row with a slip stitch at the top of the first chain 3.
Step 4: Row 3 – Adding the Petals
- Slip stitch through the next three double crochets, until you reach the first chain space.
- Create the first petal:
- Chain 3 and slip stitch into the chain space.
- Chain 5 and slip stitch into the chain space.
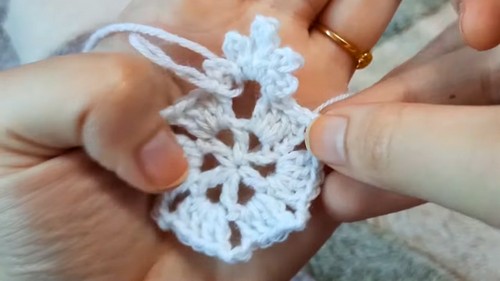
- Chain 7 for the peak of the petal, then slip stitch again.
- Chain 5 and slip stitch.
- Chain 3 and slip stitch to finish the petal.
- Repeat this petal-making process in all chain 3 spaces in the circle. The snowflake will take shape as each section is completed.
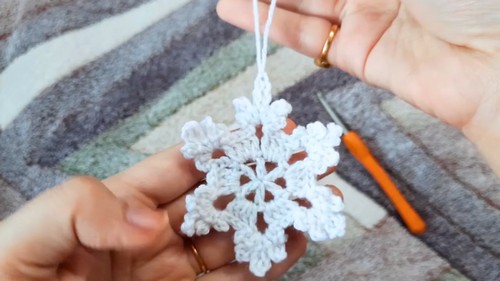
Step 5: Finishing Touches
- Once all petals are formed, attach a string for hanging:
- Cut a piece of yarn.
- Insert the hook into the top chain of the snowflake peak and pull the yarn through.
- Pull both strands completely and tie securely.
- Trim loose ends and check the ornament for neatness.
Level of Difficulty
This project is beginner-friendly, with straightforward steps such as magic rings, chain stitching, and double crochet. Some familiarity with basic crochet techniques will make the process easier. The petals may require patience and precision as the design becomes intricate.
Tutor’s Suggestions
- Use acrylic yarn for durability and flexibility, making it easier to work with intricate details.
- Pull the yarn tightly when forming the magic ring to eliminate gaps in the snowflake's center.
- If you’re new to crocheting magic rings, refer to the tutorial linked in the video description.
- Take your time making the petals to ensure uniformity across the snowflake.
Conclusion
Congratulations! You’ve created a gorgeous Christmas snowflake ornament that’s sure to brighten your holiday décor. Whether you gift it or keep it for yourself, this handmade creation adds charm and warmth to any space. Keep practicing and explore adding your personal touch to future designs.
Tip
To add extra sparkle, consider weaving metallic thread or adding small beads to the snowflake before finishing the petals. This will enhance its festive look and make it stand out on your tree!


