
Never lose your lip balm again with this Free Crochet Chapstick Holder Pattern that's stylish, functional, and perfect for beginners.
Perfectly blending practicality and charm, this Crochet Chapstick Holder Pattern adds a touch of handmade elegance to everyday essentials. Designed to keep your chapstick accessible, it features a compact, cylindrical design with a secure strap that easily attaches to keychains, bags, or lanyards. Its portability and functionality make it an ideal accessory for anyone on the go, ensuring you never lose your favorite lip balm again.
Cutest Crochet Chapstick Holder Pattern for Gifting or Personal Use
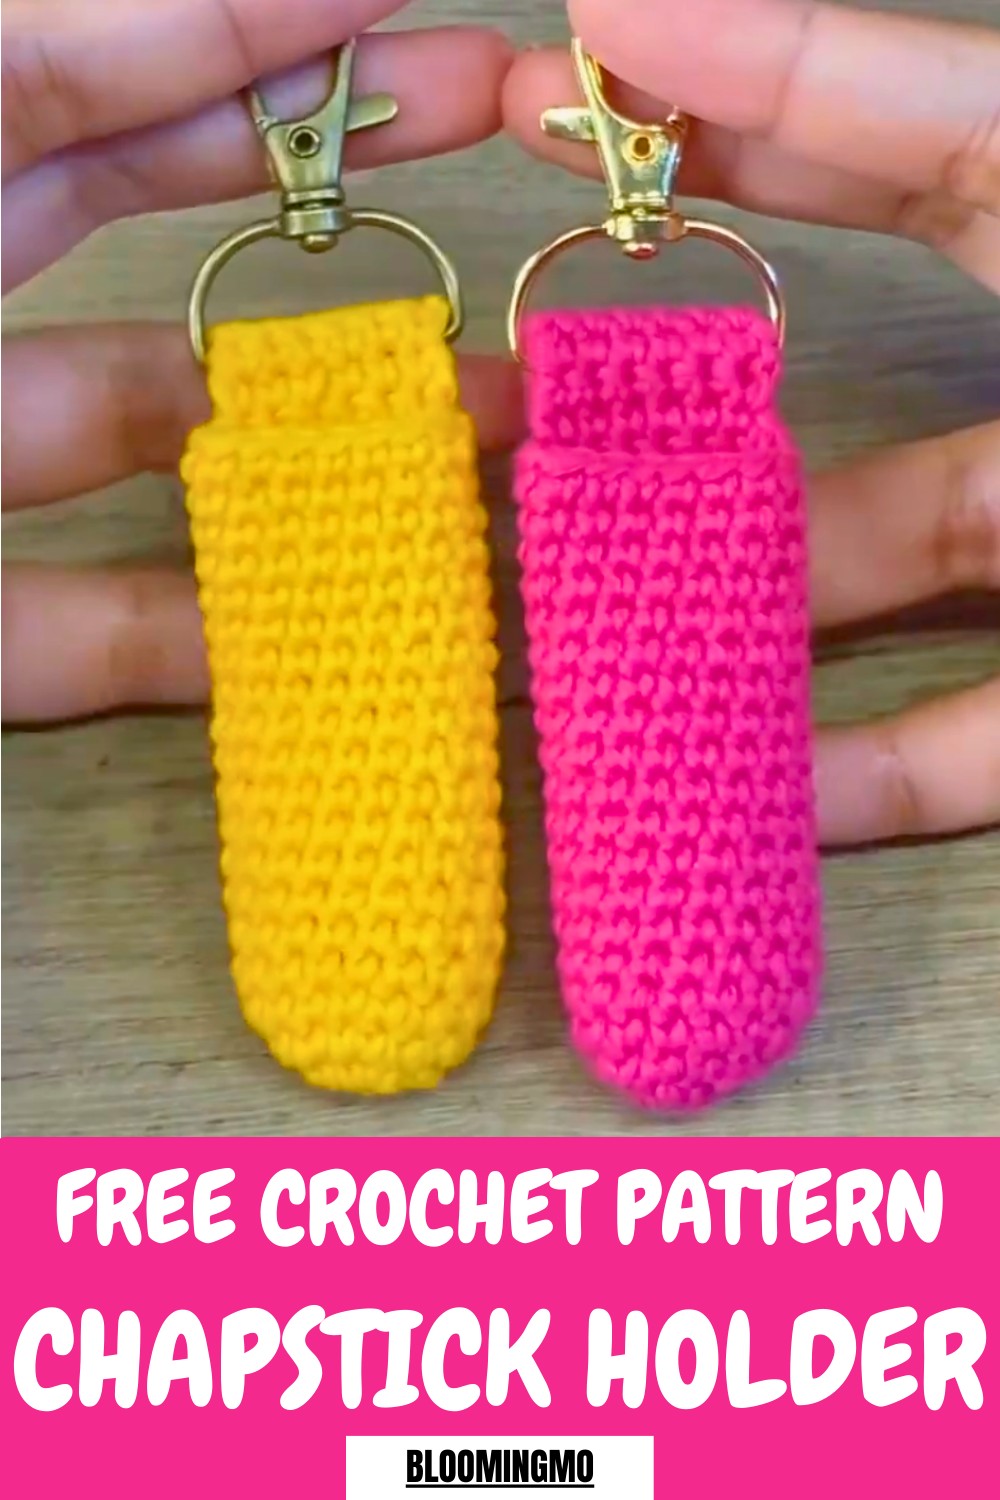
Crocheted with minimal materials such as scrap yarn and a D-ring keychain clasp, this project is not only budget-friendly but also an excellent way to utilize leftovers from other crochet projects.
The holder’s simple stitch pattern is easy enough for beginners yet satisfying for seasoned crocheters, offering opportunities for personalizing colors and textures to suit any style. Whether created as a thoughtful gift or a small treat for yourself, this pattern combines creativity, utility, and charm in one stylish handmade piece.
Step-by-Step Details:
- Materials Needed:
- Cotton yarn (13 wraps per inch recommended for similar sizing as the tutorial).
- 3 mm crochet hook.
- D-ring lobster keychain.
- Stitch marker.
- Scissors for cutting yarn tails.
- Darning needle for weaving in ends and sewing.
- Begin Crochet with Magic Ring:
- Create the magic ring by wrapping the yarn around your fingers in an "X" shape.
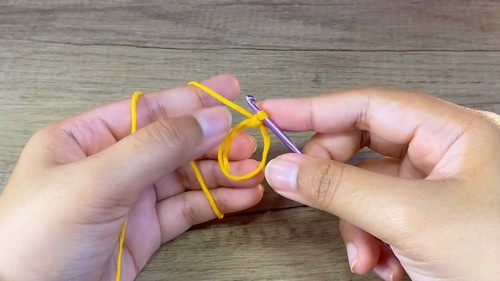
- Insert the hook under and over, twist, and yarn over to pull through the loop, forming the base.
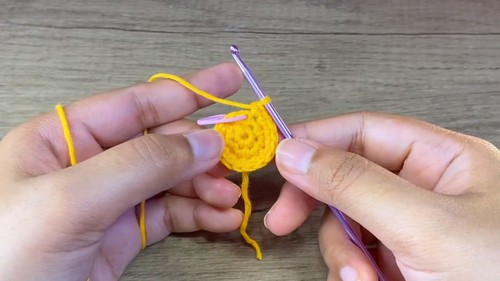
- Work six single crochets into this ring and tighten by pulling the yarn tail.

- Create the magic ring by wrapping the yarn around your fingers in an "X" shape.
- Increase Stitches:
- For Round 2, work six increases (two single crochets in each stitch) for a total of 12 stitches.
- Use a stitch marker to track the first stitch of each round.
- Build Base Diameter:
- For Round 3, crochet two single stitches followed by one increase. Repeat this sequence four times to reach 16 stitches.
- Check the diameter using your chapstick, ensuring the base fits.
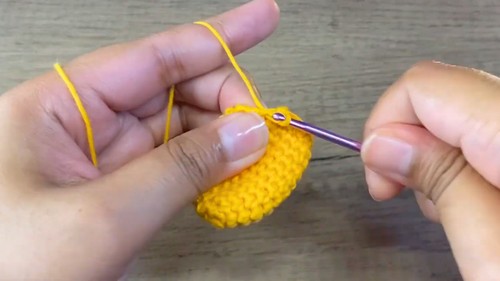
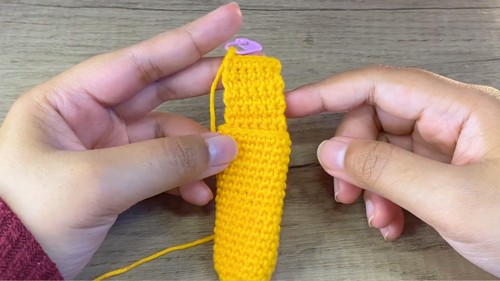
- Crochet the Cylinder Shape:
- From Round 4 onwards, work one single crochet into each stitch (16 stitches per round).
- Crochet up to Round 20, or until the height accommodates your chapstick. Adjust the rounds if needed for a perfect fit.
- Add the Strap:
- Start chaining one stitch, then create six single crochets for the strap width.
- Continue repeating single crochet rows until the strap reaches the desired length (27 rows recommended).
- Perform another fit check to ensure the strap fits well around the D-ring.
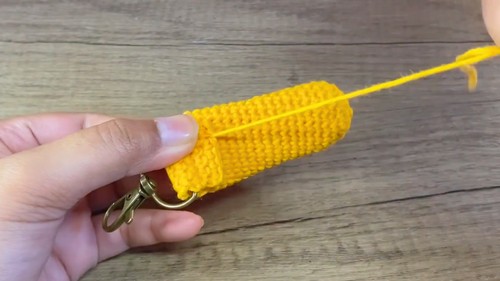
- Finish and Sew:
- Fasten off the yarn and slide the D-ring onto the strap before sewing it into place.
- Use a darning needle to align the strap with the chapstick holder and sew securely with basic back-and-forth stitches.
- Weave in all yarn tails and trim off any excess.
Special Features:
- Quick and beginner-friendly: The project is straightforward and can be completed in about an hour.
- Customizable: Adjust yarn colors, sizes, and strap lengths to suit individual preferences.
- Practical: The compact holder is perfect for keeping chapstick handy, whether clipped to a bag or keys.
- Minimal materials: Most tools and supplies can be sourced easily, including scrap yarn.
Level of Difficulty:
This project is beginner-friendly, with easy-to-follow steps and clear guidance. While sewing may require additional attention, it is a straightforward process that doesn’t demand advanced skills.
Tutor's Suggestions:
- Use a 3 mm hook and cotton yarn for similar sizing to the example demonstrated.
- Pay attention to stitch structure and placement to maintain neatness.
- Utilize the stitch marker to keep track of round transitions.
- Check the fit regularly as you work to ensure the chapstick holder is correctly sized.
Uses:
This chapstick holder is practical and portable, designed to keep lip balm within reach wherever you go. It makes a thoughtful handmade gift for friends and family, especially as a quick last-minute present.
Pro Tip:
To keep your work neat, weave in the yarn tail before completing the top. Turning the holder inside out can be tricky later, so handle it early for ease.
Conclusion:
With simple steps, minimal materials, and creative customization options, crocheting a chapstick holder is a fun and rewarding project for beginners. Its practicality and charm make it a delightful gift or personal accessory.


