
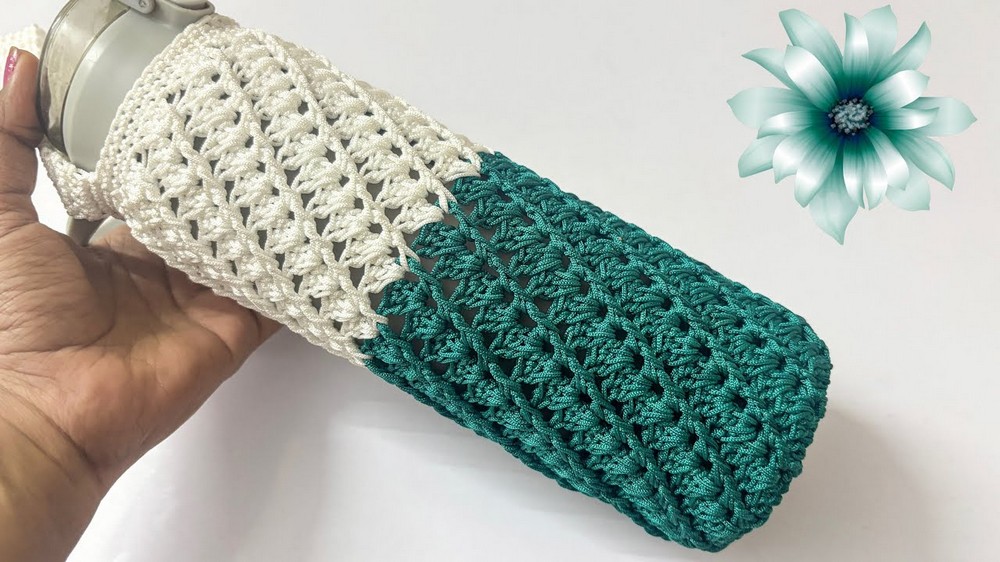
Tote drinks in style with the Crochet Water Bottle Holder Pattern, a handy and colorful accessory that adds charm, convenience, and fun to every day.
Tired of carrying bulky or flimsy water bottles that spill or slip out of your hands? This handmade accessory offers a practical and stylish solution, keeping hydration close while adding a handcrafted charm to your routine. Its sturdy crochet structure provides a secure fit for most bottles, and the breathable design ensures durability and easy cleaning.
Rock Crochet Water Bottle Holder Pattern That Adds Stylish Convenience

The Crochet Water Bottle Holder Pattern allows crafters to experiment with yarn colors, textures, and strap lengths, creating a unique piece that fits any lifestyle. Perfect for walks, gym sessions, beach trips, or casual outings, it doubles as a functional accessory and a creative statement.
Beginner-friendly yet rewarding, the pattern strengthens crochet skills while producing a durable, wearable item. Combining practicality, aesthetics, and versatility, this water bottle holder is more than just a carrier—it’s a stylish, handmade solution that makes everyday hydration convenient and fashionable.
Step-by-Step Guide: Crochet Water Bottle Holder
Special Features
- Perfect Base Size:
- The base is designed to snugly fit a standard-sized water bottle, with the option to adjust for larger or smaller bottles.
- Intermediate-Level Pattern:
- The use of front post double crochets, alternating color changes, and detailed rounds adds intricacy to the overall pattern.
- Durable Handle:
- With 140 rows of single crochet, the holder's handle is both sturdy and adjustable in length.
- Color Customization:
- The tutorial uses Rama green and off-white nylon threads, but any two colors can be substituted for a personalized look.
- Recommended Materials (Nylon Thread):
- The use of 1 mm nylon thread ensures durability and stretch resistance, making this bottle holder long-lasting.
Level of Difficulty
Intermediate:
- This pattern is slightly more challenging than basic crochet projects.
- If you are comfortable with foundational techniques like chaining, slip stitching, and double crochets, you can learn and master the intermediate techniques such as front post double crochet and seamless joining.
- Stay mindful of tension and stitch count to ensure a perfect fit for the water bottle.
Tutor’s Suggestions
- Use Nylon Thread:
- 1 mm nylon thread is recommended for durability, but if not available, cotton yarn can be used.
- Optional: If located in India, you can purchase thread directly from the tutor.
- Hook Size:
- A 2.5 mm crochet hook pairs well with the 1 mm nylon thread to achieve the proper stitch tension.
- Glue for Securing Ends:
- Use B7000 glue to secure knot ends when working with nylon thread. It's especially useful for preventing unraveling.
- Stitch Count Accuracy:
- Ensure accurate stitch counts at the end of every round to avoid shape distortion.
- Customizing the Size:
- Adjust the base size if your bottle is larger by continuing additional increase rounds during the base creation.
Materials Required
- 1 mm Nylon Thread: Two colors (tutor uses Rama green and off-white).
- Approx. 100 g of thread is required for this project.
- 2.5 mm Crochet Hook: Recommended size for working with nylon thread.
- Glue: B7000 glue for securing loose ends.
- Stitch Markers: For marking handle placement.
- Scissors
- Measuring Tape: To ensure the base and handle match your desired size.
Step-by-Step Instructions
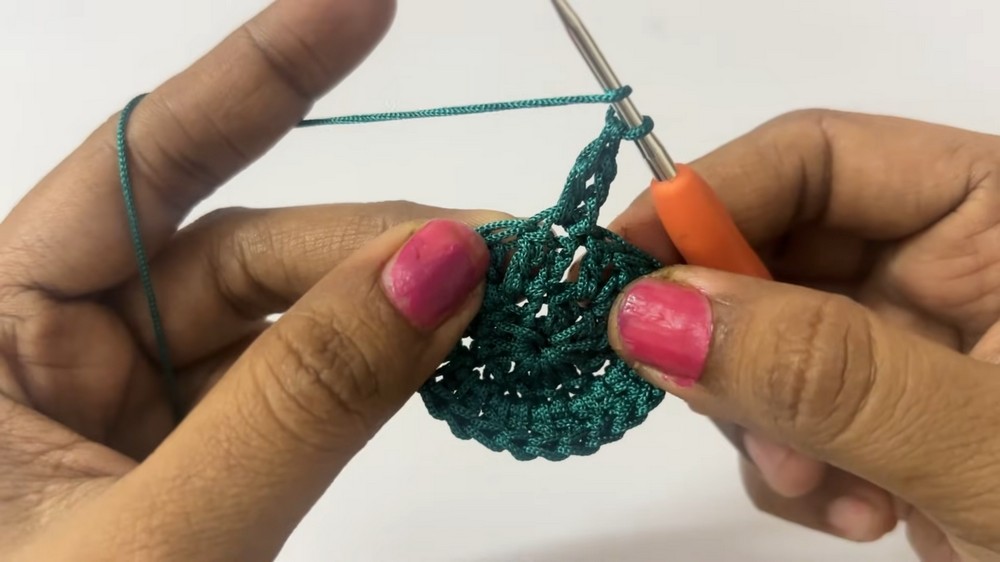
1. Base of the Holder
- Magic Ring:
- Create a magic ring, start with chain 3 (counts as 1st double crochet), and make 11 more double crochets inside the ring for a total of 12 double crochets.
- Close the ring with a slip stitch into the 3rd chain.
- Round 2:
- Chain 3, and make 2 double crochets in every stitch across. You will have 24 stitches. Close with a slip stitch.
- Chain 3, and make 2 double crochets in every stitch across. You will have 24 stitches. Close with a slip stitch.
- Round 3:
- Chain 3, make 2 double crochets in the first stitch, 1 double crochet in the next, and repeat the sequence across the round. This gives 36 stitches.

- Chain 3, make 2 double crochets in the first stitch, 1 double crochet in the next, and repeat the sequence across the round. This gives 36 stitches.
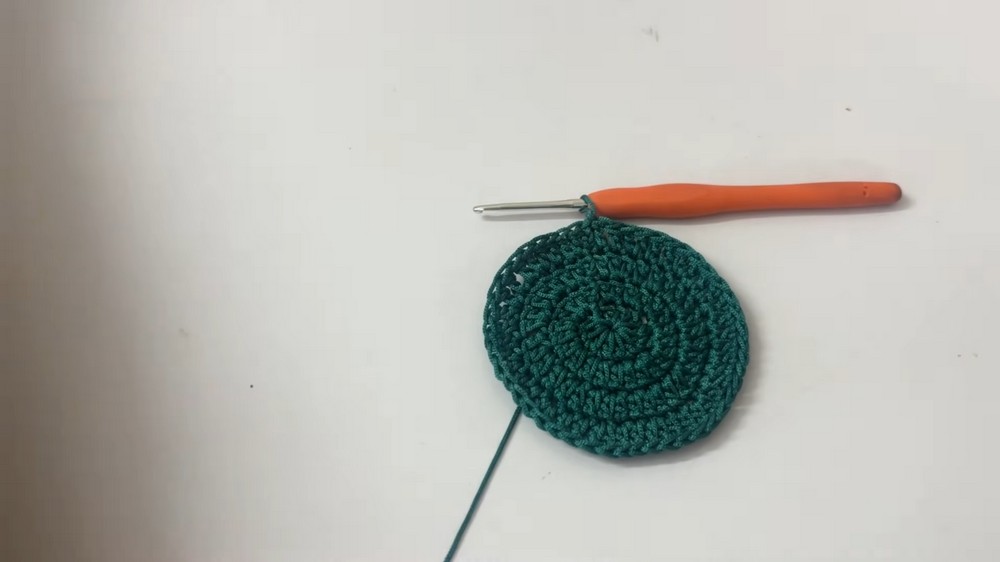
- Round 4:
- Chain 3, make 2 double crochets in the first stitch, 1 double crochet in the next two stitches, and repeat the sequence across for 48 stitches.
- Chain 3, make 2 double crochets in the first stitch, 1 double crochet in the next two stitches, and repeat the sequence across for 48 stitches.
- Measure the Base:
- Check that the base fits snugly around the bottom of your water bottle. The base should measure approximately 3 inches in diameter.
- Stop increasing once the correct fit is achieved.
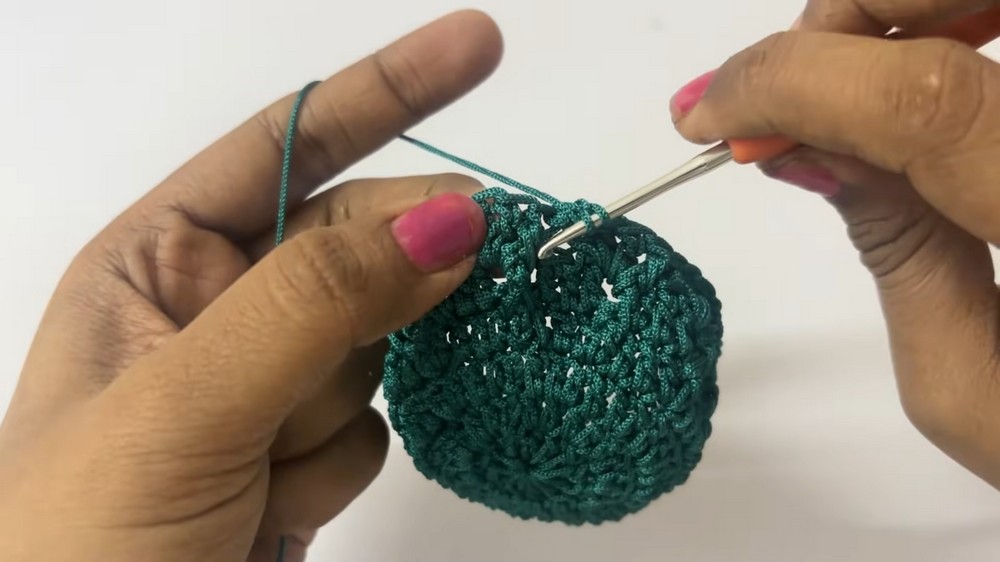
2. Pattern Work
- Start with Round 5 to introduce the pattern:
- Chain 1, make a front post double crochet (FPDC) in the first stitch.
- Work 1 double crochet in the next 3 stitches, followed by an FPDC in the next stitch.
- Repeat the sequence (FPDC, 3 double crochets) across. You will have 48 stitches.
- Round 6 and Onwards:
- Continue the pattern, but start incorporating spaces instead of stitches:
- In the space following each FPDC, make 3 double crochets, skip 3 stitches, and make another FPDC in the next FPDC.
- Repeat this pattern for a total of 20 rounds using the first thread color.
- Continue the pattern, but start incorporating spaces instead of stitches:
3. Color Change
- Switch to Second Color (Round 21):
- Secure the new color (off-white) to the first FPDC of the round.

- Repeat the same pattern sequence as before: FPDC, 3 double crochets in the spaces.
- Ensure the back side of the color change is neat by holding the thread ends tightly while crocheting the 3 double crochets.
- Secure the new color (off-white) to the first FPDC of the round.
- Complete Remaining Rounds:
- Work 12 additional rounds with the second color (off-white), for a total of 32 pattern rounds (20 in the first color + 12 in the second).

- Work 12 additional rounds with the second color (off-white), for a total of 32 pattern rounds (20 in the first color + 12 in the second).
4. Single Crochet Border
- Rounds 33-35:
- After completing the 32 pattern rounds, make 3 rounds of single crochet to form a neat border.
- Each round should have 48 single crochets (no increases or decreases).
5. Creating the Handle
- Begin Handle:
- Chain 1 and make 5 single crochets in consecutive stitches.
- Turn, and repeat single crochets across for each row.

- Build Handle Length:
- Continue until the handle measures approximately 140 rows, creating a length of 23 inches.
- Attach the Handle:
- Count 19 stitches on either side of the bag to place stitch markers for attachment.
- Use slip stitches or single crochets to attach the handle, ensuring no twists occur during attachment.
6. Finishing Touches
- Secure loose ends with B7000 glue, especially for nylon thread.
- Double-check all knots and ensure the handle is well attached for durability.

Uses of the Crochet Water Bottle Holder
- Practical Accessory:
- Ideal for carrying water bottles during hikes, shopping trips, and workouts.
- Stylish and Functional:
- Designed to be lightweight, portable, and visually appealing with customizable color options.
- Gifts and Market Items:
- Perfect for gifting or selling as handmade, eco-friendly products.
Crochet Tip
When working with nylon thread, ensure consistent tension and be mindful of the slippery texture. Using a damp cloth under your thread spool can help maintain control and prevent slipping.
Conclusion
This crochet water bottle holder is a fun and rewarding project that combines functionality with intricate design. The detailed pattern, durable materials, and sturdy handle make it a reliable and stylish accessory. Whether you’re making one for yourself or as a handmade gift, this project is sure to impress.


