
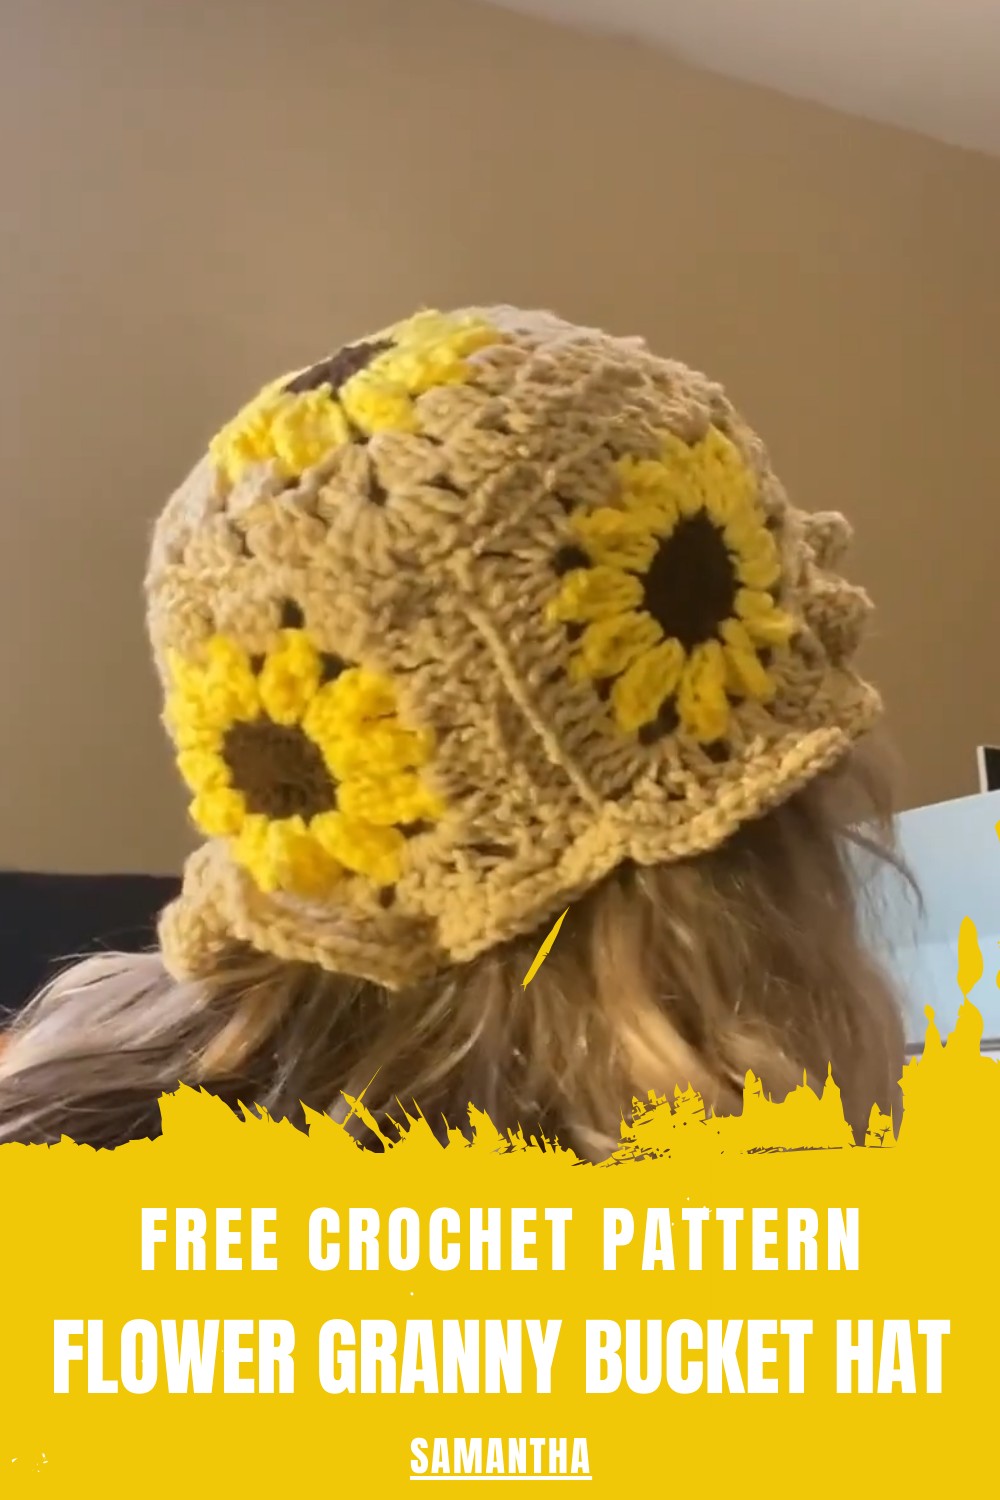
Spruce up your style with a playful crochet flower granny bucket hat that pops with color, adds charm, and turns every outfit into a statement.
A handmade hat can turn a simple outfit into a fun and stylish statement, and this pattern takes it to the next level with charming flower details. The Crochet Crochet Flower Granny Bucket Hat Pattern combines classic granny-style stitches with playful floral designs, giving the hat a unique and eye-catching texture.
Bright Crochet Flower Granny Bucket Hat Pattern for Festival Fun
Its breathable yarn makes it comfortable to wear in warm weather while still offering a soft structure that keeps its shape. One major advantage is that it’s fully customizable—you can choose yarn colors, flower sizes, and brim width to match your personal style.
The added flowers bring a cheerful and vintage feel, making the hat not only functional but also a decorative accessory. Perfect for outdoor activities, casual outings, or as a handmade gift, this crochet hat adds personality and flair wherever it’s worn. It’s a creative project that combines practicality, beauty, and individuality in one charming piece.
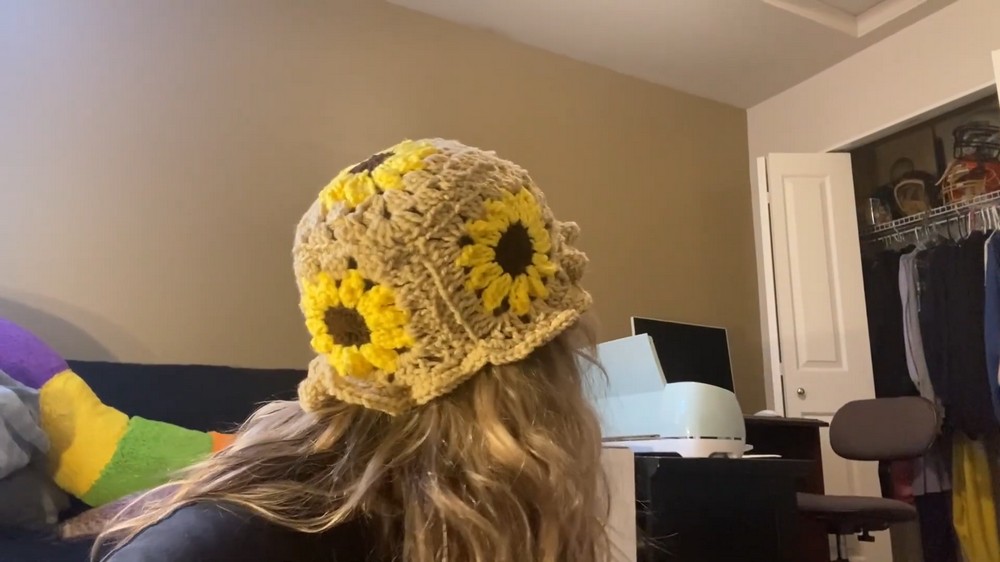
Flower Granny Square Hat
Materials Needed
You will need the following materials to complete this project:
- Yarn: The cheapest yarn available was used in the tutorial, but any medium-weight yarn will work. Choose different colors for the center, petals, border, and hat body to make the flower motif pop.
- Crochet Hook: Size 5.75 mm hook (or the size that matches your yarn choice).
- Scissors: For trimming excess yarn.
- Yarn Needle: For weaving in ends.
- Additional Stitch Markers (Optional): Useful for keeping track of corners or sides while joining squares.
Special Features
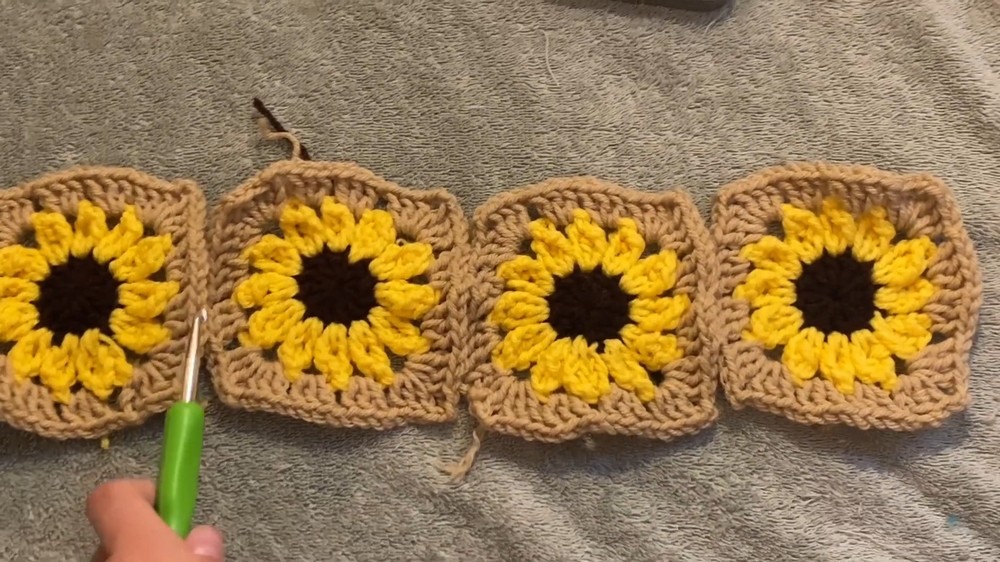
- Flower Granny Squares: The hat is constructed using flower granny squares, making the design intricate and unique. You will crochet 5 squares in total, with petals and borders standing out in different colors.
- Customization Options: You can switch colors for the center, petals, border, or flower squares to suit your preferences.
- Simple Joining Technique: The squares are connected into a row and folded into a circular base for the hat, making assembly straightforward.
- Decorative Border: The border is added using single crochet stitches and increases to create a flared edge that comfortably fits the head.
Step-by-Step Instructions
1: Create a Magic Ring for the Center
- Start with your center color yarn.
- Make a magic ring. The tutor doesn’t demonstrate how to do it, but if you’re unsure, look up tutorials or watch the video in slow motion.
- Chain 3 in the magic ring (this acts as the first double crochet).
- Crochet 11 double crochets into the magic ring.

- Tighten the magic ring by pulling the tail and close it with a slip stitch into the third chain from the start.
2: Adding the Petals
- Switch to your petal color yarn.
- Chain 5, which acts as the base for the first petal.
- In the next stitch, work 3 triple crochets:
- Wrap around twice, insert the hook, and pull through. Pull through sets of loops (two at a time) until you’ve completed a triple crochet. Repeat for a total of 3 in the same stitch.
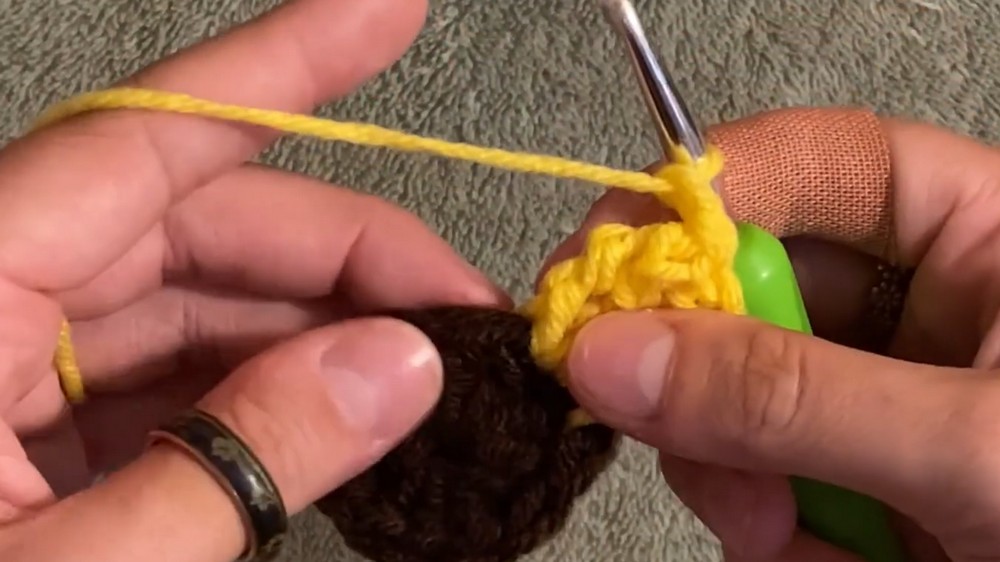
- Wrap around twice, insert the hook, and pull through. Pull through sets of loops (two at a time) until you’ve completed a triple crochet. Repeat for a total of 3 in the same stitch.
- After completing the 3 triple crochets for your first petal:
- Take your hook out of the loop, count back 3 stitches, and insert your hook into the 3rd stitch.
- Reinsert your hook into the loop and slip stitch to form a petal cluster.
- Chain 2, then repeat the process for each petal until you’ve crocheted 12 petals around the circle. The final petal will be worked into the chain 5 space you created at the start.
- Tie off the yarn and weave in the ends.
3: Adding the Border to Each Granny Square
- Switch to your border color yarn.
- In any open space, attach the new yarn and chain 3 (acts as a double crochet).
- Create a corner with 3 double crochets, chain 2, and 3 double crochets in the same space.
- For the side spaces:
- Chain 1, work 3 double crochets in the next open space.
- Repeat this for 2 side spaces (each side has 3 clusters of 3 double crochets).
- At the corners, repeat the corner pattern: 3 double crochets, chain 2, 3 double crochets in the same space.
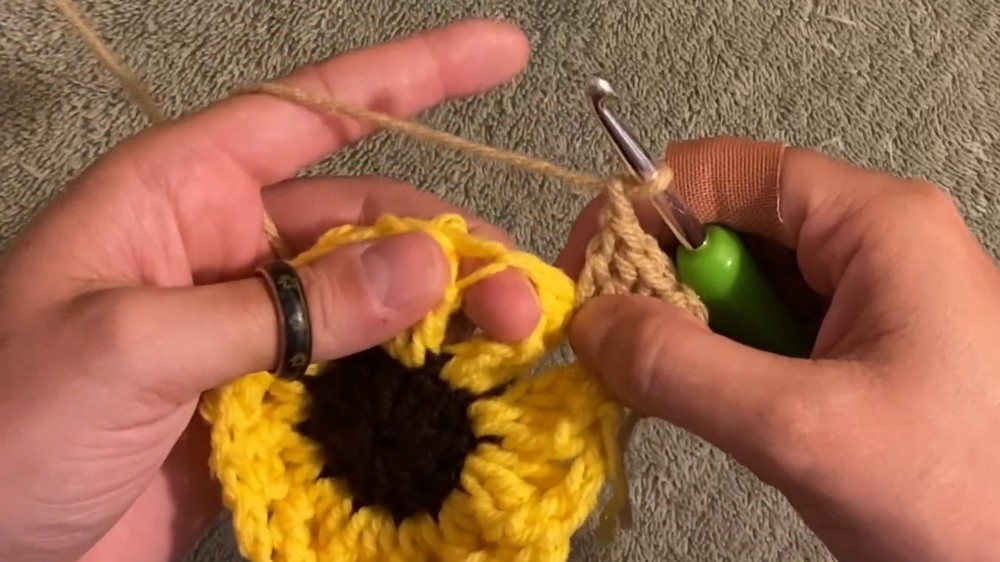
- Continue this pattern around the square and finish with a slip stitch.
- Make 5 granny squares total. Do not cut off the yarn on the 5th square, as it will be used for joining.
4: Joining the Squares
- Arrange the 4 granny squares in a line and join them together using single crochet stitches:
- Insert your hook through the stitches on both squares.
- Pull the yarn through and work single crochets to seam the squares together.
- After the squares are connected in a row, fold it into a circle (headband shape) and join the final sides.
5: Add the Top Square
- Attach the 5th granny square to the top of the circle (hat base).
- Join the top square to the circular base with slip stitches or single crochets, making sure to attach all sides evenly around the headband.
6: Crochet the Border
- With the hat inside out, begin crocheting the border.
- Work 2 single crochets into each stitch around the edge to create an increase.
- For the final row, you can either repeat single crochets only or work a single crochet + increase pattern for a slightly flared edge.
Level of Difficulty
- Beginner to Intermediate:
- Beginners will find standard stitches like double crochets easy, while the triple crochets and joining techniques require intermediate-level attention.
- The tutorial is highly informal, ideal for crocheters who prefer fun, supportive, and relaxed instructions.
Tutor’s Suggestions
- Relax: The tutor emphasizes that perfection isn’t necessary. If something doesn’t look perfect, it’s still okay—it won’t affect the final outcome too much.
- Experiment: For color switches and joining techniques, feel free to try your own methods; it’s all about what feels manageable to you.
- Take Breaks: The tutor recommends pacing yourself, especially for repetitive steps like increases and border rows.
Uses
- This hat is trendy and perfect for cooler weather.
- It can be customized with unique colors to reflect your personality or match your wardrobe.
- Makes a thoughtful, handmade gift for loved ones who appreciate crochet or boho-style fashion.
Tip
When joining the squares, use stitch markers to help align corners and sides for even attachment. This prevents the squares from stretching unevenly during the joining process.
Conclusion
The Flower Granny Square Hat is not only fun to create but also customizable, allowing endless color and design possibilities. While the process is detailed, the stunning flower squares and decorative borders make the effort worthwhile. Don’t stress about perfection—this project is all about enjoying the creative journey and celebrating the final product.


