
This miniature sushi can add charm to a desk, shelf, or display, sparking smiles and conversation. Following the pattern turns simple yarn into a playful, decorative item that combines fun and artistry. Every stitch builds character, resulting in a tiny creation that brings joy and satisfaction to both the maker and anyone lucky enough to see it.
How to Crochet Nigiri Sushi Amigurumi – Step-by-Step Guide
Materials Needed
Here’s what you'll need to complete the nigiri sushi amigurumi:
- Yarn:
- Colors: Red, orange, white, and pink (scrap yarn for cheeks).
- Medium-weight yarn works best to create structure and texture.
- Crochet Hook:
- 3.25mm crochet hook to ensure tight and consistent stitches.
- Additional Tools:
- Scissors to trim yarn.
- Stitch marker to track rounds.
- Safety eyes (size/style of your choice).
- Polyfill stuffing to shape the rice.
- Yarn needle for sewing and weaving ends.
Uses of the Nigiri Amigurumi
- Decor: Display your nigiri as a fun addition to shelves, desks, or craft spaces.
- Gifting: Great handmade gift for food lovers or fans of Japanese sushi culture.
- Toy: Lightweight and appealing for kids or collectors.
- Skill Practice: Perfect for practicing amigurumi techniques such as magic circles, invisible decreases, and color changes.
Special Features
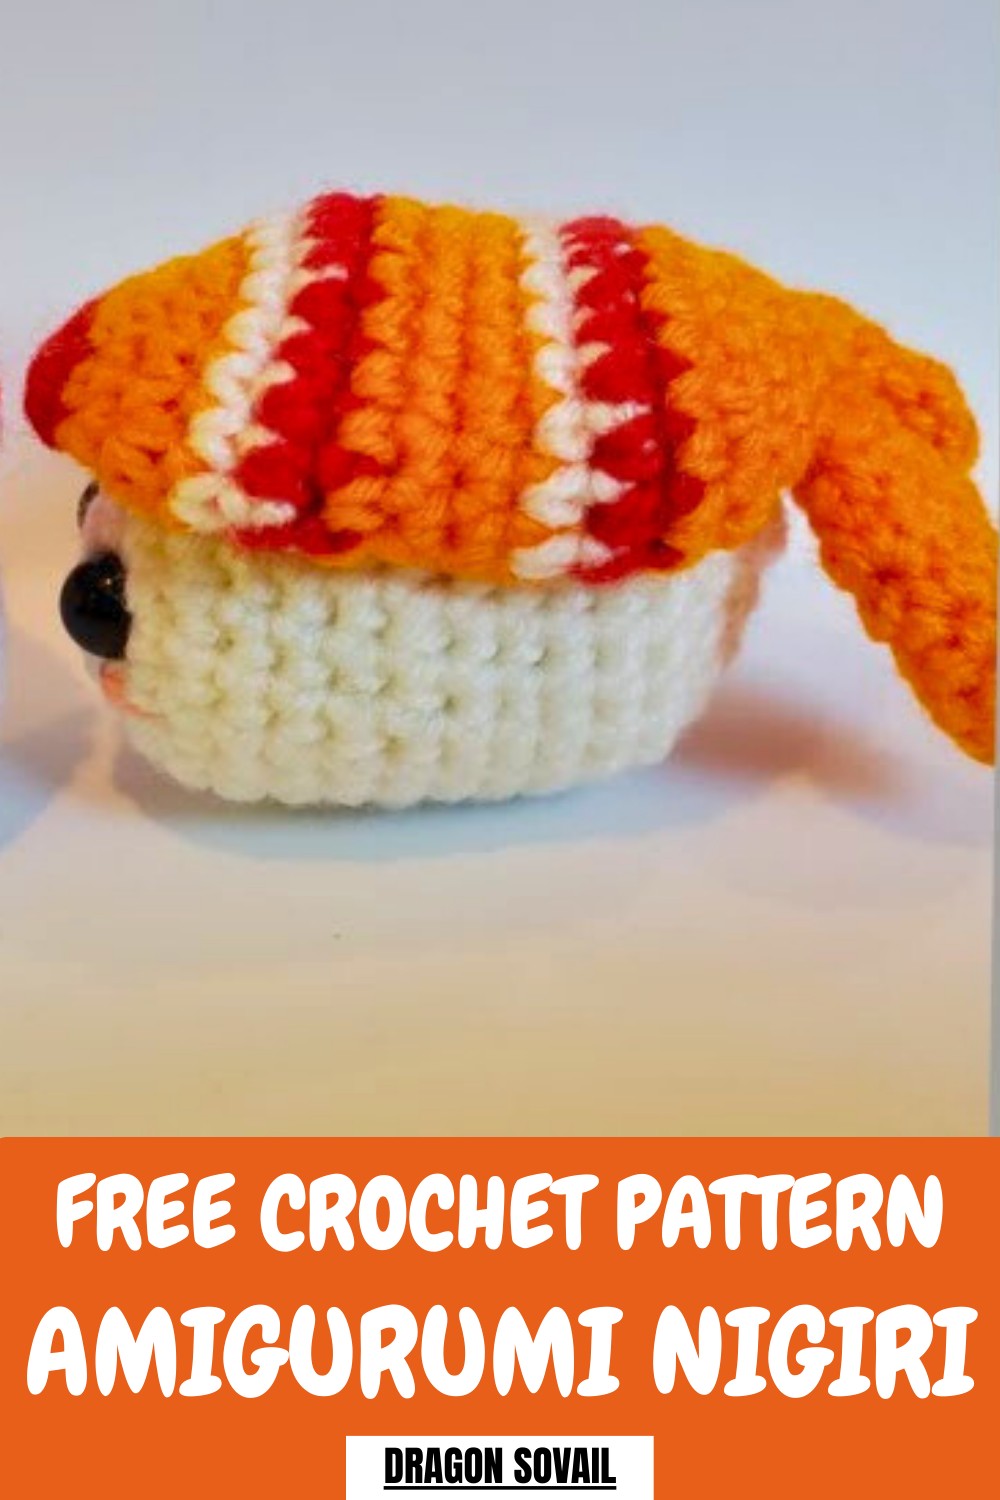
- Realistic Layers: Replicates the traditional rice base and fish topping of nigiri.
- Quick Color Changes: Includes alternating red, white, and orange yarn sections for the fish, teaching smooth transitions while maintaining neatness.
- Invisible Decrease Technique: Creates a polished finish with less visible and more seamless decreases.
- Adorable Finishing Touches: Add blush cheeks using yarn or makeup, and optionally, stitch a tiny smile to enhance its charm.
Level of Difficulty
Beginner to Intermediate
- The design uses straightforward stitches like single crochet, magic circle, and increases, ideal for beginners.
- Intermediate crocheters will benefit from practicing invisible decreases, color changes, and detailed assembly techniques.
Tutor’s Suggestions
- Start with the Magic Ring: Practice creating a magic ring as it forms the base for both the rice and fish.
- Track Stitches: Use a stitch marker to follow your progress and properly count stitches during increases and decreases.
- Take Time with Color Changes: When switching between colors for the fish, crochet over the working yarn or leave clean tails for securing later.
- Position Safety Eyes Carefully: Place eyes close to the center of the rice base for a balanced, appealing look.
- Stuff Sparingly: Avoid overstuffing the rice; aim for an oval or flattened shape.
- Handle Details Precisely: Sew the fish onto the rice using small stitches for a clean attachment, leaving the fish tail loose to enhance movement and realism.
Step-by-Step Instructions
Step 1: Create the Rice Base
- Start with White Yarn – Round 1:
- Make a magic ring and crochet 6 single crochets (SC) into the ring. Close the ring by pulling the tail.
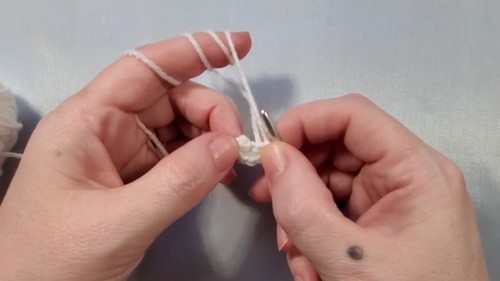
- Make a magic ring and crochet 6 single crochets (SC) into the ring. Close the ring by pulling the tail.
- Round 2:
- Increase by crocheting 2 SC into each stitch (12 stitches total).
- Round 3:
- Crochet an increase in the first stitch, followed by 1 SC in the second. Repeat this sequence (increase, SC) around for a total of 18 stitches.
- Round 4:
- Crochet an increase in the first stitch, followed by 2 SC in the next two stitches. Repeat this sequence to reach 24 stitches total.
- Crochet an increase in the first stitch, followed by 2 SC in the next two stitches. Repeat this sequence to reach 24 stitches total.
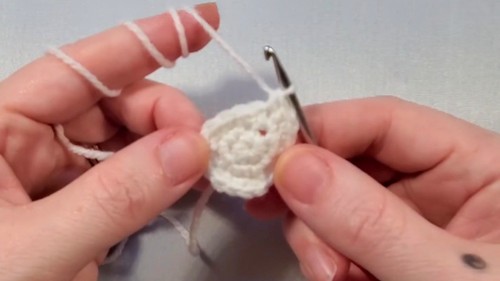
- Rounds 5–14:
- Work 1 SC into each stitch for 10 rounds to build the body of the rice. Use this time to watch a video or relax while crocheting straight rounds.
- Add Safety Eyes:
- Place eyes one round above the magic ring with 1–2 stitches between them. Attach securely with backings.
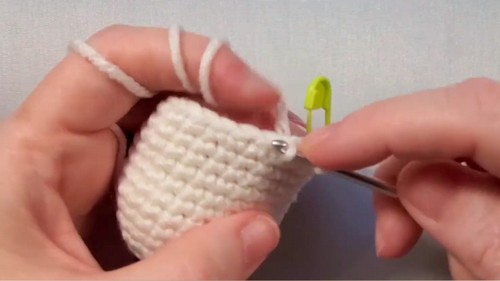
- Place eyes one round above the magic ring with 1–2 stitches between them. Attach securely with backings.
- Stuff the Rice:
- Use polyfill stuffing to shape the rice evenly, creating a flat top and bottom surface.
- Rounds 15–17:
- Round 15: Decrease from 24 to 18 stitches: perform an invisible decrease, then crochet 2 SC after each decrease.
- Round 16: Decrease from 18 to 12 stitches: alternate invisible decreases and 1 SC.
- Round 17: Decrease from 12 to 6 stitches by performing 6 decreases in a row.
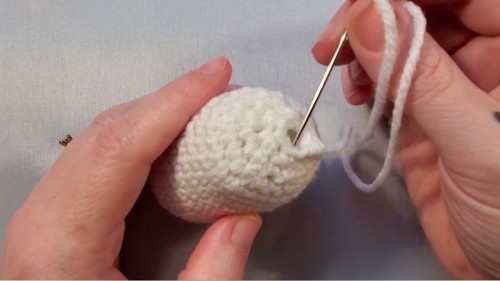
- Close the Base:
- Slip stitch into the next stitch, leave a long tail, and sew the top of the rice closed by working through the front loops of the final stitches. Fasten off securely.
Step 2: Make the Fish Top
- Start with Red Yarn – Round 1:
- Create a magic ring and crochet 6 SC into the ring.
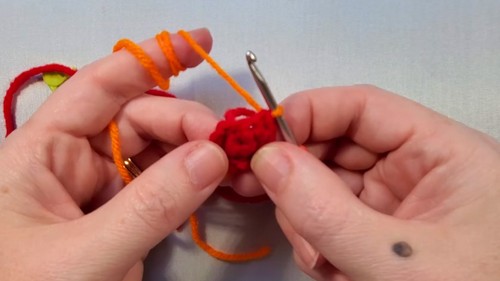
- Create a magic ring and crochet 6 SC into the ring.
- Round 2:
- Increase from 6 to 8 stitches by crocheting 2 SC in certain stitches. Introduce the orange yarn for the next color change.
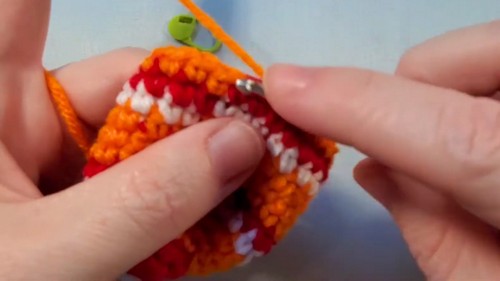
- Round 3–6:
- Alternate increases with single crochets, building up from 8 to 24 stitches.
- Switch between orange, white, and red yarn, making clean color changes at the end of rounds.
- Rounds 7–16:
- Crochet straight rounds with specific colors, using orange for the tail sections. Secure all ends neatly as you transition through colors.
- Fish Tail – Round 1:
- Start the tail with orange yarn and a magic ring. Crochet 4 SC into the ring and build it up with increases until you reach 12 stitches.
- Rounds 5–6: Crochet straight, then decrease from 12 to 6 stitches in Round 7.
- Attach the Tail:
- Sew the tail pieces at a slight angle onto the back of the fish, keeping them symmetrical and neat.
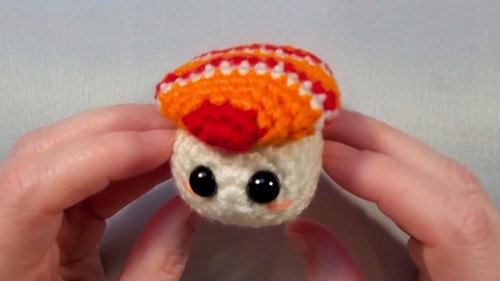
Step 3: Assemble the Sushi
- Sew Fish Onto Rice:
- Position the fish with its "rough" color-changing side facing down. Use orange yarn to attach the fish to the rice, sewing primarily through the bottom layer to keep stitches hidden. Leave the tail free for movement.
- Add Blush Cheeks:
- Use pink yarn or makeup to create small blush patches under the eyes. Embroider a smile if desired, using the same technique.
- Use pink yarn or makeup to create small blush patches under the eyes. Embroider a smile if desired, using the same technique.
Conclusion
Your Nigiri Sushi Amigurumi is complete! This delightful design combines structure and charm, making it a unique handmade piece. Whether you keep it as part of your decor, gift it to a sushi enthusiast, or enjoy it as a fun crochet collectible, it’s sure to spark joy. The color layers and tail details add character to the piece while allowing you to hone essential amigurumi skills.
This project embodies the creativity and precision of crochet artistry while offering a fun, relaxing experience.
Pro Tip
Plan all color changes in advance and crochet over the unused yarn during transitions. This technique avoids excess loose ends and keeps your work tidy while maintaining smooth transitions.


