
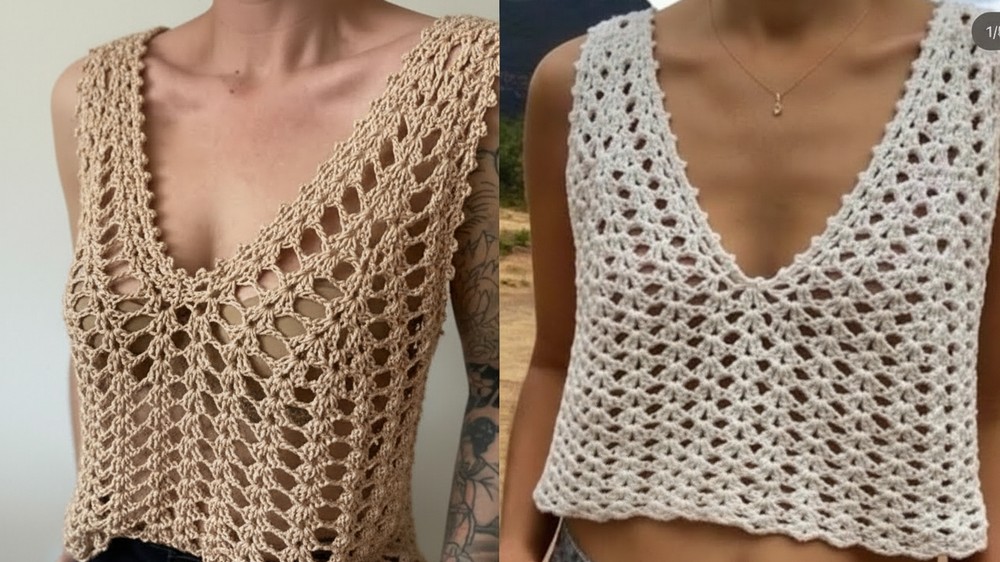
Sport a Free crochet Bustier Pattern with soft, breathable stitches that offer a stylish, comfortable fit perfect for warm days or layered outfits.
A beautifully shaped piece that feels both modern and timeless instantly draws the eye, offering a confident yet delicate touch to any outfit. Placing the Crochet Bustier Pattern at the center of your project introduces a stylish design with clean lines, flattering structure, and soft texture. Its fitted silhouette provides comfort while adding a chic accent for festivals, summer outings, or casual styling.
Vibrant Crochet Bustier Pattern for Youthful Style
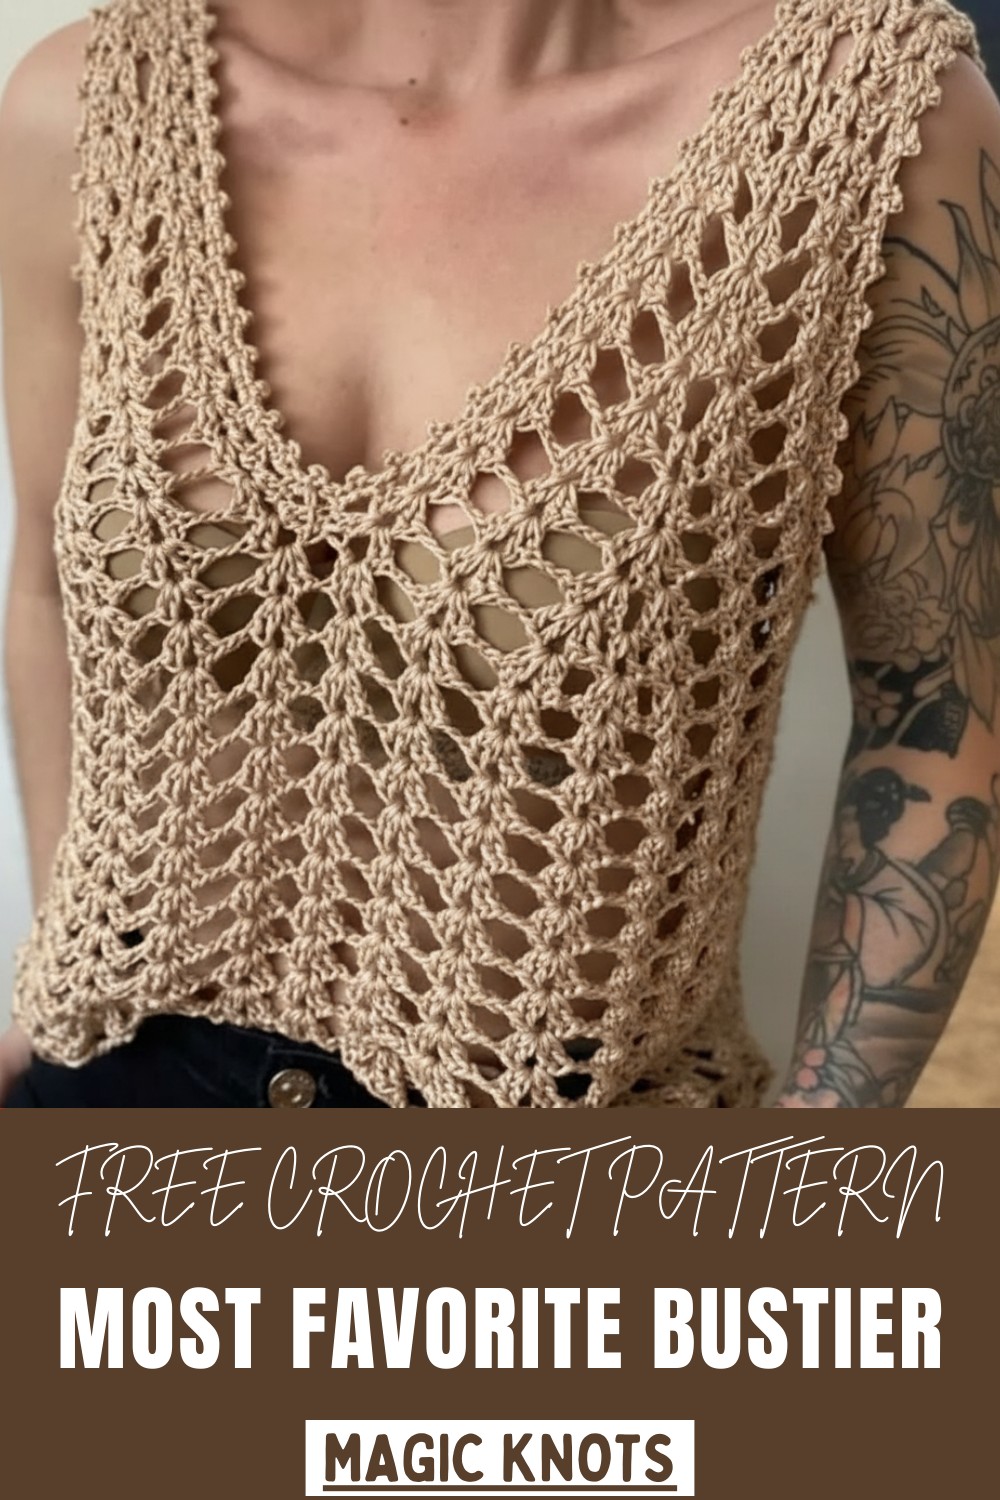
The handmade appeal brings warmth and personality, making it a standout addition to any wardrobe. With its refined shape and graceful details, this top delivers a blend of style, versatility, and handmade charm.
Step-by-Step Guide to Crochet a Bustier
Materials Needed
The following materials are recommended for creating the bustier:
- Yarn: Thin cotton yarn.
- The tutor strongly recommends using 100% cotton yarn for its breathable and comfortable texture, particularly during summer.
- Avoid acrylic yarns, as they could feel uncomfortable or “burn” the skin during hot weather.
- This project calls for approximately one skein of thin cotton yarn, though you can use two if you want a longer version.
- Crochet Hook:
- Use a 2 mm or 2.5 mm crochet hook to suit the thin cotton yarn.
- Other Materials:
- Scissors.
- Measuring tape.
- Yarn needle for sewing and finishing touches.
Uses
- Creates a bustier top suitable for holiday outings, beachwear, or layering over casual outfits.
- Ideal for summer, as the breathable cotton design keeps you cool.
- Can be extended into longer versions, making it more versatile for everyday use or styled differently.
Special Features
- Simple Pattern: The design revolves around creating basic shapes (front and back chest cups) that are joined together, followed by adding edging and optional lace decorations.
- Versatility in Sizing: The model can be adjusted to accommodate different sizes by increasing the stitches in the expansion rows.
- Edge Finish: The tutorial includes a straightforward lace edging technique for polished aesthetics.
- Customization Potential: The style can be adjusted with thicker yarn for a casual look or extended length for greater utility.
Level of Difficulty
The project is beginner-friendly and doesn’t require advanced stitching skills. It mostly uses chain stitches, double crochets, and single crochets, as well as basic techniques for sewing and assembly.
The most challenging part is making the increases evenly in the chest cups and aligning the joining points correctly. However, the tutor reassures that repeating the same steps makes it easier to understand as you go along.
Tutor’s Suggestions
The tutor offers helpful guidance for making the bustier:
- Use High-Quality Cotton Yarn: Ensure you select breathable, 100% cotton yarn to make the bustier comfortable for summer wear. Avoid acrylic yarns.
- Customize the Size: If you are a size larger than S or M, increase the stitches during the expansion rows to fit your chest size properly.
- Repeat the Steps: Once you understand how to make one chest cup, the rest will be simpler since it involves repeating the same process.
- Iron the Project: Use a steam iron after completing the bustier to stretch and shape it as needed. Ironing also enhances the overall aesthetic and sizing of the piece.
- Extend the Design: For greater functionality and a more everyday look, extend the bustier into a longer garment using two skeins of yarn.
Step-by-Step Instructions
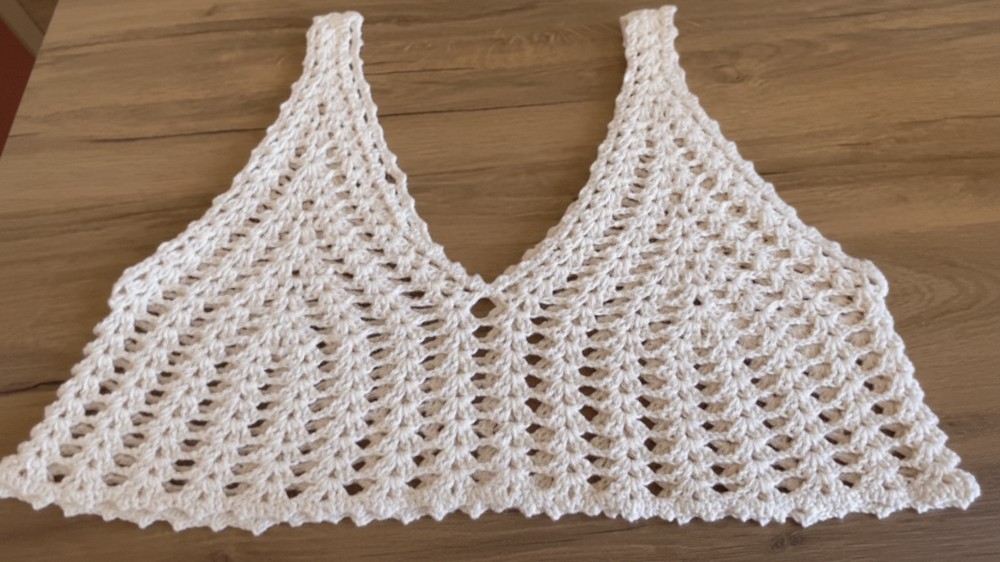
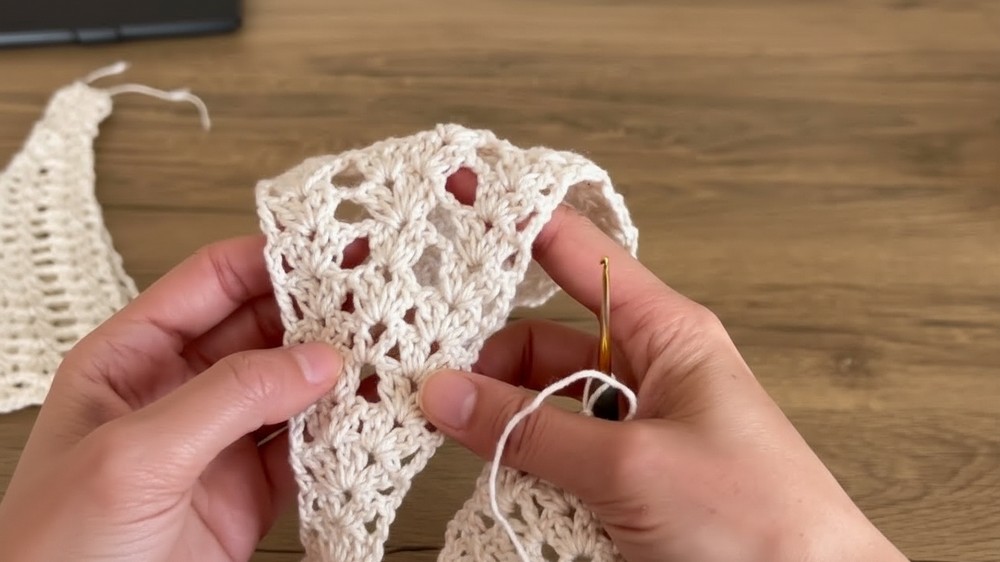
Step 1: Create the Chest Cups
- Start with a foundation chain of 4.
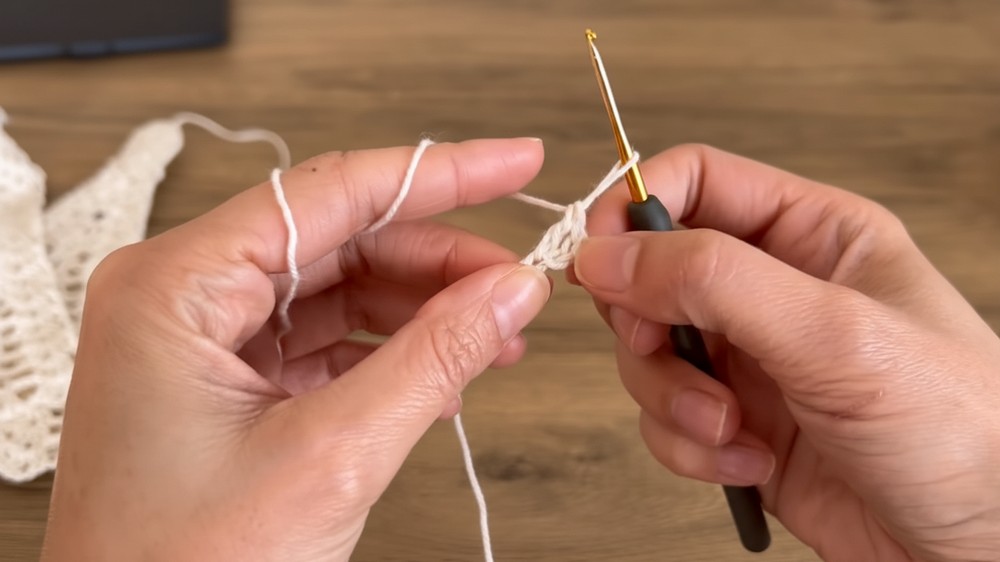
- Add 3 more chains and sink your hook into the foundation chain to create a double crochet. This forms the base of the bustier.
- Make a series of double crochet groups with two chains in between:
- Work 2 double crochets into the center point.
- Add 2 chains and repeat the process in the same spot to form a symmetrical cup.
- Work 2 double crochets into the center point.
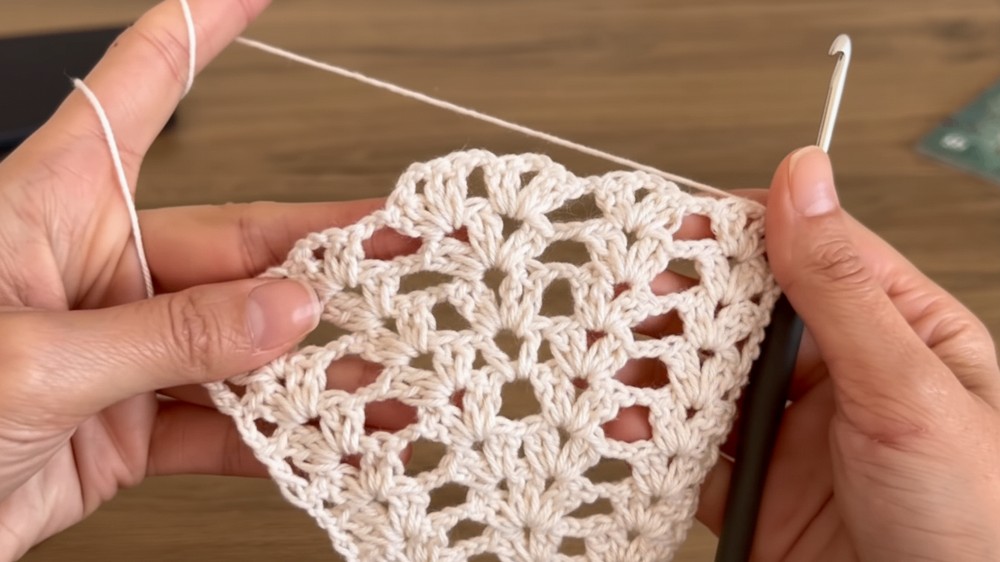
- Continue repeating this pattern for 4 rows to complete the first cup.
- For row 5 – onward, increase by adding extra double crochets at the middle point to expand the cup.
Tip: Repeat the process for all remaining cups. You will need 4 cups total for the front and back pieces.
Step 2: Assemble the Cups
- Join the cups by sewing or crocheting them together at the designated joining points (corner sections).
- Front cups are joined together, and back cups are sewn to form the back panel.
- Match the groups of double crochets evenly to achieve uniform alignment.
- Sew the armpit areas together for both sides to create the bustier shape.
Step 3: Work the Body
- Create the main body of the bustier by crocheting rows of double crochet groups along the bottom edge of the assembled cups.
- Continue crocheting without increasing or decreasing for the desired length.
- If desired, adjust the length of the bustier using more yarn.
Step 4: Finish the Edges
- Add lace edging to the top and bottom edges for a polished look:
- Crochet 4 single crochets, then draw a chain, sink into the last single crochet, and secure it.
- Repeat this process for all the edges.
Step 5: Iron and Final Touches
- Use a steam iron to go over the bustier once finished. This stretches the fabric slightly and adds a professional touch.
- Trim loose threads with scissors and weave in any remaining ends with a yarn needle.
Conclusion
This crochet bustier is a simple yet stylish project, perfect for summer outings or beachwear. With its elegant design and easy construction, it suits beginners eager to try their hand at garment-making. Using cotton yarn ensures comfort, while adjusting the size or length allows for personalization to meet any fashion need.
Ironing after completion gives the bustier a polished finish, making it look just as good as a store-bought garment. Try making one in different colors and lengths to suit your unique style.
Crochet Tip
When working on symmetrical patterns like chest cups, always double-check alignment during assembly. Mark key points with stitch markers to ensure all parts join evenly, reducing the risk of crooked or uneven edges.


