
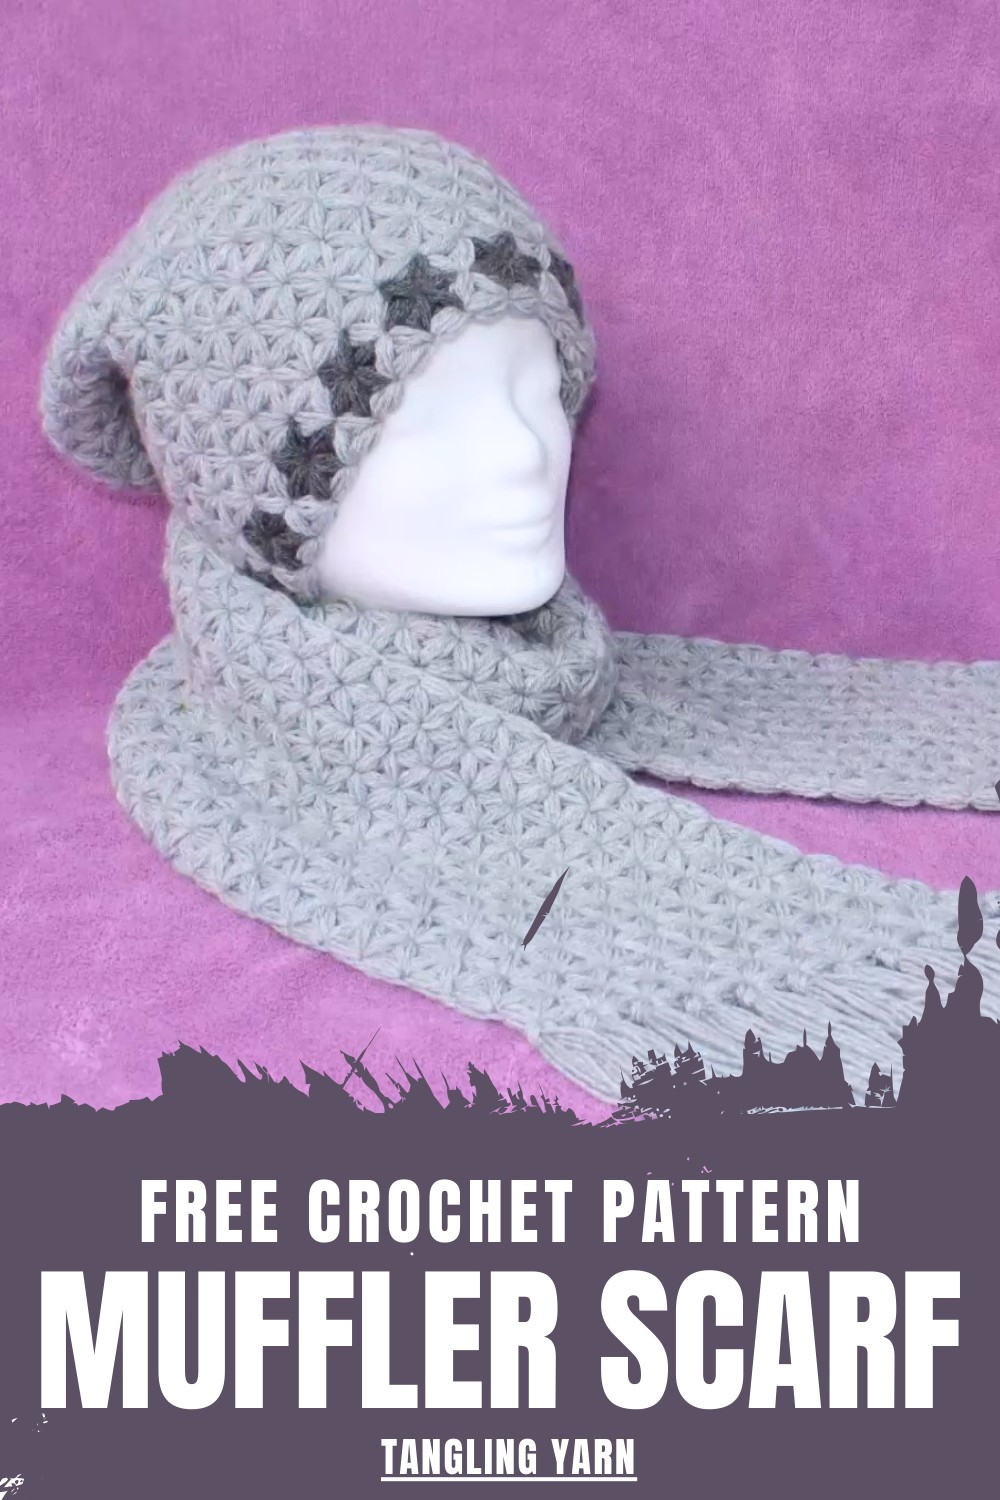
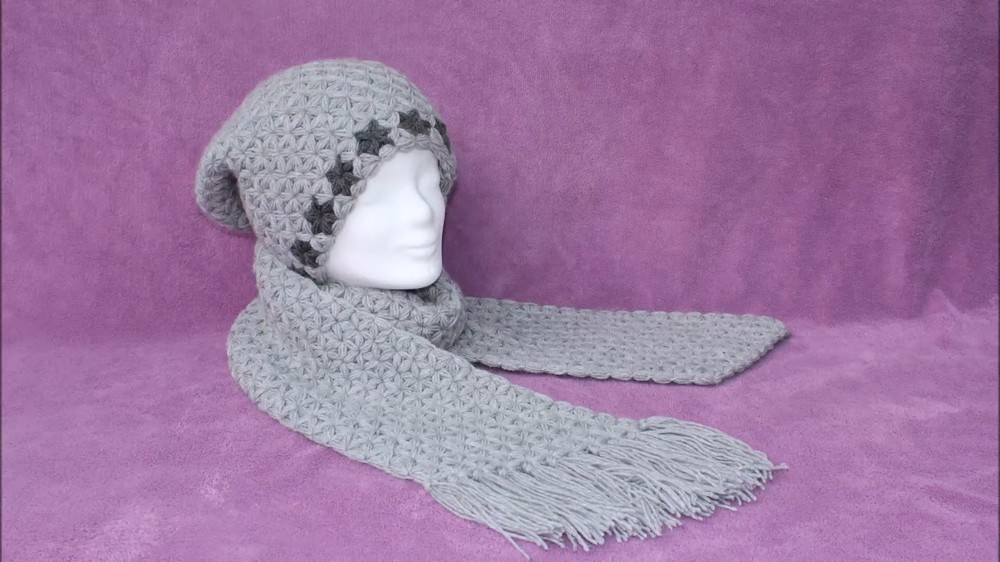
Stay warm outdoors with this crochet muffler scarf pattern, which provides thick layers remarkably helpful for freezing winter expeditions.
Embracing the biting chill of the cooler months necessitates accessories that effortlessly blend sophisticated warmth with timeless aesthetic appeal. A thoughtfully chosen crochet muffler scarf pattern serves as the ideal foundation for fashioning a cozy yet chic wardrobe essential without equal. This distinctive guides transform humble skeins of yarn into luxurious textures, ranging from dense, thermal stitches that effectively lock in body heat to airy, decorative motifs that drape elegantly across the chest.
Robust Crochet Muffler Scarf Pattern for maximum thermal comfort
Beyond mere utility, such a scarf functions as a striking statement piece, instantly elevating a standard winter coat or jacket with a touch of bespoke artistry. The rhythmic motion of forming each loop instills a deep sense of mindfulness, yielding a durable accessory that feels soft against the skin.
Materials
To create the muffler scarf, you will need the following:
- Yarn: Choose a yarn type suitable for scarves, like cotton, acrylic, or wool depending on the season.
- Crochet Hook: Use a hook size that complements your yarn (recommended size based on the tutorial is medium).
- Scissors: For cutting yarn cleanly.
- Optional: Cardboard or phone for creating fringe.
Whether made from plush merino wool for superior insulation or a silky synthetic blend for a lighter feel, the final result provides indispensable comfort while highlighting an appreciation for intricate detail.
Step-by-Step Details
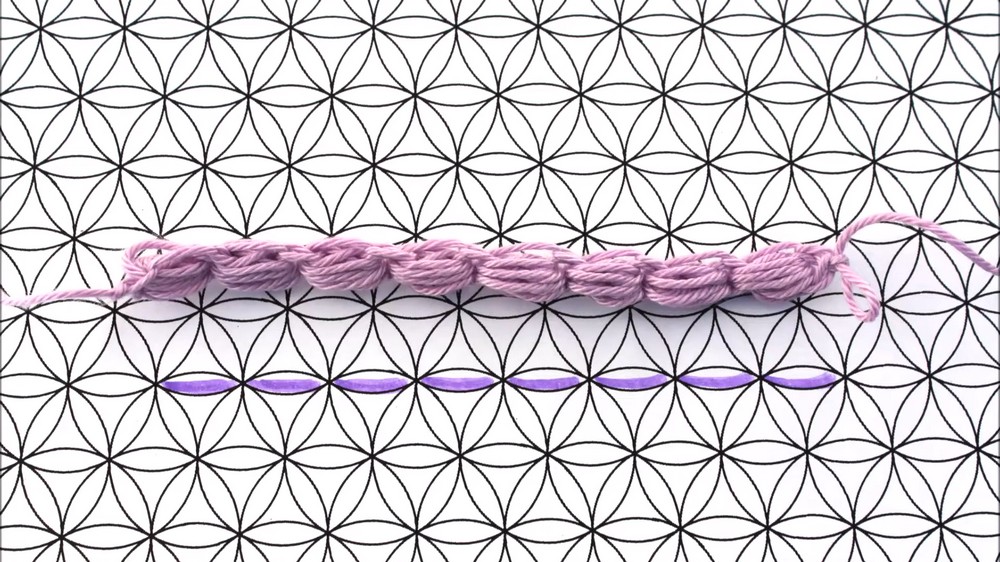
Step 2: Create a Base Chain
- Make a Slipknot: Start by making a slipknot on your hook.
- Chain Base Length: Chain enough stitches to create a base tree (foundation) for the scarf. The number of “puffs” in the chain determines the width of the scarf.
- Remember, the width of the scarf is shorter than the base chain because of diagonal crocheting.
- Add two extra puffs to the base chain for the desired scarf width. Example: If you want the scarf to be 8 puffs wide, chain for a total of 10.
- Repeat until you reach your desired width of 10 puffs (or more if required).
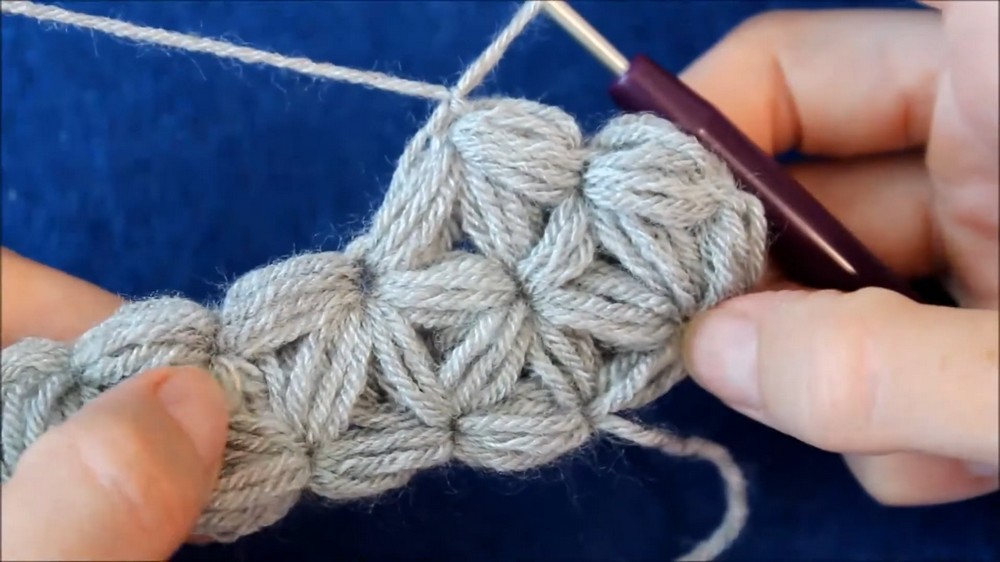
3: Row 1 – First Diagonal Row
- Start with a Set of Two:
- Begin the first row by creating a puff stitch (but don’t complete the puff).
- Leave the loops on your hook, then create a second puff at the next chain ring.
- Connect the two puffs by pulling through all loops on the hook. This forms the set of two.
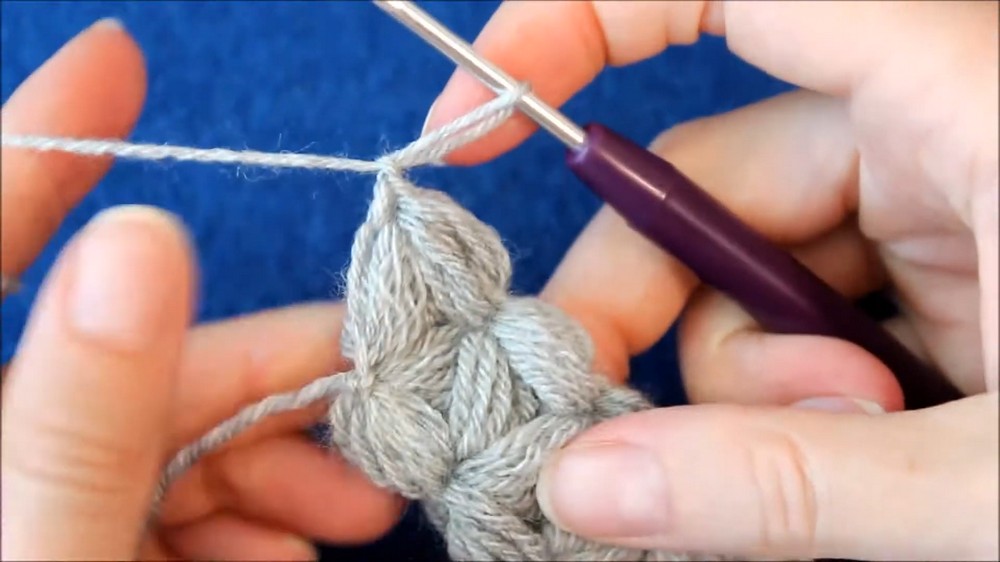
- Make Sets of Three:
- Continue the row by creating sets of three puffs.
- Start the first puff in the ring just created.
- Make the second puff in the next ring, and the third puff in the ring after that.
- Connect all three puffs together, pulling through the loops on the hook.
- At the end of the row, create a set of two puffs to finish it.
4: Row 2 and Onwards
- Turn Your Work: Begin Row 2 by turning your project horizontally.
- Start with a Single Puff: Unlike Row 1, begin Row 2 with just a single puff.
- Continue with Sets of Three: Work sets of three puffs all the way to the end of the row.
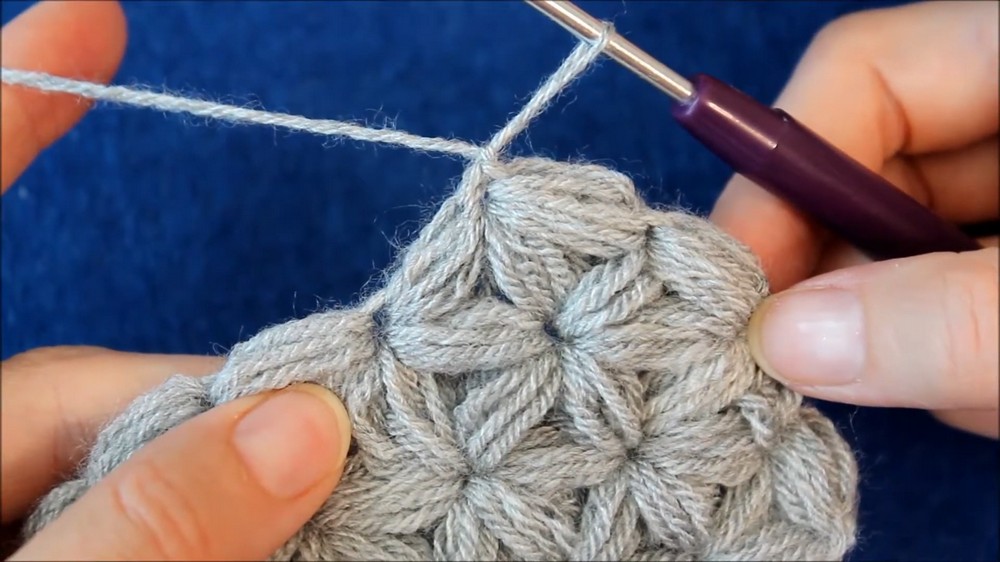
- Repeat Pattern: Alternate between:
- Rows starting and ending with sets of two puffs (Row 1, Row 3, Row 5...).
- Rows starting with a single puff and continuing with sets of three (Row 2, Row 4, Row 6...).
- Crochet this pattern diagonally until your scarf reaches your desired length. In the tutorial, the scarf is approximately 1.5 meters (1.5 yards) long, excluding the fringe.
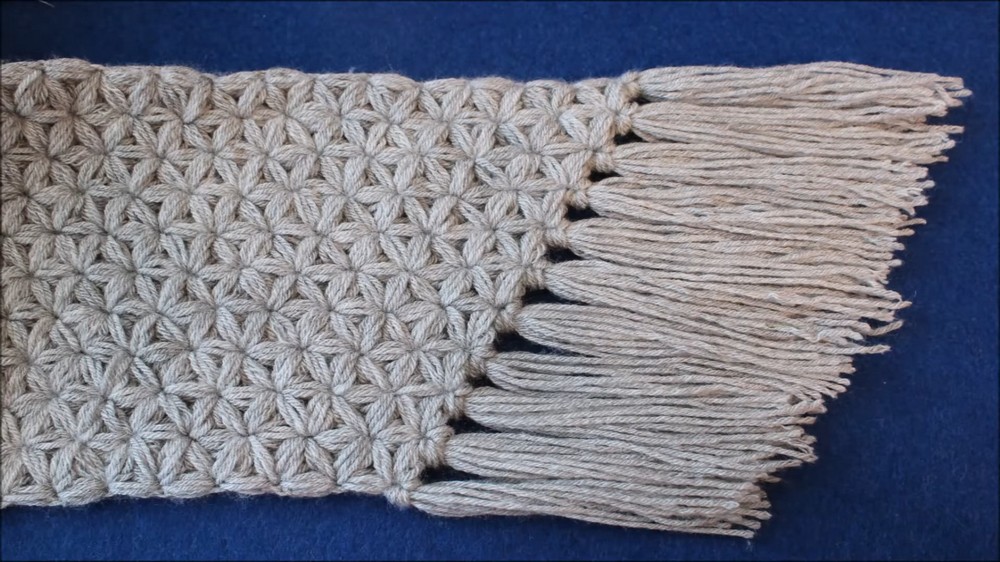
5: Add Optional Fringe
- Prepare Fringe Material: Use a piece of cardboard, phone case, or similar object (about 5.5 inches / 14 cm tall) to wrap yarn for fringe.
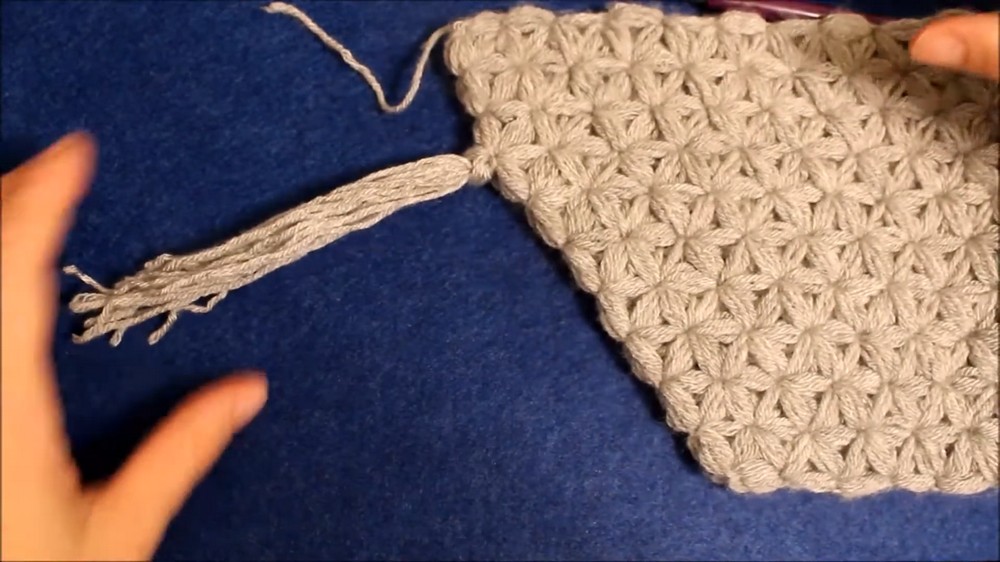
- Wrap Yarn: Wrap yarn around this object multiple times for consistency.
- Cut the Yarn: Trim the loops on one side to create even strands.
- Attach Fringe:
- Use a crochet hook to pull the yarn pieces through the rings along the edge of the scarf.
- Tie them securely and repeat until fringe is attached across the entire edge.
- Trim and Adjust: Cut the fringe evenly across the length for a polished look.
Special Features
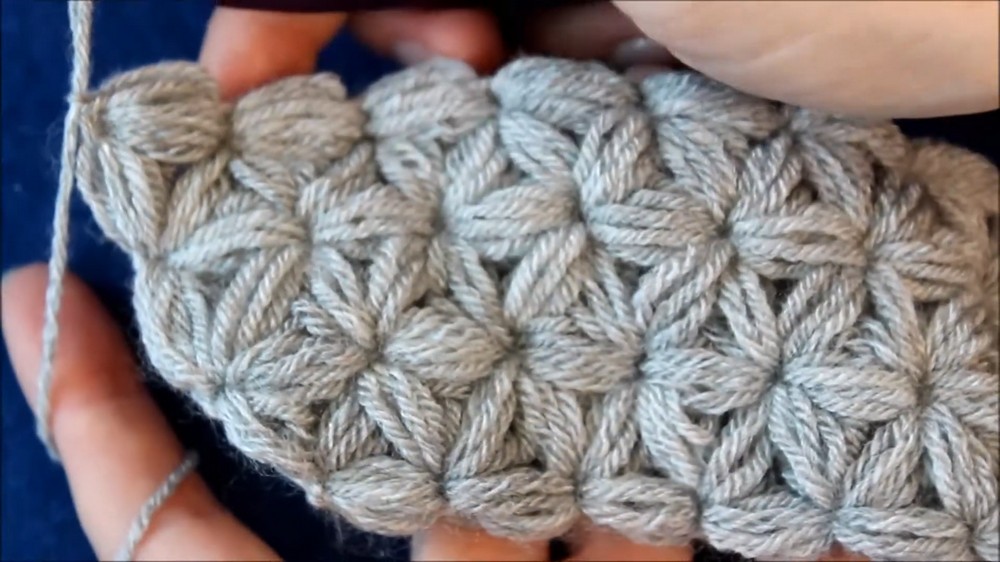
- Diagonal Crocheting: The scarf is worked in diagonal rows, creating a unique triangular stitch pattern with great texture.
- Customizable Width and Length: You can adjust the number of base puffs for width and continue rows until your desired length is achieved.
- Optional Fringe: Adding fringe transforms the finished scarf into an accessory with extra style.
Level of Difficulty
This project is suitable for advanced beginners or intermediate crocheters. While puff and triangular stitches require some familiarity, the repetition makes this scarf beginner-friendly once the technique is mastered. Advanced crocheters can experiment with color changes or embellishments for a unique finish.
Tutor's Suggestions
- Master the Triangular Stitch: Before starting the scarf, ensure you know how to create puff stitches and triangular stitches. Watch the basic tutorial by the same creator if needed.
- Plan Length and Width: Calculate scarf dimensions carefully since diagonal crocheting slightly shortens the overall width.
- Use Consistent Tension: Be consistent with the tightness of your stitches to ensure an even finish.
- Measure and Test Often: Use a tape measure periodically to track your progress and ensure the scarf meets your target length.
Uses
- Fashion Accessory: A stylish scarf for all seasons, especially fall and winter.
- Gift Idea: Perfect as a handmade gift for loved ones.
- Customizable Home Decor: The stitch pattern can also be repurposed into other items like throw blankets or table runners.
Quick Tip
To maintain consistent puff stitches, pull your loops to approximately the same height every time. This ensures all puffs look uniform and prevents uneven rows.
Conclusion
The triangular stitch muffler scarf tutorial provides clear instructions on creating a stylish diagonal-pattern scarf with optional fringe. Ideal for personal use or as a thoughtful gift, the project allows creative freedom in length and design. With practice, crocheters of varying skill levels can confidently crochet this beautiful accessory.


