
Enhance your beach ensemble with this crochet granny bucket hat pattern, which creates vintage motifs perfectly suited for sunny vacations.
Harnessing the nostalgic charm of classic geometric motifs a crochet granny bucket hat pattern offers a sophisticated roadmap for a headpiece that merges vintage soul with a modern street-style edge. This design utilizes a series of vibrant and interconnected squares to form a structured crown that feels remarkably breathable and lightweight. The primary appeal lies in its playful yet polished appearance making it a standout choice for summer festivals, outdoor brunches, or breezy coastal getaways.
Vibrant Crochet Granny Bucket Hat Pattern to pop in the sun
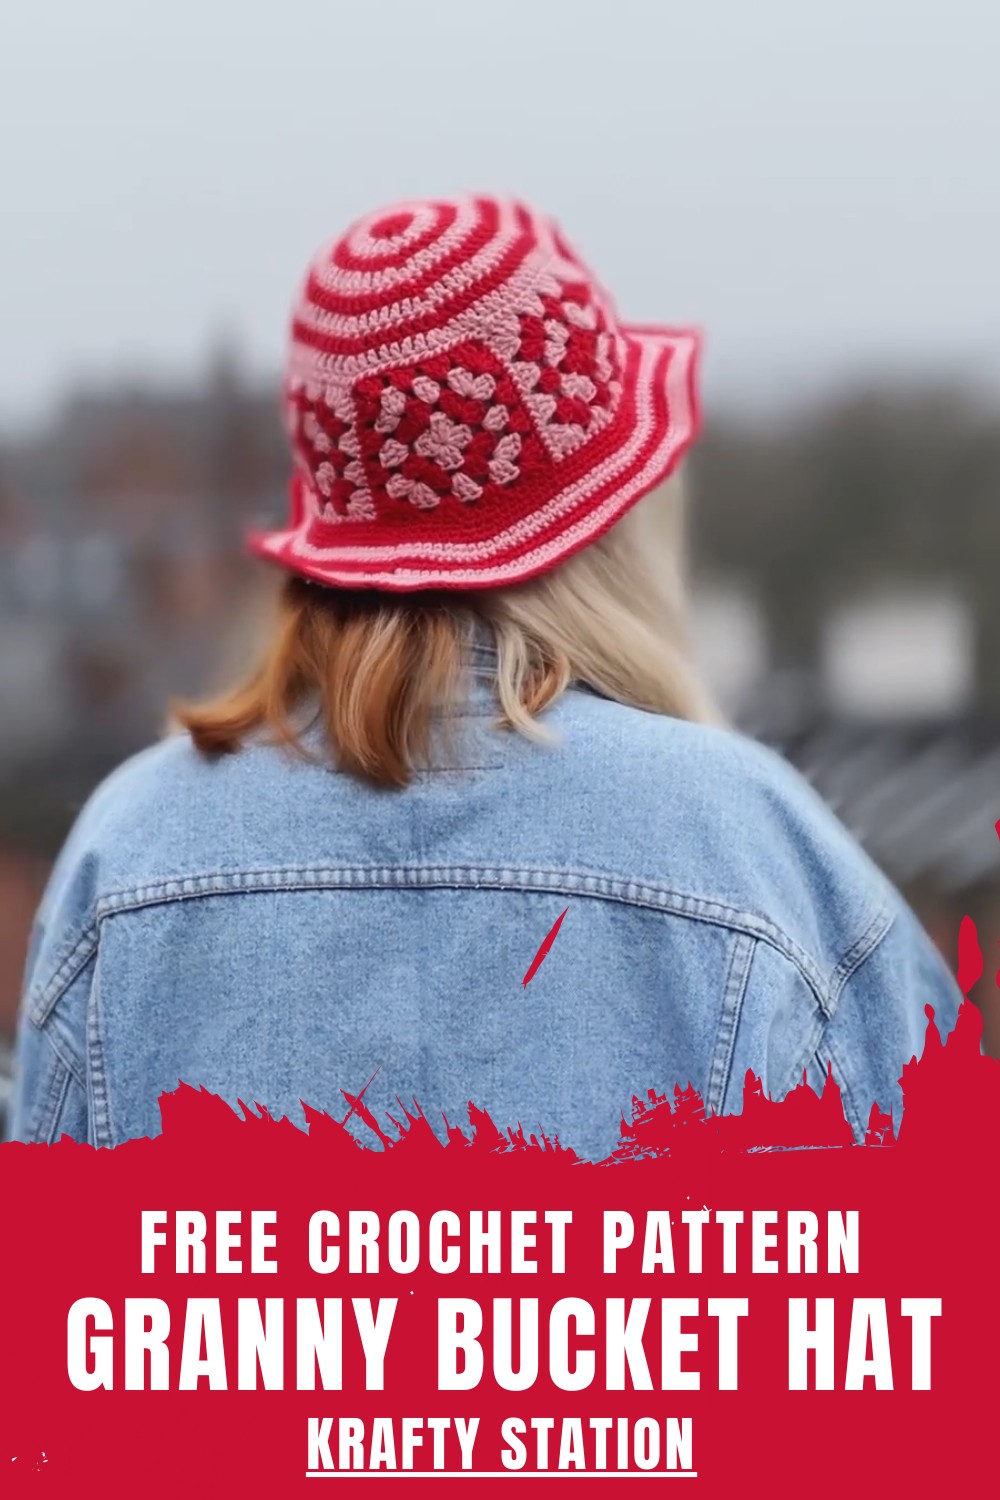
The overall look is defined by a rhythmic and colorful symmetry that adds a layer of curated personality to a casual wardrobe. Beyond its striking visual impact the hat provides a soft and flexible brim that offers essential shade while remaining easy to fold into a small bag for travel.
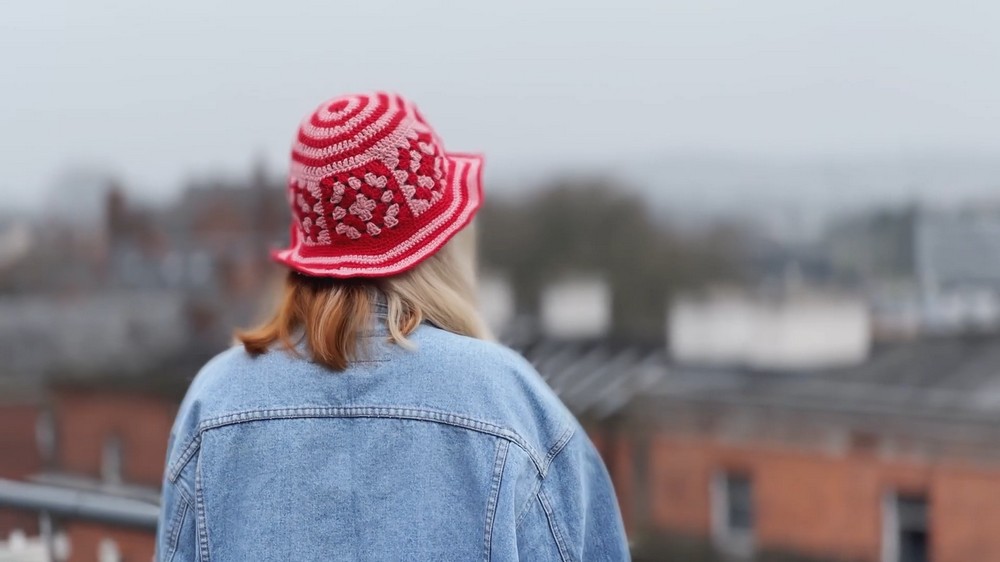
Its airy construction ensures a cool and comfortable experience even during peak heat while the thick texture of the yarn work provides a high-end and bespoke finish. This accessory stands as a vibrant celebration of pattern and utility offering a unique and eye-catching silhouette for the contemporary individual.
Step-by-Step Details
Step 1: Materials Needed
You’ll need the following materials:
- Two colors of yarn (the creator used Paintbox Cotton Yarn in pink and red).
- A 4 mm crochet hook.
- A tapestry needle.
- Scissors.
Step 2: Top Piece of the Hat
- Start by creating the center of the top piece:
- Make a slip knot and chain 5 stitches.
- Connect the chain ends with a slip stitch to form a small circle.
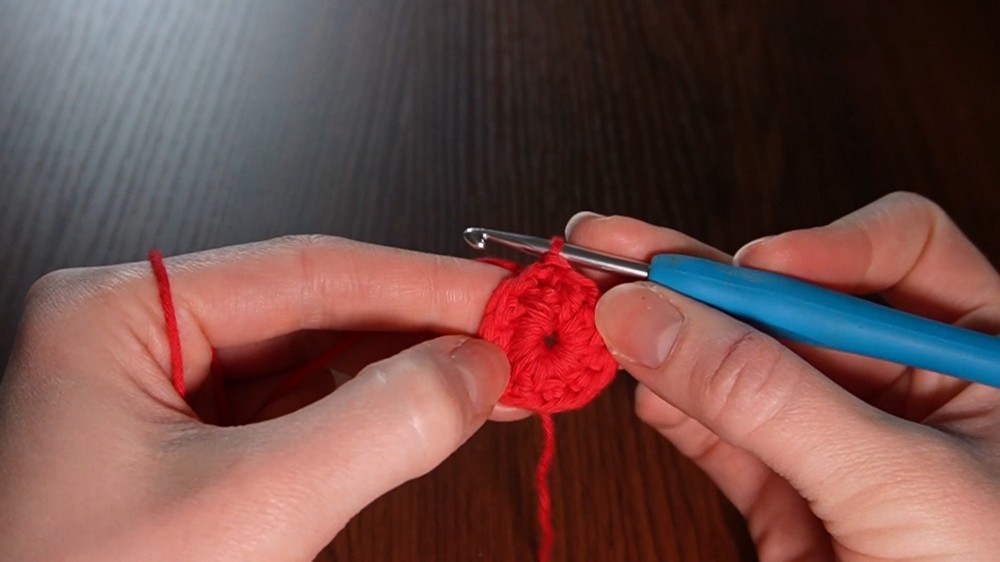
- Row 1:
- Chain 2 (counts as the first double crochet), then work 11 double crochets into the circle to total 12 stitches.
- Connect the first and last stitches with a slip stitch to close the row.
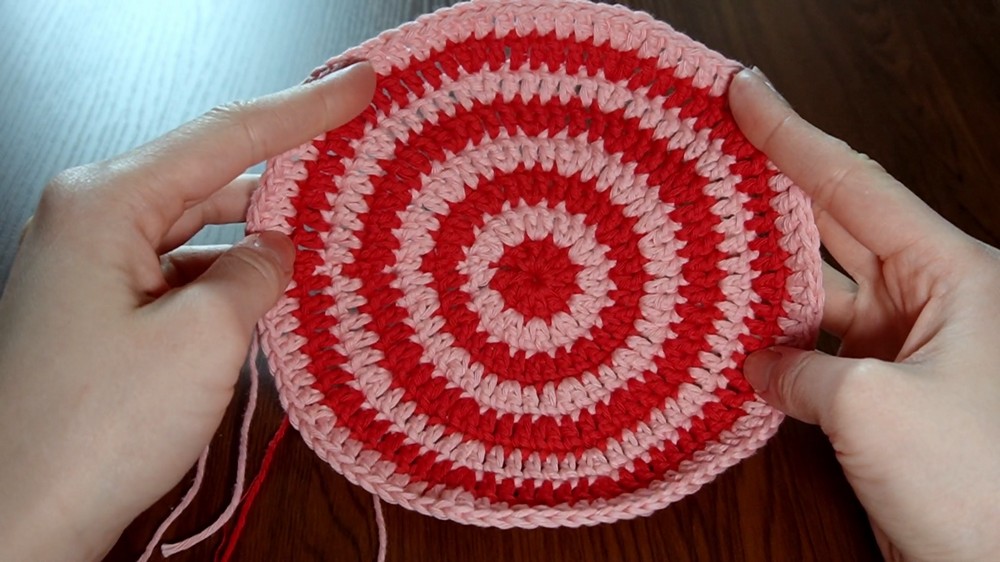
- Row 2:
- Change to the second color of yarn. Attach it tightly to avoid loose ends.
- Chain 2 again to start the row.
- Work double crochet increases in each stitch, creating two double crochets per stitch. You should end this row with a total of 24 stitches.
- Continue increasing in subsequent rows:
- Row 3: Use alternating increases (two double crochets in one stitch, followed by one double crochet in the next). End with 36 stitches.
- Row 4: Increase every first stitch.
- Row 5+: Gradually spread out increases (e.g., every fourth stitch), until the circle matches the size of the top of your head. In total, the creator completed 8 rows for a perfect fit.
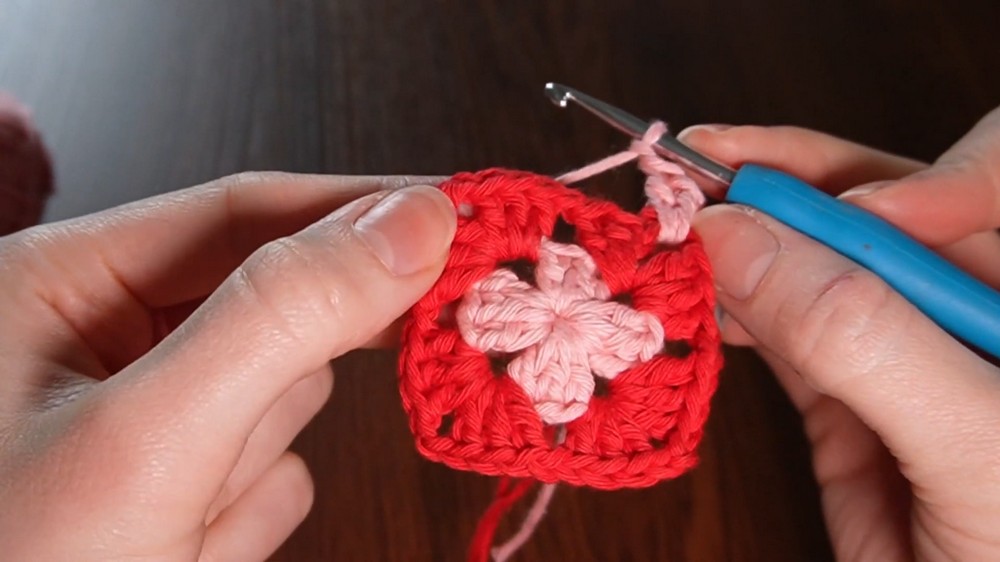
3: Crown (Granny Squares)
- Begin making a granny square:
- Create a slip knot and chain 4 stitches.
- Join the chain ends with a slip stitch to form a circle.
- Row 1:
- Chain 2 (acts as the first stitch).
- Work 3 double crochet clusters into the circle separated by chain 2. Repeat this pattern four times, creating four corners and closing the row with a slip stitch.
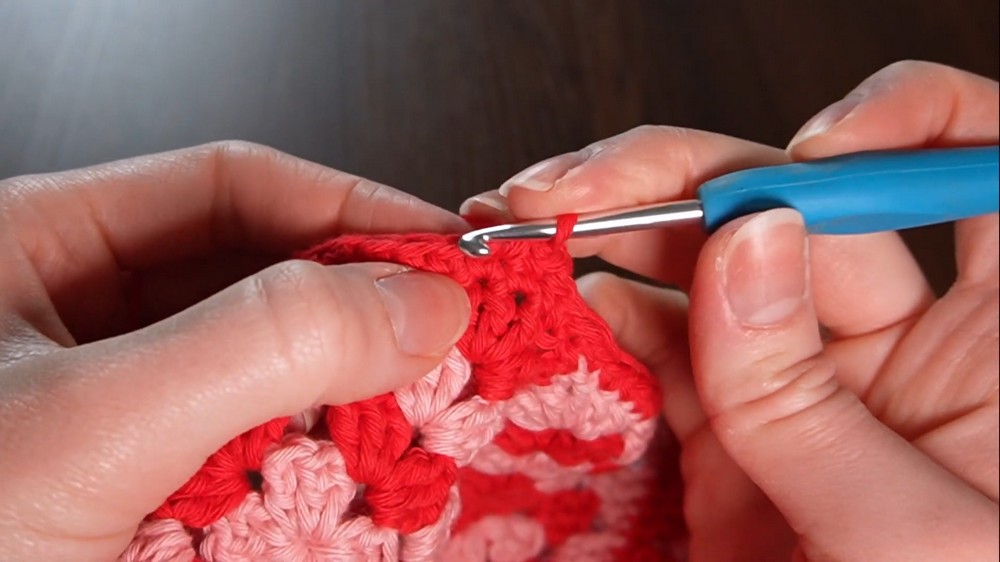
- Row 2 and 3:
- Change yarn color.
- For corners: Work two sets of three double crochets separated by chain 2.
- For sides: Work single sets of three double crochets separated by chain 1.
- Repeat until the granny square grows. In total, the creator made 4 rows per square.
- Repeat granny square-making:
- Make enough squares to cover the circumference of your top piece. The creator used 6 squares but mentions that the number may vary depending on your head size.
- Make enough squares to cover the circumference of your top piece. The creator used 6 squares but mentions that the number may vary depending on your head size.
4: Assembly
- Attach granny squares to the top piece:
- Use a tapestry needle and yarn that matches your top piece, to reduce visibility.
- Sew granny squares to the edge of the top piece, ensuring they are securely stitched.
- Stitch granny squares together along their edges to complete the crown section.
- Handle uneven stitches:
- If your granny squares and the top piece don’t align perfectly, stitch two spaces from a granny square into one stitch of the top piece. Spread these adjustments evenly for a uniform look.
5: Brim
- Start the brim with single crochet stitches:
- Attach yarn at your chosen "back" section of the hat.
- Work one row of single crochets all around and close the row with a slip stitch.
- Build the brim:
- Continue making rows of single crochets (rows 2–12).
- Add flare by working 6 increases at random spots per row for subtle, evenly spaced shaping.
- End by weaving in any loose ends.
Special Features
- Combines practicality and creativity: The granny square bucket hat is both fashionable and functional.
- Multi-colored granny squares create a playful design while showcasing beginner-friendly techniques.
- Adjustments for fit: The tutorial emphasizes customization, allowing you to tailor the size to your head.
Level of Difficulty
This project is intermediate level due to the complexity of combining granny squares, working evenly around curved edges, and adding increases for the brim. Beginners can try it but may need extra care with stitch alignment and assembly.
Tutor’s Suggestions
- Avoid visible loose ends: Pull loose threads tightly when switching colors.
- Use matching yarn for stitching: This hides seams for a clean finish.
- Customize stitch adjustments: Fix alignment issues by combining two stitches from the granny square into one top-piece stitch when needed.
Uses and Materials
- Uses:
- A unique summer accessory to protect from the sun.
- A stylish crocheted gift that shows off your creativity.
- A customizable item for personal or seasonal flair.
- Materials:
- Yarn in two colors (Paintbox Cotton Yarn recommended).
- 4 mm crochet hook.
- Tapestry needle.
- Scissors.
Tip
To make stitching easier, plan your increases and alignment. Mark the middle of each granny square or crown section to ensure uniformity. This simple trick ensures your stitches are spaced evenly and avoids misalignment.
Conclusion
This granny square bucket hat tutorial combines functionality with a fun and versatile design. The creator provides straightforward instructions for crocheters looking to experiment with granny squares while creating a practical accessory. With creative use of colors and attention to detail, this project is perfect for intermediate crocheters eager to challenge themselves and craft something unique.


