
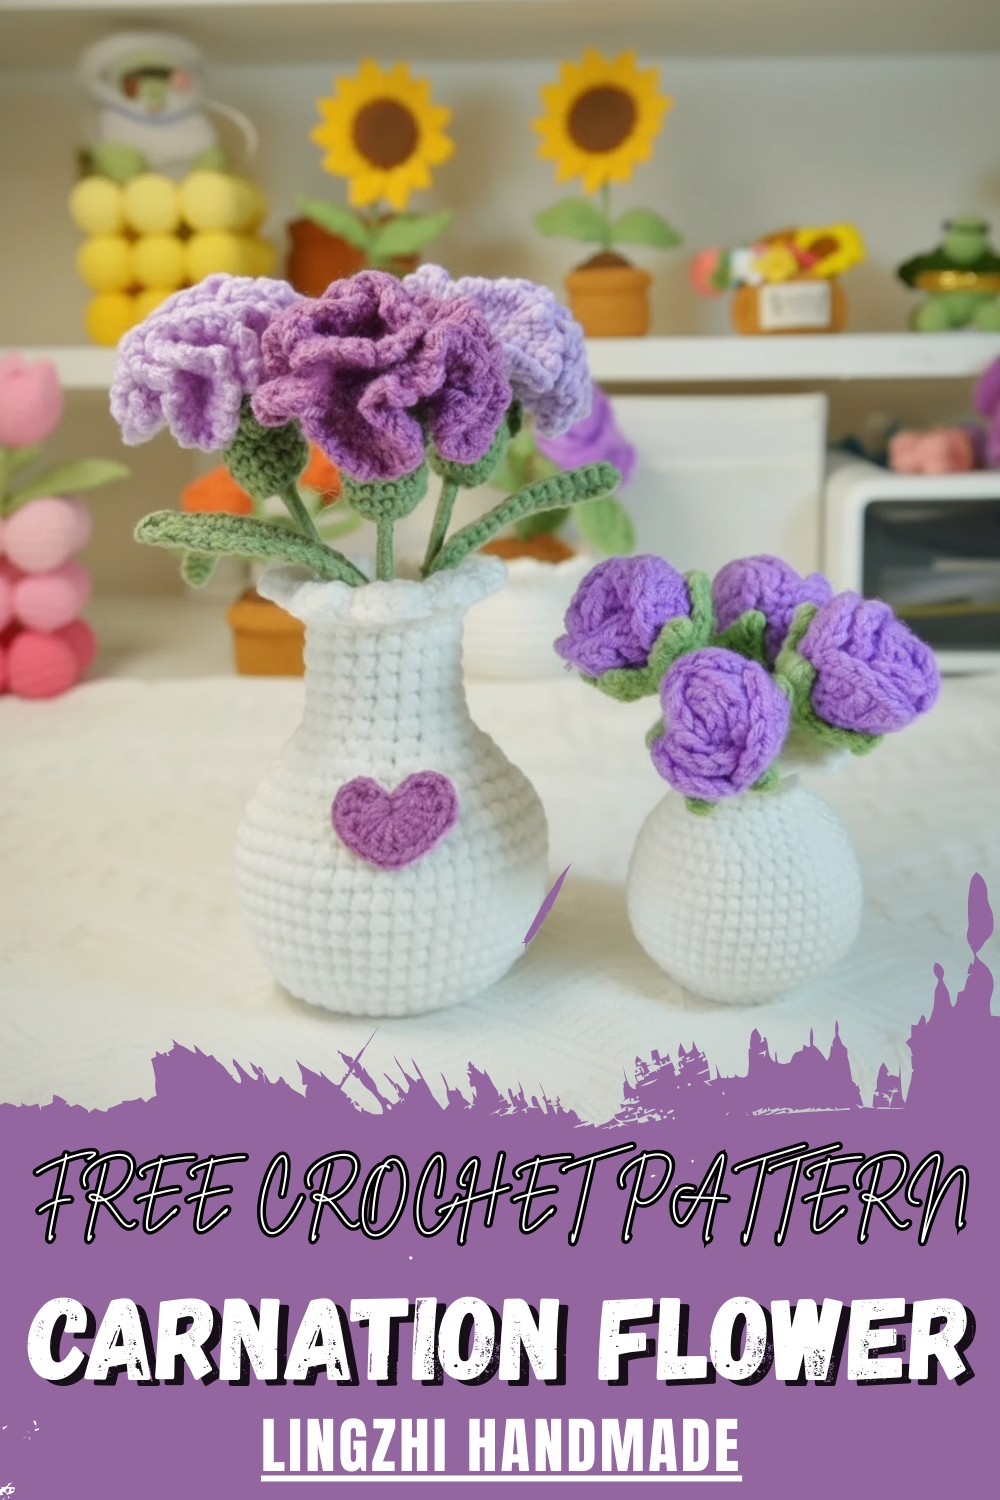
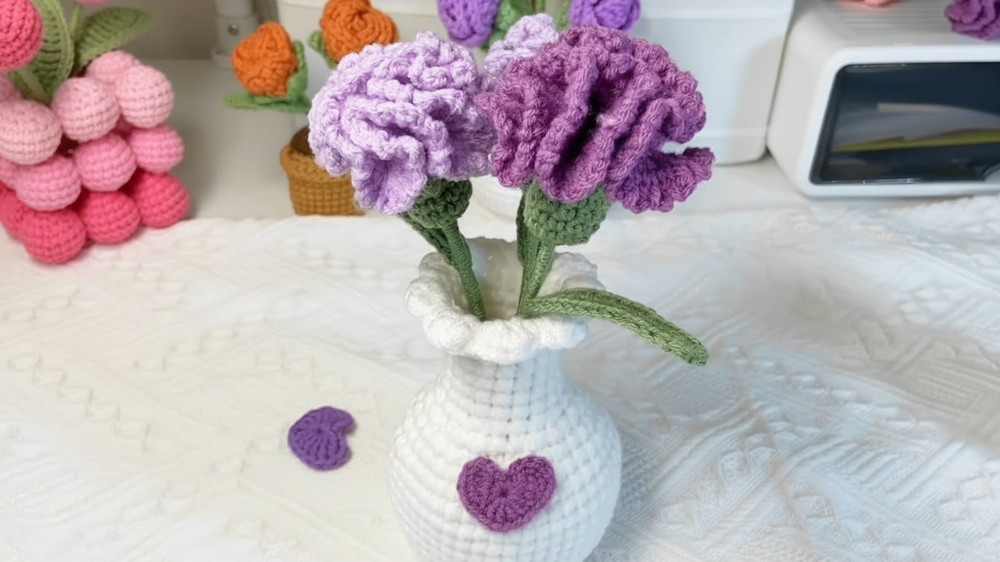
Bring elegance to your décor with a lively crochet carnation flower that spreads happiness, and adds a playful touch to any space.
This bright bloom has soft, ruffled layers that create a full, round shape, much like a real carnation in a garden. The petals have a gentle texture with waves and folds that catch light, giving the flower a lively and natural appearance.
Charming Crochet Carnation Flower Pattern to Add Cheerful Blooms
Its sturdy yet delicate appearance makes it a lasting decorative piece, and the vivid colors bring warmth and joy wherever it is displayed. The rich texture and layered petals ensure it draws attention, making the flower a timeless and elegant accent.
Thick, snug layers give the petals a firm but delicate feel, holding their shape beautifully. Simple crochet loops add depth and dimension, making each bloom appear rich and vibrant.
Hints of green around the base suggest leaves, adding a fresh, realistic touch that complements the petals’ colors.
The flower’s vibrant shades—pink, red, and white—stand out, giving any display a cheerful and eye-catching effect. Its layered design and textured surface create a three-dimensional look that makes it feel full of life.
This carnation is perfect for brightening up a desk, adding charm to a room, or combining with other flowers in a colorful bouquet.
Here’s a detailed step-by-step guide and explanation of the tutorial you’ve scraped:
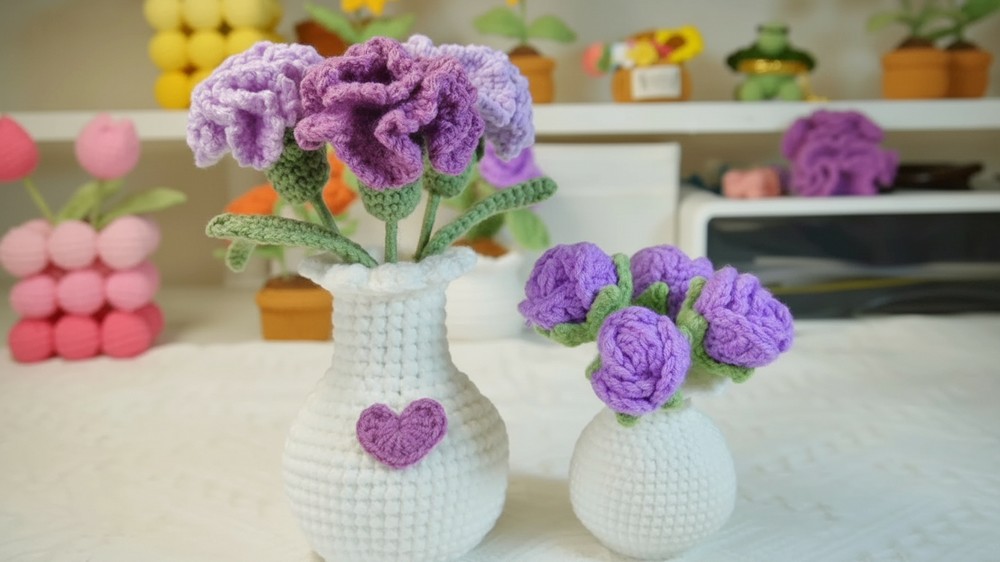
How to Crochet Cone Flower in a Vase – Step-by-Step Tutorial
Introduction
This tutorial walks you through the process of crocheting beautiful cone flowers in a vase—a perfect handmade gift idea, especially for occasions like Mother's Day, or to add a decorative touch to your home. Designed as a beginner-friendly project, the tutorial features easy-to-follow steps for creating the flower petals, leaves, a decorative vase, and even tiny optional hearts. It also shares tips on customizing the project with different yarns, adding weight (decorative pebbles or cotton), and assembling the finished flower arrangement.
Whether you’re looking to brighten up a corner or express your creativity with crochet, this project is both fun and versatile.
Materials Needed
Here are the materials you’ll need to complete this project:
For the Flowers
- Fine Green Yarn (for stems and leaves).
- 4-ply Cotton Yarn (purple for petals or use your preferred color).
- Crochet Hook: 2.5 mm.
- Craft Wire: For providing structure to leaves and flowers.
- Decorative Pebbles or Cotton Filling: To add weight to the vase.
For the Vase
- Yarn: Purple or any color of your choice for the vase.
- Crochet Hook: 2.5 mm for a smaller vase; 3 mm for a larger vase.
- Optional Heart Design: Purple yarn for hearts.
Tools
- Scissors
- Yarn Needle (to finish off and secure loose ends).
Special Features
- Beginner-Friendly – Although detailed, the tutorial uses simple stitches (single crochet, double crochet, slip stitch, etc.) and is perfect for beginners or those new to creating 3D crochet projects.
- Customizable – By changing yarn colors, hook sizes, or patterns, you can create a variety of flower and vase designs.
- Lightweight and Stable – Add decorative pebbles or stuffing to prevent the vase from tipping over.
- Complete Decoration – Includes flowers, vase, leaves, and optional heart embellishments.
- Versatile Gift – A thoughtful, homemade item for Mother's Day, birthdays, anniversaries, or as home décor.
Level of Difficulty
The overall difficulty level is beginner to intermediate:
- The flower petals, leaves, and vase are simple and approachable for beginners with basic crochet knowledge.
- The project uses simple techniques like magic ring, invisible decreases, and increasing stitches, which may be new to absolute beginners but can be mastered with practice.
Tutor's Suggestions
- Yarn Selection: The tutor demonstrates two versions of the project with different yarn types and hooks for varying sizes. Follow their suggestions for experimenting with texture and dimensions.
- Add Stability: Decorative pebbles or cotton serve as a great way to provide weight to the vase, ensuring it stays upright.
- Wire Support: Use craft wire with green yarn for support and shaping, especially for leaves.
- Alternatives to Magic Ring: If you struggle with a magic ring, you can create a loop with chains and work into it as the starting circle.
- Assembly Tips: Keep tails hidden when joining petals, vases, or leaves for a clean finish.
Step-by-Step Instructions
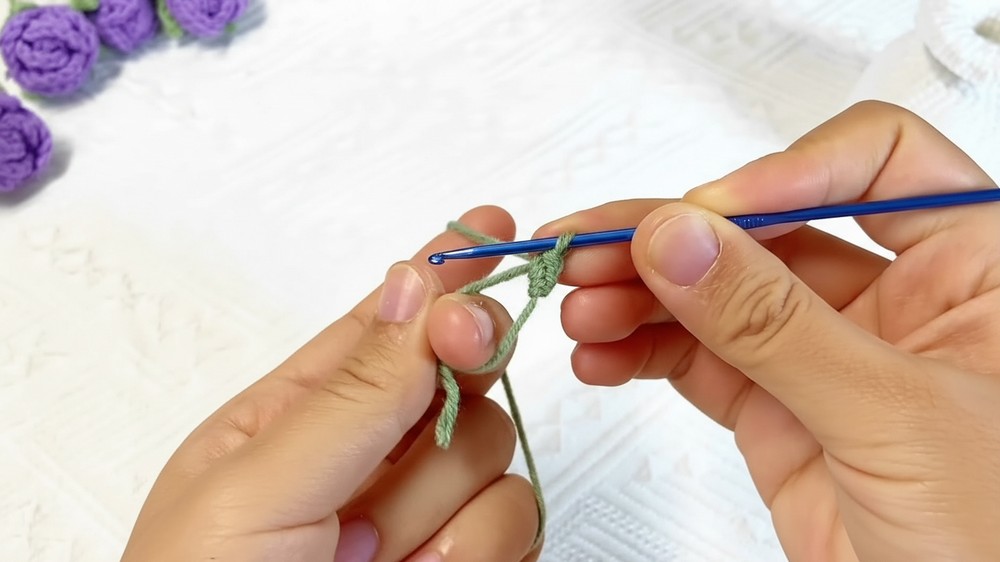
Part 1: Making the Flower
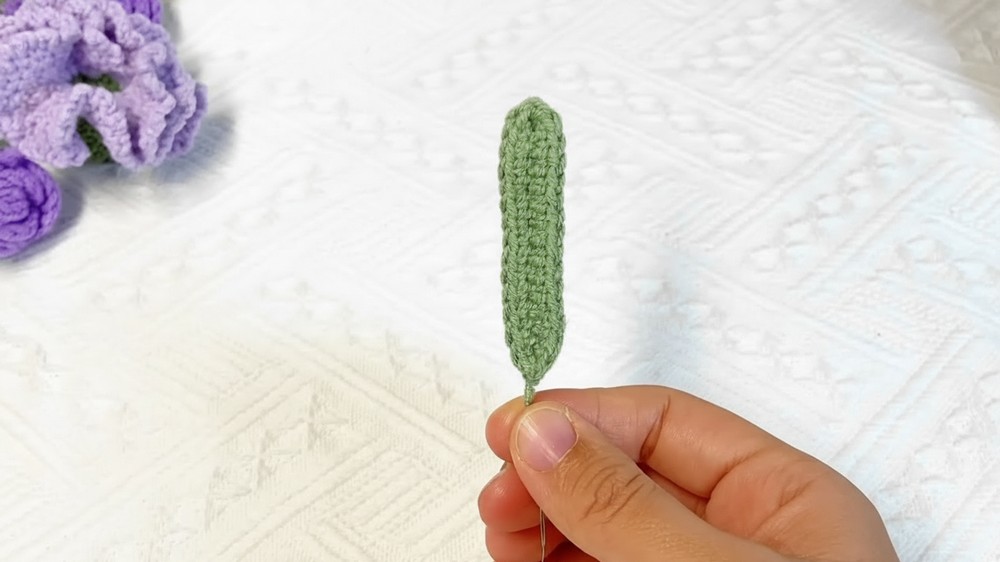
- Start with the Flower Base (Toruses):
- Create a slip knot using fine green yarn.
- Chain 1, then crochet 6 single crochets into the magic circle or slip knot loop.
- Close tightly with a slip stitch and start Round 2.
- Round 2: Create 6 increases (work 2 single crochets into each stitch). At the end, you should have 12 stitches.
- Continue rounds (Round 3 to Round 8): Crochet 1 single crochet into each stitch without increasing. By Round 8, you’ll form the base tube for the flower stem.
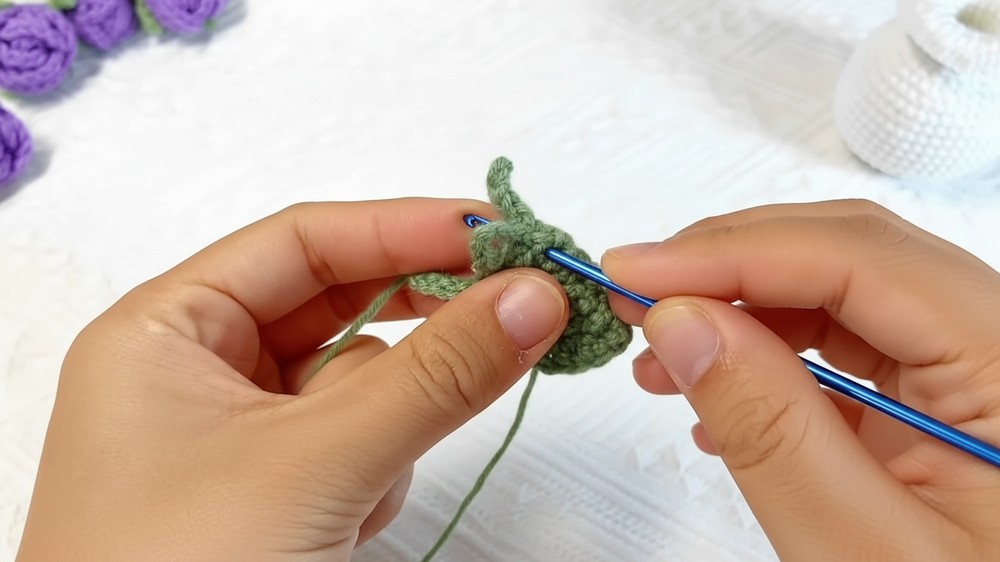
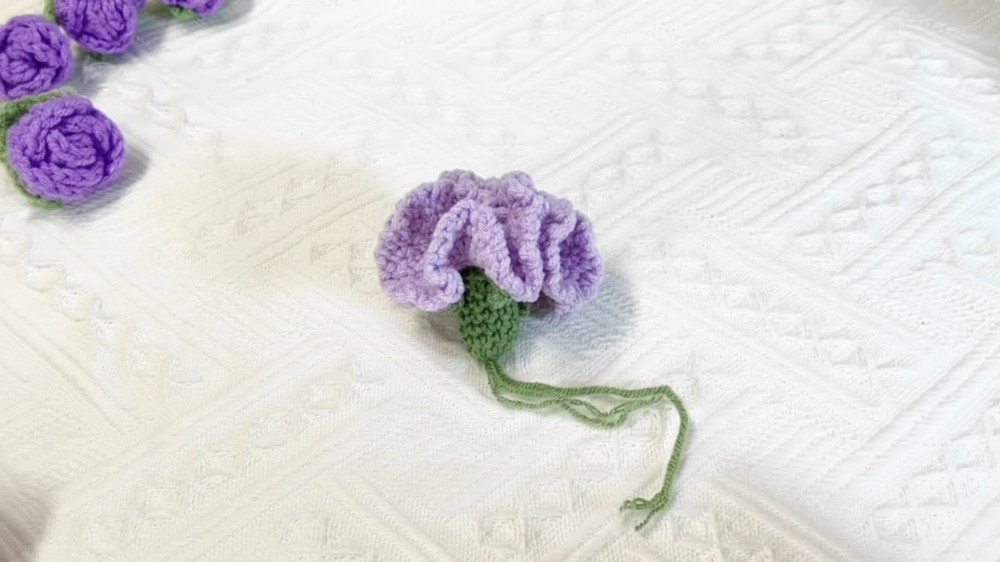
- Adding Flower Petals to Toruses:
- Chain 5 to start the petals.
- In the second chain from the hook, work across the chain: slip stitch → single crochet → half double crochet → double crochet. This forms the first petal.
- Skip 2 stitches on the flower base, then secure the petal with a slip stitch to create its shape.
- Repeat for a total of 4 petals, evenly spaced around the base. Secure loose ends before moving on.
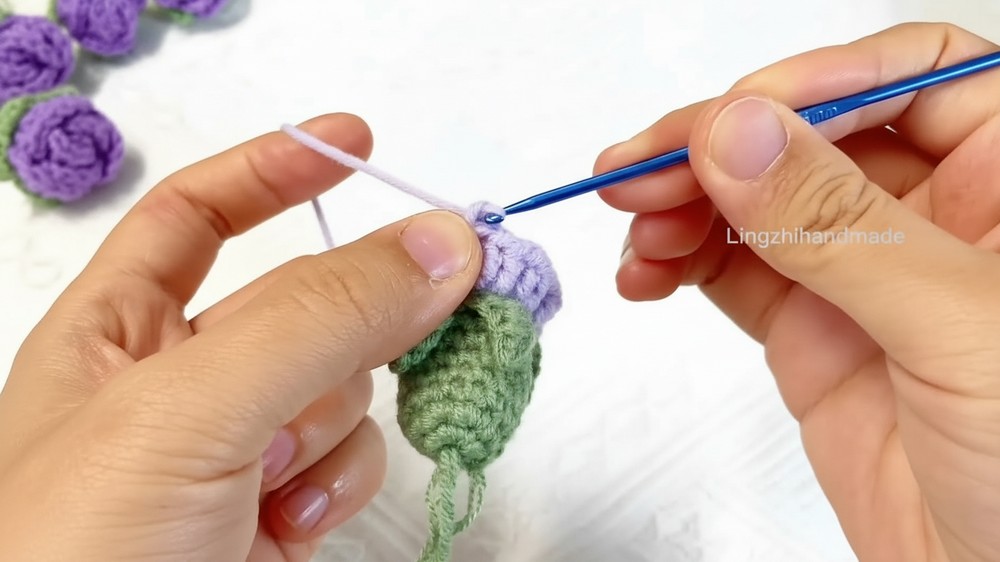
- Adding Purple Petals Around the Flower:
- Attach purple yarn to the back loop of the base stitches.
- Chain 3, then work 3 double crochets in each back loop around the flower base.
- Slip stitch to close the round and repeat (about 3 rounds of petals).
- For the final decorative effect, chain 3 and single crochet in the next stitch to create loops around the edge of the flower.
Part 2: Making the Leaves
- Chain 15 with green yarn and insert craft wire for support.
- Begin crocheting along the chain:
- Work 1 single crochet into each back bump of the chain (13 stitches).
- In the last chain, increase by working 3 single crochets in the same stitch to create a rounded tip.
- Repeat the same process along the other side of the chain for symmetry, hiding the wire as you go.
- Finish by trimming the wire and securing loose ends. One leaf is complete; repeat for as many leaves as needed.
Part 3: Making the Vase
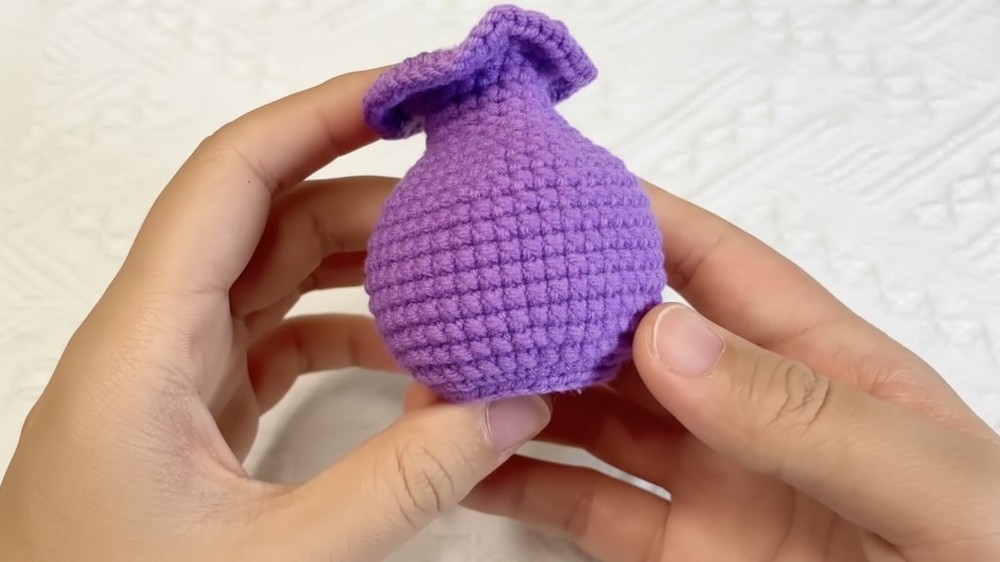
- Base of Vase:
- Begin with a magic ring or slip knot and chain 1.
- Round 1: Work 6 single crochets into the ring.
- Round 2: Make 6 increases (2 single crochets per stitch) for a total of 12 stitches.
- Round 3: Work 1 single crochet in the first stitch, then an increase in the second stitch. Repeat pattern until you have 24 stitches.
- Continue increasing through the rounds until you achieve the desired circular base size.
- Building the Vase:
- After completing increases, start working back loop only stitches to form the vase’s vertical structure.
- For several rounds, work single crochets in each stitch. To add texture, use cross stitch single crochet.
- When you reach the desired height (13-24 rounds), you can begin decreasing to shape the vase opening.
- Optionally, create a decorative ripple effect by chaining between stitches on the final round.
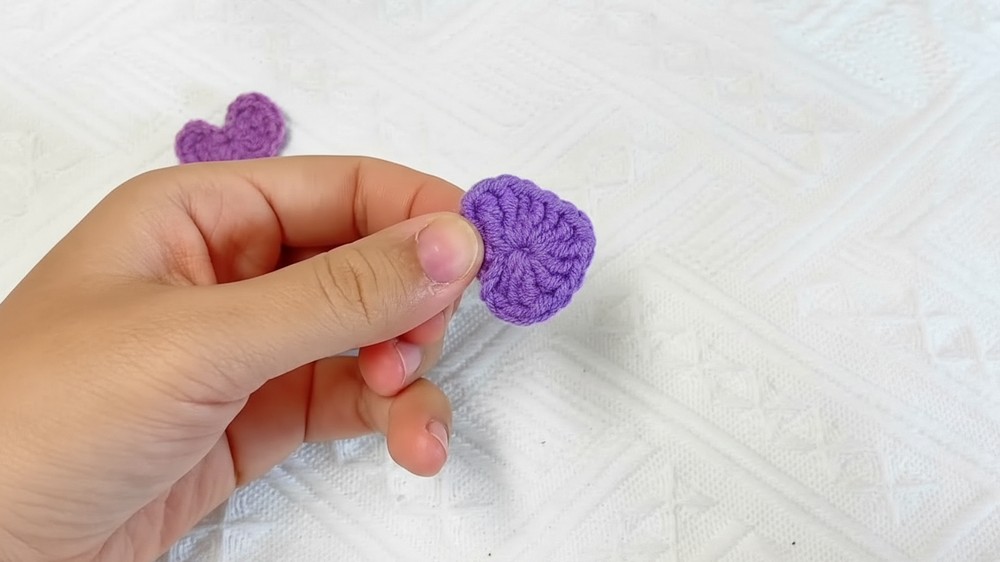
Part 4: Embellishments (Optional Hearts)
- Create a magic loop and chain 3.
- Work 3 triple crochets, then 3 double crochets, chain 1, and repeat on the other side of the loop to create a heart shape.
- Slip stitch to finish and secure the yarn. You can sew or glue the hearts to your vase for added decoration.
Uses of the Crochet Flower Vase Design
- Home Décor: Use as a table centerpiece or brightens up bookshelves and desks.
- Gift Idea: A heartfelt handmade gift for Mother’s Day, birthdays, or anniversaries.
- Custom Décor: Easily customizable to match themes (e.g., wedding décor, holiday gifts).
- Personal Projects: A great project for practicing 3D crochet techniques.
Tip
To avoid frustration during assembly:
- Secure your wires properly and weave in your yarn tails as you finish each element (petals, leaves, flower vase). This ensures they don’t unravel during use.
Conclusion
This fun and easy-to-follow crochet tutorial shows you how to make an enchanting flower vase complete with realistic details like petals, leaves, and decorative elements. Whether you’re creating this as a heartwarming gift or adding it to your home décor, it’s a project full of customization opportunities. The tutor guides you throughout the process, and beginners can tackle the design with a little patience and creativity.
Happy crocheting!


