
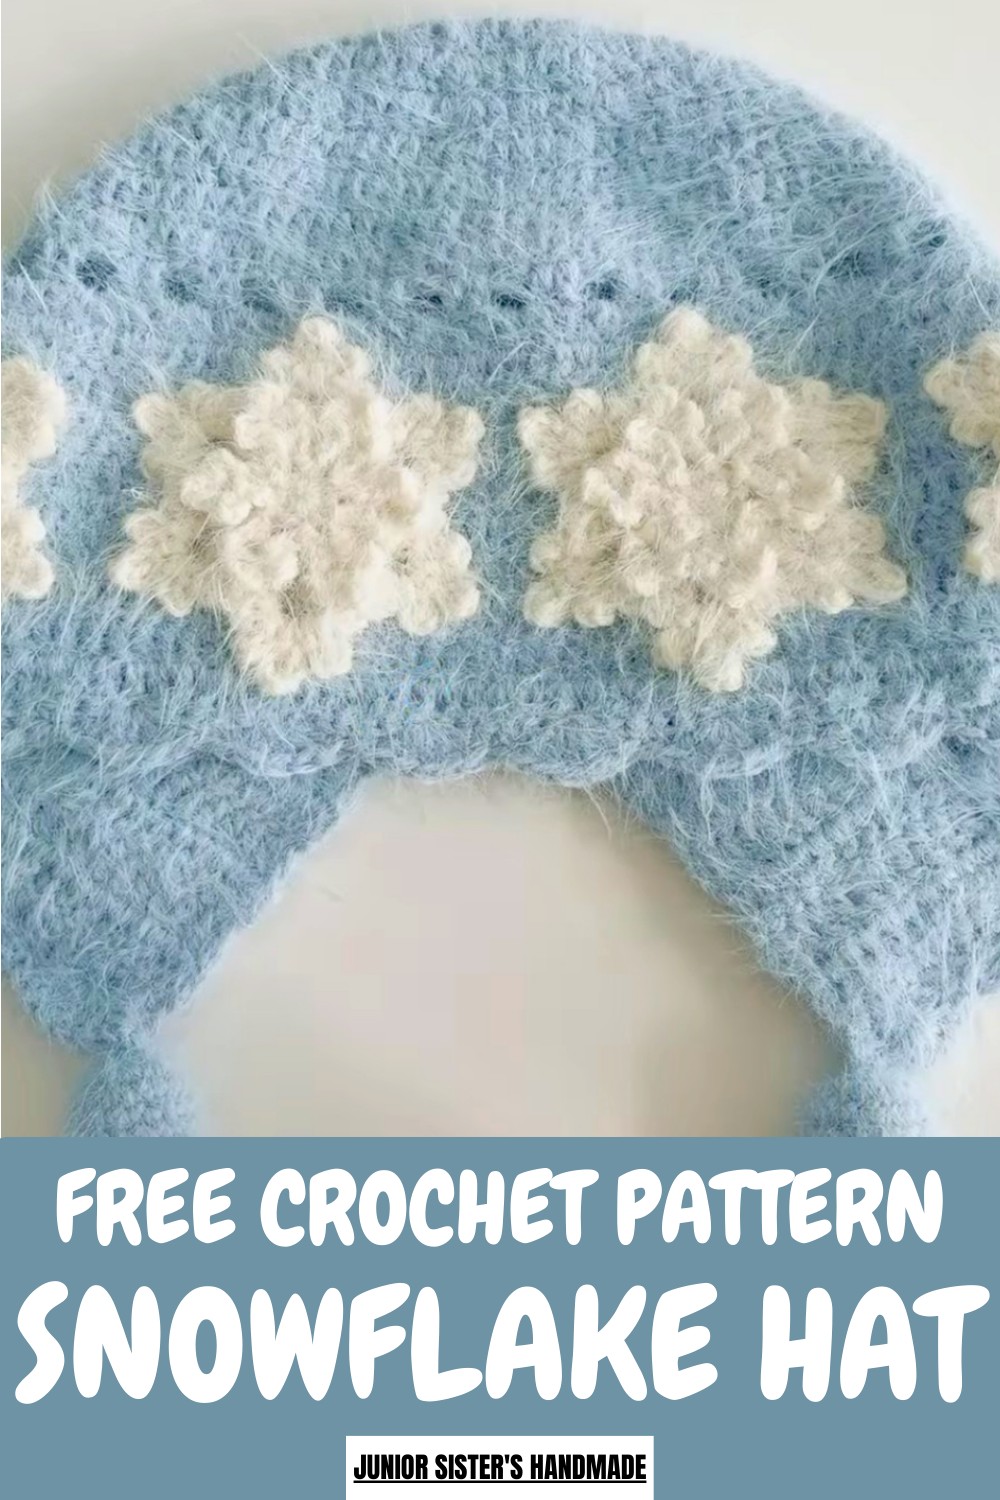
Stay cozy in winter with this Crochet Snowflake Hat Pattern, featuring a warm, stylish design perfect for cold days and festive outdoor fun.
The delicate essence of a winter wonderland becomes a reality when utilizing a Crochet Snowflake Hat Pattern. This sophisticated guide enables the creation of a stunning headwear piece that features intricate, crystalline motifs against a rich, contrasting background. The finished garment serves as a graceful statement for outdoor holiday gatherings or crisp morning walks, offering a level of elegance that mirrors a high-end boutique find.
Blissful Crochet Snowflake Hat Pattern That Feels Warm
One primary benefit is the dense, multi-layered fabric produced by the tapestry or fair-isle technique, which provides exceptional insulation against freezing temperatures. By selecting premium wool or soft alpaca fibers, you ensure a breathable yet cozy fit that feels luxurious throughout the day.
The overall look is one of refined, artisanal charm, blending a seasonal theme with a modern, professional silhouette. This design empowers you to produce a high-quality accessory that radiates festive beauty while offering reliable, heavy-duty warmth for the coldest months of the year.
Step-by-Step Guide Crochet Snowflake Hat:
Step-by-Step Details:
Materials Needed:
- Long-pile wool blend yarn (100g/skein)
- Two skeins of blue
- One skein of white
- Crochet Hook
- 4.5mm for larger head circumference
- 4.0mm for smaller head circumference
- Optional: Tassel maker
Making the Snowflake Motif:
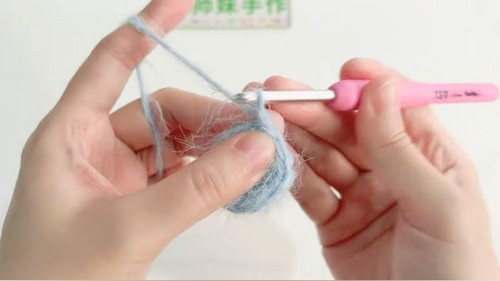
- First Round:
- Start with a circular loop and crochet 5 chain stitches.
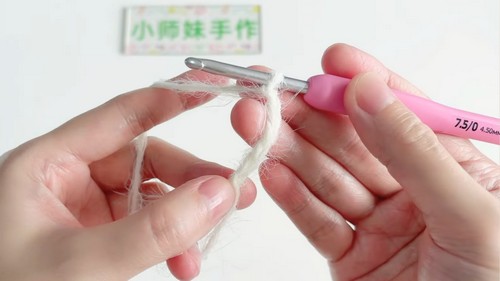
- These 5 stitches represent one double crochet and two chain stitches.
- Around the loop, alternate between one double crochet and two chain stitches until there are 6 sets in total.
- Tighten the loop, pull the yarn, and secure it with a slip stitch at the start.
- Start with a circular loop and crochet 5 chain stitches.
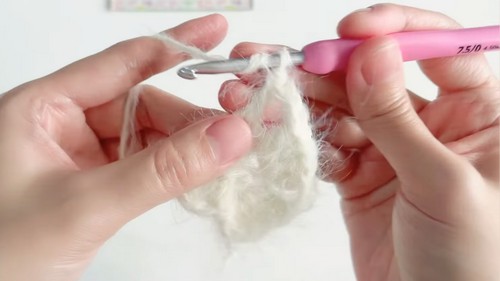
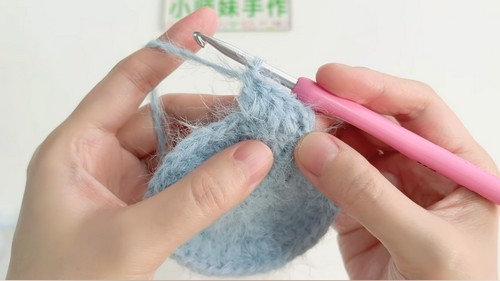
- Second Round:
- Chain 3 stitches as a double crochet base, then crochet 3 more double crochets for 4 total double crochets per space.
- Between each group of 4 double crochets, crochet 3 chain stitches.
- Repeat this process around the loop 6 times, ending with a slip stitch.
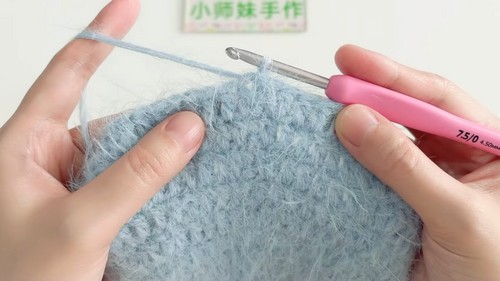
- Third Round:
- Chain 3 stitches, slip stitch into various points along the snowflake.
- Alternate chaining 5, 7, or 3 stitches between slip stitches to create the open, decorative snowflake layers.
- Small Snowflake:
- Start with a circular loop and crochet 6 single crochet stitches around the loop.
- Tighten the loop and secure it with a slip stitch. Continue adding intricate details by chaining and slipping into specific points.
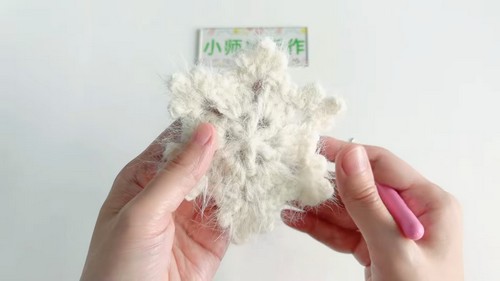
- Assemble the Snowflakes:
- Attach the small snowflake layer to the large one and crochet additional decorative flower motifs (6 in total).
Crocheting the Hat Body:
- Begin with a circular cast-on and crochet 12 double crochet stitches in the loop (first round).
- Increase stitches after each round:
- Round 2: Add a stitch every stitch (24 total).
- Round 3: Add a stitch every other stitch (36 total). Continue this progression until you achieve 84 stitches by Round 7.
- From Rounds 8-10, maintain 84 consistent double crochets.
- Round 11: Increase 12 stitches, adding one stitch every 7 stitches (108 total).
- Round 12: Add decorative openings by alternating two double crochets followed by two chain stitches, leaving spaces in between.
- Work until Round 22 with simple double crochets, then finish with a lace trim for the edge:
- Alternate between one single crochet and 5 double crochets, leaving spaces in between.
Final Assembly:
- Attach the finished snowflakes to the hat body.
- Add tassels to each side of the hat for a fun, lively touch.
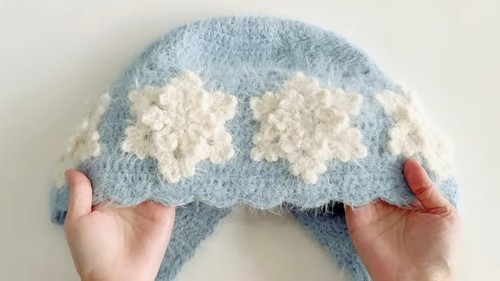
Special Features of the Hat:
- The intricate snowflake design adds a beautiful winter-themed aesthetic.
- Tassels bring a playful and cozy vibe.
- The project is lightweight yet warm, making it practical for winter wear.
Level of Difficulty:
This project is suited for intermediate-level crocheters due to the intricate motifs and detailed assembly process. Beginners with patience and practice can attempt it.
Tutor’s Suggestions:
- Follow the steps carefully, especially for the snowflake assembly.
- Use the appropriate hook size to match the head circumference.
- Pay attention to stitch counts to ensure symmetry in the hat and motifs.
Uses:
- A stylish winter accessory that keeps you warm.
- A handmade gift with a personal touch for holidays or special occasions.
Crochet Tip:
To achieve cleaner edges and smoother snowflake motifs, block the snowflakes after crocheting them. This ensures they hold their shape beautifully before attaching them to the hat.
Conclusion:
The tutorial walks you through creating a unique snowflake hat with detailed patterns and a playful finish. Combining functionality and beauty, this project offers both warmth and elegance, making it a wonderful addition to any winter wardrobe!


