
Keep cozy with this Free Crochet Hat Pattern, offering a comfortable fit, soft texture, and a versatile look for everyday use across seasons.
A well-shaped hat adds both comfort and style, making it a practical accessory for everyday wear. Designed to suit different seasons, it provides warmth during cooler months and light coverage when the weather turns mild. This type of headwear works beautifully for casual outings, outdoor activities, and relaxed fashion styling. One of the key benefits of following a Crochet Hat Pattern is the freedom to customize fit, stitch texture, and color choice to suit personal taste.
Beginner Crochet Hat Pattern With Easy Step-by-Step Shape

The textured surface enhances visual appeal while maintaining a comfortable, flexible feel. Its adaptable design allows it to complement a wide range of outfits, from cozy winter layers to simple everyday looks.

Overall, it presents a pleasing balance of function and elegance, delivering a timeless accessory that feels comfortable, stylish, and versatile. With its refined appearance and practical use, this hat remains a favorite addition to modern wardrobes.
Step-by-Step Details
Materials Needed
- Yarn: Chunky weight yarn, size #6 (Deborah uses leftover “Cozy Occasion” yarn).
- Crochet Hook: Size 10mm crochet hook.
- Scissors.
- Measuring Tape: Optional, but useful for ensuring a perfect fit.
- Stitch Markers: Optional for tracking stitches.
- Tapestry Needle: For weaving in yarn and stitching the top.
Steps
- Start with the Foundation Chain:
- Create a chain of 25 stitches (or adjust based on your desired hat height).
- Keep your chaining loose, but not overly loose, to avoid pulling or tightness.
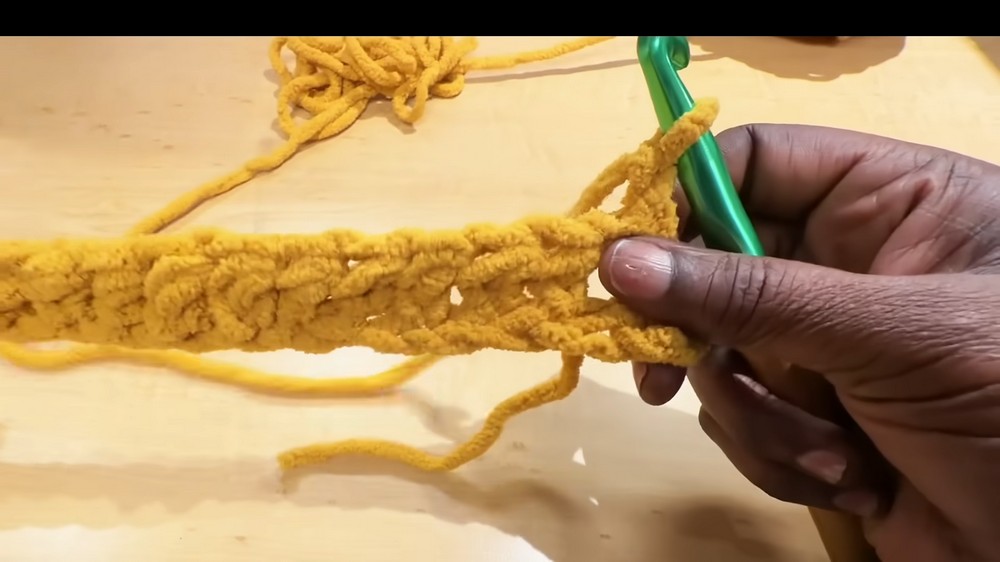
- Work Half Double Crochet (HDC):
- Starting from the second chain from the hook, crochet a row of half double crochets (HDCs) all the way across.
- At the end of the row, chain one and turn your work to begin the next row.
- Switch to Back Loop Only Stitches:
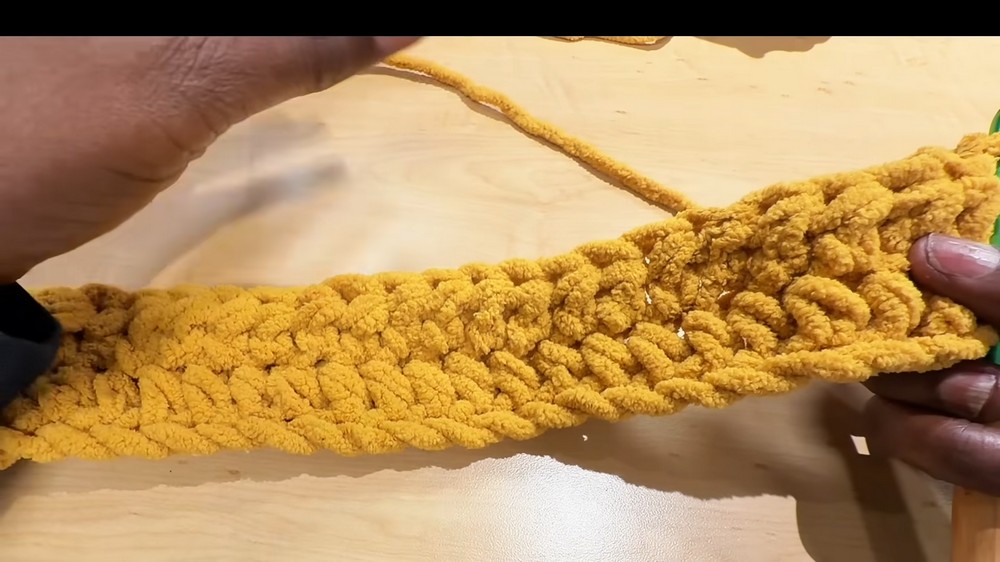
- Moving forward, crochet HDC through the back loop only instead of under both loops.
- Deborah highlights this as the key to creating the stretchy texture and ribbed design of the hat.
- Repeat this pattern for 20 rows (or adjust the number of rows to fit your head circumference).
Tip from Deborah: Measure the hat as you go by wrapping it around your head to ensure it fits snugly. Adjust the number of rows as needed.
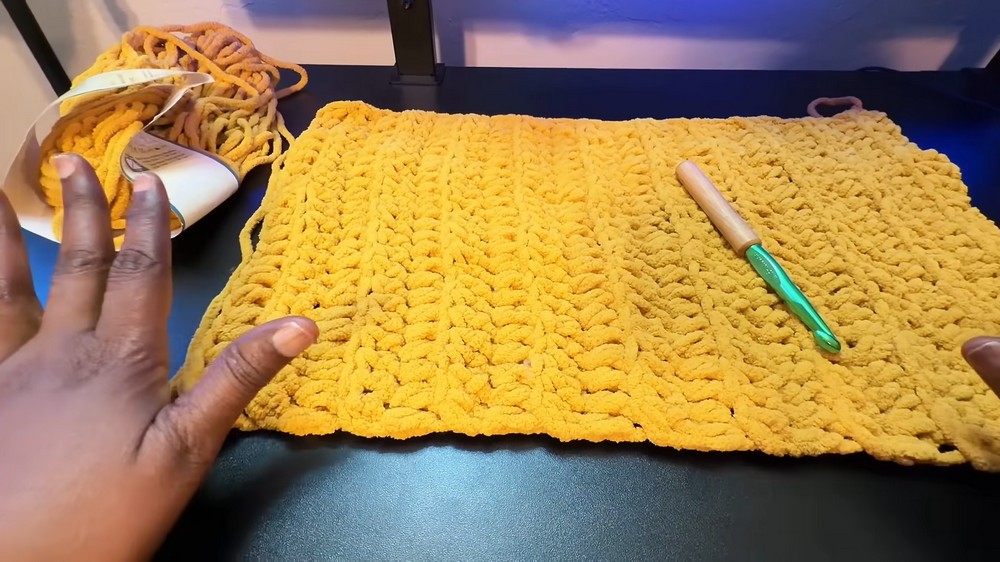
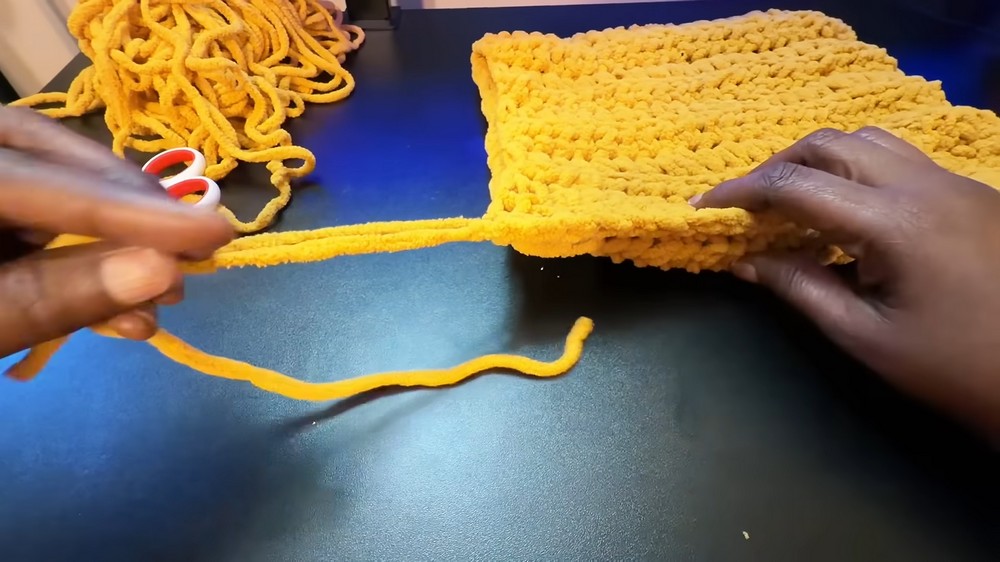
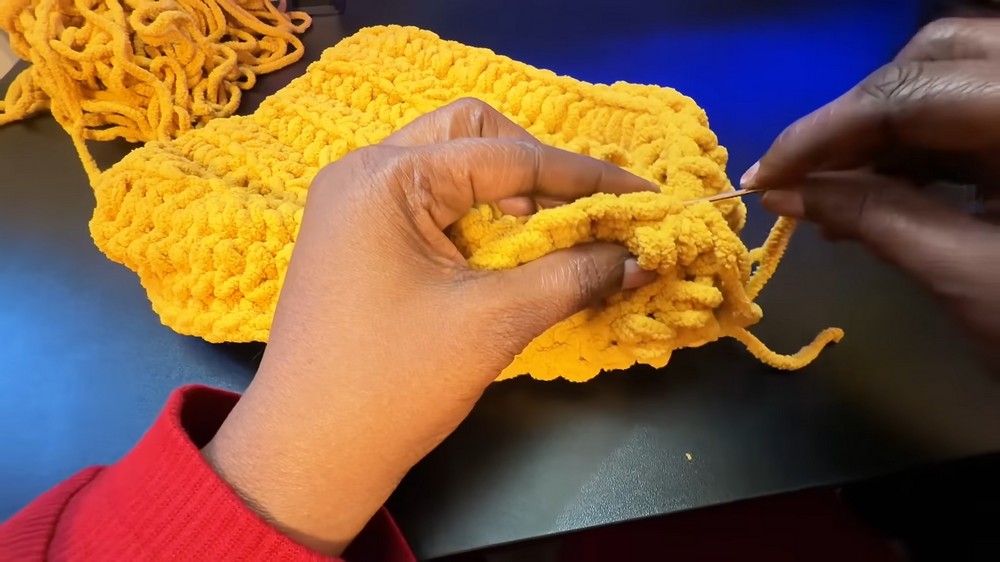
- Assemble the Hat:
- Fold the finished panel in half lengthwise.
- Use single crochet or slip stitches to seam the sides together. Deborah recommends working through only one loop on each side to avoid bulkiness.
- Close the Top:
- Thread a tapestry needle with the tail end of your yarn.
- Weave the thread through the top edge of the hat, pulling it tight to cinch the opening closed.
- Continue weaving and pulling until the top hole is fully closed.
- Secure the stitches with a knot and weave in any loose ends.
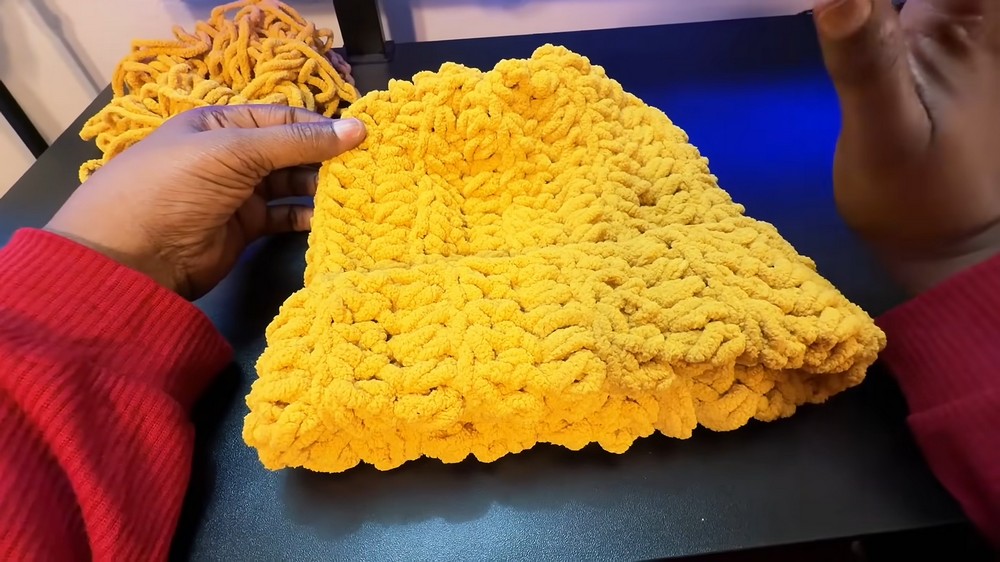
- Finishing Touches:
- Turn the hat inside out to hide the seam.
- Fold up the bottom edge to create a cuff for added style.
- Optional: Add a pom-pom to the top for a playful look.
Special Features
- Quick to Make: The project can be completed in under an hour, making it ideal for last-minute gifts.
- Stretchy Ribbed Design: The back-loop-only HDC stitch creates a comfortable, snug fit.
- Beginner-Friendly: The tutorial uses a simple, repetitive stitch pattern with clear instructions.
- Customizable: You can adjust the chain length for height or row count for width to fit different head sizes.
Level of Difficulty
- Beginner-Friendly: This project is straightforward and repetitive, requiring only basic crochet skills such as chaining, HDC, seaming, and weaving.
- Time-Efficient: Suitable for crocheters of all levels who want a quick and rewarding project.
Tutor's Suggestions
- Keep your chains loose: Tight chains can make the foundation stiff and difficult to work into.
- Feel your stitches: Chunky and plush yarn can make it challenging to see stitches, so use your fingers to locate them.
- Customize as needed: Continuously measure the piece to ensure a perfect fit. Adjust the length of your chain or the number of rows if necessary.
- Avoid bulk at the seam: Use only one loop when seaming the sides to prevent a thick, bulky seam.
- Be mindful when tightening the top: Do not pull the yarn too hard when closing the top, as thick yarn can snap easily.
Uses
- Gifting: Ideal for coworkers, family, or friends due to its quick and customizable design.
- Personal Use: A warm and stylish winter accessory for your wardrobe.
- Stash-Buster Project: Great for using up leftover chunky yarn.
Tip
For added flair, attach a pre-made pom-pom or crochet your own using the leftover chunky yarn. It adds a playful touch and makes the hat stand out.
Conclusion
Cozy crochet hat tutorial is a fantastic project for beginners and experienced crocheters alike. With its quick assembly, simple pattern, and customizable design, you can create a warm, stylish hat in little to no time. Whether for a thoughtful last-minute gift or a personal accessory, this hat is functional, fashionable, and fun to make.


