
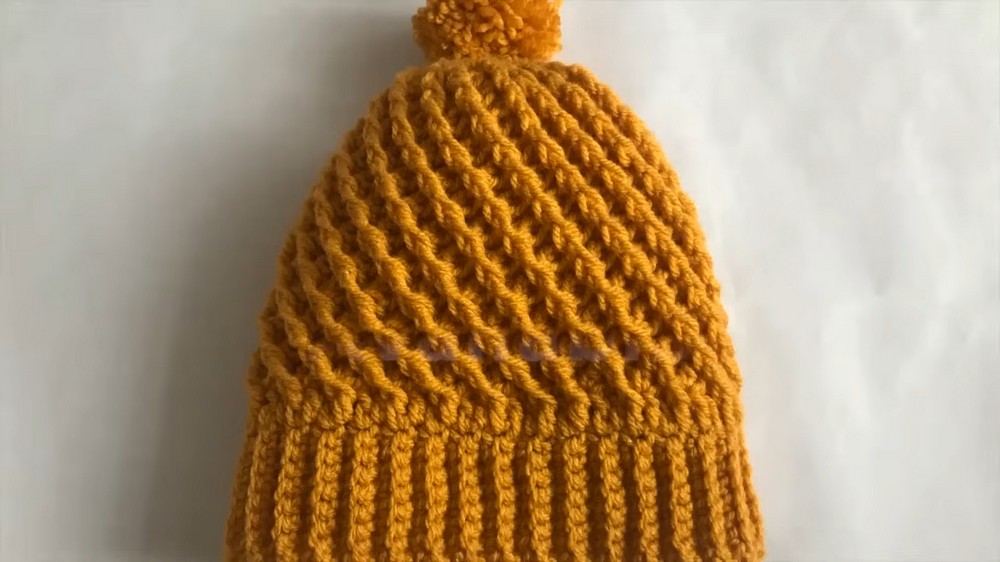
Top off your look with this Crochet Hat Pattern for cozy headwear that offers warmth, texture, and comfort for cool days and casual wear.
Suitable for daily wear and seasonal layering, this design blends comfort, warmth, and style in a practical yet attractive form. The Crochet Hat Pattern provides a well-balanced structure that works for casual outings, outdoor activities, or meaningful handmade gifts. Its adaptable style allows customization in yarn choice, colors, and sizing, making each finished piece unique while maintaining a clean, polished look.
Handmade Crochet Hat Pattern You’ll Love Creating

Soft textures and thoughtful stitch placement create a hat that feels lightweight yet offers reliable coverage. Clear and approachable instructions support both beginners and experienced crocheters, turning the process into an enjoyable and rewarding experience. The completed hat retains its shape beautifully and pairs easily with a variety of outfits, from relaxed to layered looks.
Beyond visual appeal, this project helps improve stitch control and creativity while producing a useful, long-lasting item. Combining practicality with timeless crochet design, it adds comfort and charm to any wardrobe.
Step-by-Step How to Crochet Hat
Materials Needed
- Yarn: Two 50g balls of golden yellow yarn (100g total)
- Crochet Hook: 5mm hook
- Pom-pom: 7cm-sized pom-pom (optional)
- Scissors
- Yarn Needle
1. Create the Band
- Start with a Slipknot: Chain 9 stitches.
- Skip the first chain and make a single crochet into the second chain. Continue making single crochets into the remaining stitches (9 single crochets total).
- Turn the Work: Chain 1, then work only in the back loops of each stitch across (9 single crochets).
- Repeat: Continue creating rows of single crochets using the back loops only, ensuring each row has 9 stitches.
- Build the Band: Repeat for 69 rows to create a band approximately 45cm long.
- Join the Ends: Align the starting edge and the ending edge of the band. Use a slip stitch to join them together, creating a loop.
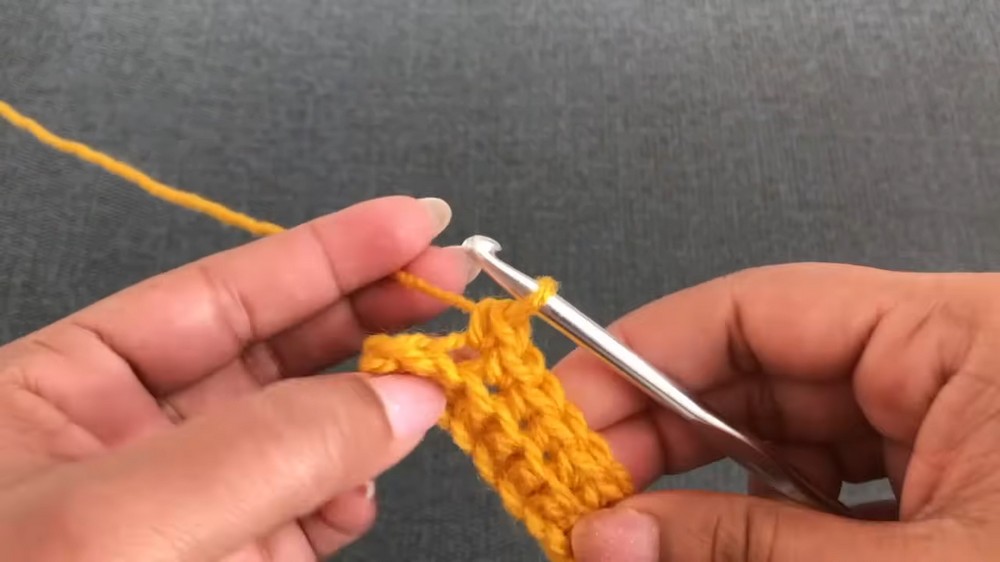
2. Build the Body of the Hat
- Adding Foundation Rows:
- Chain 3 and begin working one double crochet into each row of the band (69 double crochets total).
- Join the last stitch to the top of the chain-3 with a slip stitch.

- Start the Pattern: Work in multiples of 3.
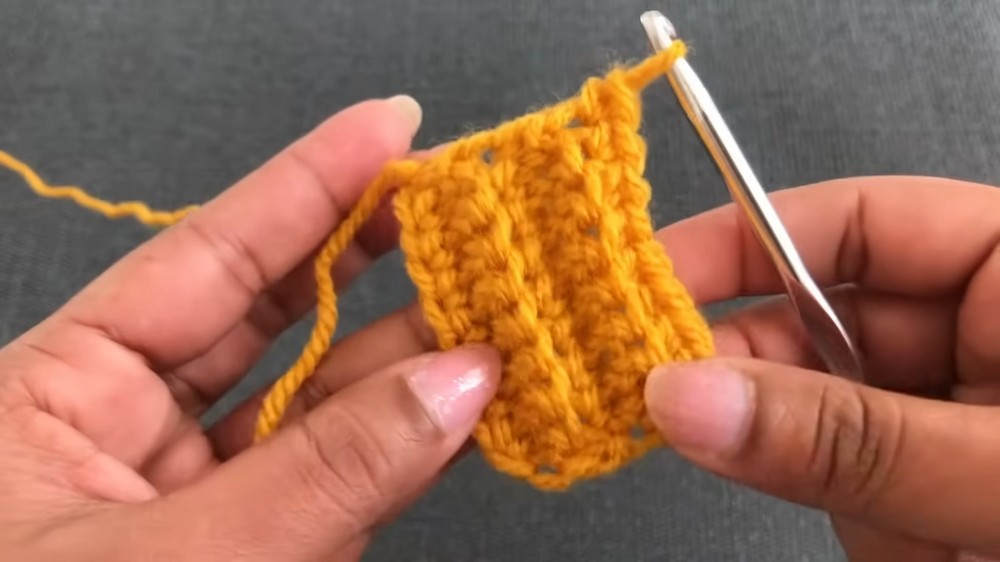
- Round 1: Chain 3. Into each set of 3 stitches, work 3 double crochets into the top row and 1 double crochet into the row below. Repeat around.
- Round 2 and Beyond: Continue the pattern by shifting the 3 double crochets and aligning a single double crochet into the row below. Repeat for 23 rounds to complete the main body of the hat.
3. Reduce the Stitches for Shaping
- Start Decreasing: After completing 23 rounds, begin reducing stitches gradually to shape the top of the hat.
- Round 11: Work 2 double crochets in the usual pattern but skip every third stitch.

- Round 12: Work 2 double crochets and only one stitch into the lower row, skipping one stitch.
- Round 13: Continue reducing by skipping stitches and working only 1 double crochet with one loop into the lower row.
- Close the Top: By Round 14, combine multiple loops from the last row into one final stitch using the hook. Pull the yarn tight to secure.
4. Add the Pom-pom
- Tie the Pom-pom: Use a 7cm-sized pom-pom. Attach it using 4 strands of yarn tied securely through the top of the hat.
- Create a Reversible Effect: Leave a slightly larger opening at the top when closing the hat so you can push the pom-pom from one side to the other. This allows the hat to be flipped and worn with the second pattern visible.
Special Features
- Two Patterns in One: The hat is reversible; flip it to achieve a completely different look using the same design.
- Customizable Size: The project uses medium measurements but can be easily adjusted.
- Reusable Pom-pom: The pom-pom is versatile, allowing it to work for either of the reversible sides.
Level of Difficulty
This project falls into the beginner to intermediate level. Basic stitches like single crochet and double crochet are used, but back loop work, decreasing stitches, and shaping require some precision and attention.
Tutor's Suggestions
- Always count your stitches to ensure consistency in the band, body, and reduction phases.
- Use back loops for the band to create a ribbed, stretchy effect.
- Leave a slightly larger opening at the top if you plan to switch the pom-pom between patterns for reversibility.
- Work patiently on the decreases, especially when combining multiple loops into one stitch.
Uses and Materials
Uses:
- This crochet hat is a creative and practical addition to your wardrobe.
- Ideal as a handmade gift for birthdays, winter holidays, or special occasions.
- Suitable for personal use when you want a versatile fashion accessory.
Materials:
- Two balls of yarn (100g total)
- 5mm crochet hook
- Scissors and yarn needle
- Optional pom-pom
Pro Tip
When shaping the crown of the hat, keep your tension consistent during decreases. This will prevent the hat from looking bunched or uneven at the top.
Conclusion
This reversible crochet hat pattern is perfect for anyone seeking a unique, multipurpose project. With simple materials and clear instructions, you can create a stylish and functional hat in no time. Whether for personal use or gifting, this design will impress anyone with its dual-pattern feature.


