
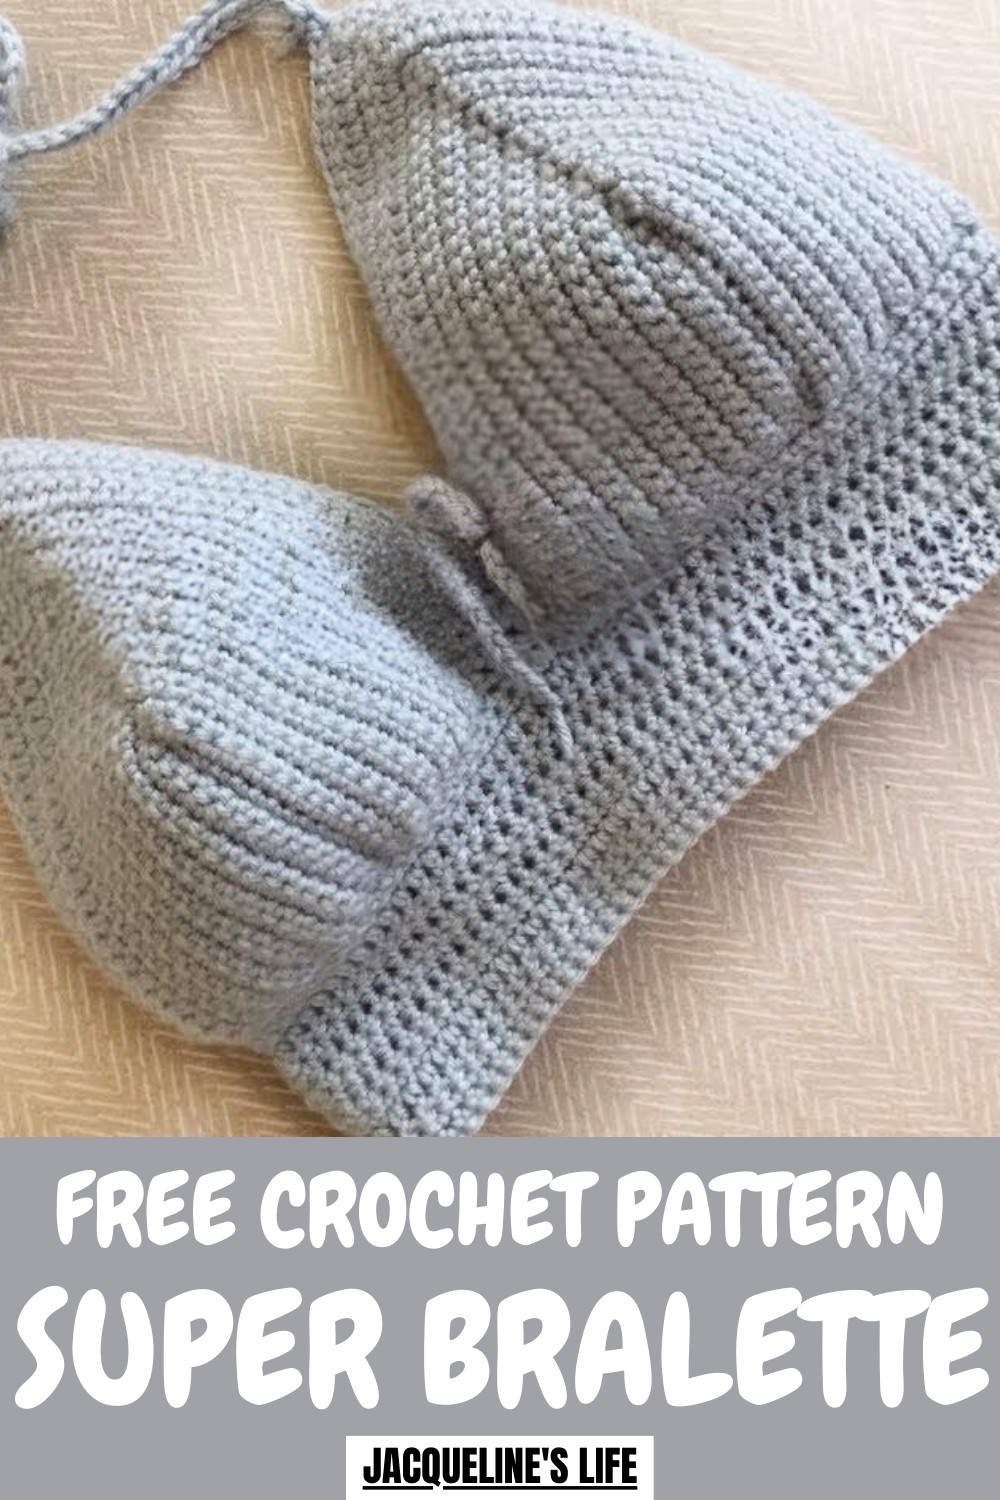
Stay stylish and comfy with this Free Crochet Bralette Pattern, perfect for a handmade wardrobe update or adding a unique touch to your outfits.
Comfort and style can go hand in hand, especially when you create something tailored to your taste. A Crochet Bralette Pattern allows you to craft a piece that is both fashionable and personalized, offering a lightweight and breathable alternative to conventional bras. Its customizable design means you can adjust the size, style, and color to perfectly suit your body and wardrobe, making it versatile for layering under tops or wearing as a standalone statement piece.
Fun Crochet Bralette Pattern That Combines Comfort and Style
Creating it can also be a relaxing and fulfilling activity, helping to improve your crochet skills while producing something practical. Beyond personal use, it makes a thoughtful and stylish gift, showing effort and creativity. With its elegant texture, modern design, and tailored fit, this bralette merges function, comfort, and fashion seamlessly.
How to Crochet a Custom Triangle Bra Top – Step-by-Step Guide
Materials Needed
To start this project, gather the following materials:
- Yarn: The tutor uses two types: One Pound yarn in "Sunflower" (specific color unclear) and Caron Simply Soft yarn. Both are #4-weight yarns.
- Crochet Hook: A 5.5 mm crochet hook (the tutor’s personal favorite). You can also follow the pattern creator’s recommendation and choose a hook size that suits your yarn and tension.
- Scissors: For cutting yarn ends.
- Stitch Marker: Essential for marking stitches during the process.
- Pattern (Optional): The tutor follows someone else’s pattern and emphasizes personal adjustment and customization.
Uses
- Summer Wear: A stylish and breathable top for casual outings or the beach.
- Festival Top: Ideal for events like Coachella, as noted by the tutor.
- Customizable Fit: Makes a great base for a personalized project, offering options for various body types and style preferences.
Special Features
- Adjustable Sizing: Customizable for different cup sizes (e.g., A-Cup, D-Cup, or larger).
- Style Variations: You can add double crochets or more rows to increase coverage or change the overall style.
- Functional Support: Includes customizable bands and straps for added comfort and security.
- Detailed Process for Attachment: Covers band and strap placement for versatility and practicality.
Level of Difficulty
This project is suitable for advanced beginners and intermediate crocheters.
- Basic Knowledge Required: Slip knots, chaining, single crochet, and double crochet stitches.
- Challenging Aspects: Requires some precision when attaching the cups and creating even decreases for the band.
Step-by-Step Instructions
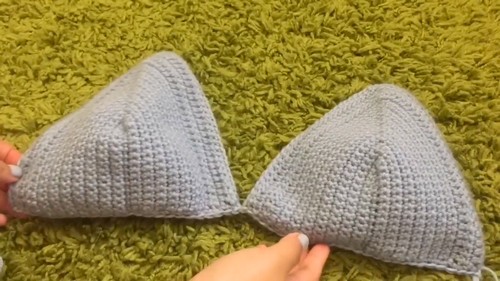
1. Crocheting the Cups
- Start with a slipknot.
- For a D-cup, make a chain of 15 stitches (adjust to 11 for an A-cup).

- Single crochet into the third chain from the hook, adding two single crochets into the same chain.
- Continue single crocheting across the chain until the end.
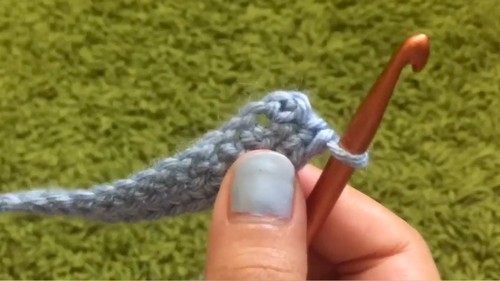
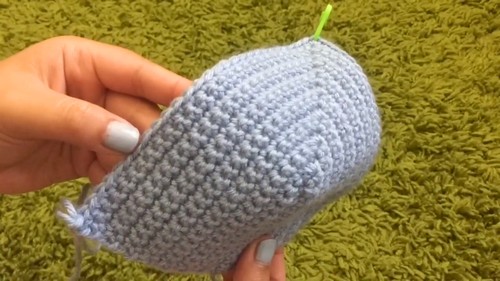
- At the top of the cup, make 3 single crochets in the same stitch to create the small triangle peak.
- Place a stitch marker in the middle of the 3 single crochets.
- Work along the other side of the chain with single crochets to complete the first round.
- Chain 1, turn your work, and repeat the process for each row. Keep creating 3 single crochets at the midpoint (stitch marker) until you reach the desired cup size.
- (Optional) Use double crochets for some rows to add coverage faster.
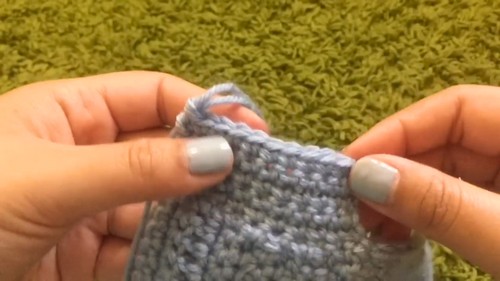
2. Joining the Cups
- Lay the two completed cups side by side.
- Single crochet along the base of each cup to add firmness and connect the two pieces.
- Ensure the last stitch of one cup aligns with the first stitch of the second cup.
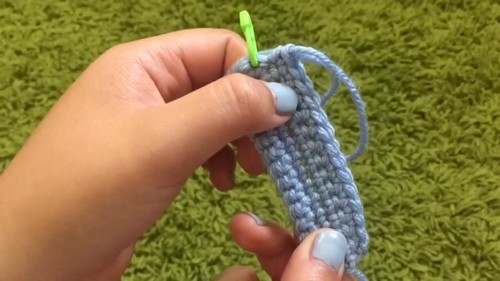
3. Adding the Bottom Band
- Start single crocheting along the base of the connected cups to create the band.
- Continue adding rows of single crochet to build the width of your band.
- For larger chest sizes, extend the band for better support.
4. Creating Decreases for the Band
- To shape the band for tying, decrease at the start of every row.
- Skip the first stitch, insert the hook into the next two stitches, and pull yarn through to combine into one stitch.
- Repeat this process for each row until only one stitch remains.
- At the final single stitch, create a chain of 40 stitches for the back tie (or customize the length based on preference).
- (Optional) Single crochet back along the chain to make it sturdier.
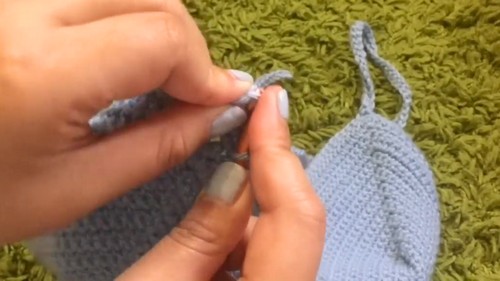
5. Adding the Straps
- Slipknot and attach yarn to the top edge of each triangle cup.
- Chain 73 (or desired length for straps).
- (Optional) Single crochet back along the chain for added durability.
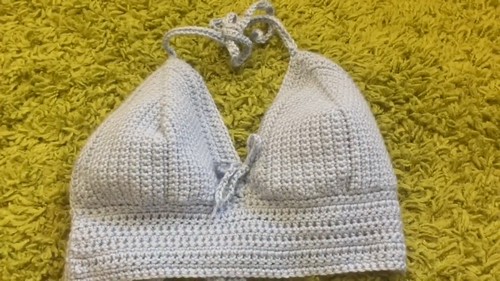
6. Finishing Touches
- Add a shoelace-style chain to the front of the cups for extra support, especially for larger cup sizes. Create a chain of 40 and weave it through the openings at the inner edges of the cups.
- Secure all loose ends by weaving them back into the stitches.
- Tie bows for the straps and the band to test the fit and adjust accordingly.
Tutor’s Suggestions
- Customize Hook and Yarn Choices: The tutor prefers a 5.5 mm hook and chooses yarn based on texture and personal preference rather than strict pattern instructions.
- Practice Patience for Larger Sizes: Larger cup sizes, like D, take longer, but following the process consistently yields beautiful results.
- Focus on Stitch Markers: Always place the stitch marker in the middle of the top 3 single crochets to maintain symmetry.
- Modify for Support: Add rows or make the band thicker to suit larger sizes or personal comfort.
Conclusion
This crochet triangle top is a wonderful handmade project that combines practicality, style, and customization. While the process might seem repetitive, the reward is a perfectly fitted, fashionable piece. Whether you’re making an A-cup for regular use or a D-cup for added coverage, the pattern is easily adjustable for various preferences. The connections, bands, and straps make it a sturdy and wearable design, perfect for summer or festivals.
Pro Tip
For clean edges and a polished look, evenly space your single crochets when working along the rough edges of the cups and base. If rows feel uneven, adjust by adding an extra crochet where needed to fill gaps.


