
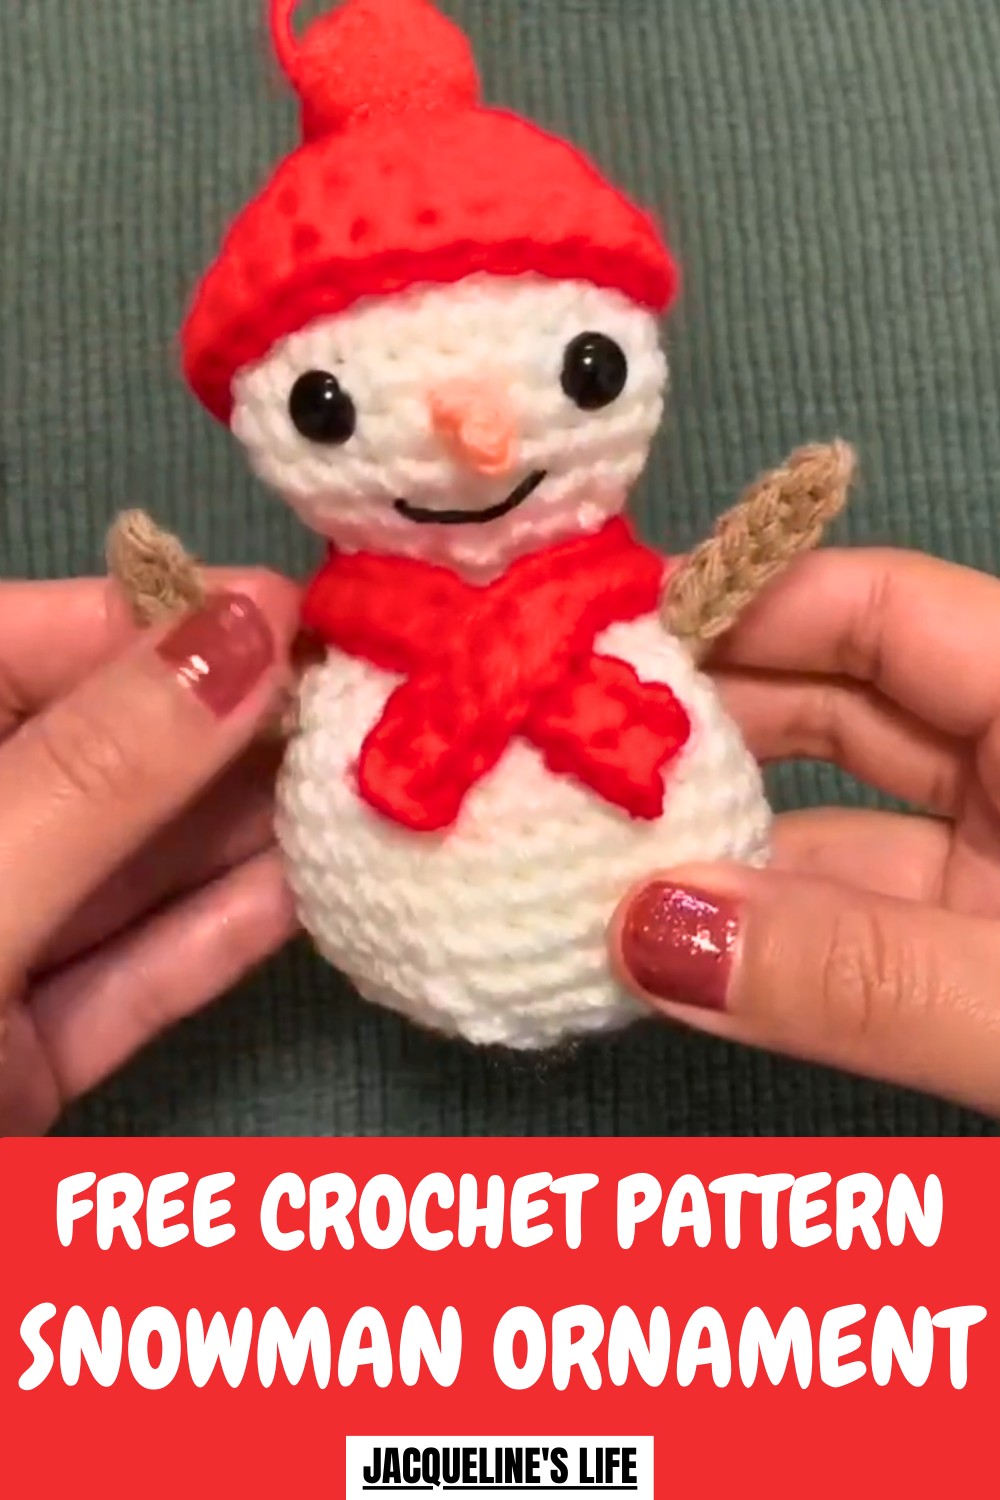
Frosty fun awaits with this Free Crochet Snowman Ornament Pattern, perfect for adding a cheerful touch to your holiday décor or handmade gifts.
A tiny snowman brings instant holiday cheer with its round body, button accents, and cozy scarf or hat, capturing the magic of winter in a charming way. Soft textures and balanced proportions make it visually delightful, while delicate details add personality without overwhelming any space. This little ornament fits perfectly on Christmas trees, mantels, or as a festive accent on gifts and shelves, making it versatile for holiday décor.
Adorable Crochet Snowman Ornament Pattern for Festive Cheer
It carries the warmth of handmade charm, turning ordinary decorations into personal, memorable pieces. Its lightweight design allows easy display, and its cheerful look adds a cozy, joyful vibe wherever it’s placed.
Ideal for festive collections or as a heartfelt gift, it combines visual appeal, practicality, and seasonal charm. Overall, it’s a delightful handmade piece that brightens any space, evokes the spirit of winter, and brings a touch of handcrafted magic to the holiday season.
How to Crochet a Snowman Ornament – Step-by-Step Guide
Materials Used
To create the snowman ornament, you will need:
- Yarn:
- White Yarn: For the head and body.
- Brown Yarn: For the arms.
- Orange Yarn: For the snowman’s nose.
- Red Yarn: For the scarf and beanie.
- Additional Supplies:
- Pom-Poms: A red pom-pom for the snowman’s beanie.
- Embroidery Thread: To create the snowman’s mouth.
- Safety Eyes: For the snowman’s face.
- Stuffing: Polyester fiberfill to stuff the head and body.
- Glue Gun: For attaching accessories like the hat and scarf.
- Scissors: To cut and trim excess yarn.
- Stitch Marker: To keep track of rounds.
- Crochet Hook: A 5mm hook (recommended).
Uses for the Snowman Ornament
- Christmas Tree Ornament: Hang the snowman from your tree using the yarn loop attached to its beanie.
- Holiday Decorations: Place it on shelves, mantels, or as part of your table centerpiece.
- Gift Option: A thoughtful handmade gift or stocking stuffer for family and friends.
- Crochet Practice: A great project for practicing increases, decreases, and working with small parts.
Special Features
- Lightweight Design: The finished snowman remains light, ensuring it doesn’t weigh down your tree.
- Customizable Elements: Change the yarn colors or add features like buttons for a unique snowman.
- One-Piece Head and Body: The head and body are crocheted as one piece, simplifying assembly.
- Cute Accessories: Includes a removable scarf, beanie with pom-pom, and carrot-shaped nose for added charm.
Level of Difficulty
Beginner to Intermediate
- The project uses basic crochet techniques such as single crochet (SC), double crochet (DC), half-double crochet (HDC), and magic circles.
- Small parts like the arms and nose may require patience, especially for beginners.
- Aligning and attaching the facial details and accessories can take time but remains manageable with proper guidance.
Tutor’s Suggestions
The creator offers valuable suggestions throughout the process:
- Work in Sections: Start with accessories (beanie and scarf) before moving on to the snowman’s body and head for easier assembly.
- Use a Stitch Marker: Mark the end of each round to avoid losing track of stitches.
- Plan Facial Placement: Attach the beanie and scarf during assembly to properly place the safety eyes, nose, and mouth.
- Secure Accessories with Hot Glue: Use a glue gun to attach the scarf and pom-pom for faster results and a secure finish.
- Count Stitches Regularly: Keep track of stitch counts during increases and decreases to ensure consistent shaping.
- Avoid Overstuffing: Use light stuffing for the snowman’s body and head to maintain proportions without distortion.
Step-by-Step Instructions
Step 1: Making the Beanie
- Start with red yarn and create a magic circle.
- Insert your hook into the circle, yarn over, and pull through to form the foundation of the circle.
- Rounds:
- Round 1: Single crochet (SC) 6 times into the magic circle. Slip stitch into the first stitch to close the round.

- Round 2: Chain 1 and increase into each stitch using double crochet (DC). End with 12 stitches.
- Round 3: Chain 1, increase into the first stitch (2 DC) and make 1 DC into the next stitch. Repeat to end with 18 stitches.
- Round 4: Chain 1, increase into the first stitch (2 DC), make 1 DC into the next two stitches, then repeat to end with 24 stitches.

- Round 1: Single crochet (SC) 6 times into the magic circle. Slip stitch into the first stitch to close the round.
- Bind off after completing the beanie, cut the excess yarn, and secure the ends with a hook. Later, attach a red pom-pom with hot glue and cut yarn for the hanging loop.
Step 2: Making the Scarf
- Start with the slip knot technique and chain 29 stitches using red yarn.
- Work half-double crochet (HDC) all the way back:
- Yarn over, skip the first stitch, and go into the next stitch. Yarn over again, pull through all three loops.
- Repeat until you finish the row.
- Bind off, trim excess yarn, and use hot glue to prevent frayed ends. Optionally, add fringe if desired.
Step 3: Snowman’s Arms
- Use brown yarn and the slip knot technique, leaving some extra yarn for attaching later.
- Chain 6 stitches, then work single crochet (SC) into each stitch.
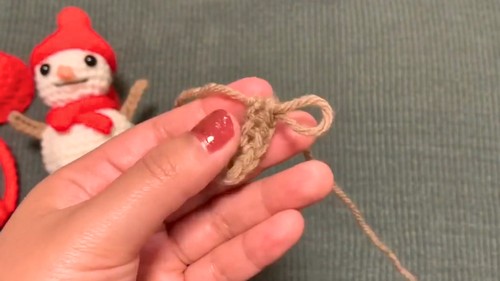
- Bind off, leaving a long tail for sewing the arms to the snowman’s body later. Make two arms in total.
Step 4: Snowman’s Nose
- Use orange yarn and the slip knot technique.
- Chain 2 stitches, then single crochet (SC) into the first stitch.
- Bind off, leaving two strings for tying and attaching the nose to the snowman’s head.
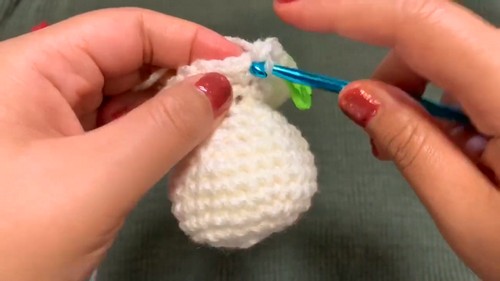
Step 5: Head and Body
- Use white yarn and a magic circle to start the snowman.
- Head Rounds:
- Round 1: Create a magic circle and SC 6 times into the circle. Slip stitch into the first stitch to close the round.
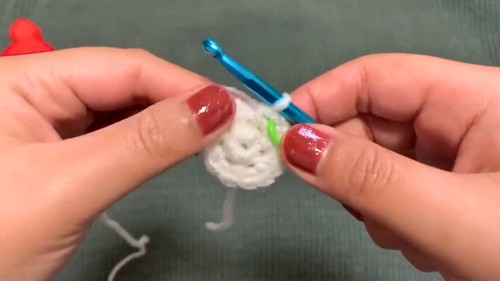
- Round 2–4: Increase by adding two SC into each stitch (12 stitches in Round 2, 18 stitches in Round 3, 24 stitches in Round 4).
- Rounds 5–8: SC into each stitch to build head length.
- Round 9–11: Perform invisible decreases and SC as instructed, ending with 6 stitches in Round 11.
- Round 1: Create a magic circle and SC 6 times into the circle. Slip stitch into the first stitch to close the round.
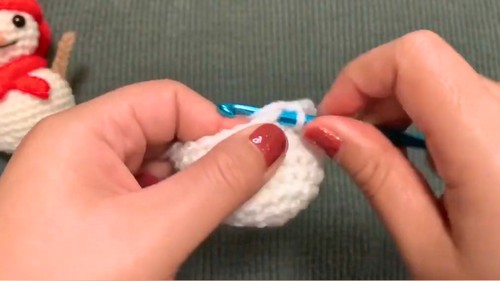
- Body Rounds:
- Attach white yarn directly to the bottom of the head. Work increases as instructed, ending with a larger base (30 stitches after Round 4).
- SC across several rounds for body length, then decrease to close off the body.
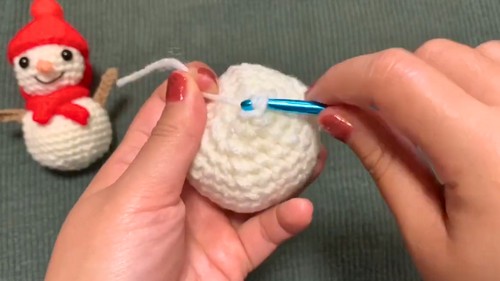
- Add safety eyes, stuff the head and body lightly, and sew the facial features (nose and mouth).
Step 6: Assembly
- Position the beanie and glue it securely on the head, along with the pom-pom.
- Attach the arms to the body using the excess yarn or glue.
- Glue the scarf around the neck for stability.

Conclusion
Congratulations on crocheting your adorable snowman ornament! This handmade piece is a festive way to showcase your crochet skills and add personalized decor to your Christmas setup. Its charming design, lightweight build, and customizable features make it a wonderful addition to any tree or gift.
Pro Tip
When placing the safety eyes and nose, position the beanie beforehand to get the proportions right. This ensures the snowman’s face looks symmetrical and well-balanced!


