
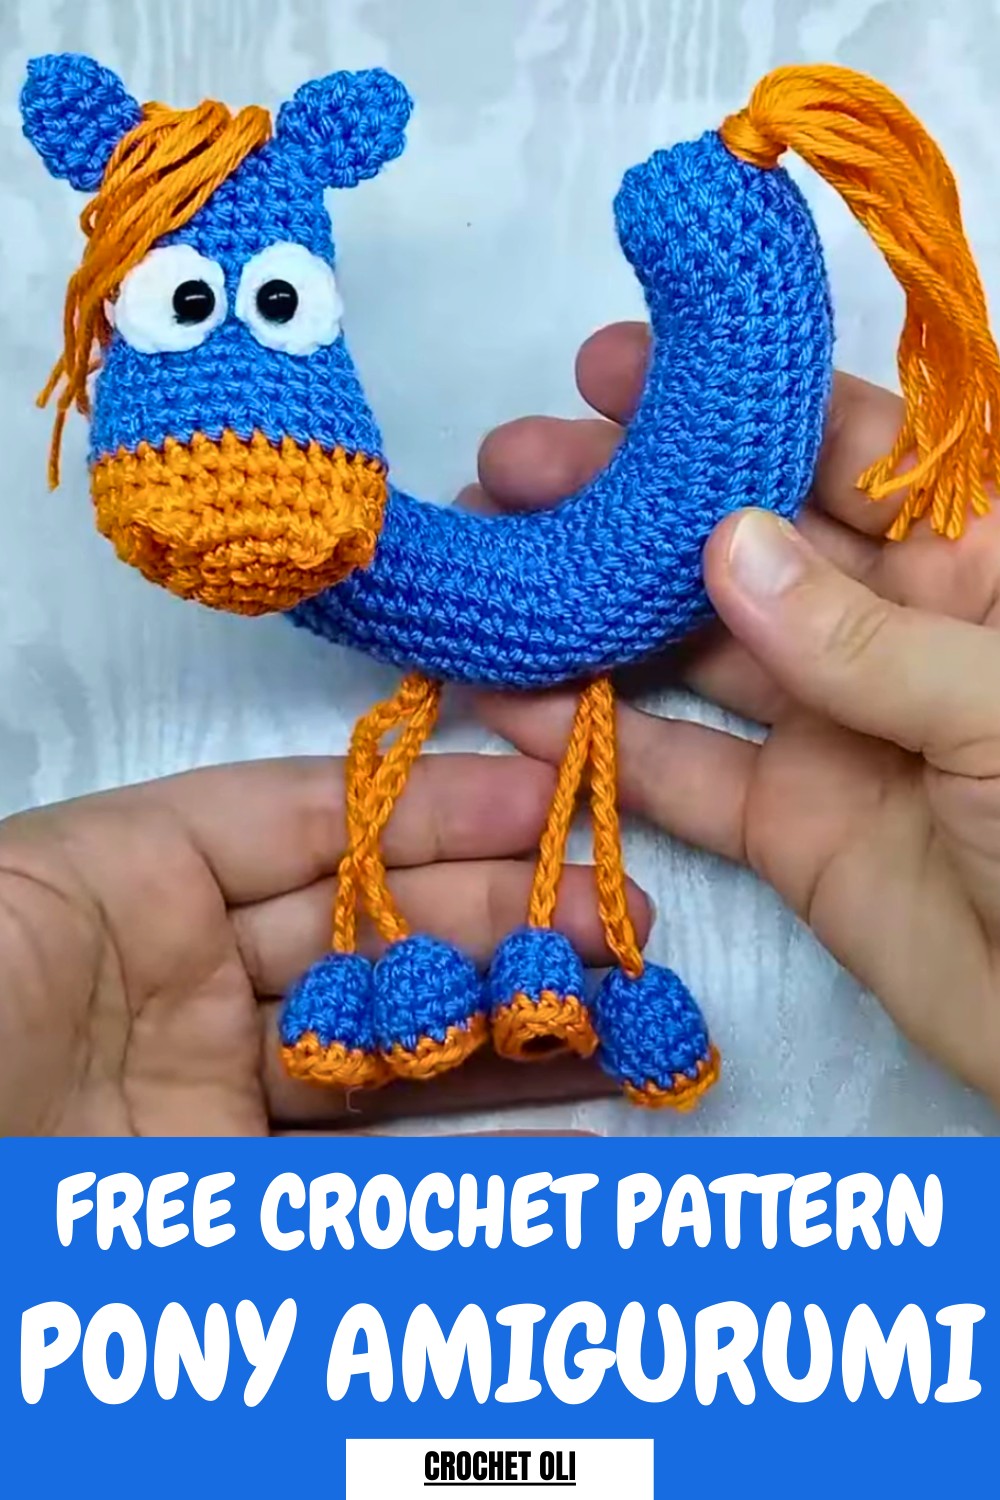
Snuggle up with an adorable companion using this Free Crochet Pony Amigurumi Pattern perfect for gifts, décor, or a charming collection.
This Pattern combines charming design with lovable features to create a whimsical handmade creation. It is perfect for personalizing a nursery decorating a child’s room or gifting something unique and heartfelt to loved ones. The Crochet Pony Amigurumi Pattern offers delightful details like its rounded snout adorable ears and flowing mane which add a playful yet elegant touch to the finished project.
Modern Crochet Pony Amigurumi Pattern for Stylish Spaces
Crocheting this piece allows for creative expression with opportunities to experiment with colors and textures. It is an eco-friendly alternative to store-bought items that brings lasting value to both the crocheter and recipient.

This project exudes warmth and skill as it transforms thoughtful materials into a durable and unique handmade treasure. Whether displayed as a cute collectible or cherished as a keepsake this Crochet Pony Amigurumi Pattern creates a lasting impression. Its timeless appeal versatility and graceful look make it a standout creation for crocheters at all levels to enjoy.
Step by Step Crochet Pony Amigurumi Pattern
Materials Required
- Thread or yarn in your preferred color(s)
- Crochet hook (size appropriate for your yarn)
- Small beads or half beads (for the eyes)
- Needle for sewing assembling parts
- Stuffing material (for shaping the head and nose)
- Glue (optional, for attaching beads)
Step-by-Step Instructions
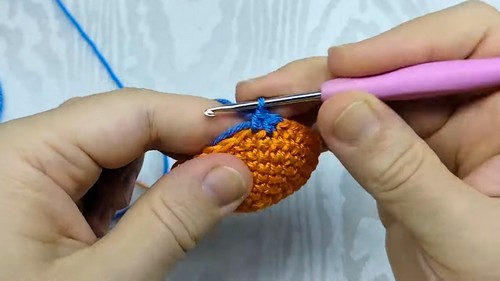
Head
- Create a magic ring (also called an adjustable ring).
- Row 1: Crochet six single crochet stitches into the ring.
- Row 2: Double every stitch from the first row to make 12 stitches.
- Row 3: Alternate one single crochet and one increase (repeat six times) to get 18 stitches.
- Row 4: Alternate one single crochet, one increase, and one single crochet again (repeat six times) to get 24 stitches.
- Row 5: Alternate three single crochet stitches and one increase (repeat six times) resulting in 30 stitches.
- Rows 6-8: Knit 30 stitches per row (no increases or decreases). At this stage, you can use one or two colors depending on your design preference. If changing color, do so in Row 8.
- Row 9: Alternate three single crochet stitches and one decrease (repeat six times) to reduce to 24 stitches.
- Rows 10-11: Knit 24 stitches per row.
- Row 12: Alternate two single crochet stitches and one decrease (repeat six times) reducing to 18 stitches.
- Row 13-19: Knit 18 stitches per row.
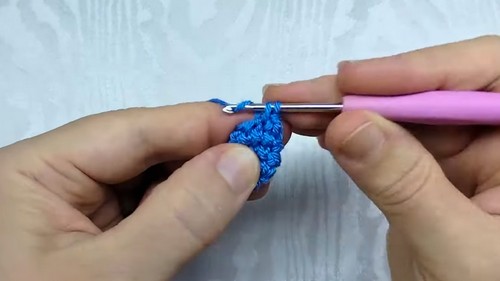
- Row 20: Alternate one single crochet and one decrease (repeat six times) to reduce to 12 stitches.
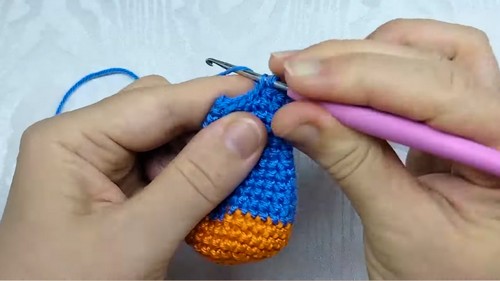
Stuff the head: At this point, add more stuffing to the nose to create a rounder shape while keeping the back of the head slightly less filled for a crimped effect.
13. Stitch four decreases to close the head completely. Use a needle to tighten the remaining loops, and the head is ready.
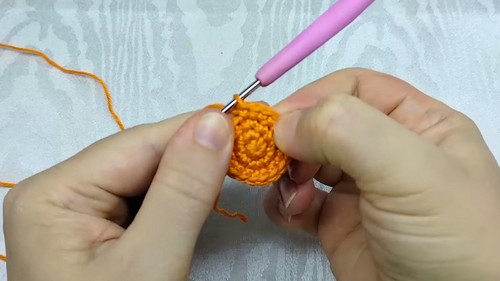
Ears
- Create a magic ring.
- Row 1: Crochet six single crochet stitches into the ring.
- Row 2: Alternate two single crochet stitches and one increase (repeat twice) to make eight stitches.
- Rows 3-4: Knit eight stitches per row.
- Row 5: Alternate two single crochet stitches and one decrease (repeat twice) to return to six stitches.
- Leave a long tail of thread for sewing, and cut it off. Repeat these steps for the second ear.
Attach the ears to the head by sewing them securely in place.
Eyes
- Create a magic ring and crochet eight single crochet stitches into it.
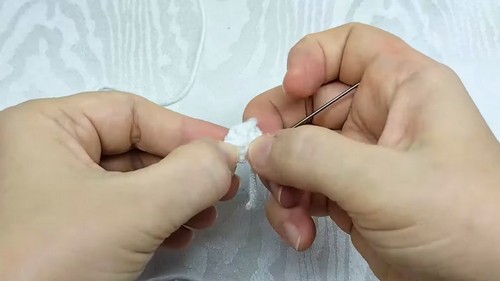
- Close the ring with a slip stitch and secure the threads.
- Attach a bead (or half bead) to the center of the eye – you can either sew this or glue it in place.
- Glue or sew the eyes onto the head after assembling the other components.
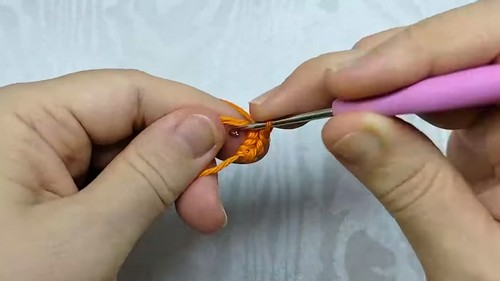
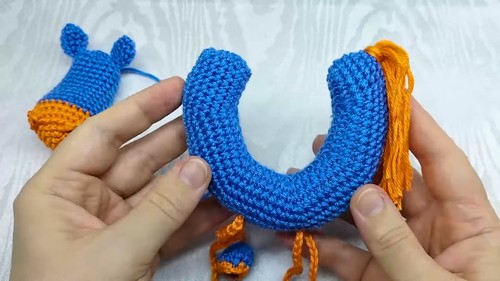
Legs and Tail
- Legs: Create two chains of 35 air loops each. Each chain forms two legs. Thread the chain into the horseshoe and secure it to the hooves.
- Tail and Mane: Follow the method demonstrated in the previous video, which includes adding strands of yarn to complete the tail and mane. The steps there are detailed and easy to replicate.
Special Features
- The horse's head design uses stuffing strategically to ensure the head is shaped realistically, with the nose round and the back gently crimped.
- It includes easy-to-make but detailed features like the ears and eyes for a polished look.
- This project is versatile: it makes for great decor, gifts, or DIY keepsakes.
Tutor's Suggestions
- The instructor emphasizes not overstuffing the head to maintain its shape.
- She suggests switching thread colors in Row 8, if desired, to give the horse an aesthetic contrast between its head and nose.
- Be sure to glue or sew the eyes securely so they stay in place over time.
Level of Difficulty
This project is suitable for intermediate skill levels. While beginners can attempt it, understanding basic crochet methods like magic rings, increases, and decreases is essential.
Conclusion
By carefully following the steps outlined in the pattern and paying attention to the assembly process, you can create a charming horse with wonderful details. This project is ideal for personalizing your decor or gifting to loved ones.
Tip
When assembling parts (such as attaching ears or sewing the head), use stitch markers to position elements evenly beforehand. This ensures a symmetrical design and a professional finish.


