
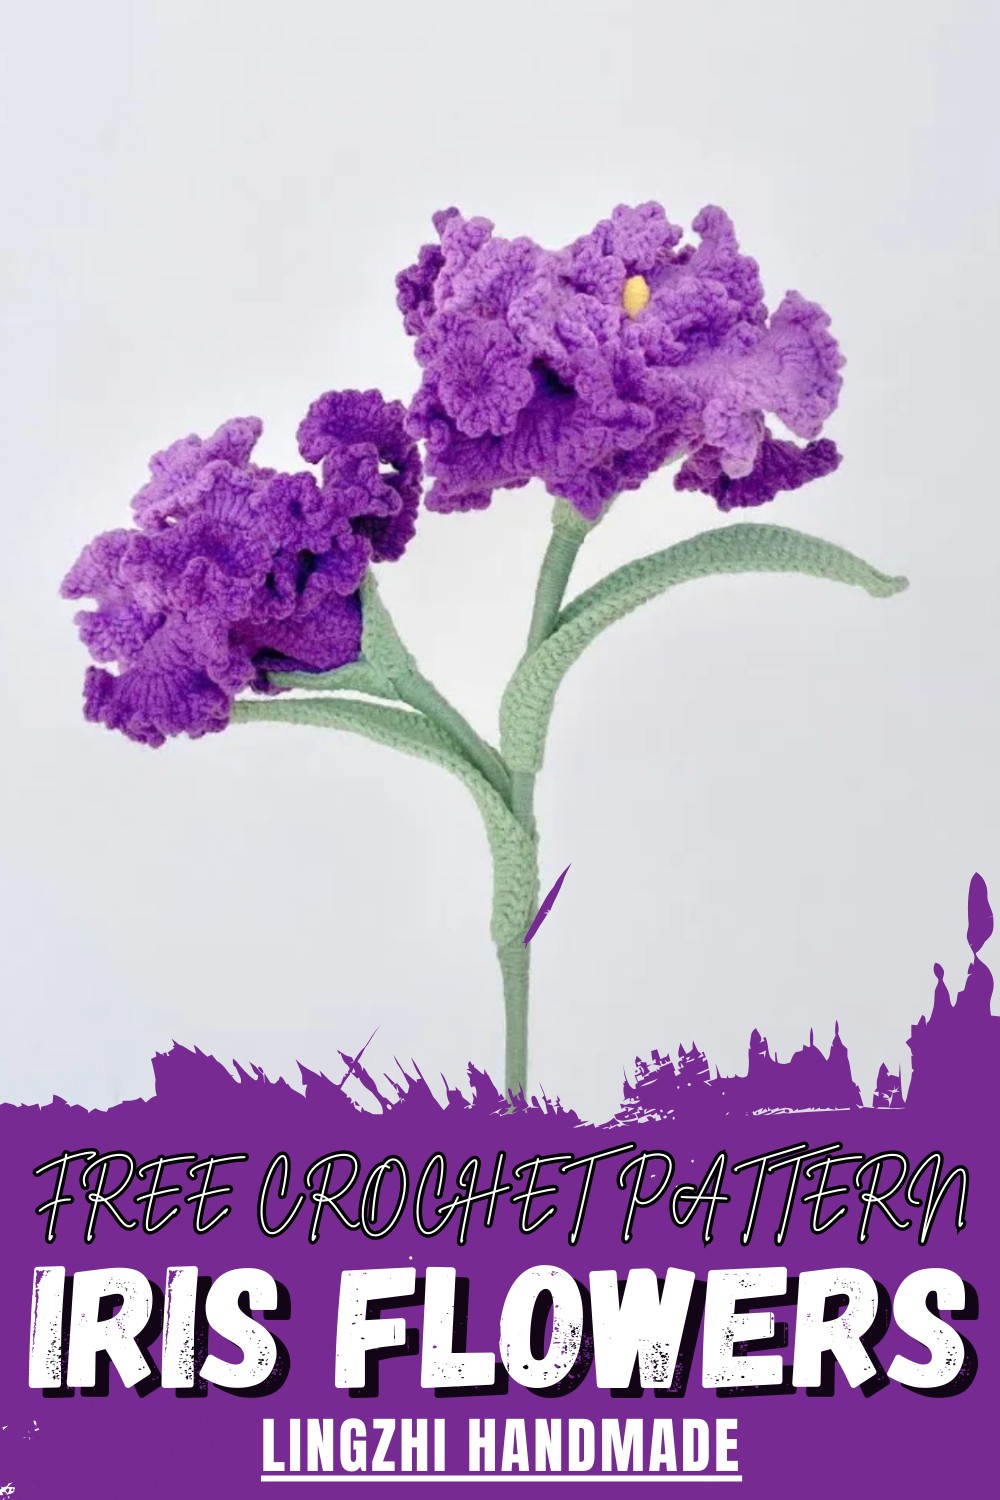
Add elegant color to decor with the Crochet Iris Flowers Pattern, featuring graceful petals, simple stitches, and a fresh floral look that stands out.
Floral crochet adds meaning to handmade decor by turning yarn into lasting keepsakes with personal value. This pattern allows makers to form realistic iris blooms that never fade, offering a thoughtful option for mindful hobbies and meaningful gifts. Crochet Iris Flowers Pattern supports stress relief through rhythmic motion while sharpening focus, patience, and fine motor skills.
Minimal Crochet Iris Flowers Pattern Easy To Style Anywhere
It is better for us because it replaces short-lived flowers with reusable pieces that reduce waste and save money over time. Advantages include size control, color freedom, allergy-safe beauty, and easy care without water or sunlight. The structured petals give graceful lines, depth, and a soft elegance that suits modern or classic tastes.
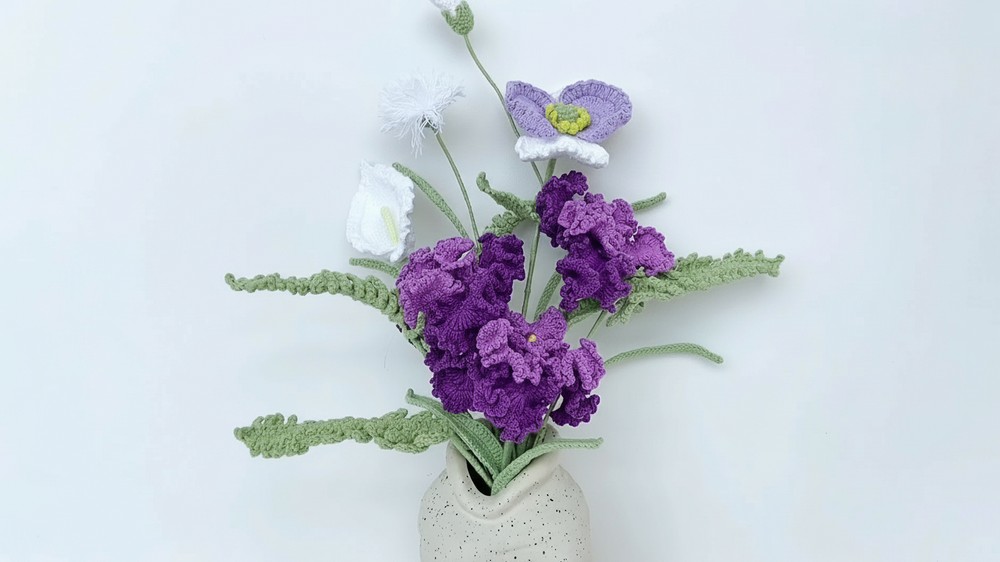
These flowers work well in home accents, wedding decor, brooches, table settings, wall art, and seasonal displays. They also suit teaching projects and small businesses, adding charm, durability, and emotional warmth wherever they appear. Made for thoughtful makers seeking floral art.
How to Crochet an Iris Flower
Special Features
- Realistic Design: The Iris flower is designed with careful attention to detail, featuring small petals, large petals, flower hearts, and leaves for a lifelike look.
- Wire Integration: Craft wire is used throughout the project to provide the flower with stability and structure.
- Custom Assembly: The tutorial allows flexibility, letting you assemble the Iris flower as one standalone piece or combine multiple flowers together.
- Detailed Instructions: The tutor explains every step clearly, making it beginner-friendly while teaching advanced crochet techniques such as triple and double-triple crochet stitches.
Materials Required
- Yarn: Purple and green yarn for petals, leaves, and the flower torus.
- Craft Wire: Used to incorporate structure and shape into the flower components.
- Markers: Optional, to help mark stitches effectively, particularly for beginners.
- Crochet Hook: The size of the hook depends on the yarn selection and personal preference.
- Sharp Scissors: To neatly cut the yarn and craft wire.
Step-by-Step Instructions
1. Creating the Large Petals
- Start with purple yarn and make a slip knot.
- Chain 16 stitches.
- Insert into the 2nd space from the hook and work 14 single crochet stitches.
- At the last stitch, place 3 single crochets in the same space to form a curve.
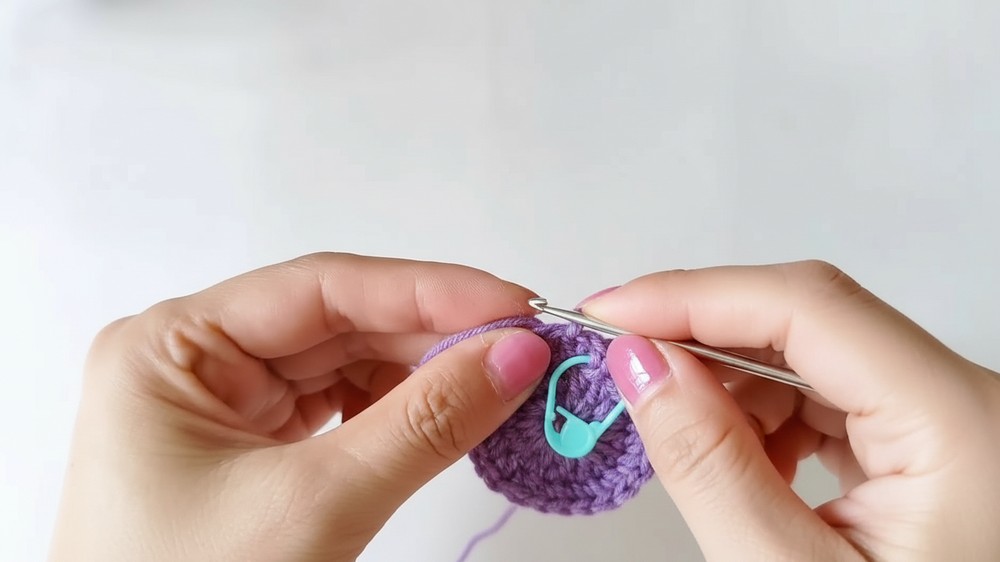
- Continue on the other side with another 14 single crochets, ensuring the tail is hidden.
- Close the round with a slip stitch and incorporate craft wire for structure.
2. Adding Layers to the Large Petals
- In round 2, crochet along the craft wire:
- Single crochet in the first 4 spaces.
- Half double crochet in the next 2 spaces.
- Double crochet in 6 spaces.
- Triple crochet in the next space and work 3 triple crochets in one spot.
- Double-triple crochet, wrapping 3 times, in the next few spaces, repeating the pattern for both sides.
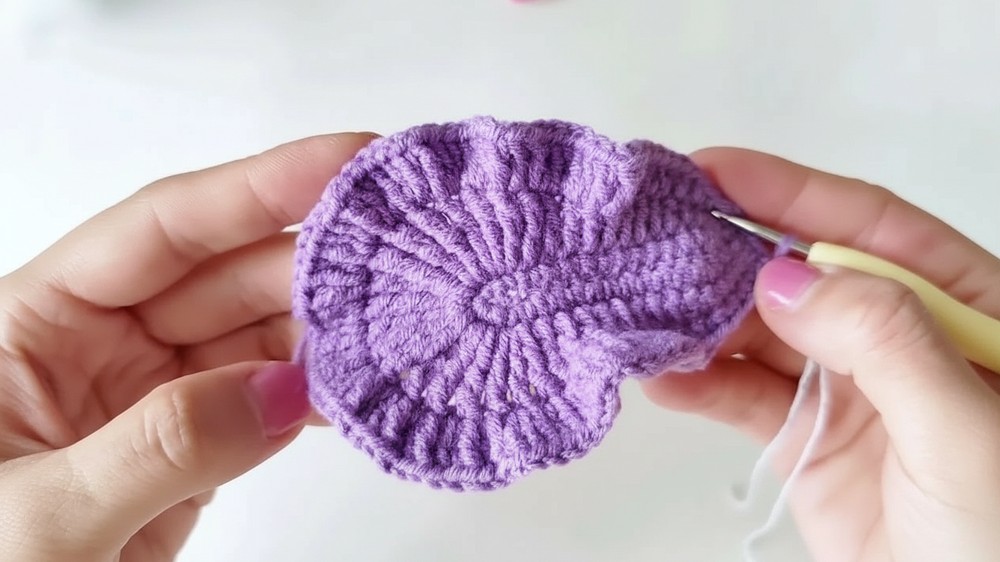
- Close with a slip stitch.
- Round 3 involves increases like:
- Single crochets, double increases, and placing 15 double crochets in one spot for volume.
- Repeat for symmetry on the other side.
3. Small Petals
Small petals follow a similar pattern but involve fewer increases and chains. Repeat the crochet technique used for large petals to make 3 small petals per flower.
4. Flower Torus
- Use green yarn for small flower leaves. Start with a slip knot followed by 11 chains.
- Crochet along the craft wire and work double crochet stitches across both sides, finishing each end with 3 single crochets in one space.
- Repeat to create two identical small leaves for each flower torus.
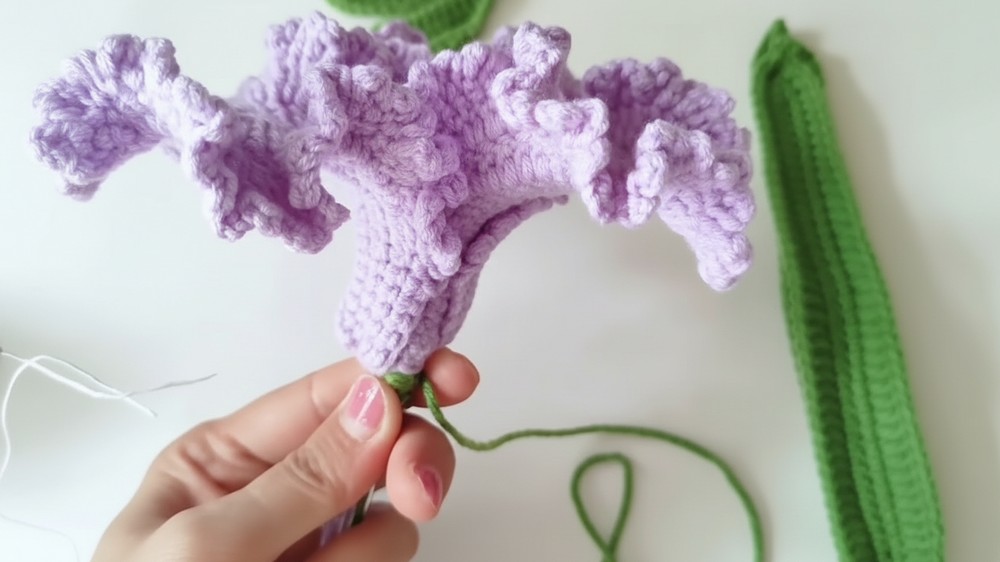
5. Creating the Flower Heart
- Make one piece of the flower heart using purple yarn. This smaller internal piece adds dimension and realism to the flower.
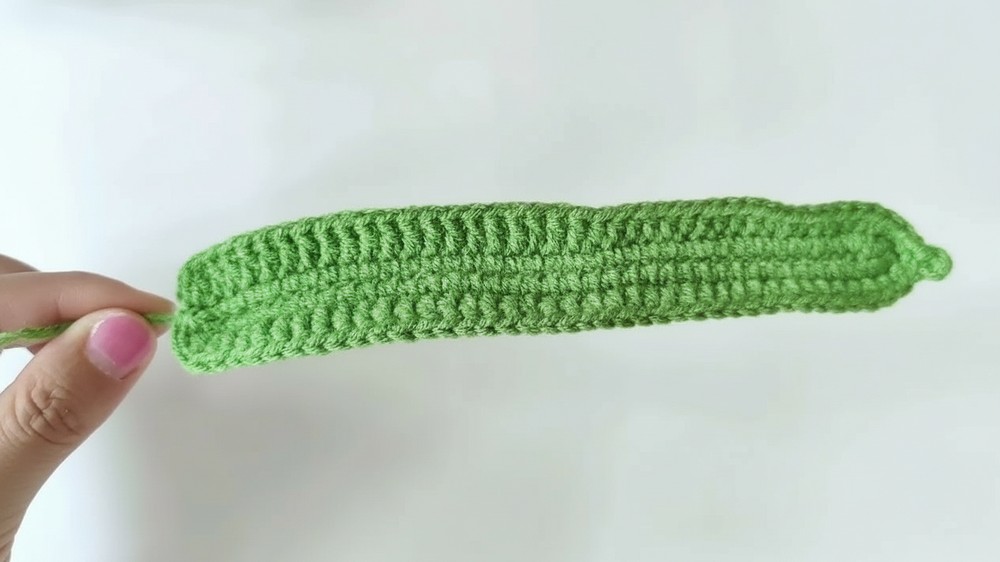
6. Adding Leaves
- For each flower, create two leaves using green yarn.
- Begin with a slip knot and chain 40 stitches.

- Crochet single stitches along the chain, inserting craft wire while moving.
- In round 2, work along the craft wire with:
- 20 double crochets, 10 half-double crochets, and 9 single crochets.
- Add a picot stitch at the tip of the leaf for refinement.
7. Assembly
- Assemble one flower or combine two flowers for a fuller arrangement. Balance the structure by using two pieces of stem wire to support the heavier design.

Level of Difficulty
This project is intermediate, as it combines basic stitches like single and double crochets with advanced techniques like picot stitches, triple crochets, and integrating craft wire for structure. Beginners can still attempt the project by pausing and repeating steps as shared in the tutorial.
Tutor’s Suggestions
- Use Markers: Beginners are recommended to use stitch markers to keep track of key spaces and areas for increases as crochet patterns can become detailed and complex.
- Hide the Tail: Always hide the tail while working on the opposite side for a cleaner finish.
- Pause As Needed: The tutor suggests pausing the video at certain steps to ensure each section is completed accurately.
Uses and Applications
- Decorations: The finished Iris flower can be displayed as a centerpiece or used to brighten up a room.
- Gifts: This handmade flower can be given as a thoughtful and personalized gift.
- Accessories: With slight modifications, it can be turned into brooches, hairpins, or embellishments for clothing.
Pro Tip
When integrating craft wire, ensure the wire is firmly secured and hidden within the stitches to prevent it from poking out and disrupting the aesthetic of the finished piece.
Conclusion
By following this detailed tutorial, you can crochet a stunning Iris flower that is both practical and beautiful. The careful combination of basic and advanced crochet stitches creates a realistic flower design, with the added structure from craft wire enhancing its durability. Whether you're making it for yourself or as a gift, this project is a rewarding way to develop your crochet skills.


