
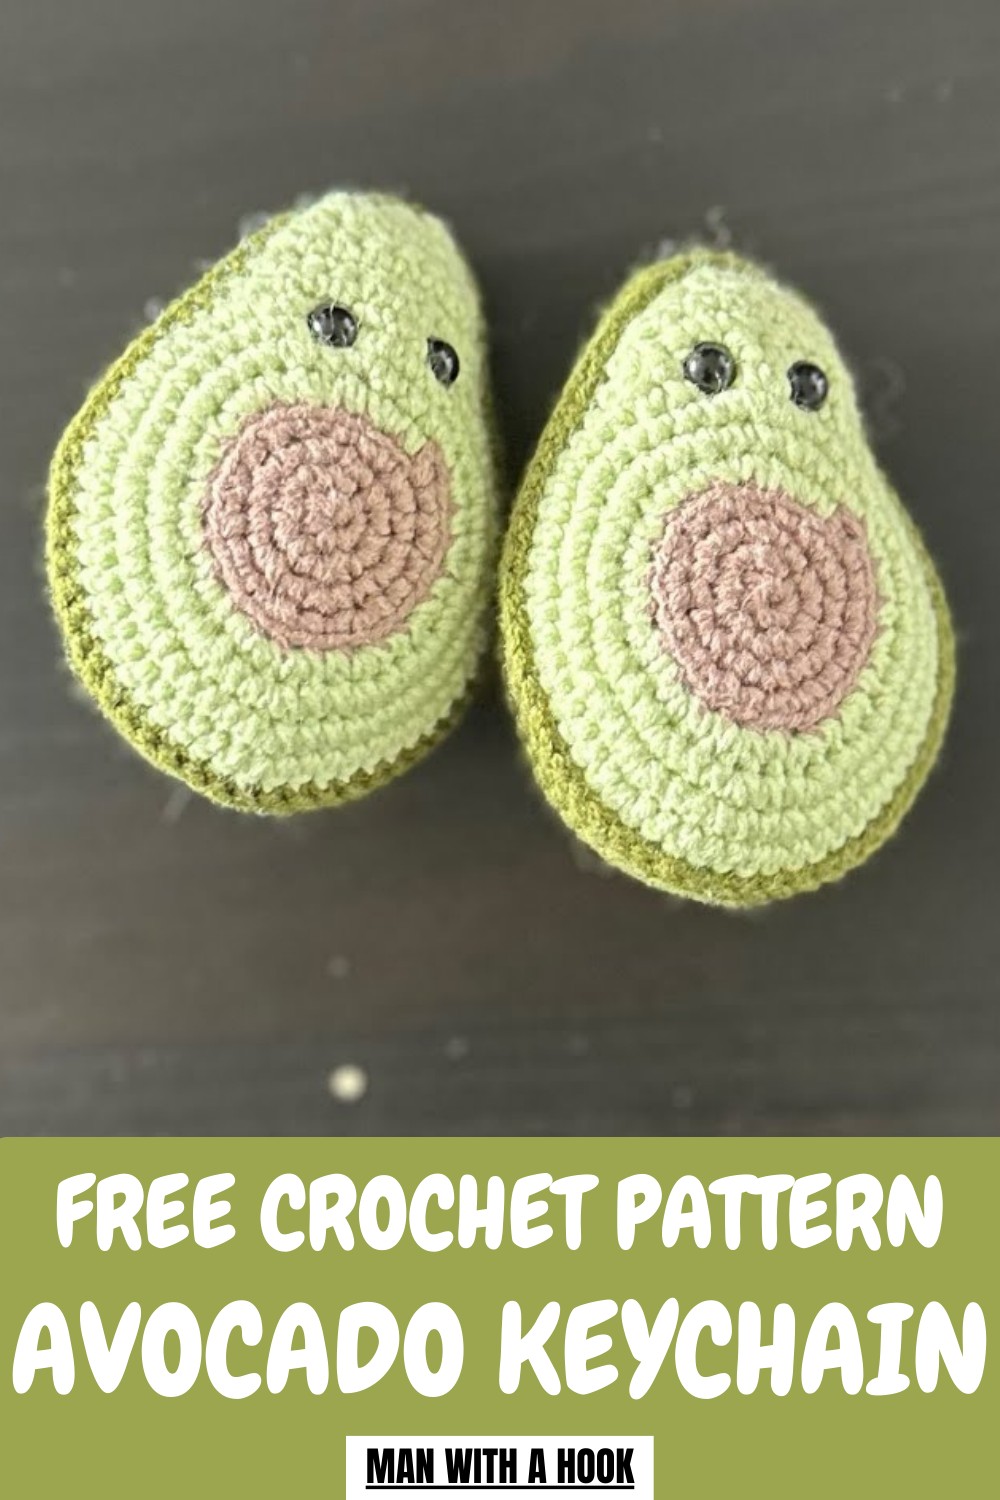
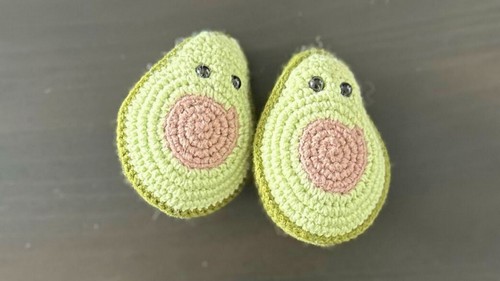
Carry a slice of fun with this Free Crochet Avocado Keychain Pattern, perfect for brightening your keys or adding a cute little gift idea.
A small accessory can leave a lasting impression, transforming ordinary items into stylish statements. A Crochet Avocado Keychain Pattern brings this to life, turning keys or bags into charming, eye-catching pieces. Its compact and versatile design allows it to attach effortlessly to keys, handbags, or backpacks, adding a subtle touch of sophistication.
Delightful Crochet Avocado Keychain Pattern You’ll Want to Make
Handmade crochet offers durability and a unique artisanal quality, giving each keychain a personal and exclusive feel. Crafting it is also a mindful and enjoyable way to enhance crochet skills while producing something practical. Beyond personal use, it serves as a refined gift, reflecting thoughtfulness and creativity. With its soft texture, vibrant hues, and elegant detailing, this keychain merges functionality with style, elevating everyday essentials into a tasteful expression of personality and charm.
How to Crochet an Avocado Keychain – Step-by-Step
Materials Needed
To crochet the avocado keychain, you’ll need:
- Light Green Yarn: For the avocado's belly.
- Dark Green Yarn: For the skin.
- Brown Yarn: For the seed (pit).
- Crochet Hook (size 2): Recommended by the tutor.
- Scissors: To cut the yarn.
- Safety Eyes (0.5 mm): Alternative: You can embroider the eyes if you don’t have safety eyes.
- Needle or Tapestry Needle: For sewing and assembly.
- Stuffing (Hollow Fiber): To fill the avocado, giving it structure.
Uses
- Keychain Accessory: A unique, personalized keychain to carry.
- Gifts: Perfect for gifting to friends or loved ones.
- Decor: Can be used as a small home decoration or attached to bags.
Special Features
- Compact Design: Small size makes it easy to carry and use as an everyday accessory.
- Customizable: You can adjust the colors, facial expressions, or size to make it unique.
- Durable: With careful stitching and filling, the product is sturdy and long-lasting, ideal for keychains.
- Two-Sided: The avocado features two attractive sides, making it a complete, polished design.
Level of Difficulty
The project is best suited for beginners to intermediate crocheters:
- Beginner-Friendly Techniques: The tutorial includes simple stitches such as magic rings, increases, and decreases, explained step-by-step.
- Attention to Detail for Intermediates: The assembly, alignment, and incorporation of facial features challenge more experienced crafters.
Tutor’s Suggestions & Tips
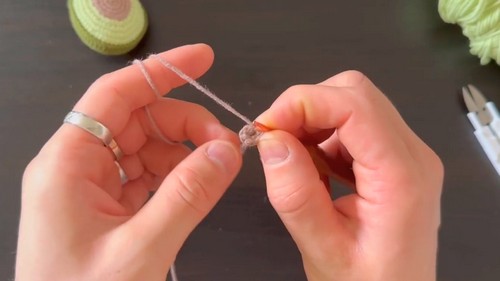
- Magic Ring Start: Begin pieces, such as the brown seed, with a magic ring for a clean, professional look.
- Mark Rows: Mark each round to avoid losing track of your stitches and rows, especially during increases.
- Stuffing: Add hollow fiber gradually and ensure the filling is firm to create a sturdy shape for the keychain.
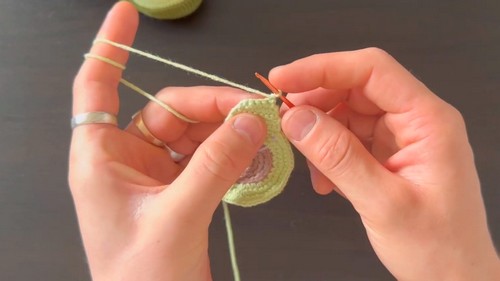
- Safety Eyes: Insert the eyes carefully between the third and fourth rows of the green section, leaving three stitches in between. Adjust based on your preference.
- Neat Increases: Shift your increases slightly in each round to avoid creating visible lines along the surface of the avocado.
- Even Edges: When crocheting rows back and forth for the edges, follow the decrease instructions carefully for a smooth finish.
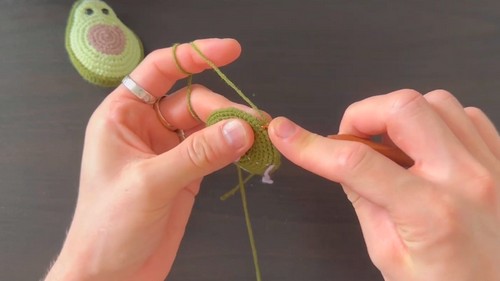
- Assembly: Attach both avocado sides carefully with neat stitches, leaving a small opening to add stuffing and close securely.
Step-by-Step Instructions
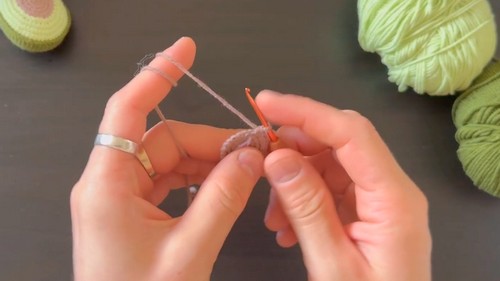
1. Crochet the Seed (Brown Section):
- Start with a magic ring and create 6 stitches.
- Work 6 increases (12 stitches in total).
- Follow this pattern: 1 stitch, 1 increase six times (18 stitches).
- Continue the increase rows, ensuring smooth transitions. Shift the increases slightly to avoid visible lines.
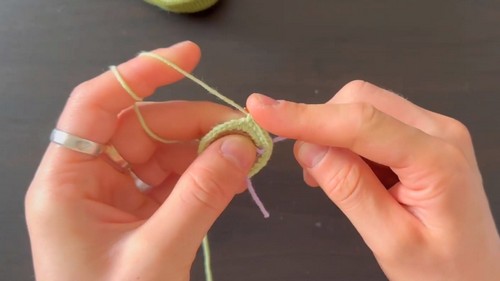
2. Add the Avocado Belly (Light Green Section):
- Switch to light green yarn on the last stitch of the brown section. Tie the yarn securely.
- Crochet one row with increases to create a defined line between the belly and the seed. Use only the back half of each stitch to mark the edge.
- Follow the increase pattern: 1 stitch, 1 increase in every other stitch for one row. Continue with more rows, adjusting for 2 stitches and one increase, and so on.
- Crochet rows back and forth to shape the top indentation, making decreases where needed to smooth the edges. Stop when you complete the belly shape.
3. Create the Avocado Skin (Dark Green Section):
- Start with the darker green yarn for the skin. Begin with a magic ring and 6 single stitches.
- Work increases row by row until the diameter matches the belly section.
- Crochet rows back and forth on one end to align with the top of the belly. Decrease at the edges to achieve symmetry.
4. Assemble the Two Sides:
- Crochet the dark green side and light green side together. Align the edges carefully.
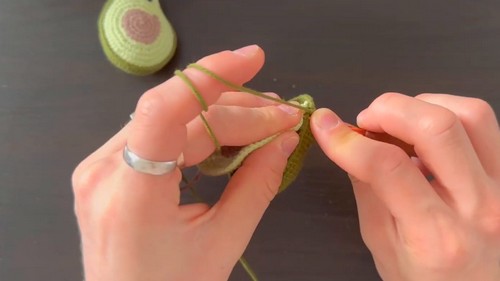
- Leave the top open to add stuffing before sealing it completely.
- Fill it firmly with hollow fiber stuffing for durability and a puffy 3D shape.
- Complete the final stitches and close the opening securely.
5. Add Facial Details and Finalize:
- Attach the safety eyes to the belly section (between the 3rd and 4th row), ensuring equal spacing of three stitches.
- Optionally, you can embroider or sew the eyes and add other details, like a smile.
- Attach the keychain ring to the top for easy usage.
Conclusion
Congratulations! You’ve completed the adorable avocado keychain. This project combines practicality, creativity, and a bit of fun, offering a perfect way to improve your crochet techniques. It’s small enough to carry around, but the vibrant design will attract attention and compliments. While straightforward, the tutorial still challenges you with elements like alignment and assembly to perfect your amigurumi skills.
Pro Tip
If you want to avoid visible color transitions when switching yarns, finish the last stitch of the current row with the new color yarn, pulling it through the final loop. This simple trick keeps your work looking polished and professional.


