
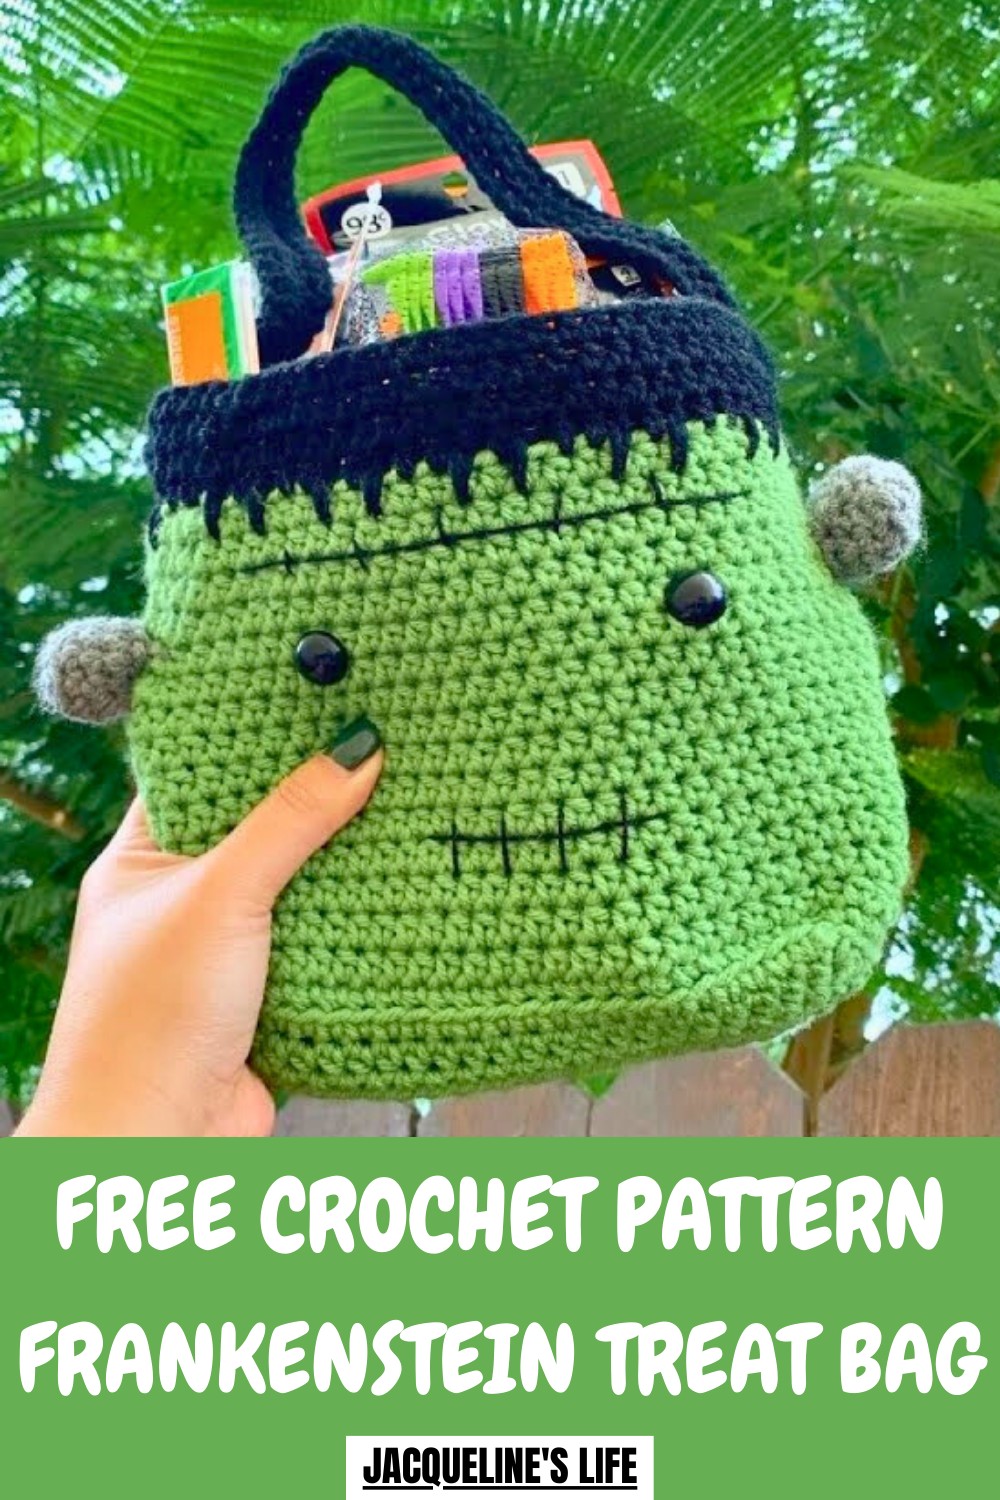
Have a monstrous good time with the Free crochet Frankenstein Treat Bag Pattern, making a playful and spooky bag perfect for sweets, gifts, or party fun.
A spooky yet playful little bag brings Halloween fun to life, perfect for holding treats and small surprises. With its square-shaped body, stitched details, and fun Frankenstein-inspired face, it captures the holiday spirit while staying cute and approachable. Ideal for parties, trick-or-treating, or as a festive gift holder, it combines decoration and functionality in one compact accessory.
Easy Crochet Frankenstein Treat Bag Pattern for Festive Fun
Lightweight and easy to carry, it keeps candies and small goodies secure while adding personality to any celebration. Making it offers a fun and satisfying project, giving a chance to practice basic stitches, improve focus, and enjoy a hands-on creative experience.
Bold colors and neat finishing enhance its visual appeal, while the drawstring closure adds practicality and charm. This little treat bag balances festive fun with usefulness, turning a simple accessory into a cheerful, memorable piece that brightens Halloween celebrations and everyday spaces with a touch of handmade magic.
How to Crochet a Frankenstein Treat Bag - Step-by-Step Guide
Materials Used
To create your Frankenstein Treat Bag, gather the following materials:
- Yarn:
- Green yarn for the body (e.g., Red Heart Super Saver in Spring Valley or Caron’s One Pound yarn).
- Gray yarn for the bolts (from Caron’s One Pound or similar).
- Black yarn for the hair and face details.
- Optional: Embroidery thread (if you prefer an embroidery finish for the face).
- Tools:
- 5mm Crochet Hook
- 16mm Safety Eyes
- Stitch Marker
- Threading Needle
- Scissors
- Optional Extras:
- Felt and glue (for alternative face design).
- Stuffing (if you want the bolts to protrude more).
Uses for the Frankenstein Treat Bag
This treat bag is as functional as it is festive!
- Halloween Candy Carrier: Fill it up with glow sticks, candy, mini gifts, erasers, and other treats for kids or loved ones.
- Personalized Gift Bag: Customize the color and style to make it personal and reusable for small presents.
- Themed Décor: Use it as a Halloween decoration on tables or as part of a costume.
Special Features
- Beginner-Friendly Design: The tutorial eliminates complex techniques like the magic circle to make it accessible.
- Customizable Face: You can choose between using black yarn, embroidery thread, or even felt for the face.
- Textured Details: The hairline, bolts, and seams—all crocheted—add depth and character to the design.
- Versatile Construction: The size and style of the bag can be adjusted simply by changing the size of the chain or yarn weight.
- Durable Build: Designed to hold multiple items like candy or toys without losing its shape.
Level of Difficulty
Beginner-Friendly
- This project is ideal for those new to crochet, as it primarily uses simple stitches like chains, single crochets, and half-double crochets.
- The tutor introduces straightforward techniques (such as chaining two and single crocheting into the second chain) instead of the magic circle, making it less intimidating for beginners.
- However, attention to detail is required for sewing pieces accurately, especially when attaching the bolts and handle.
Tutor’s Suggestions
The tutor offers key tips to simplify the process and improve your results:
- Use Caron’s One Pound Yarn for Better Results: While both Caron and Red Heart Super Saver yarns are weight-4, the tutor prefers Caron for its thickness and uniform results.
- Keep Safety Eyes Secure: Trim or shave down the sharp backings of safety eyes to prevent poking or replace them with felt or yarn alternatives if desired.
- Expect Interior Work to Show: Embroidery or yarn used for facial features will show on the inside of the bag—it’s not an issue, but consider using felt decorations if this bothers you.
- Work Gently on the Face Details: Adjust the eyes and mouth placement multiple times to ensure perfect alignment before securing.
- Count Stitches Carefully: Use stitch markers for borders, decreases, and rows to maintain evenness, especially when transitioning between colors or working on the base.
- Hairline Flexibility: Allow creative freedom when crocheting Frankenstein’s hairline—make it longer, shorter, or wavy to suit your preference without following the exact pattern.
Step-by-Step Instructions
1. Crochet the Base and Body of the Bag
- Start with a Chain: Create a starting chain of 23 stitches using green yarn and form a slip knot to begin.
- Work Half Double Crochets (HDC):
- Work into the second chain from the hook and continue HDC across the chain. You’ll end with 22 stitches.
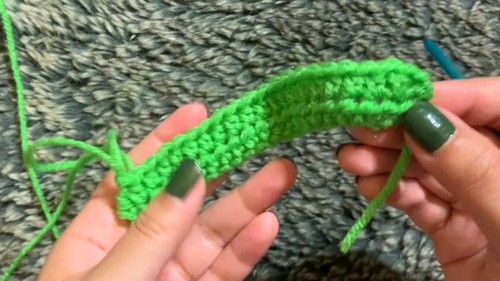
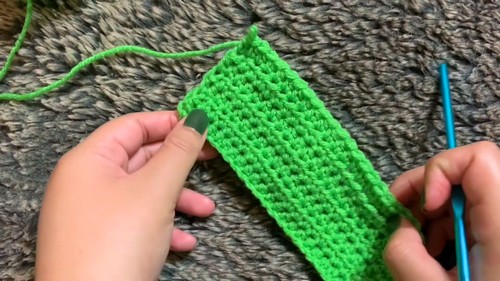
- Turn your work, chain one, and repeat the rows of HDC until you complete seven rows total.
- Work into the second chain from the hook and continue HDC across the chain. You’ll end with 22 stitches.
- Single Crochet Around the Border:
- After completing the green rectangle, single crochet around the edges (7 on the short sides, 20 on the long sides). Chain two at the corners to keep the border even, resulting in 60 stitches total.
- After completing the green rectangle, single crochet around the edges (7 on the short sides, 20 on the long sides). Chain two at the corners to keep the border even, resulting in 60 stitches total.
2. Build the Sides by Working Upwards
- Turn your base upward and work half double crochets into the back loops only for the first row. This creates the upward curve.
- Place a stitch marker at the start and repeat regular HDCs in the next rows. Slip stitch to join at the end of each row and chain one to begin a new row.
- Add Height: Continue until you complete:
- 15 rows (if using Red Heart yarn).
- 14 rows (if using Caron One Pound yarn).

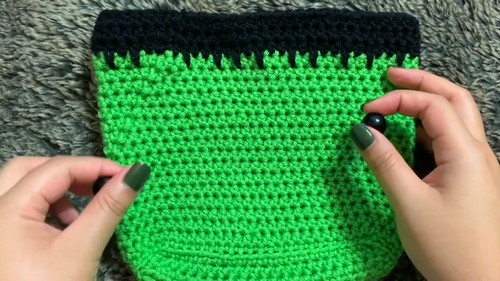
3. Add Frankenstein's Hairline
- Attach black yarn to start the hair at the top of the bag.
- Create a jagged hairline by alternating regular HDCs and extended HDCs (working into the row below the current stitch).
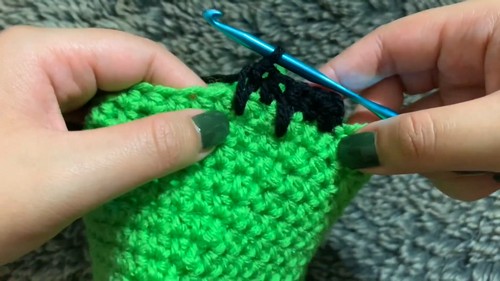
- Repeat the pattern around the row and slip stitch to close.
- Add two full rows of regular HDCs in black for hair thickness.
4. Create and Attach the Bag Handle
- Using black yarn, create a slip knot and chain 55 stitches (adjust for desired length).
- Skip the first chain and work a row of HDC across the chain. If necessary, create a second row of HDC for a thicker handle.
- Sew the handle securely to the inside of the bag, attaching both ends just below Frankenstein’s hairline. Tie off and weave in the excess yarn.
5. Add the Face
- Use safety eyes (16mm) or alternatives like felt circles for Frankenstein’s eyes. Adjust the placement before securing them.
- Create the mouth using black yarn or embroidery thread. For a seamless look, use a threading needle to sew the mouth inside the stitches.
- Secure loose threads inside the bag with knots, and trim off excess yarn.
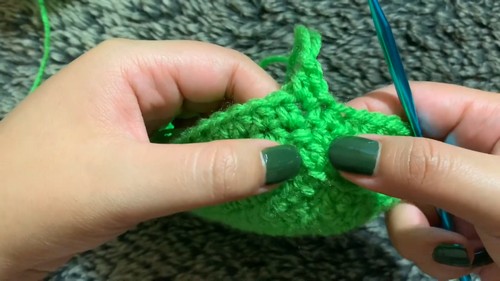
6. Crochet the Bolts
- Use gray yarn to create each bolt.
- Start with a slip knot and chain 2.
- Single crochet 6 stitches into the first chain to form a small circle.
- Increase to 12 stitches in the second row, then single crochet around for the third row.
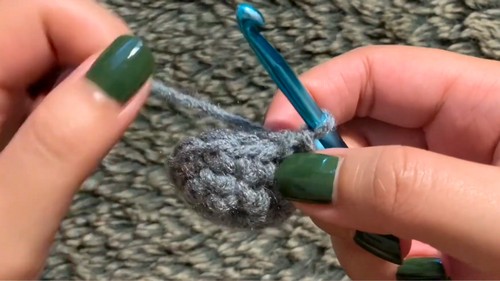
- Close the bolts by decreasing stitches in the final row, leaving a long tail for sewing. Attach each bolt to the sides of the bag below the hairline.
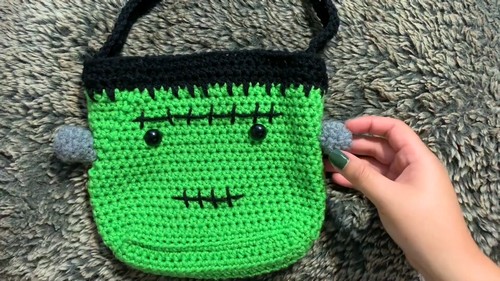
Conclusion
Your handmade Frankenstein Treat Bag is now complete! This playful Halloween-themed project blends utility and style, holding a surprising amount of treats or goodies. Whether you use it for gifting, candy collection, or decoration, this personalized bag is sure to stand out and bring smiles. The design is perfect for beginners and allows room for creativity with customizable details like hairlines, facial features, and handle length.
Pro Tip
Add a layer of fabric or felt to the inside of the bag if you want to hide the stitches from the facial embroidery or knots. This gives the interior a cleaner and more polished look!


