
How to Crochet Halloween Spider Web Pattern for Spooky Decor
Level up your haunted house and save on decorations using the Free Crochet Halloween Spider Web Pattern for standout seasonal style.
Halloween decorations often bring a mix of fun and spooky vibes, and making your own spider web adds a unique handmade touch to the festive atmosphere. This crochet spider web pattern stands out with its intricate loops, delicate chains, and layered treble and double crochet stitches, which create an airy yet detailed design. Despite its complex look, the main stitches used—single crochet, double crochet, treble crochet, and chain stitches—are easy to learn, making it a great project even for beginners curious about advanced patterns.
Unique Crochet Halloween Spider Web Pattern for Your Home

The web begins with a magic ring, forming the tight center with 16 single crochet stitches. From there, the pattern builds outward in rows featuring chains and various crochet stitches that shape the web’s rays and connecting loops. Slip stitches tie each row neatly, while longer chains form the open spaces you’d expect in a spider web, giving the piece a realistic and delicate finish. The gradual increase in chain lengths and stitch types enhances the dimensional effect, making it both decorative and eye-catching.
Other Projects Inspired by This Pattern
Using similar stitches and the magic ring start, you can adapt this pattern to make doilies, lace coasters, or delicate wall hangings. Changing yarn thickness and colors allows you to create different moods—from elegant to festive. This pattern is a flexible base for learning how to work with open spaces and layered stitches in crochet, offering endless possibilities for creative decorative items.

Crochet Pattern: Creepy Spider Web
This Creepy Spider Web pattern is perfect for Halloween decor or any spooky-themed project. The intricate pattern mimics the delicate and eerie web spun by a spider, and you’ll learn essential crochet techniques like magic ring, double crochet, treble crochet, and chain spaces to achieve the web-like effect. This project is versatile—use it as a hanging decoration, table accent, or window display!
Skill Level & Terminology
- Skill Level: Beginner-Intermediate
- Terminology: Pattern uses US crochet terms.
Materials & Tools
- Yarn:
- Black or white yarn (size: light worsted or fingering weight recommended for a delicate web-like effect)
- Crochet Hook: 3.00 mm hook or appropriate size for your yarn
- Tapestry Needle: For weaving ends and securing loose threads
- Scissors
Gauge
Gauge is not essential for this project, but consistent stitch tension will ensure the web looks neat and symmetrical.
Abbreviations List
Here’s a glossary of abbreviations featured in this pattern:
- ch: Chain
- sc: Single Crochet
- dc: Double Crochet
- tr: Treble Crochet
- trtr: Triple Treble Crochet
- sl st: Slip Stitch
- yo: Yarn Over
Special Stitch Instructions
Magic Ring
The magic ring allows starting a round without a visible hole in the center. To make a magic ring:
- Wrap the yarn around your fingers to form a loop.
- Insert the hook into the loop, yarn over, pull through the loop, and start working your stitches into the ring.
Treble Crochet (tr)
- Yarn over twice, insert hook into the stitch, yarn over, pull up a loop (4 loops on hook).
- Yarn over, pull through 2 loops (3 loops remain).
- Yarn over, pull through 2 loops again (2 loops remain).
- Yarn over, pull through the remaining 2 loops.
Triple Treble Crochet (trtr)
- Yarn over 3 times, insert the hook into the stitch, yarn over, pull up a loop (5 loops on hook).
- Yarn over, pull through 2 loops (4 loops remain).
- Repeat yarn over and pull through 2 loops until only 1 loop remains.
Finished Size
The completed spider web will measure approximately 12–14 inches in diameter, depending on your gauge and yarn weight.
The Pattern
Step 1: Creating the Center of the Web
- Create a magic ring using your chosen yarn.
- Round 1:
- Ch 1 and work 16 sc into the magic ring.
- Pull the loose tail tightly to close the ring, ensuring the center is closed.
- Join the round with a sl st into the first sc.
For Beginners: The magic ring is the foundation of the spider web. If you find it challenging, feel free to replace it with a chain-6 loop to work into.
Step 2: Expanding the Web
- Round 2:
- Ch 3 (counts as the first dc), then dc into the next stitch, ch 1.
- Repeat 1 dc, ch 1 in each stitch from the previous round. You should have 16 dc and 16 chain spaces.
- End the round with a sl st into the top of the starting ch 3.
- Round 3:
- Ch 6 (counts as the first tr + ch 3).
- Work 1 tr into the next stitch, ch 3.
- Repeat 1 tr, ch 3 in each stitch around, finishing with a sl st into the top of the ch-6 from the start.


For Beginners: Each row expands outward to resemble the growing size of a spider web. Ensure your chains are consistent to avoid bunching or uneven spaces.
Step 3: Adding Chain Spaces
- Round 4:
- Ch 8 (counts as the first trtr + ch 5).
- Work 1 trtr into the next stitch, then ch 5.
- Continue around the row with 1 trtr followed by ch 5 in each stitch. For Halloween flair, remember symmetry is key!
- End with a sl st into the 8th chain from the start of the row.
- Round 5:
- Ch 10 (counts as the first trtr + ch 7).
- Work 1 trtr into the next stitch, followed by ch 7.
- Repeat this pattern across the row: 1 trtr, ch 7.
- Close the round with a sl st into the 10th chain of the starting row.
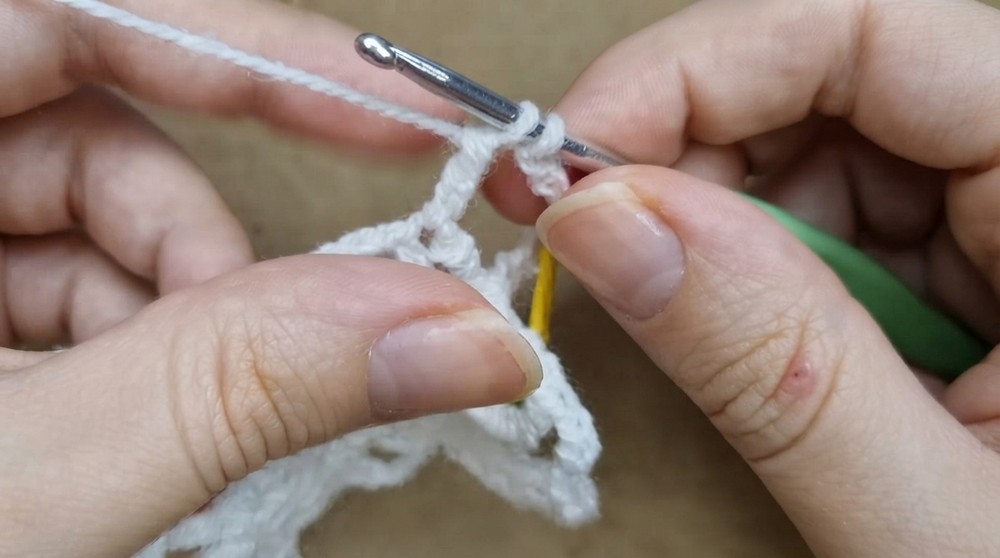
For Beginners: These chain spaces represent the negative space in a web. They give the web its iconic, intricate look. Take your time with treble and triple treble crochet stitches for smooth results.
Step 4: Final Web Details
- Round 6:
- Ch 3, then make 7 dc into each ch space.
- After completing 7 dc into a space, work 1 dc into the stitches between spaces. Continue this pattern around the web.
- Round 7 - The Edge:
- Ch 1, work 4 sc into the next 4 stitches, then ch 4.
- Sl st into the next stitch and work 3 sc in the next 3 stitches.
- Skip the next chain, then work 4 sc into the next 4 stitches. Repeat this pattern.
- Finish:
- Ch 1, cut the yarn, and tie it securely.
- Use your tapestry needle to weave in all loose ends.

For Beginners: These rounds form the intricate spider web texture while finishing the edges. Take note of the row count to keep symmetrical results.
Assembly & Finishing
- Fasten Off and Attach:
- Tie off the yarn securely and weave in the loose ends using a tapestry needle. This will keep your web intact while you use it as decor.
- Display:
- You can hang the spider web decoration using a loop of yarn or attach it on flat surfaces like tables, windows, or walls.

Troubleshooting & Solutions
Problem 1: Magic Ring Won’t Close
If the ring remains loose, double-check that you’ve anchored the stitches correctly around the loop before pulling the loose yarn tight. If it’s challenging, use a chain-6 circle instead.
Problem 2: Uneven Spacing
Uneven spacing may occur if you miss or accidentally add chains. Count your stitches at the end of each row to ensure accuracy.
Problem 3: Web Doesn’t Lie Flat
If the web starts curling or ruffling, check the tension of your stitches. Revisit the row where the issue started and adjust to keep it flat.
What You'll Learn
- Magic Ring Technique: A foundational technique for crochet projects worked in the round.
- Treble and Triple Treble Crochet Stitches: These stitches add height and elegance to your web design.
- Chain Spaces: Learn to create the open spaces characteristic of a spider web.
- Edges and Finishing Techniques: Add neatness and stability to your project.
Why You'll Love This Pattern:
The creepy spider web bookmark is a perfect blend of spooky yet elegant pattern. It's fun to crochet with just enough complexity to make it interesting. You'll love creating delicate and intricate patterns while practicing your stitches!
This spider web is not only beautiful but scalable. You can use thinner yarn for smaller designs or thicker yarn for larger displays—making it versatile for any spooky setting.