
Free Crochet Tiny Flower Ring Pattern For Playful Fashion
Fresh ideas deliver a free crochet tiny flower ring pattern, adding a pop of handmade whimsy to your accessory lineup instantly.
Creating tiny, delicate jewelry by hand is such a joyful way to express your creativity, especially when the result is as charming as a crochet flower ring. This dainty accessory captures the effortless beauty of a blooming flower with just a few simple stitches. The pattern mainly uses single crochet and chain stitches worked in a magic ring, which is ideal for beginners because it’s easy to follow but still produces an intricate, elegant look. The small flower sits atop a sturdy yet flexible band, perfect to wear as a sweet statement piece or gift to someone special.
Learn The Art Of Crochet Tiny Flower Ring Pattern For Beginners

The ring starts with a magic ring worked in soft pink yarn to form the flower petals through chain loops and single crochets. Then, a contrasting green band is created with rows of single crochet stitches, growing into a neat ring shape that fits comfortably. Adding a small bead in the flower’s center and even a touch of eyeshadow for depth brings a personalized and polished finish to this lovely piece. Using embroidery thread and a tiny crochet needle gives the ring a fine, delicate texture that’s surprisingly durable for daily wear.
Working on this project is a wonderful way to practice your tension, confidence with the magic ring technique, and basic stitch repetition. Its quick completion makes it perfect for crocheters who want to try something new and rewarding without a huge time commitment. Whether worn solo or stacked with other rings, this flower ring adds a handcrafted touch of nature’s charm to your style.
Creative Possibilities Beyond the Ring
Once you’ve mastered this beautiful flower motif, you can easily expand your skills to make crochet flower appliqués, hair accessories like headbands or clips, or even decorate bags and scarves. By adjusting size and colors, these tiny flowers become versatile embellishments to brighten up many projects. Experiment with beads, subtle shading, or layering for unique handmade creations that showcase your growing crochet talents.

Crochet Pattern: Flower Ring
Introduction
This step-by-step crochet flower ring pattern is perfect for beginners looking to practice the magic ring technique, basic crochet stitches, and assembly of small decorative pieces. The ring features a charming flower accent that can serve as a whimsical accessory or a handmade gift. With optional tips for customization like beads and makeup for added depth, this project offers endless creative possibilities!
Uses of This Pattern
- Fashion Accessory: Wear as a statement or casual crochet ring.
- Gift or Souvenir: Perfect for occasions like birthdays, baby showers, or weddings.
- Decor: Use these flowers as accents for bags, hats, or even as brooches.
Skill Level & Terminology
- Skill Level: Beginner. This project only uses basic stitches like chains, single crochet, and slip stitch.
- Terminology: This pattern follows US crochet terms.
Materials & Tools
These are the materials required to create your flower ring:
- Yarn:
- Pink yarn for the flower.
- Green yarn for the band.
- Crochet Hook: Size 1.25 mm, or corresponding to your yarn size.
- Scissors: To trim excess yarn neatly.
- Tapestry Needle: For finishing and attaching parts of the piece.
- Optional Materials:
- Silicone Glue: For attaching the flower securely to the band.
- Small Bead: For embellishing the center of the flower.
- Eyeshadow: A creative touch to give depth to the flower center.
Gauge
Gauge is not critical for this project as it is decorative, but tight stitches are preferable for the flower’s crisp structure.
Abbreviations List
Quick reference of abbreviations:
- ch: Chain
- sc: Single Crochet
- sl st: Slip Stitch
- MR: Magic Ring
Special Stitch Instructions
Magic Ring (MR):
The magic ring is used to create a tightly closed loop for the flower. Wrap the yarn around your fingers to form a ring, insert the hook into the circle, yarn over, and pull through to lock the ring in place.
Finished Size
The completed ring will measure approximately 2-2.5 inches in diameter at the flower and fit most finger sizes when the band is wrapped around.
The Pattern
Step 1: Making the Flower with Pink Yarn
- Create a Magic Ring (MR):
- Wrap the pink yarn around your fingers to form a loop. Insert the hook into the ring, yarn over, pull through, and chain 1 to lock the ring.
- Start the Petal:
- Ch 3 from the magic ring.
- Yarn over, return to the magic ring, yarn over again, and pull through all loops at once (creating a single crochet).
- Ch 3 and sl st into the magic ring to complete the first petal.

- Repeat for 5 Petals:
- Work 3 chains, 1 single crochet, then 3 chains and sl st into the magic ring. Repeat this process for a total of 5 petals.
- Close the Ring:
- Pull the tail of the magic ring to tighten the center. Cut the yarn, leaving a small tail for weaving in later.
For Beginners: Each petal forms using chains and simple loops in the magic ring. Tighten the magic ring securely for a neat finish.

Step 2: Crocheting the Band with Green Yarn
- Create the Base:
- Make a slip knot and attach the green yarn to your hook. Work 3 chains for the foundation of the band.
- Start the Band:
- Skip the first chain and work sc in the next two chains.
- Build the Band Rows:
- Ch 1, turn, and work 2 sc stitches in the row.
- Continue this pattern (ch 1, turn, 2 sc per row) until you complete 14 rows of single crochet, forming the length of the band.
- Finish the Band:
- Cut the yarn, leaving about a 15 cm tail for sewing. Use a tapestry needle to secure and finish the ends.
For Beginners: Crocheting rows back and forth with single crochet stitches creates the flat rectangular band. Adjust the number of rows for a larger or smaller ring size.

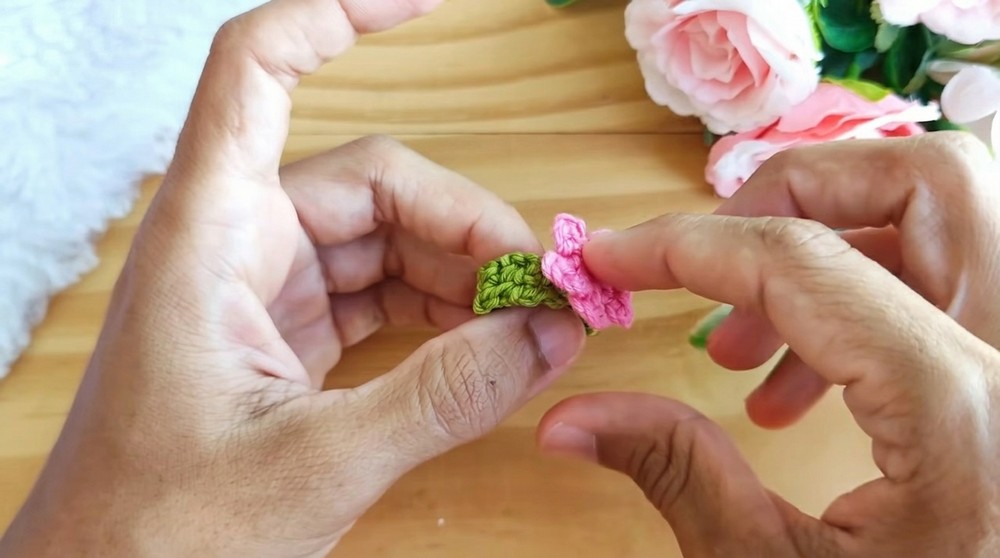
Step 3: Attaching the Flower to the Band
- Position the Flower:
- Center the pink flower on one end of the green band.
- Glue or Sew:
- Using silicone glue, attach the flower to the band. Alternatively, use a tapestry needle to carefully sew the flower to the band for secure finishing.
Tip: Gluing is quicker and works well for decorative usage, while sewing provides extra durability for everyday wear.
Step 4: Customizing the Flower
- Add Depth:
- Use a small amount of eyeshadow or blush to lightly brush the center of the flower for added depth and shading.
- Attach a Bead:
- Thread a small bead onto the tapestry needle and sew it into the center of the flower for embellishment. Alternatively, glue the bead securely with silicone glue.
Creative Add-Ons: These optional details elevate the design and make your piece unique.
Step 5: Final Assembly
- Secure Loose Ends:
- Use the tapestry needle to weave in and trim any loose threads for a clean finish.
- Adjust the Band:
- Wrap the band around the finger to check the fit. Adjust if necessary, and sew the band’s ends together securely.
What You’ll Learn From This Pattern
- Mastering the Magic Ring: Learn to create a seamless center for circular crochet designs.
- Basic Stitch Practice: Refine foundational crochet techniques like chains, single crochet, and slip stitch.
- Customizing and Assembling: Explore creative ways to add accents and assemble smaller projects.
This tutorial enhances your crochet skills while allowing room for personal creativity. Small projects like this are ideal for beginners and serve as a gateway into larger and more complex crochet designs.
Difficulties You May Encounter
Difficulty: Securing the Magic Ring
Loose magic rings can unravel.
- Solution: Practice pulling the initial knot tightly after inserting all stitches into the ring.
Difficulty: Uneven Band Rows
Rows in single crochet may appear uneven with inconsistent tension.
- Solution: Focus on maintaining steady tension and pulling yarn evenly through loops.
Difficulty: Attachment Challenges
Glue or sewing may not hold securely.
- Solution: Use silicone glue sparingly and give it time to dry completely. For sewing, ensure stitches are tight and evenly spaced.
Final Notes: Why You’ll Love This Piece
This crochet flower ring is a simple yet rewarding project that combines fine detailing with beginner-friendly steps. It is quick to create, and the optional embellishments allow for endless personalizations—beads, shading, and color variations can make each ring unique.
Whether crafting gifts, experimenting with crochet techniques, or brightening your wardrobe with handmade accessories, this pattern teaches valuable skills and provides a lovely finished product you'll be proud to wear or gift.
