
How To Stylish Crochet Earrings Pattern for Creative Outfits
Upgrade your accessory collection with the Free Crochet Earrings Pattern for chic, lightweight designs anyone can wear.
Adding a touch of handmade charm to your accessories can instantly brighten your style. These earrings bring together soft yarn colors and simple crochet techniques to create a delicate yet eye-catching design. The combination of double crochet stitches with slip stitches and chains forms lovely patterns that look intricate but are easy to make. These earrings are light, comfortable to wear, and perfect for sprucing up everyday outfits or for special moments when you want a subtle pop of color.
Other Fun Items to Make with This Pattern
This pattern is quite adaptable and isn’t limited to earrings alone. By changing the size or joining several motifs, you can make coasters, small decorative doilies, or even add charming edging to scarves and hats. Playing with colors and yarn weights lets you create matching accessories or unique gifts that carry the same lovely style and texture. This pattern offers plenty of room to be creative and try new things with your crochet skills.
Stunning Crochet Earrings Pattern for Handmade Fashion
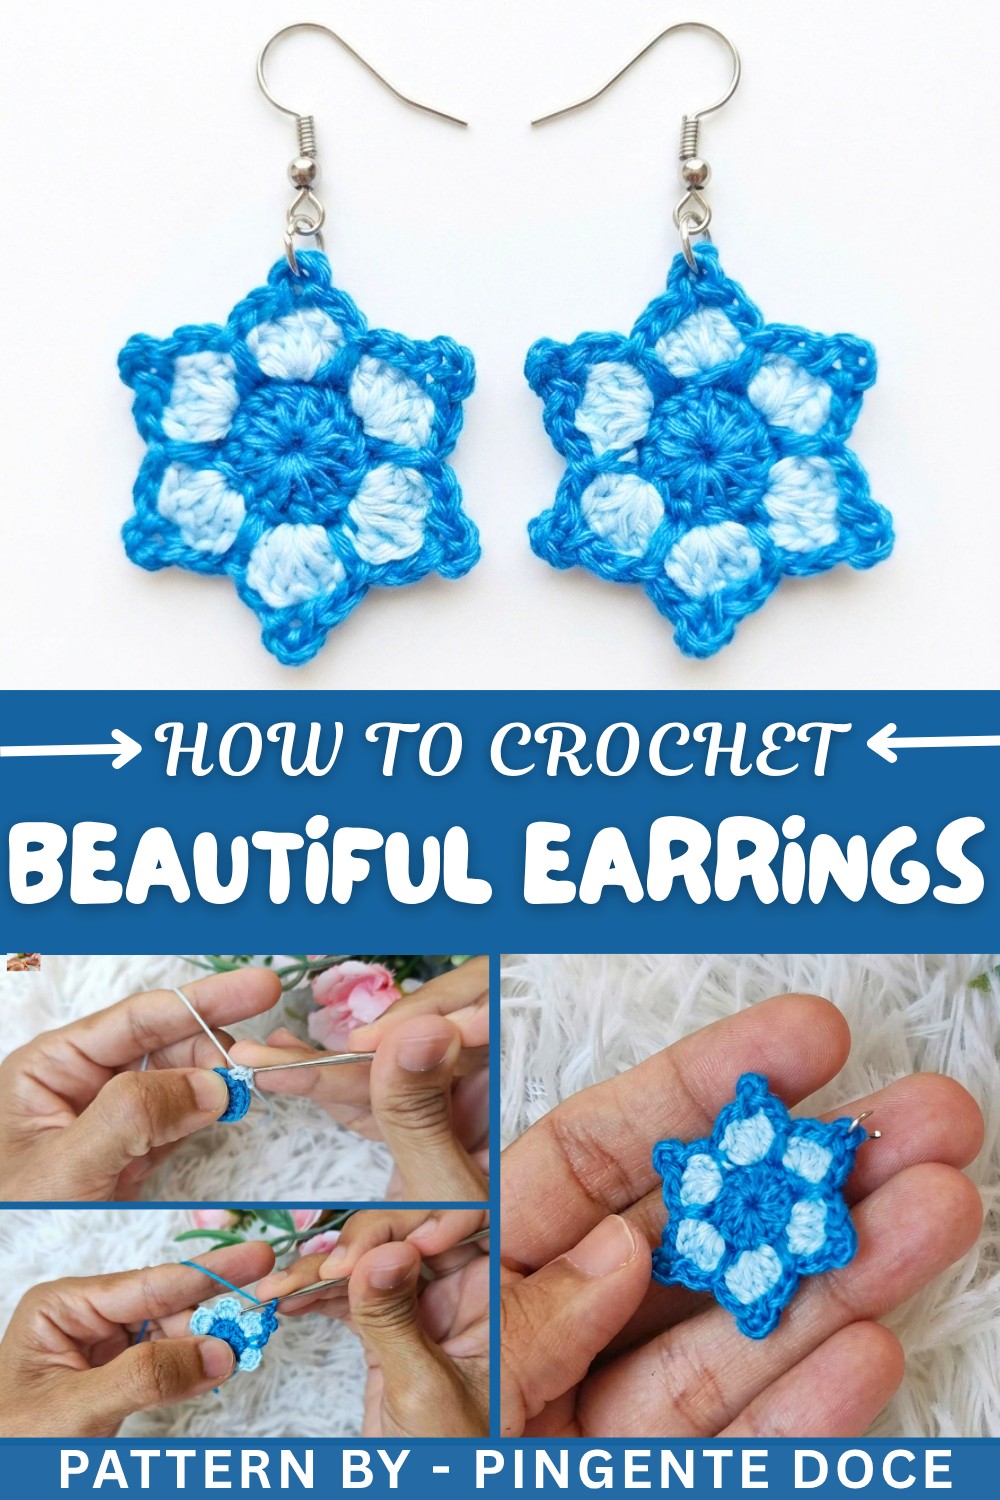
The project begins with a magic ring, then moves into rounds where groups of stitches build textured loops and shapes. By working clusters of double crochets together and pairing them with slip stitches and chain spaces, the earrings take on a beautiful, airy look. Using two or three different yarn shades adds dimension and fun, while the careful finishing with a glue and water mixture helps keep the shape steady without making the piece stiff.
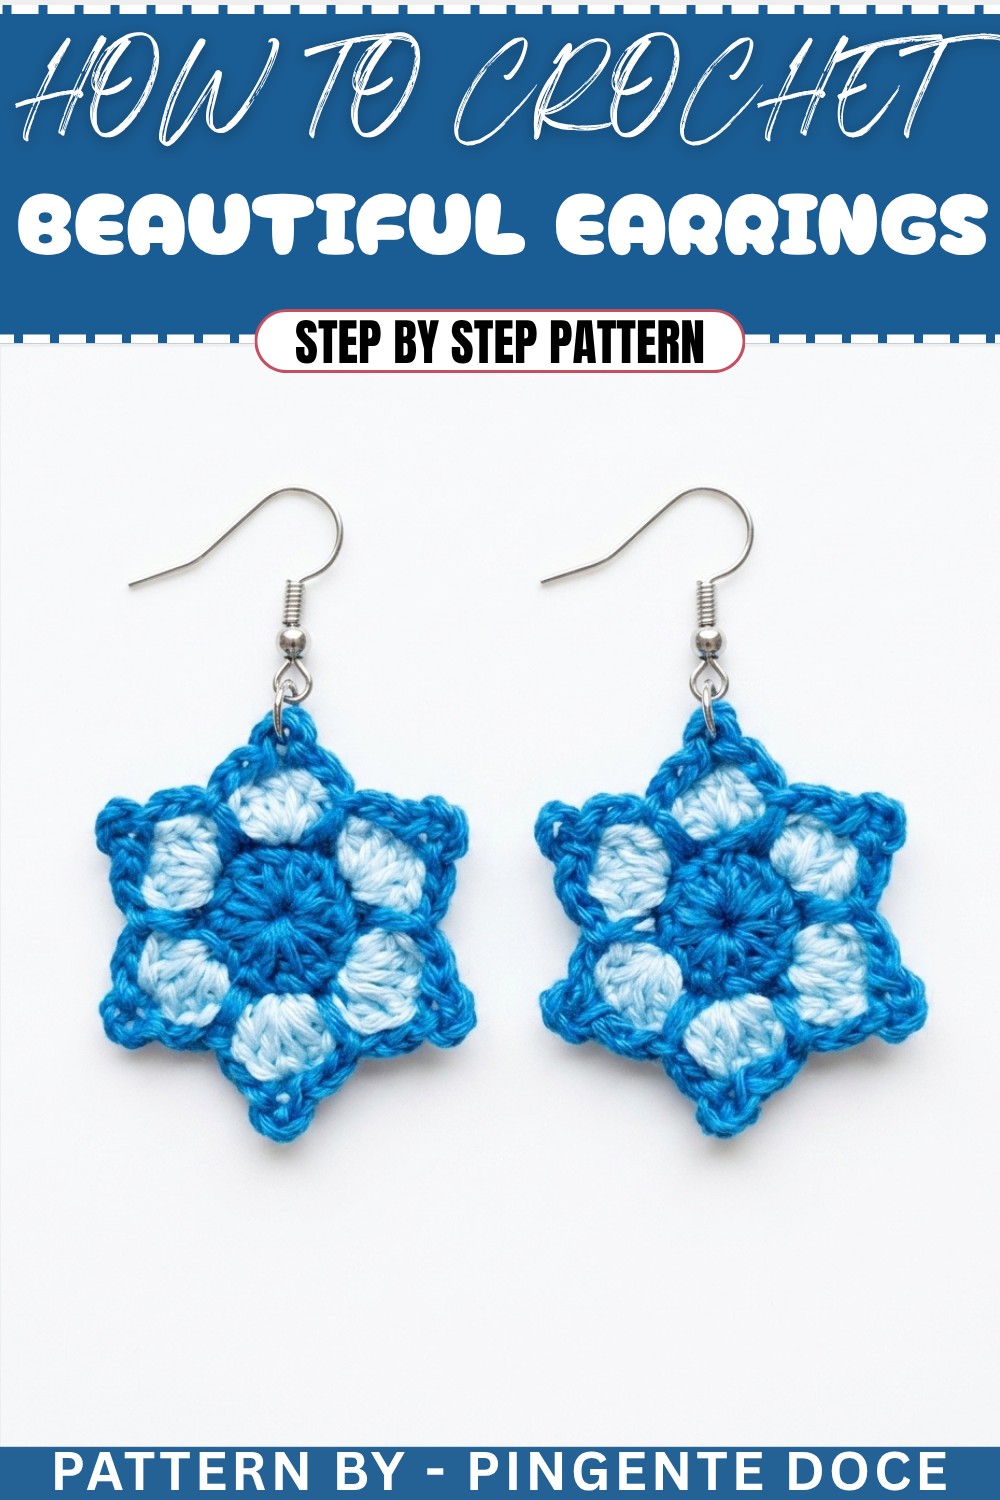
Crochet Mandala Earring Pattern
Crochet earrings are a great way to express your creativity and showcase your skills, and this earring pattern is perfect for beginners and intermediate crocheters. The pattern creates intricate, layered circles with two complementary colors and three rounds of different textures. Easily customizable with your favorite yarn colors and earring hardware, these lightweight earrings are ideal for adding a pop of color to your outfit. With just a few simple stitches, you'll create a beautiful accessory in no time.
Skill Level & Terminology
- Skill Level: Beginner to Intermediate. This tutorial is friendly to those who are comfortable with basic stitches such as chains, slip stitch, double crochet, and simple cluster stitches.
- Terminology: US Crochet Terms:
- Magic Ring (MR): A loop of yarn worked into the center with stitches.
- Chain (Ch): Yarn over and pull through the loop on your hook to form a chain.
- Double Crochet (Dc): Yarn over, insert hook, pull up a loop, yarn over, pull through two loops, yarn over, pull through the final two loops.
- Slip Stitch (Sl st): Insert hook into the stitch, yarn over, pull through the stitch and loop on hook.
- Medium Point (Mp): A unique stitch explained under Special Stitch Instructions.
Materials & Tools
- Yarn/Thread:
- Dark blue embroidery thread (base layer).
- Light blue embroidery thread (middle layer).
- dark blue shade for edging (outer layer).
- Hook: 1.25mm crochet hook.
- Scissors: For trimming thread.
- Sewing Needle: For finishing and securing threads.
- Fabric Glue: A mixture of water and fabric glue for stiffening.
- Earring Findings: Rings and hook.
- Brush: For applying the glue mixture to the back of the earring.
Gauge
This project does not require a strict gauge, but the approximate size for the finished mandala earring will be 2.5–3 inches in diameter using the specified hook and thread.
Abbreviations List
| Abbreviation | Stitch/Action |
|---|---|
| MR | Magic Ring |
| Ch | Chain |
| Sl st | Slip Stitch |
| Dc | Double Crochet |
| Mp | Medium Point (explained below) |
Special Stitch Instructions
- Magic Ring (MR): Wrap your yarn around your fingers to form a loop. Insert the hook into the loop, yarn over, pull through, and create one chain to secure the ring for working stitches.
- Medium Point (Mp):
- Insert the hook into the intended space.
- Yarn over and pull up a loop. Yarn over, pull through all loops at once.
What You'll Learn & Why You'll Love This Pattern
- What You'll Learn:
- The magic ring technique to create mandala earrings from a center-ring foundation.
- How to work medium point stitches to achieve a decorative raised texture.
- Finishing tips for a professional result, including gluing and assembling earring hooks.
- Why You'll Love It:
This pattern creates lightweight, dazzling earrings that add elegance and vibrance to any outfit. The project was designed with simplicity and creativity in mind, making it quick and easy to follow yet incredibly stylish. Plus, you’ll learn some new decorative stitching techniques for advanced patterns later!
Finished Size
The completed earrings measure approximately 2.5–3 inches in diameter. The thickness and stiffness can be adjusted using glue or thread variations.
The Pattern Itself
Round 1: Base Circle with Dark Blue Thread
- Start with Magic Ring: Form a magic ring with your dark blue thread. Secure the loop with a Ch 1.
- Create Foundation Stitches:
- Ch 3 (counts as your first Dc).
- Work 11 Dc into the magic ring. Counting the initial chains, you will have 12 stitches total.
- Pull the Magic Ring Closed: Gently pull the leftover thread to close the ring tightly.
- Finish the Round: Insert your hook into the third chain of the initial Ch 3 and secure with a Sl st.
- Cut Thread: Leave a small tail and use your tapestry needle to weave the tail into the back of the stitches for a clean finish.
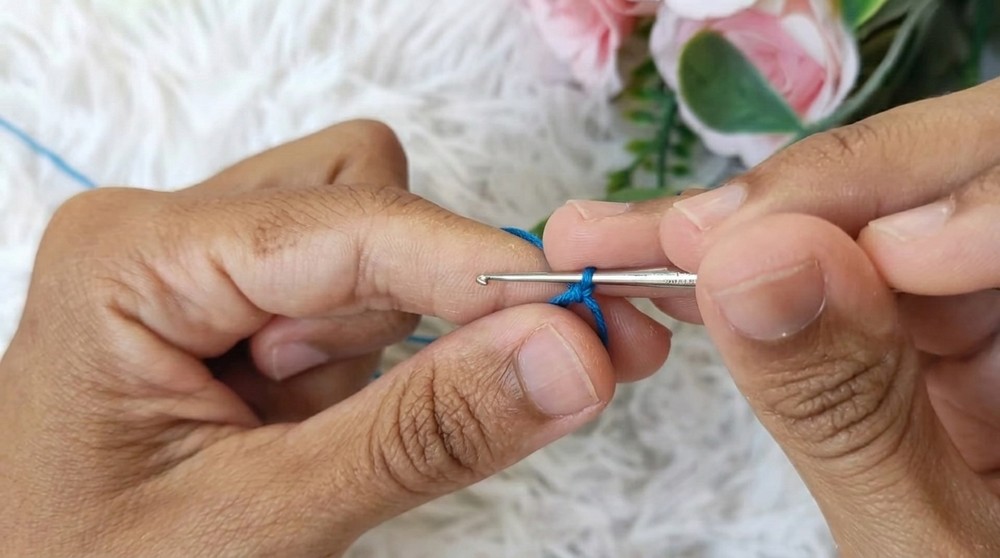
Overview: This step creates the base layer of your mandala and sets the foundation for building the intricate earring design.
Round 2: Light Blue Cluster Shapes
- Attach Light Blue Thread: Make a Slip Knot with light blue thread and leave the loop on your hook.
- Insert the hook into any Dc from Round 1, pulling the thread through.
- Begin Stitch Sequence:
- Work 1 Mp (Medium Point) in the selected stitch.
- In the same stitch, Work 3 Dc.
- Work another Mp back into the same space, pulling through all loops at once.
- Slip Stitch Connection:
- Insert the hook into the next base Dc and make a Sl st to secure the cluster.
- Repeat the Sequence:
- For each remaining Dc in the round: Work Mp, 3 Dc, Mp in the same stitch, followed by Sl st into the next stitch.
- Complete the Round: Repeat the steps for a total of 6 clusters. Cut the thread and weave the remaining tail toward the back using your sewing needle.
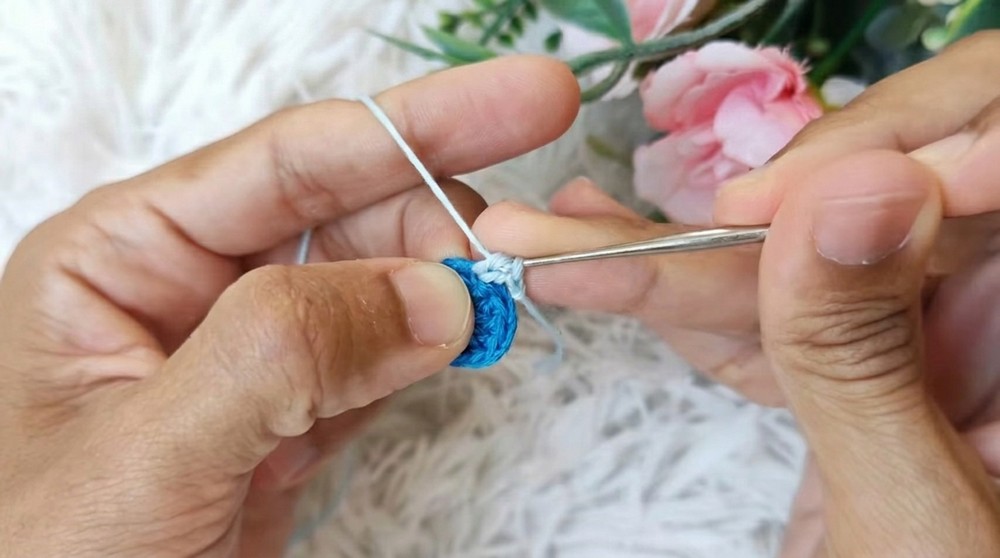
Simplified Instructions: This round creates textured clusters at equal points around the earring, forming petals to resemble a flower or mandala.
Round 3: Adding Outer Chains and Decorative Edging
- Attach dark Blue Thread: With your dark shade of blue, make a Slip Knot and leave the loop on the hook. Insert the hook into the base stitch at the foot of any cluster.
- Work Edging:
- Work Sl st.
- Ch 2, then move to the middle of the Mp in the previous row and work Sl st.
- Ch 3, return to the same Mp, and work another Sl st into the same space.
- Ch 2, and insert your hook at the base of the next cluster to work a Sl st.
- Repeat Around: Continue the sequence of Sl st, Ch 2 + 3, Sl st around the earring, creating a delicate chain edging.
- Finish the Round: Tie off the thread, leaving a tail for sewing. Use the tapestry needle to secure the tail by weaving through the stitches neatly.
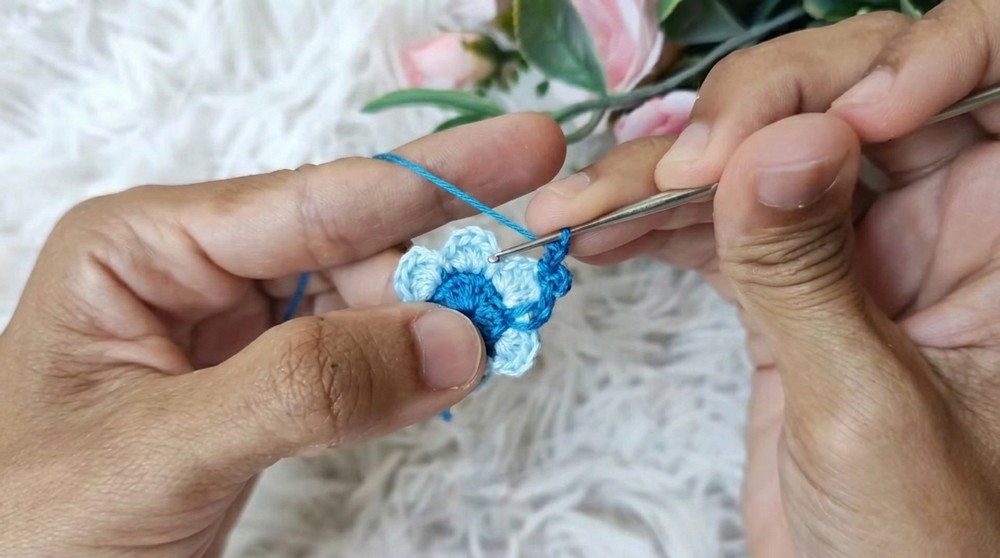
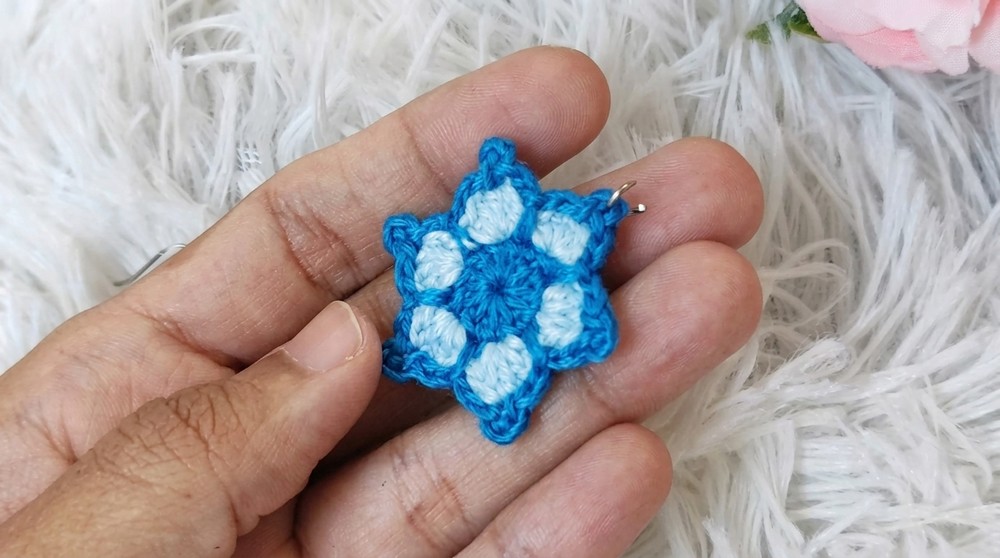
Tip for Beginners: If the chain loops begin to look uneven, slow down and make sure each chain loop is evenly spaced for a balanced outer mandala edging.
Assembly & Finishing
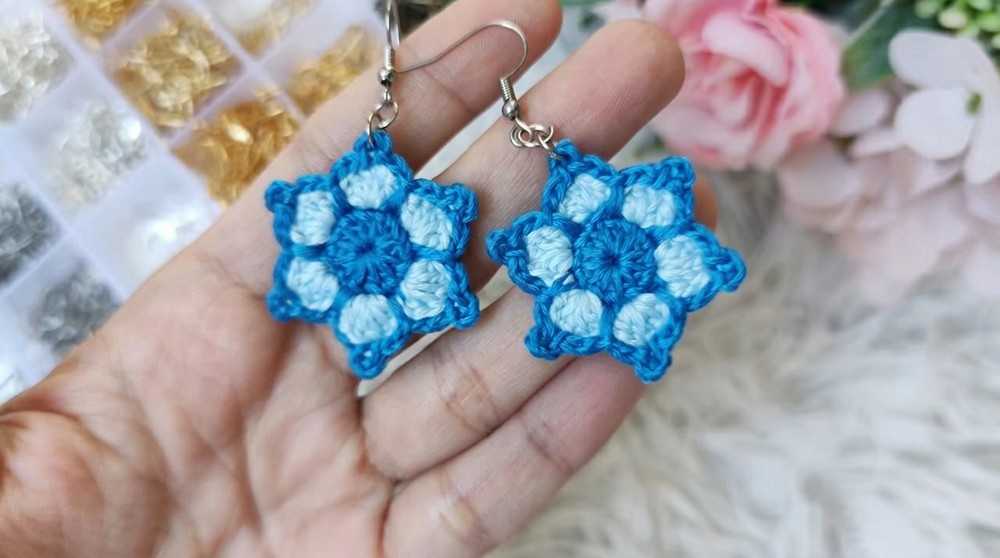
- Harden the Earring: Once all threads are finished, apply a thin layer of fabric glue mixed with water on the back of the piece using a brush. This stiffens the earring and helps it hold its shape. Allow the piece to dry completely.
- Attach Earring Hoops: Use the earring findings and attach them to your finished mandala at the topmost point of the piece. Secure with glue or adjust hoops using pliers.
Difficulties & Solutions
Challenge: Uneven stitches in the cluster round.
- Solution: Practice the medium stitch and maintain consistent yarn tension throughout the project. Taking your time and repeating stitches slowly will improve consistency.
Challenge: Earring not holding shape after assembly.
- Solution: Make sure you apply a sufficient layer of water-glue mixture to harden the back of the earring. Let it dry completely for durability and a polished finish.
Final Thoughts
This mandala-inspired crochet earring pattern makes a beautiful handmade accessory while utilizing simple techniques and stitches. You’ll crochet a gorgeous design with just three rounds of work, and the pattern is highly customizable with different yarn colors and patterns. Whether for yourself or as a gift, these earrings are quick and fun to complete and offer endless creative possibilities. Get ready to add vibrant charm to your jewelry box with these beautiful handmade earrings.