
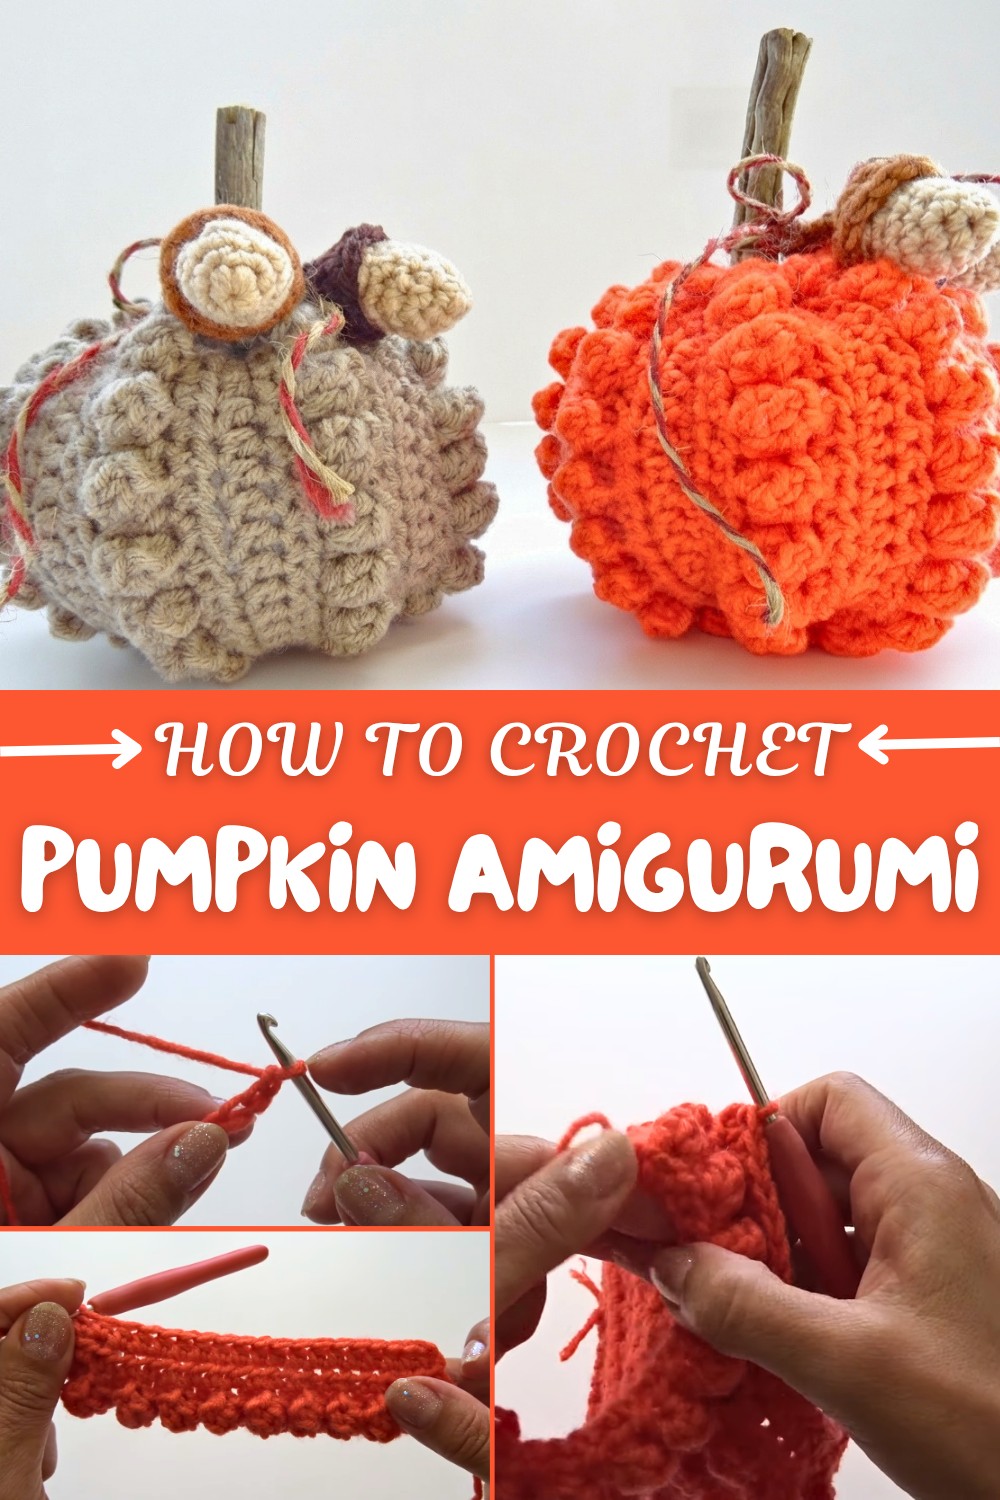
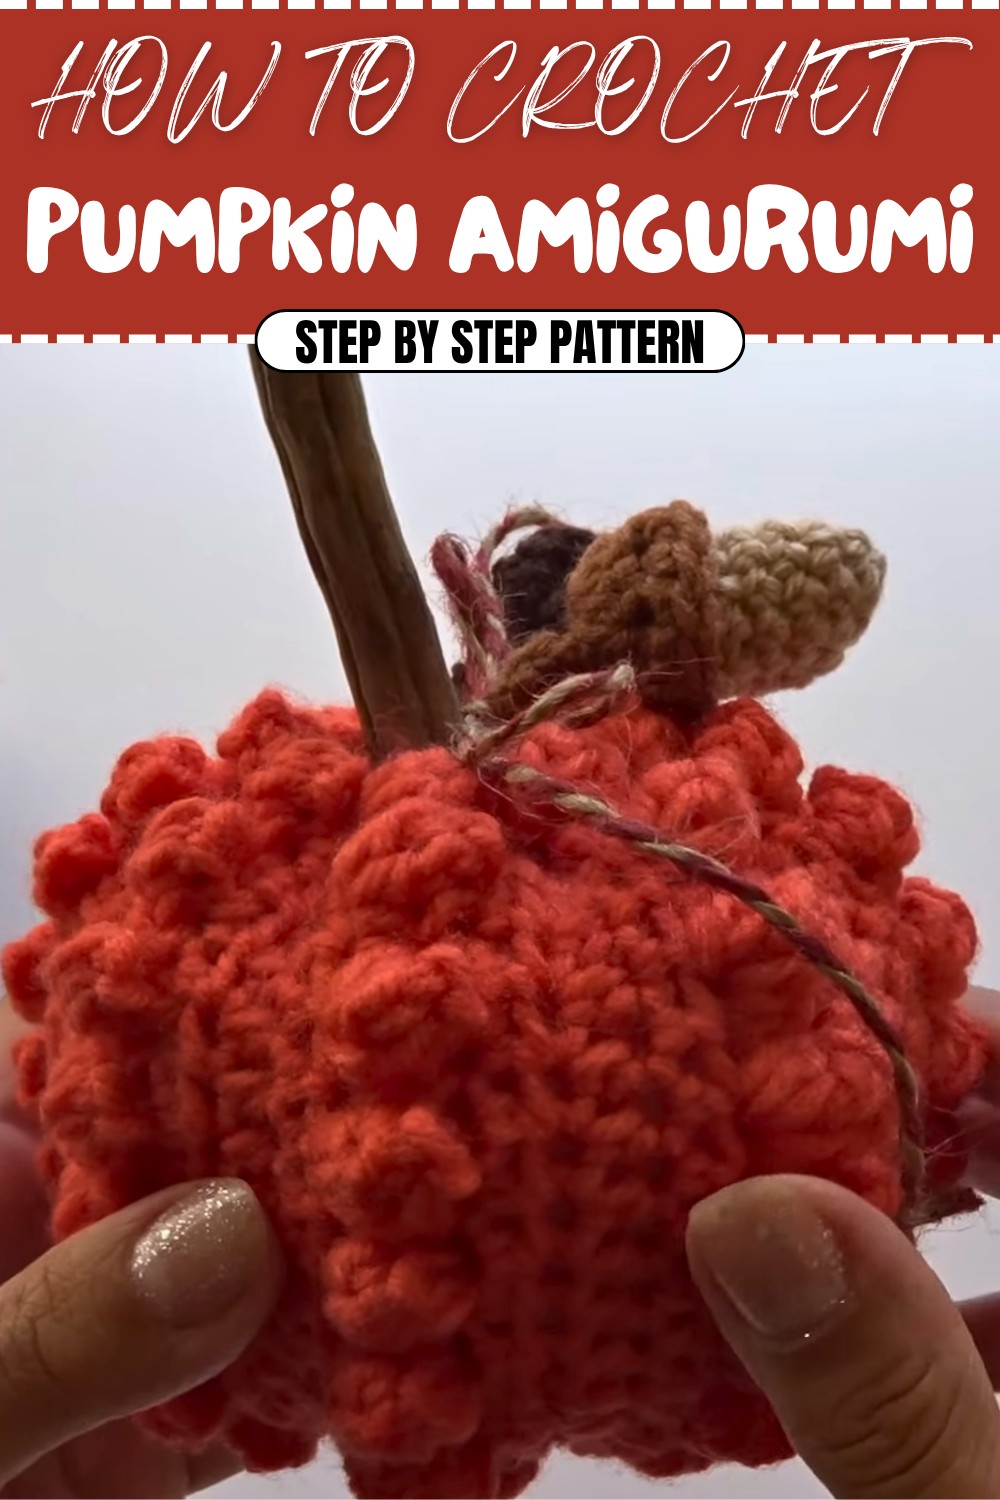
Crochet Pumpkin Amigurumi Pattern for Seasonal Decorations
Try new decorations using the Free Crochet Pumpkin Amigurumi Pattern for tiny, happy pumpkins you can share with friends.
There’s something truly special about crocheting cozy decorations that bring warmth and charm to any space, especially during the fall season. This crochet pumpkin amigurumi pattern offers a fun and simple way to crochet your own festive pumpkin using a mix of popcorn stitches and half double crochets. The popcorn stitch adds delightful texture and dimension, giving the pumpkin a plump, rounded look that's both cute and inviting. Meanwhile, the half double crochet rows provide a smooth contrast, making the overall design balanced and visually interesting.
Guidance to Crochet Pumpkin Amigurumi Using Free Creative Pattern
Starting with a rectangular piece worked in rows, this pattern is beginner-friendly and easy to follow, guiding you through chaining, turning, and repeating stitch sequences. You can customize the size by adjusting the number of chains and rows to make pumpkins that fit perfectly on your mantel, as table accents, or even as playful gifts. After completing the stitched rectangle, assembling the pumpkin amigurumi with stuffing and shaping gives it that charming 3D effect that really brings your handiwork to life. Adding a small stick as a stem and optional decorations like cords or ribbons completes the cozy autumn look.
The skills you learn from making this pumpkin open the door to many other projects. The popcorn stitch is fantastic for adding texture and can be used to create bumpy effects on hats, scarves, blankets, or even playful amigurumi characters. Plus, practicing half double crochets helps with building versatile, sturdy fabrics perfect for bags, coasters, or home decor items. Experimenting with this pattern, you can branch out and design a whole range of seasonal decorations and charming gifts that are uniquely yours.
Crochet Pumpkin Pattern
This fun and decorative pumpkin pattern is perfect for bringing a handmade touch to your fall or holiday decorating. Using a rectangle worked with popcorn stitches and half double crochets, you'll create a textured fabric that can be assembled into a charming pumpkin shape. Whether you keep it simple or decorate it further with acorns, jute cord, or ribbon, this pattern suits any skill level and is quick and satisfying to crochet.
Skill Level & Terminology
Skill Level: Beginner.
Terminology: US Crochet Terms.
Materials & Tools
- Yarn: Number 4 medium weight yarn (recommended in orange, but you can use any color).
- Hook: 4 mm crochet hook.
- Other Supplies:
- Scissors.
- Tapestry needle.
- Polyfill stuffing.
- Stick for the pumpkin stem (can use twigs, dowels, or craft sticks).
Gauge
Gauge is not critical for this pattern. Ensure your stitches are consistent to create a properly shaped rectangle for assembly.
Abbreviations List
- ch: Chain.
- sl st: Slip Stitch.
- hdc: Half Double Crochet.
- dc: Double Crochet.
- popcorn st: Popcorn Stitch (5 dc worked into the same stitch).
- st(s): Stitch(es).
Special Stitch Instructions
Popcorn Stitch
- Work 5 dc into the same stitch.
- Remove your hook from the loop and insert it into the first dc worked (front to back).
- Pick up the loop you dropped, tighten it, and slip stitch through the first dc to form the popcorn stitch.
Running Stitch (Sewing)
Used for gathering the edges of the pumpkin:
- Insert the tapestry needle into loops along the edge of the fabric.
- Alternate the needle in and out of the stitches to prepare for cinching them together.
Finished Size
You can customize the pumpkin size depending on the number of rows and stitches, but this pattern produces a small decorative pumpkin approximately 4 inches in width and height.
What You'll Learn
- Textured Stitch Technique: Create eye-catching texture with popcorn stitches.
- Shaping: Learn how to transform a simple rectangle into a 3D shape.
- Assembly Skills: Get comfortable using slip stitching and running stitches to sew and create unique shapes.
- Customization: Add details to turn your pumpkin into a personalized masterpiece.
This project teaches beginners important skills while creating a fun decorative item. It’s a pattern that’s perfect for fall festivals, Thanksgiving tables, or gifting!
The Pattern
Step 1: Crocheting the Rectangle
Row 1:
- Start with a slip knot, and ch 19 (for this pumpkin size) + 2 additional chains.
- Work hdc into the third chain from the hook.
- Continue hdc into each chain across the row.
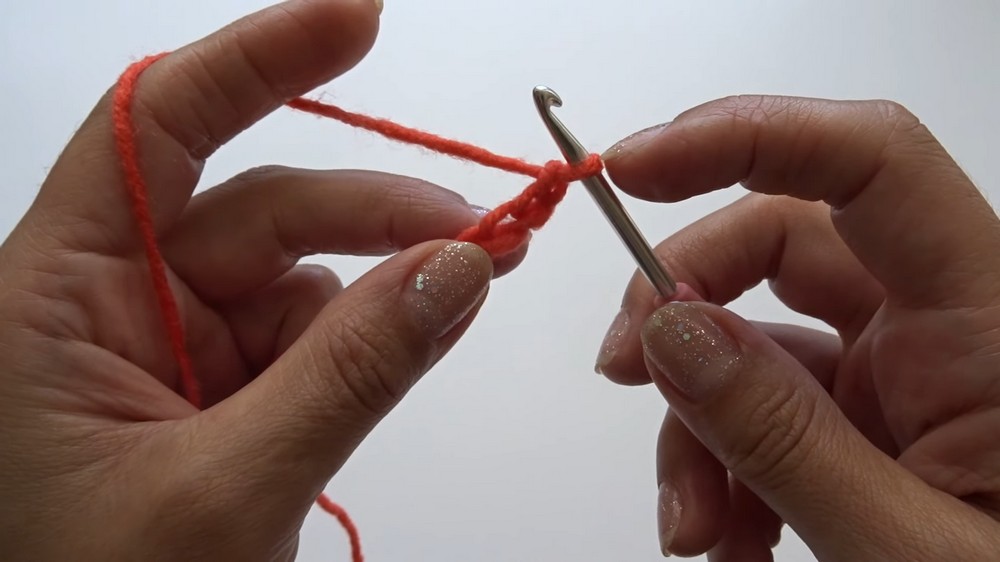
At the end of Row 1: You should have 19 hdc.
This is your simple foundation row made with half double crochets.
Row 2 (Popcorn Row):
- Ch 1, turn your work.
- Work 1 dc in the first stitch.
- Into the next stitch, make a popcorn stitch (5 dc in the same stitch, slip stitch to complete).
- Continue alternating:
- Popcorn stitch in one stitch, then 1 dc in the next stitch.
- End the row with a popcorn stitch followed by 1 dc in the last stitch.
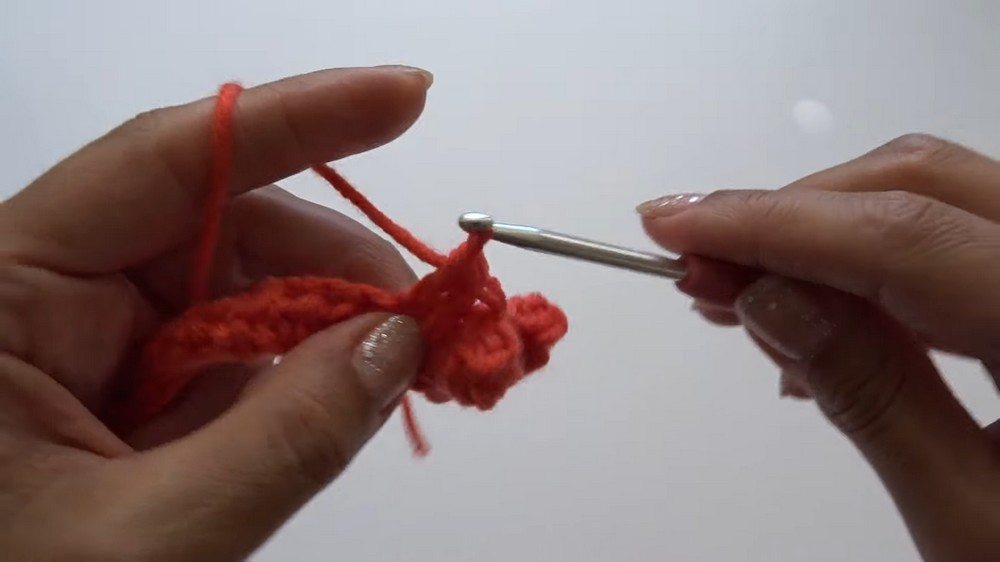
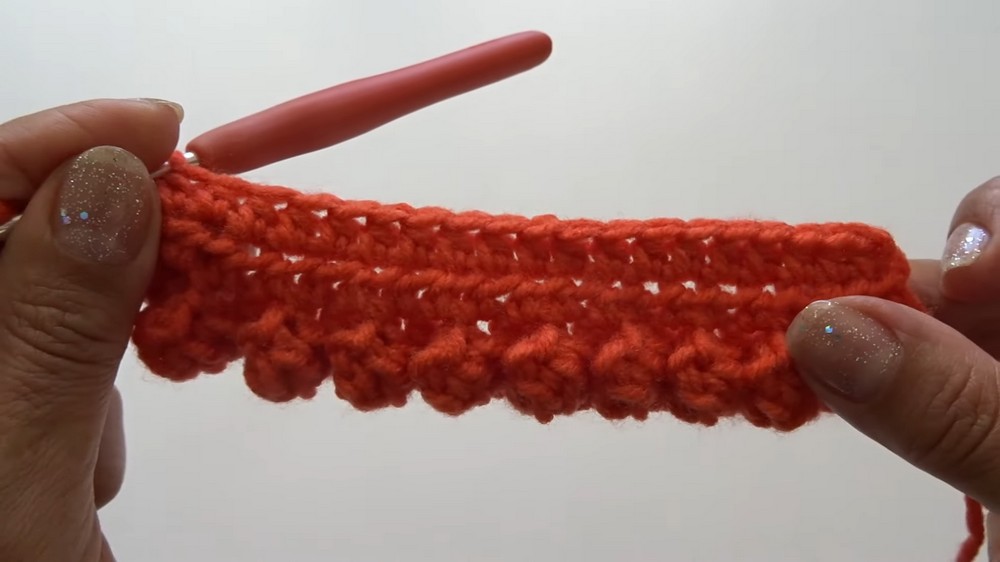
At the end of Row 2: You will have 9 popcorn stitches.
Row 3:
- Ch 1, turn your work.
- Work hdc into each stitch across the row.
At the end of Row 3: You should have 19 hdc.
Rows 4–5 (Straight Rows):
- Ch 1, turn your work.
- Continue working hdc into each stitch across the rows.
Step 2: Repeating the Pattern
To build the pumpkin’s texture:
- Repeat Rows 2–5 until you have completed 8 rows of popcorn stitches.
- Always follow popcorn rows with 3 rows of hdc.
- End with a popcorn row.
This repeat forms the textured rectangle that will be used to create the body of the pumpkin.
Step 3: Final Rows
Rows for Straight Edges:
- After finishing the 8 rows of popcorn stitches, work 2 final rows of hdc on the last edge.
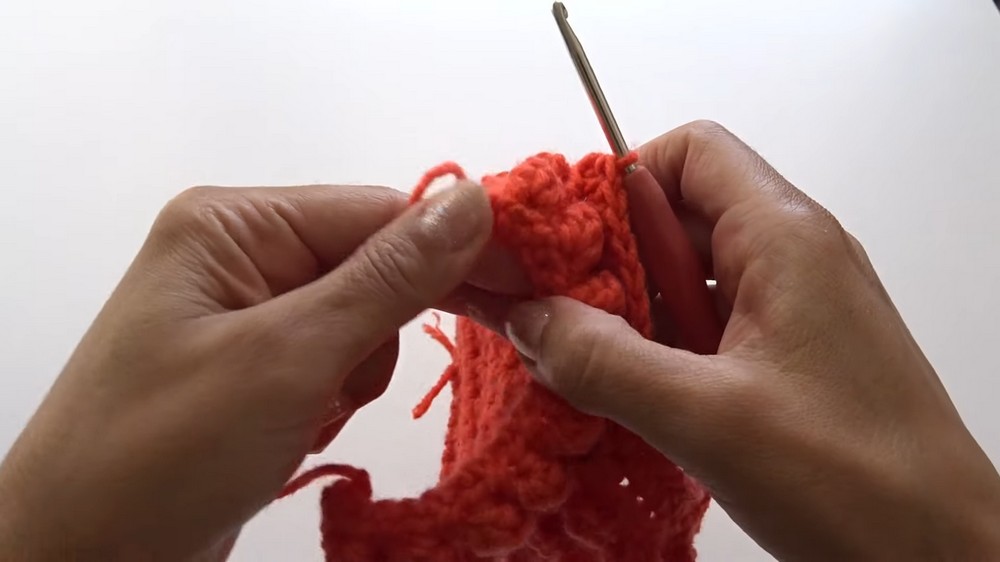
Step 4: Slip Stitching the Rectangle
- Fold the rectangle in half with the right sides together.
- Using the last row and foundation row, slip stitch the two edges together:
- Insert your hook through both loops from the last row and one loop from the foundation row.
- Yarn over and pull through all loops on the hook.
- Continue slip stitching along the edge to join the sides completely.
This creates a cylindrical shape.
Step 5: Sewing the Bottom
- Insert your tapestry needle into one end of the cylinder.
- Work a running stitch along the edge by picking up loops from the stitches and going in and out.
- Pull the yarn tightly to cinch the bottom closed.
- Tie secure knots and add stitches to reinforce the closure.
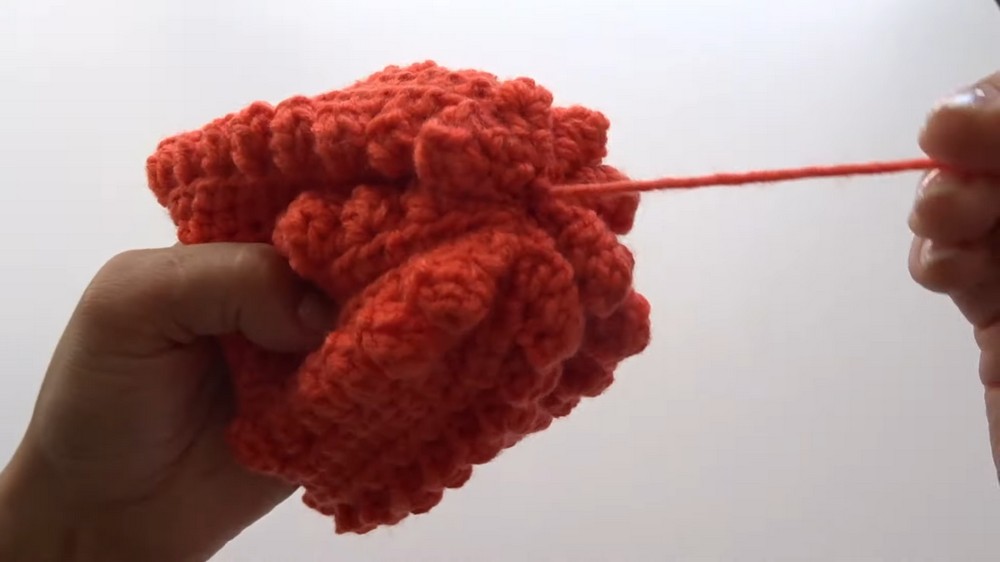
Step 6: Stuffing the Pumpkin
- Use polyfill stuffing to fill the pumpkin.
- Adjust the stuffing amount based on how full and firm you want the pumpkin.
Step 7: Sewing the Top
- Repeat the running stitch technique along the top edge of the cylinder.
- Pull the yarn tightly to close the top.
- Before completely closing, leave a small opening for the stick/stem.
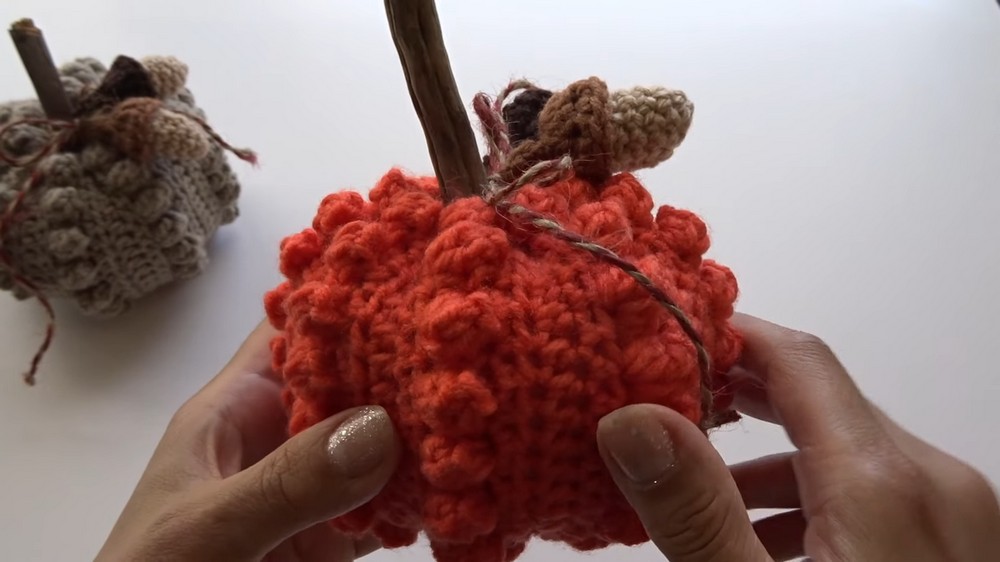
Step 8: Adding Decorations
- Stem:
- Insert the stick into the top opening.
- You can glue it in place, but leaving it unglued allows for flexibility.
- Jute Cord or Ribbon:
- Wrap the cord around the stem and tie a bow.
- Optional: Use acorns or decorative items for added charm.
Assembly & Finishing
Weaving in Yarn Tails
- Use the tapestry needle to weave in any loose ends. Hide the tails by threading them securely into the body of the pumpkin.
Customization Tips
Decorate your pumpkin further with:
- Embroidery on the pumpkin’s surface.
- Paint or stain the stick/stem for a polished look.
- Glitter or sequins for festive sparkle.
Why You'll Love This Pattern
This crochet pumpkin amigurumi pattern is versatile, easy, and teaches valuable techniques like popcorn stitches and assembly methods. Whether making one or a whole set, these pumpkins are perfect for decorating Thanksgiving tables, fall celebrations, or gifting as handmade decor. The repetitive nature of the stitches offers meditative relaxation, and the customizations are endless!