
How to Crochet Christmas Tree Pattern for Festive Holiday Style
Refresh your holiday look fast using the Free Crochet Christmas Tree Pattern for creative and playful tree designs.
Crocheting something festive with your own hands can instantly brighten the holiday season, and this delightful crochet Christmas tree pattern is just the creative boost you need! Starting from a magic ring and building upward with simple stitches like single crochet, double crochet, and slip stitches, this pattern cleverly uses fan or ruffle stitches to mimic the lush texture of pine needles. The process is straightforward but results in a beautifully layered tree that’s full of character and charm, perfect for both beginners and seasoned crocheters looking for a quick holiday project.
Learn to Crochet a Christmas Tree Pattern for Quick Gift Ideas
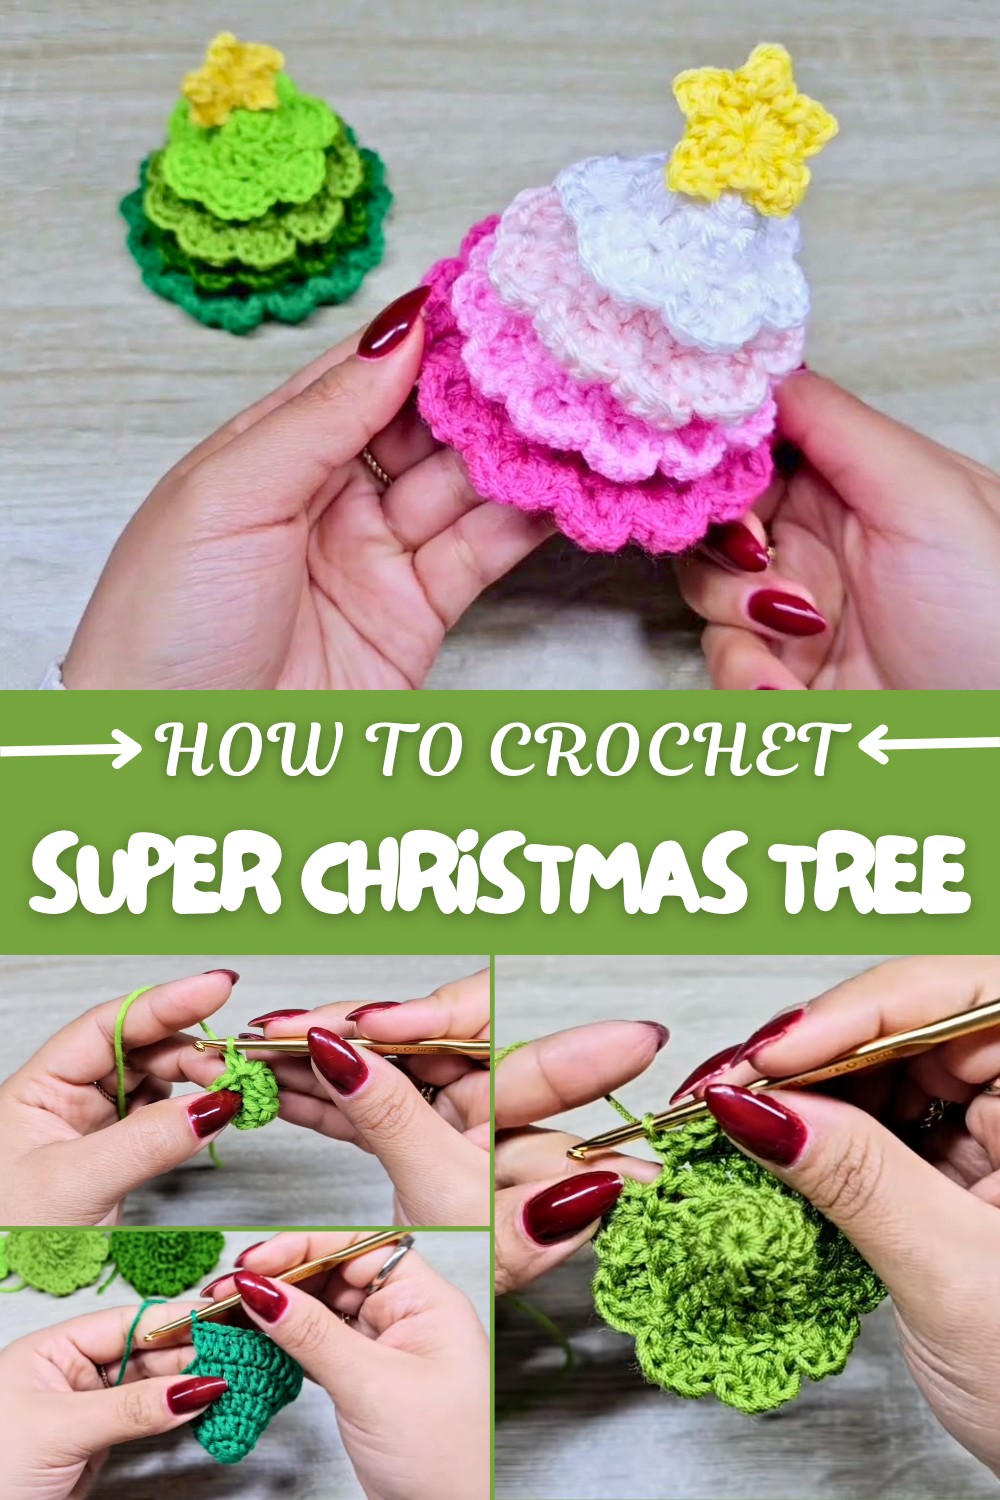
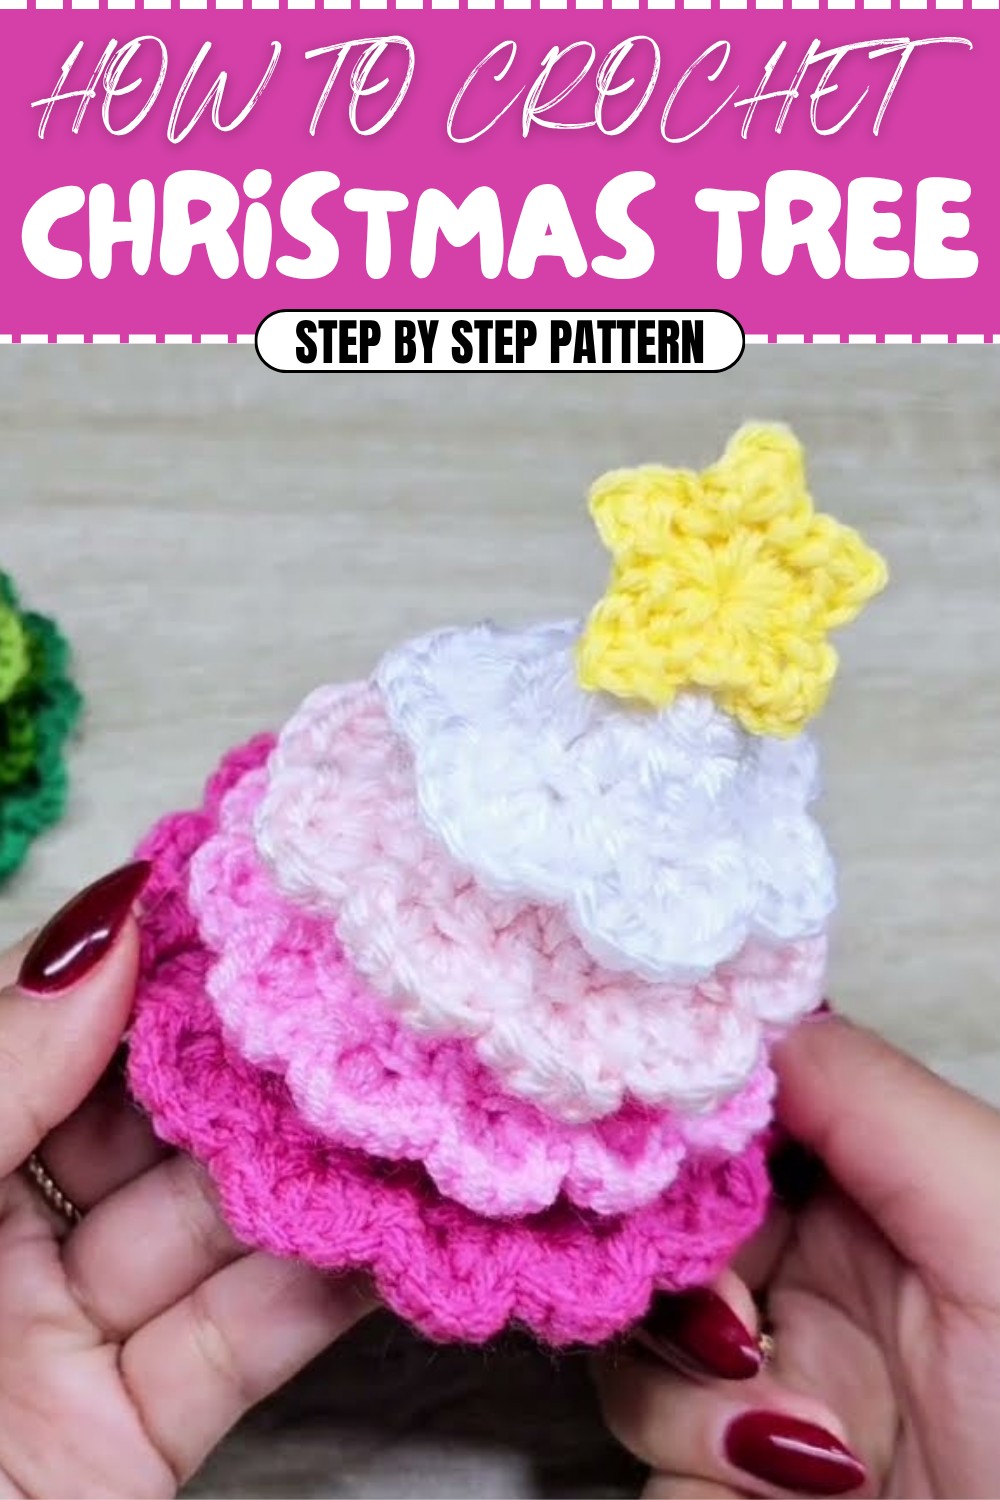
Using a 3 mm hook and yarn, you’ll alternate colors to add that classic festive flair, making each row feel like adding a new branch to your tree. The star on top, crocheted with the same stitches, ties the whole piece together with a sweet finishing touch. This pattern is a fantastic way to bring warmth and personality to your holiday décor or create heartfelt gifts everyone will love.
More Creative Things to Explore
After enjoying this project, you can easily expand your skills to make a variety of seasonal decorations. The textured fan stitches are versatile—they work beautifully for crocheting unique garlands, charming wreaths, and even textured scarves or shawls that add a bit of holiday magic to your wardrobe. This pattern is a wonderful starting point to fall deeper into layered crochet designs that combine beauty and simplicity in the most festive ways.
Crochet Pattern: Festive Christmas Tree
Welcome to this beginner-friendly crochet pattern for making a Festive Christmas Tree. This easy project uses simple crochet techniques and follows a step-by-step process to create a cute and decorative Christmas tree, along with a tiny star at the top. Whether you're just starting or looking for a quick holiday project, this is perfect for decorating your home or gifting to loved ones.
What You'll Learn
- How to start using a magic ring, build layers with increases, and finish decorative edges with a fan stitch.
- Adding a star to the top of the tree using simple techniques like single crochet, double crochet, and slip stitches.
Why You’ll Love This Pattern
This project is simple, customizable, and works up quickly—ideal for beginners to build their skills or for experienced crocheters searching for a quick, seasonal craft!
Skill Level & Terminology
- Skill Level: Beginner
- Crochet Terminology: US crochet terms
Materials & Tools
- Yarn:
- Green yarn for the tree (3 mm).
- Optional alternative colors for layered tree sections.
- Yellow or gold yarn for the star.
- Crochet Hook: Size 3 mm.
- Glue/Silicone (optional): For affixing the star.
- Needle: Tapestry needle for weaving in ends.
- Scissors: To cut yarn.
Gauge
Gauge is not critical for this project, but for reference:
- 5 single crochets (sc) x 5 rows = 1 inch.
Abbreviations List
- ch: Chain
- sc: Single Crochet
- dc: Double Crochet
- sl st: Slip Stitch
- inc: Increase (2 dc in the same st)
- magic ring: A loop used as the foundation for crocheting in the round.
Special Stitch Instructions
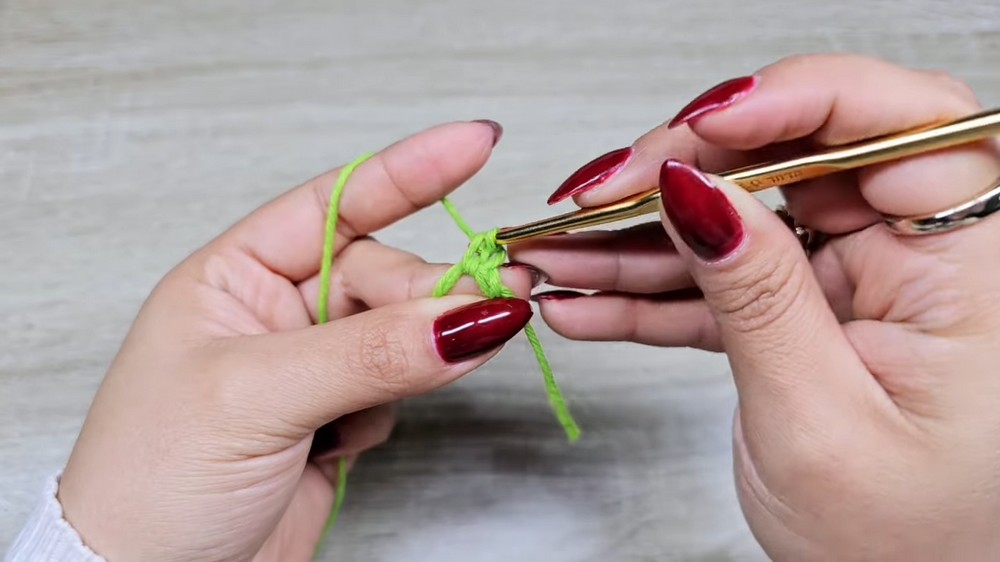
- Magic Ring:
To create a magic ring, wrap the yarn around your finger to form a loop, insert the hook into the loop, yarn over, and pull through to make a stitch. - Fan Stitch:
The fan stitch involves working 2 dc, 1 ch, 2 dc into the same st to create decorative edging.
Finished Size
- Height: Approximately 6 inches (includes the star).
- Width: About 3 inches at the base.
The Pattern Itself
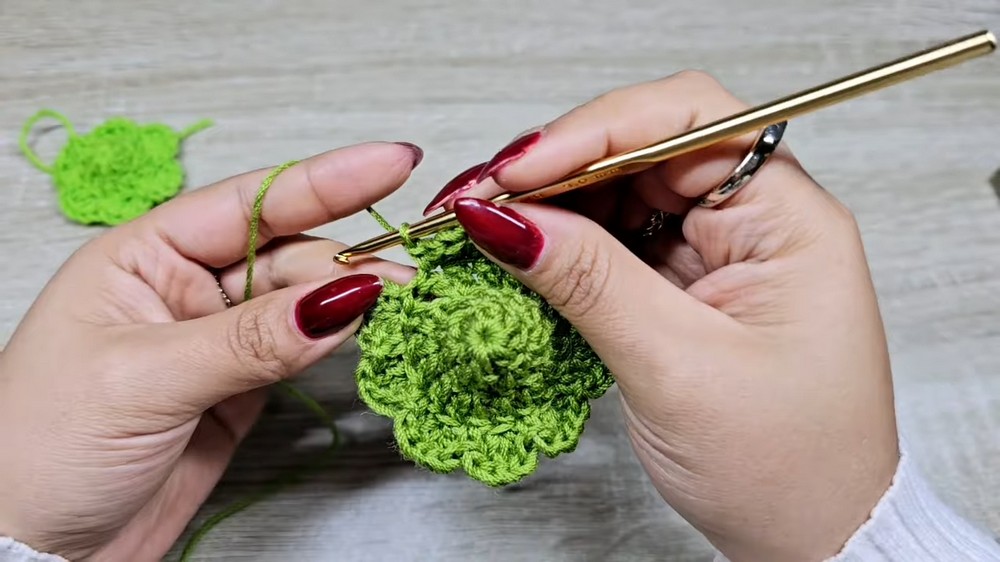
Step 1: The Base - First Layer
- Create a Magic Ring.
- Round 1:
- Crochet 6 dc into the magic ring.
- Pull the tail of the ring tightly to close the circle.
- Join with a sl st to the first dc to close the round.
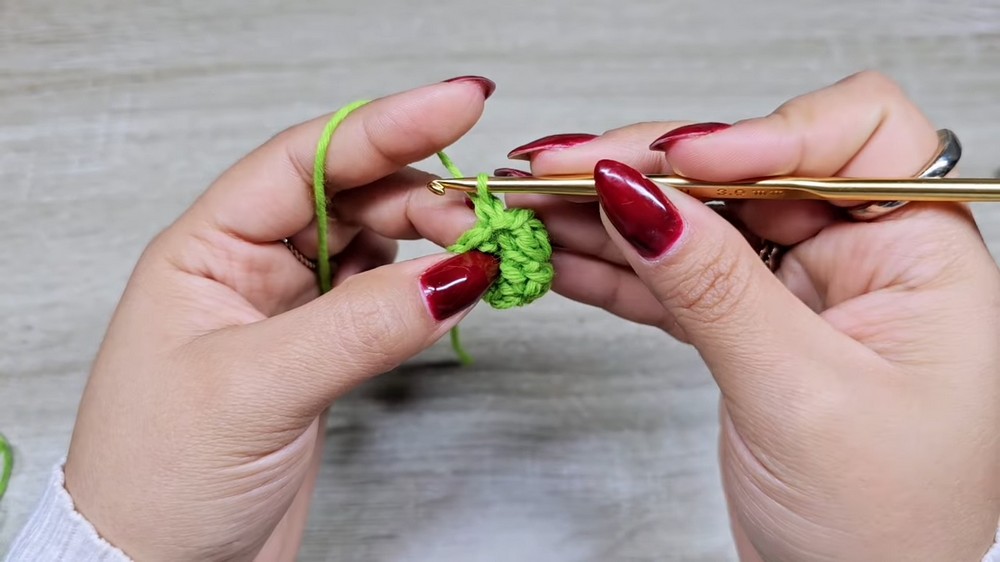
- Round 2:
- Ch 1, crochet 2 dc (inc) into each st around (total: 12 dc).
- Join with a sl st to the first dc.
- Round 3:
- Ch 1, crochet 2 dc in the first st, then 1 dc in the next st. Repeat (2 dc, 1 dc) around (total: 18 dc).
- Join with a sl st to complete.
- Add the decorative fan pattern:
- Ch 1, work into the back loops of the stitches as follows: 1 sc, (2 dc, ch 1, 2 dc) in the next st, 1 sc.
- Repeat this fan pattern all the way around.
At this point, you’ve finished the base layer. If you're unfamiliar with the pattern format, simply know that you are creating a circular base and adding decorative fans along the edge.
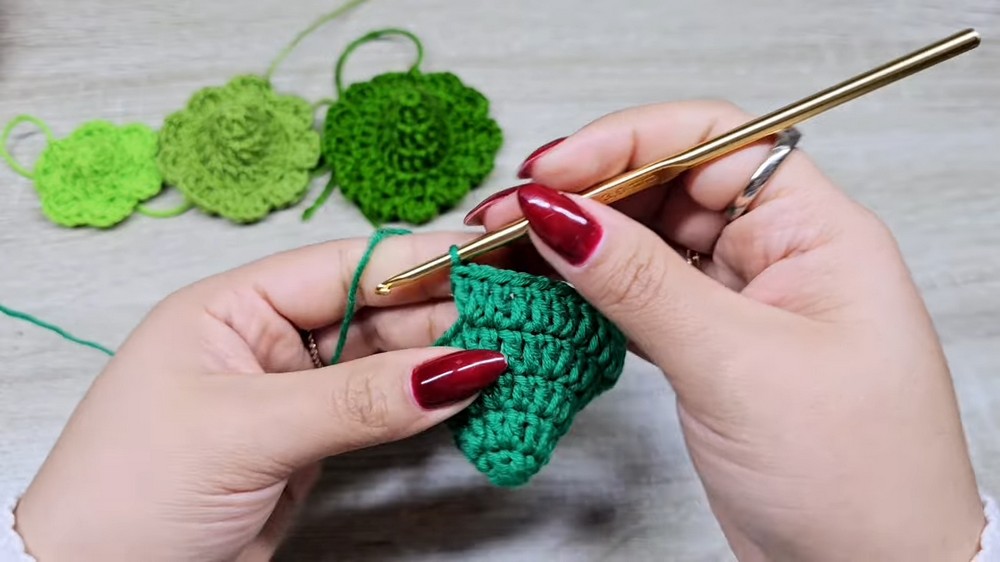
Step 2: Second Layer
- Join a New Color (Optional): To give the tree distinct layers, switch to a new shade of green or alternate color.
- Follow the exact same process as the first layer:
- Round 1: Start with a magic ring and crochet 6 dc.
- Round 2: Crochet 2 dc into each st around (total: 12 dc).
- Round 3: Crochet 2 dc, then 1 dc alternately around (total: 18 dc).
- Add the fan pattern into the back loop, just like you did before.
This becomes the middle layer of your tree, slightly smaller in circumference than the base layer.
Step 3: Third (Top) Layer
- As with the first two layers, create a smaller circular base for the top of the tree:
- Magic ring, 6 dc.
- Round 2: 2 dc into each st (total: 12 dc).
- Round 3: 2 dc, 1 dc alternately (total: 18 dc).
- Add fan stitching for the decorative edge, following the same instructions as the previous layers.
The third layer will taper the shape of the tree, completing the triangular look.
Step 4: The Star
- Create a Magic Ring.
- Inside the ring:
- Crochet 1 sc, 1 ch, and 1 dc.
- Stretch the loop slightly and crochet 1 ch, then secure with 1 sc.
- Repeat this process 5 times to form the star’s points.
- Pull the ring tightly to close the star. Use sl st to secure the point.
- Trim any excess yarn or weave the ends, then attach the star to the top of the tree using glue or a needle and thread.
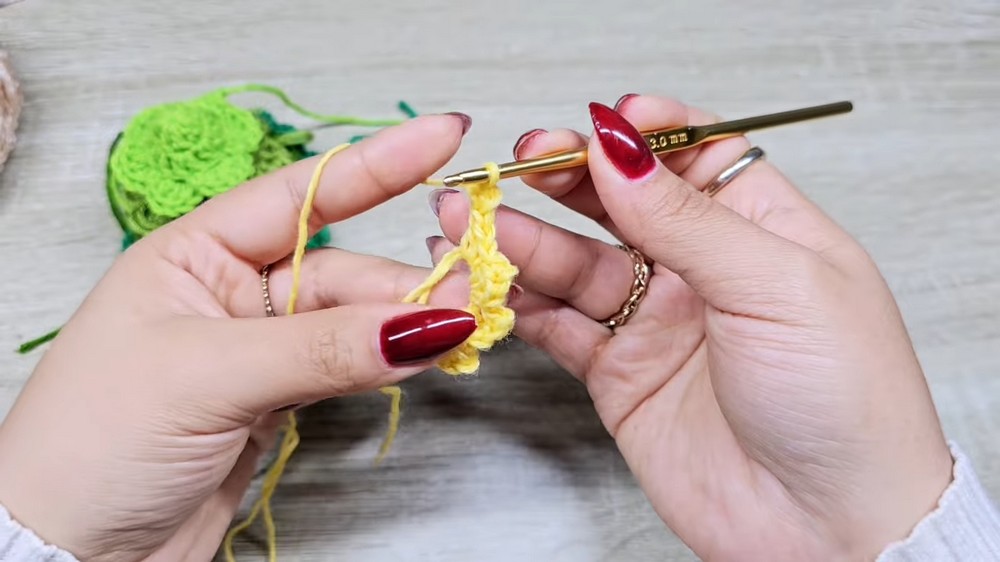
This tiny star adds the perfect finishing touch to your festive Christmas tree!
Assembly & Finishing
- Stack the layers from largest (base) to smallest (top), aligning the centers.
- Secure the layers with a dab of glue, light stitching, or a hidden strand of yarn drawn through all layers.
- Attach the star to the top.
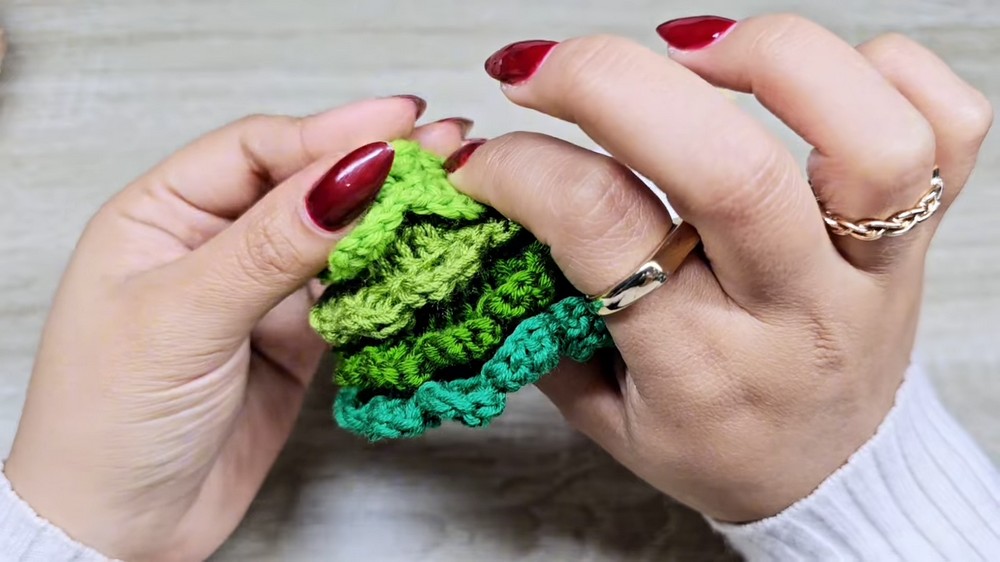
Once assembled, your Christmas tree will take on its full festive form!
Pattern Summary
This Christmas tree pattern uses simple crochet techniques including magic ring, fan stitches, and basic increases. The repetitive process of creating layered sections makes it beginner-friendly, while the star and color-changing details allow for customization.
Give your tree a personal touch by adding beads, sequins, or embroidered details, and use it as a holiday decoration or thoughtful handmade gift.