
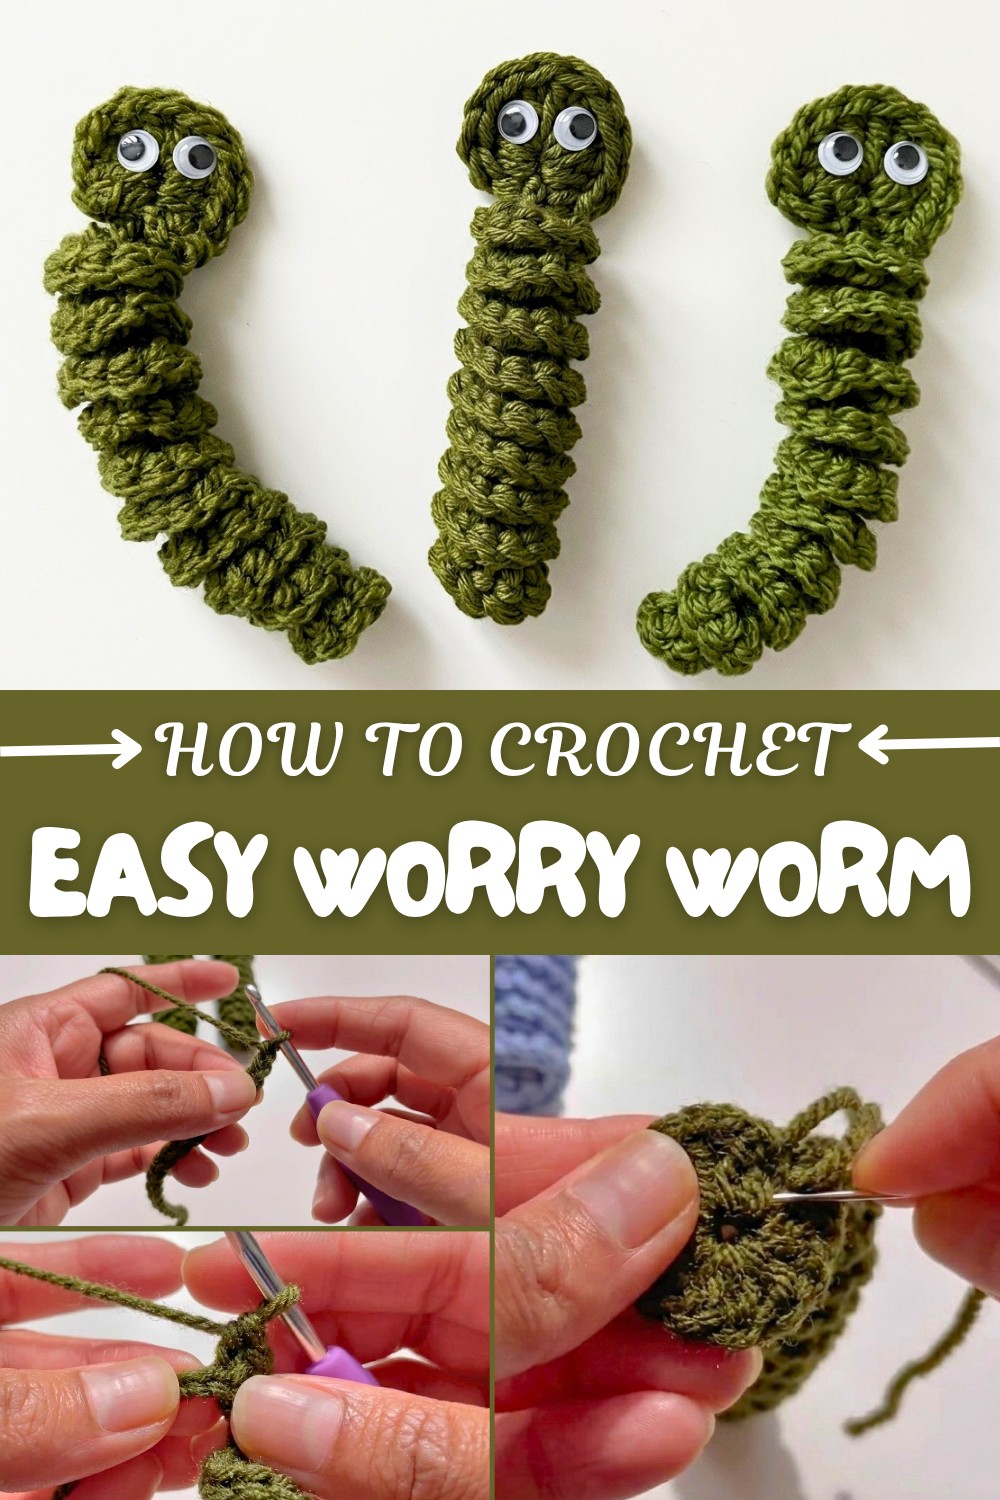
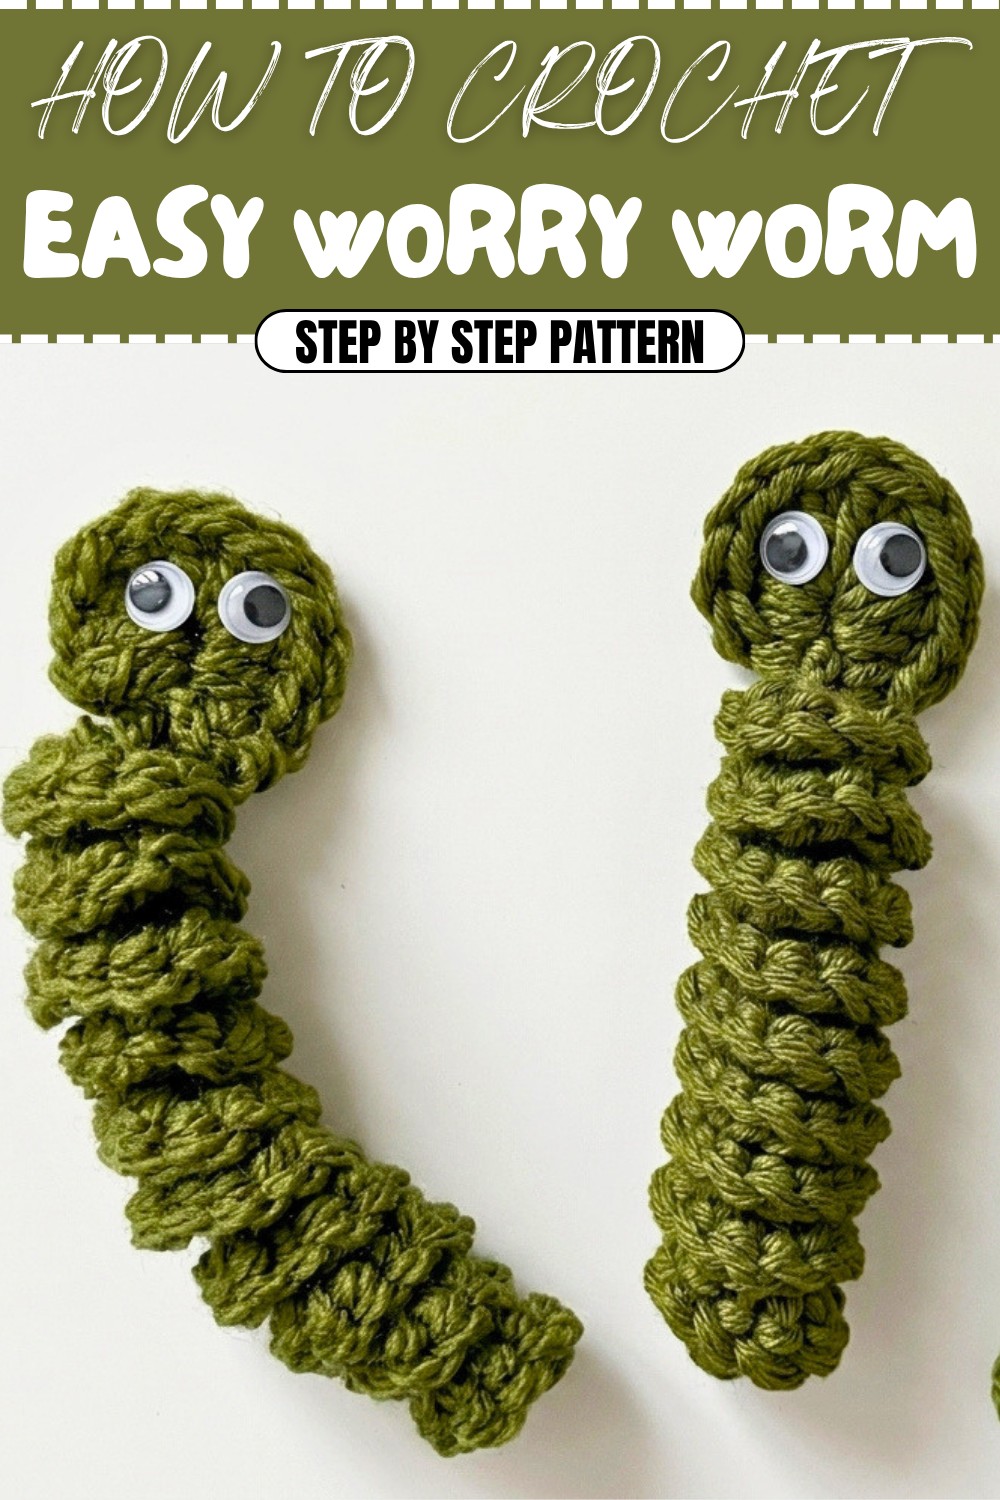
Adorable Free Crochet Worry Worm Pattern for Creative Fun
Uplift someone’s spirits with a Free Crochet Worry Worm Pattern, quick to follow, fun to give, and sure to spread positivity everywhere.
Crocheting a tiny, twisty friend that can chase away worries is more than just a project—it’s a mini adventure in creativity and comfort. This crochet worry worm pattern is designed to be both a colorful toy and a soothing companion, perfect for kids or anyone needing a gentle distraction. Using a 4mm hook and soft yarn, you’ll bring this little coil to life with simple stitches like single crochet and double crochet, arranged in a clever pattern that shapes the worm’s plump body and expressive head. This unique approach to combining stitches creates a textured, snuggly toy that’s fun to hold, squish, and even fidget with when nerves hit.
Irresistible Crochet Worry Worm Pattern Free Project for Happy Moments
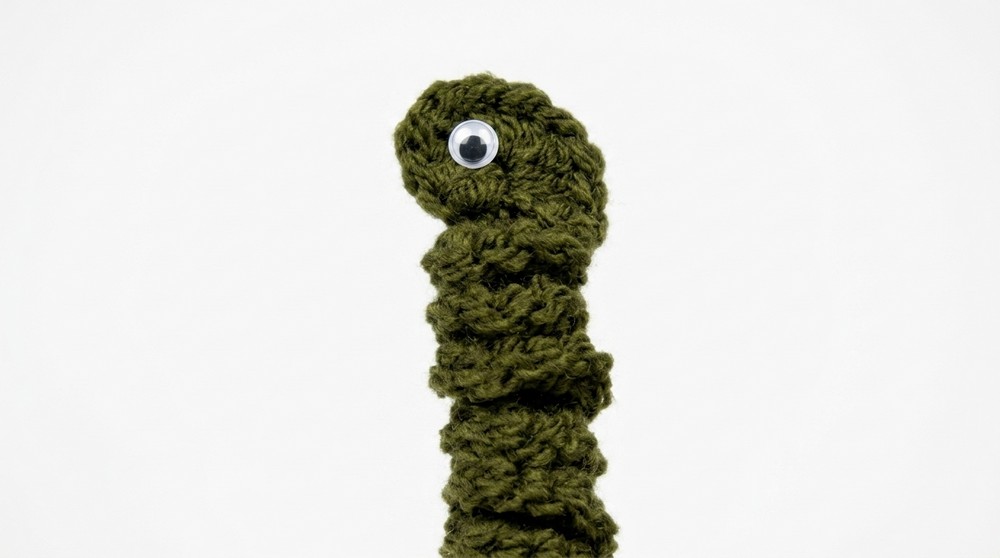
From the very first chain, you’ll build the worm’s body by packing four single crochets into each chain stitch, giving it a thick, cushiony feel. The head stands out with ten double crochets, creating a rounded shape that contrasts beautifully with the body’s coils. Adding googly eyes is the final touch—personality in the form of playful sparkle that invites smiles and stories.
Beyond the charm of this pattern, the techniques you learn open doors to an arsenal of creative possibilities. Mastering the art of multiple single crochets in one chain and combining single and double crochets can lead you to crochet plush caterpillars, bumpy scarves, or even springy coiled bowls. This pattern isn’t just a project; it’s a hands-on lesson in texture, shape, and handmade happiness that turns simple yarn into joyful treasures. So grab your hook and yarn, and let this innovative little worm inspire your next creative journey!
Crochet Cute Worm Toy Pattern
Welcome to this delightful beginner-friendly crochet pattern for a cute worm toy! This fun and simple project can be created in no time and makes an adorable toy for children or even a charming desk or shelf buddy. Whether you choose acrylic or cotton yarn, this worm comes together beautifully with its curled tail and a rounded head, complete with googly eyes for added personality!
Note: For safety, avoid giving this toy to children under 3 years due to the small plastic eyes being a potential choking hazard.
Let’s dive into this quick and cute crochet journey!
Skill Level & Terminology
- Skill Level: Beginner
- Terms Used: US Crochet Terms
Materials & Tools
- Yarn: Acrylic or cotton yarn (choose any color or Dark Olive).
- Hook: 4mm crochet hook.
- Eyes: 9mm googly or wiggly eyes (self-adhesive or normal).
- Glue: Hot glue or fabric-safe glue for attaching eyes.
- Tapestry Needle: To weave in any ends.
- Scissors: For cutting yarn.
Note: Acrylic and cotton yarn produce slightly different textures, but both work perfectly for this project!
Gauge
Since this is a small toy, gauge is not crucial. However, if you’re replicating the same size, aim for tight stitches to ensure your toy retains its shape and structure.
Abbreviations List
| Abbreviation | Description |
|---|---|
| ch | Chain |
| sc | Single Crochet |
| dc | Double Crochet |
| sl st | Slip Stitch |
Special Stitch Instructions
- Working Multiple Single Crochets in One Chain: For the body of the worm, you’ll be adding 4 single crochets (sc) into each chain to create the curled look. This is a key part to forming the shape.
- Double Crochets for the Head: Add multiple double crochets (dc) into the same stitch to form the rounded head.
Finished Size
The finished size depends on the number of chain stitches you create. Following this pattern (with 30 chains), the worm is approximately 4-5 inches in length when fully curled.
The Pattern
Part 1: Start with the Chain
- Begin with a slip knot on your hook.
- Chain 30 stitches (or adjust based on your desired worm size):
- For a smaller worm: Chain 20-25.
- For a longer worm: Chain 40 or more.
- Add 1 extra chain (for turning).
For those unfamiliar with the pattern format: This is the base of your worm – the length you chain determines its size. If you’d like, practice chaining to refine your tension before you proceed.
Part 2: The Worm’s Body
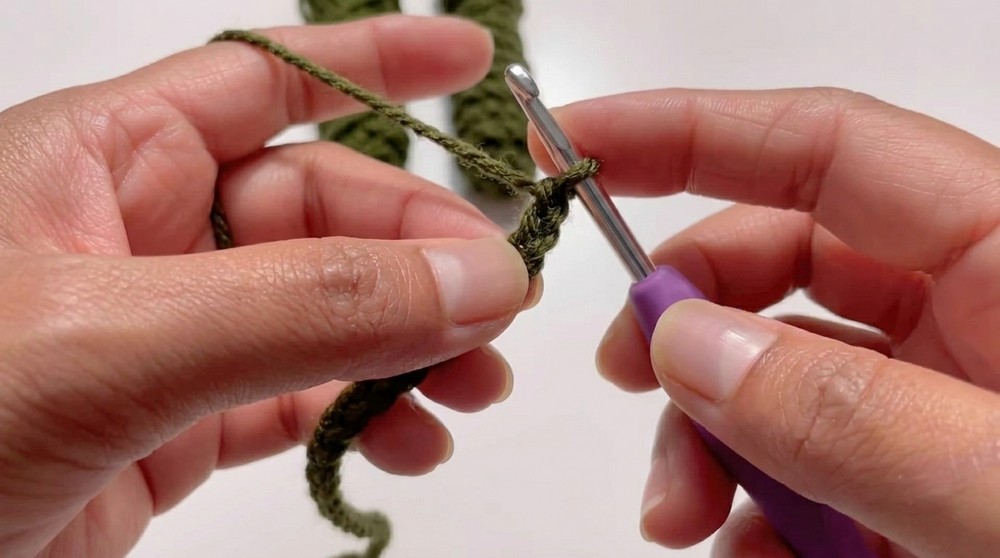
- Insert your hook into the second chain from the hook.
- Slip stitch into this chain to secure the end (this marks the "tail" end of the worm).
- Work 4 single crochets (sc) into each chain space along the row:
- Insert the hook into the next chain space.
- Yarn over and pull through the loop.
- Complete the single crochet.
- Repeat this 3 more times into the same stitch.
- Continue to work 4 single crochets in each chain space until you reach the second-to-last chain.
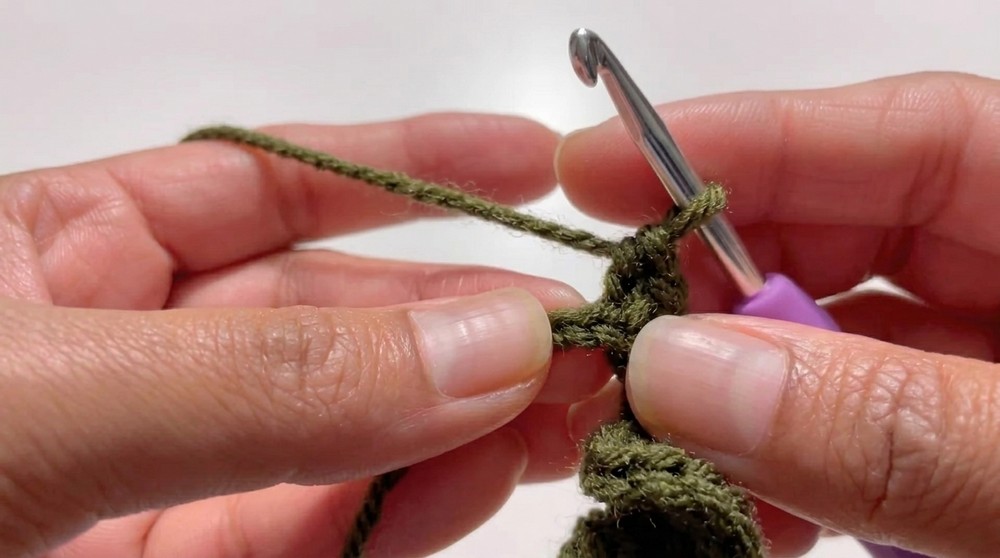
Explanation: These multiple single crochets create the curl/coil effect that gives the worm its spiral shape. Don’t worry if the work looks messy as you crochet – it will curl naturally into the worm shape as you go.
Part 3: The Worm’s Head
- Once you reach the final chain, create the head by working 10 double crochets (dc) into this last stitch:
- Yarn over, insert the hook into the chain space, pull the yarn through, yarn over, and pull through two loops. Yarn over again and pull through the remaining loops.
- Repeat this process 10 times in the same chain space.
- Fasten off by cutting the yarn and securing it with a final pull through the loop.
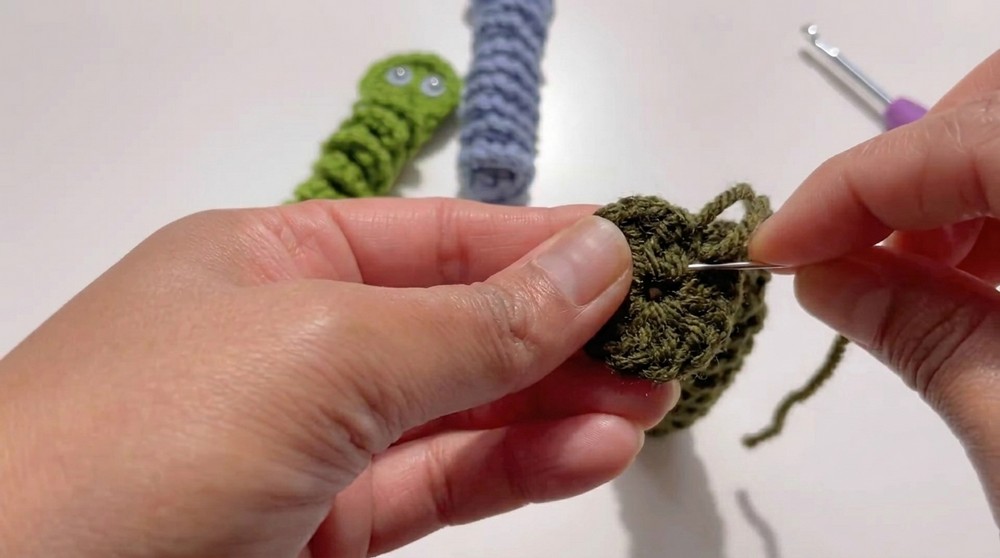
For pattern beginners: This part forms the worm’s rounded head. Make sure your stitches are snug and consistent for an even look.
Part 4: Assembly & Finishing
- Shape the Worm: Adjust the worm’s curls by gently twisting and reshaping the body as needed to achieve the desired spiral effect.
- Secure the Head Loop: Tuck and tie off any small loops of yarn at the head to smooth the shape. Make a small knot to secure.
- Attach the Eyes:
- If using self-adhesive googly eyes, simply press them onto the head.
- For non-adhesive googly eyes, use a dot of glue on each eye and press firmly in place.
Tips for Success
- Keep your stitches snug and consistent to ensure the curls form neatly.
- If the worm doesn’t curl naturally, you can manually twist the body for the desired shape.
- Play around with different yarn colors to create unique mini worms – perfect for gifts or decoration!
How to Start the Pattern for Beginners
This pattern is straightforward, using chains (ch), single crochets (sc), and double crochets (dc) as the primary techniques. You start with a basic chain to set the length of your worm. From there, working 4 sc into each chain creates the curled body, and 10 dc in the final stitch forms the head. This simple sequence is ideal for beginners to practice working into chain spaces while creating an adorable result.
Conclusion
Congratulations! Your cute little crochet worm is complete! This playful and quick project helps improve your basic crochet skills, particularly working multiple stitches into one chain for shaping. Whether you make it for a child (aged 3 and above) or as a whimsical addition to your desk, this adorable worm is sure to bring smiles.