
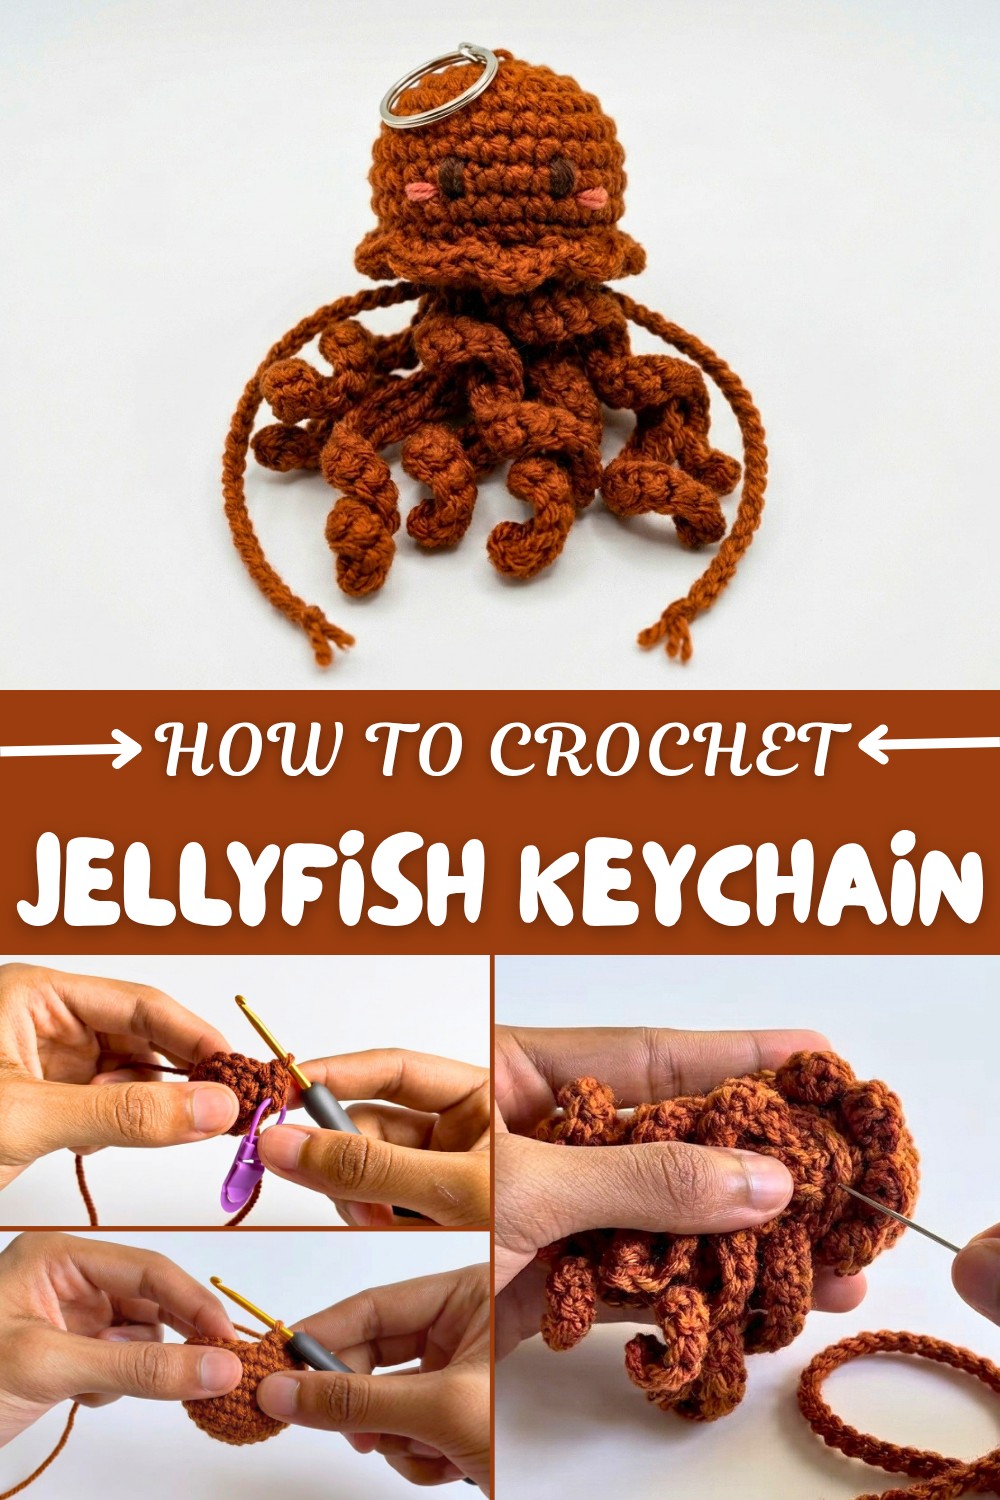
Quick & Cute Crochet Jellyfish Keychain Pattern for Ocean Lovers
Bring smiles everywhere with a free crochet Jellyfish Keychain pattern that's quick, friendly, and awesome for gifts or bags.
A tiny, squishy jellyfish keychain pattern is as cute as it is fun to make. With its curly tentacles swaying below and a cheerful face, this crochet project is perfect for beginners or anyone looking for a quick and creative crochet. You can make it in soft pastel colors, bright and bold tones, or even mix and match your favorite shades to make it truly unique. It’s small enough to finish quickly, but the result is full of charm and personality.
Boho Style Free Crochet Jellyfish Keychain Pattern for Chic Accessorizing
This pattern is more than just adorable—it’s also super handy! You can attach it to your keys, add it as a charm for your backpack, or gift it to a friend to brighten their day. It’s lightweight and easy to carry, making it the perfect accessory for kids and adults alike. While working on this pattern, you’ll get to practice simple crochet stitches, learn how to create loops for its fun tentacles, and even add a keyring to make it useful.
One of the best things about this project is how much you can customize it. From the colors you pick for the jellyfish and its tentacles to personalizing it with small details like blush cheeks, every piece can showcase your own style. Whether you keep it for yourself or give it as a thoughtful handmade gift, this pattern is sure to spread smiles everywhere. Simple, cute, and full of fun; it’s a small creation that brings big joy.
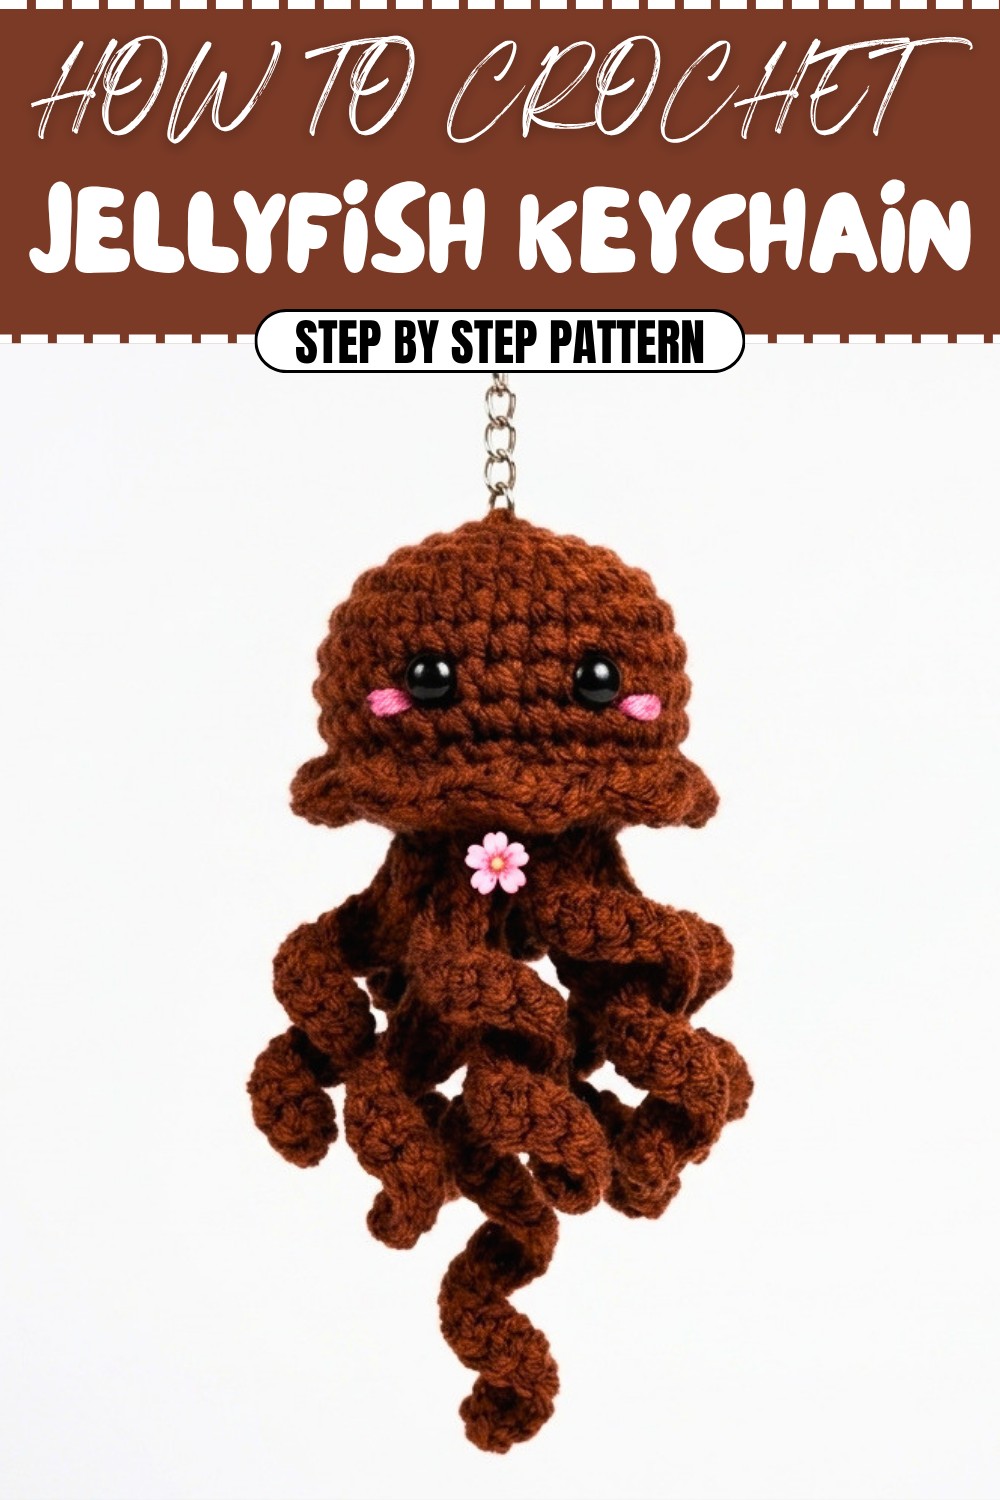
Crochet Jellyfish Keychain Pattern: Step-by-Step Guide
This pattern will guide you step by step to crochet an adorable jellyfish keychain. Its whimsical tentacles and cute face make it the perfect accessory or gift item. This project is beginner-friendly and walks you through each detail using basic crochet stitches.
Skill Level & Terminology
- Difficulty: Beginner
- Crochet Terms: US terminology
Materials & Tools
- Yarn:
- Main color: Weight 4 yarn (e.g., Chestnut ).
- Secondary color for tentacles (optional).
- Pink and black yarn for details (eyes and blush).
- Hook: 3 mm crochet hook
- Keyring
- Notions:
- Scissors
- Yarn needle
- Stitch marker
- Stuffing: Polyfill or yarn scraps for filler
Gauge
Gauge is not critical for this pattern, but tight stitches will help maintain the jellyfish’s shape.
Abbreviations List
- ch: Chain
- sl st: Slip stitch
- sc: Single crochet
- inc: Increase (two sc in one stitch)
- dec: Invisible decrease (crochet two front loops together)
- dc: Double crochet
- BLO: Back loops only
Special Stitch Instructions
- Invisible Decrease: Insert your hook into the front loop of the next 2 stitches, yarn over, pull through both loops, yarn over, and pull through the remaining loops.
- Magic Circle Alternative: Use a beginner-friendly chain circle technique.
Finished Size
Approximately 3 inches in diameter, not including tentacles.
Pattern Overview
This jellyfish starts with a slip knot and uses single crochet rounds to shape the body. Invisible decreases bring the top to a close, and the body’s final round includes tentacles for flair. Facial details and keyring attachments complete the project.
The Pattern Itself
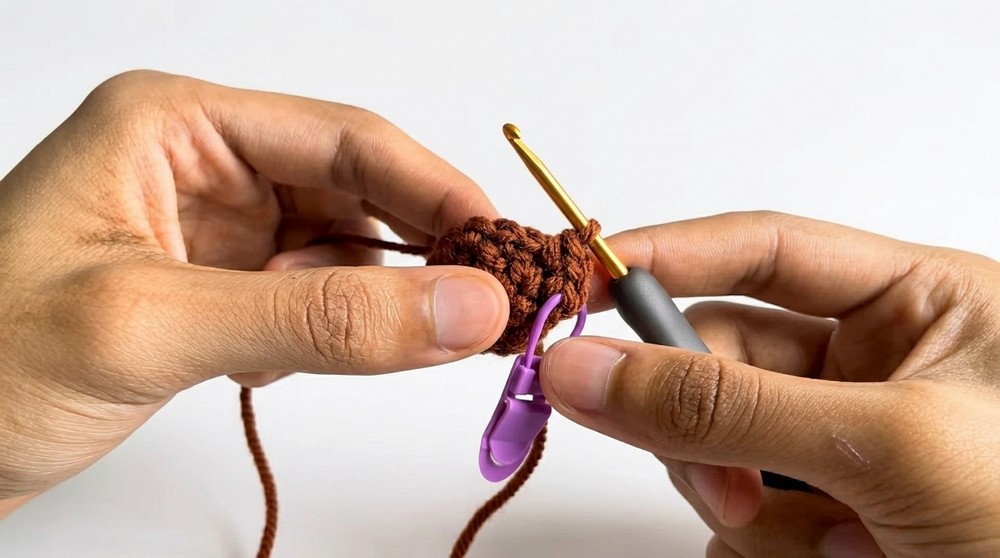
Foundation (Round 1)
- Make a slip knot and tighten it onto your hook.
- Ch 4, then sl st into the first chain to form a ring.
- Work 6 sc into the center of the ring, ensuring you crochet over the tail for easy closure later.
- Sl st into the first stitch. Ch 1. Pull the tail tightly to close the ring completely.

Ready, set, crochet! Begin with a simple chain circle technique to build the jellyfish’s foundation. This is where the magic starts!
Rounds 2–5: Increasing to Shape the Body
Round 2
- Work 2 sc into each stitch (6 increases total). Mark the first stitch of the round with a stitch marker. (12 sts)
- Sl st into the first stitch. Ch 1.
Round 3
- [sc, inc]: Repeat this pattern. (1 single crochet, followed by an increase). (18 sts)
- Sl st into the first stitch. Ch 1.
Round 4
- [sc, sc, inc]: Repeat around. (24 sts)
- Sl st into the first stitch. Ch 1.
Round 5
- [sc, sc, sc, inc]: Repeat around. (30 sts)
- Sl st into the first stitch. Ch 1.
Tip: These rounds will create the rounded base of your jellyfish. Use a stitch marker to keep track of your first stitch in each round.
Rounds 6–9: Maintaining the Shape
- Work 1 sc in each stitch around for 4 rounds.
- At the end of each round, sl st into the first stitch. Ch 1.
Notice the shape taking form! We’re holding steady to create the jellyfish body.
Rounds 10–13: Decreasing
Round 10
- [sc, sc, sc, dec]: Repeat this pattern (invisible decrease method). (24 sts)
- Sl st into the first stitch. Ch 1.
Round 11
- In BLO, [sc, sc, dec]: Repeat this pattern. (18 sts)
- Sl st into BLO of the first stitch. Ch 1.
Round 12
- In BLO, [sc, dec]: Repeat around. (12 sts)
- Sl st into BLO of the first stitch. Ch 1.
Round 13
- In BLO, dec in every stitch. (6 sts)
- Sl st into the first stitch (working into both loops this time).
Stuffing time! Before the final decrease, fill your jellyfish with stuffing. Shape it to ensure the top is rounded but the bottom remains collapsible.
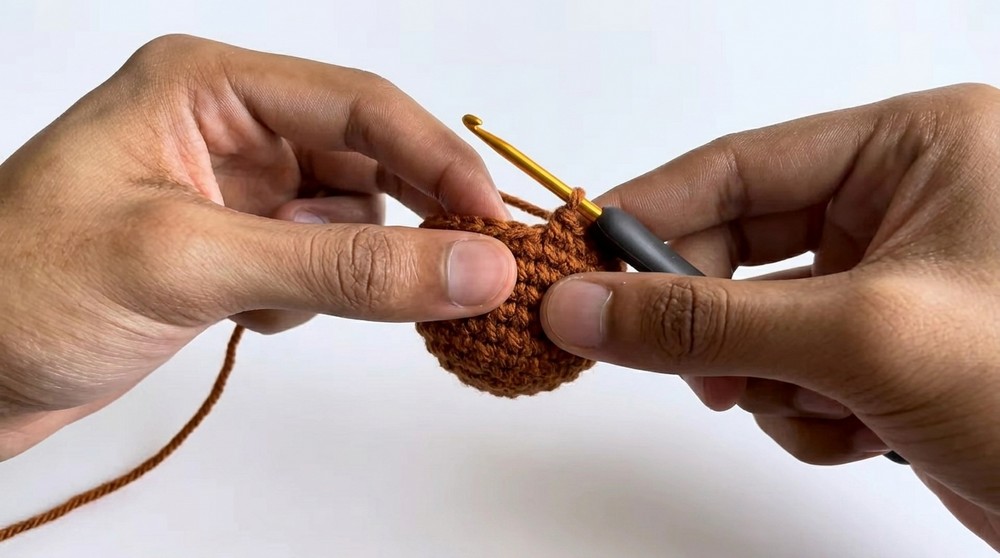
Tentacles
Tentacle Instructions
- Ch 21, skip the first chain, and work 20 sc back down the chain.
- Slip stitch into the next 3 stitches.
- Repeat to create the desired number of tentacles (8 total).
- If you run out of stitches in your round, follow the front-loop transfer method: Make a long slip stitch into the next round of BLO and continue!
Swish and swirl! The tentacles bring the jellyfish to life. Chain stitches and single crochets make them soft and springy.
Decorative Front Loops
- Switch to the remaining BLO round.
- Start with a sc in the first loop, followed by 3 dc in the next loop, and a sl st into the next. Repeat this pattern around.
A little flair adds character! These scallops give your piece a polished, bubbly look.
Adding the Face
- For eyes, thread black yarn and stitch two small lines four stitches apart on Round 8.
- For blush, use pink yarn and make tiny horizontal stitches one round below each eye.
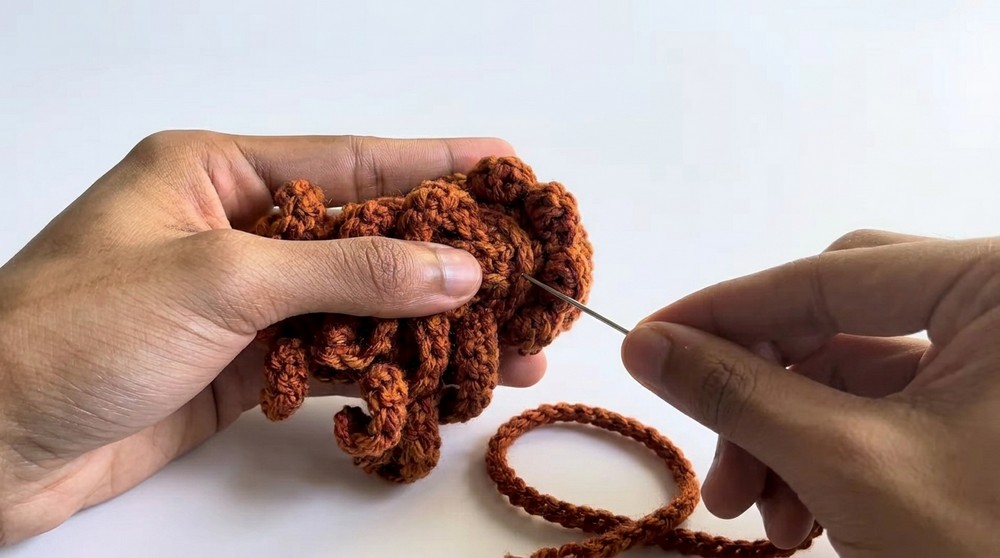
- Knot and hide all tails neatly inside the jellyfish.
Bring your jellyfish to life with a touch of charm! The face is the most expressive part.
Attaching the Keyring
- Use the same color yarn as your jellyfish.
- Secure the yarn under Round 1, loop through the keyring, and come back through the base.
- Repeat until the keyring feels secure. Knot and hide the remaining tail inside the jellyfish.
A functional finish! Turn your jellyfish into a handy accessory with this simple keyring attachment.
Assembly & Finishing
- Ensure all details are securely fastened.
- Tug loose ends gently to adjust tentacle symmetry.
- Tuck any visible yarn tails inside for a clean finish.
Congratulations! Your adorable jellyfish keychain is now complete!
Pattern Summary
This jellyfish pattern is worked in rounds, starting from the top down. The stitches used are beginner-friendly, focusing primarily on sc, sl st, inc, and dec. Chains and double crochets are used for decorative elements, while front-loop-only work adds dimension. The tentacles and facial details add charm to this functional keychain.
Challenges and Simple Solutions
While making the jellyfish keychain is beginner-friendly, a few parts might feel tricky at first. For example, starting with a magic ring can be confusing if you’re new to crochet. If that’s the case, you can use a simple chain circle as an alternative to begin your project.
Another common challenge is keeping track of your stitches, especially when working with small rounds. Using a stitch marker can make this much easier and prevent mistakes. Finally, making the curly tentacles may seem tough, but they’re simply achieved by crocheting more stitches into the same loop—just take your time, and they’ll turn out perfect! With a bit of patience and these simple tips, any difficulty can be solved easily.