
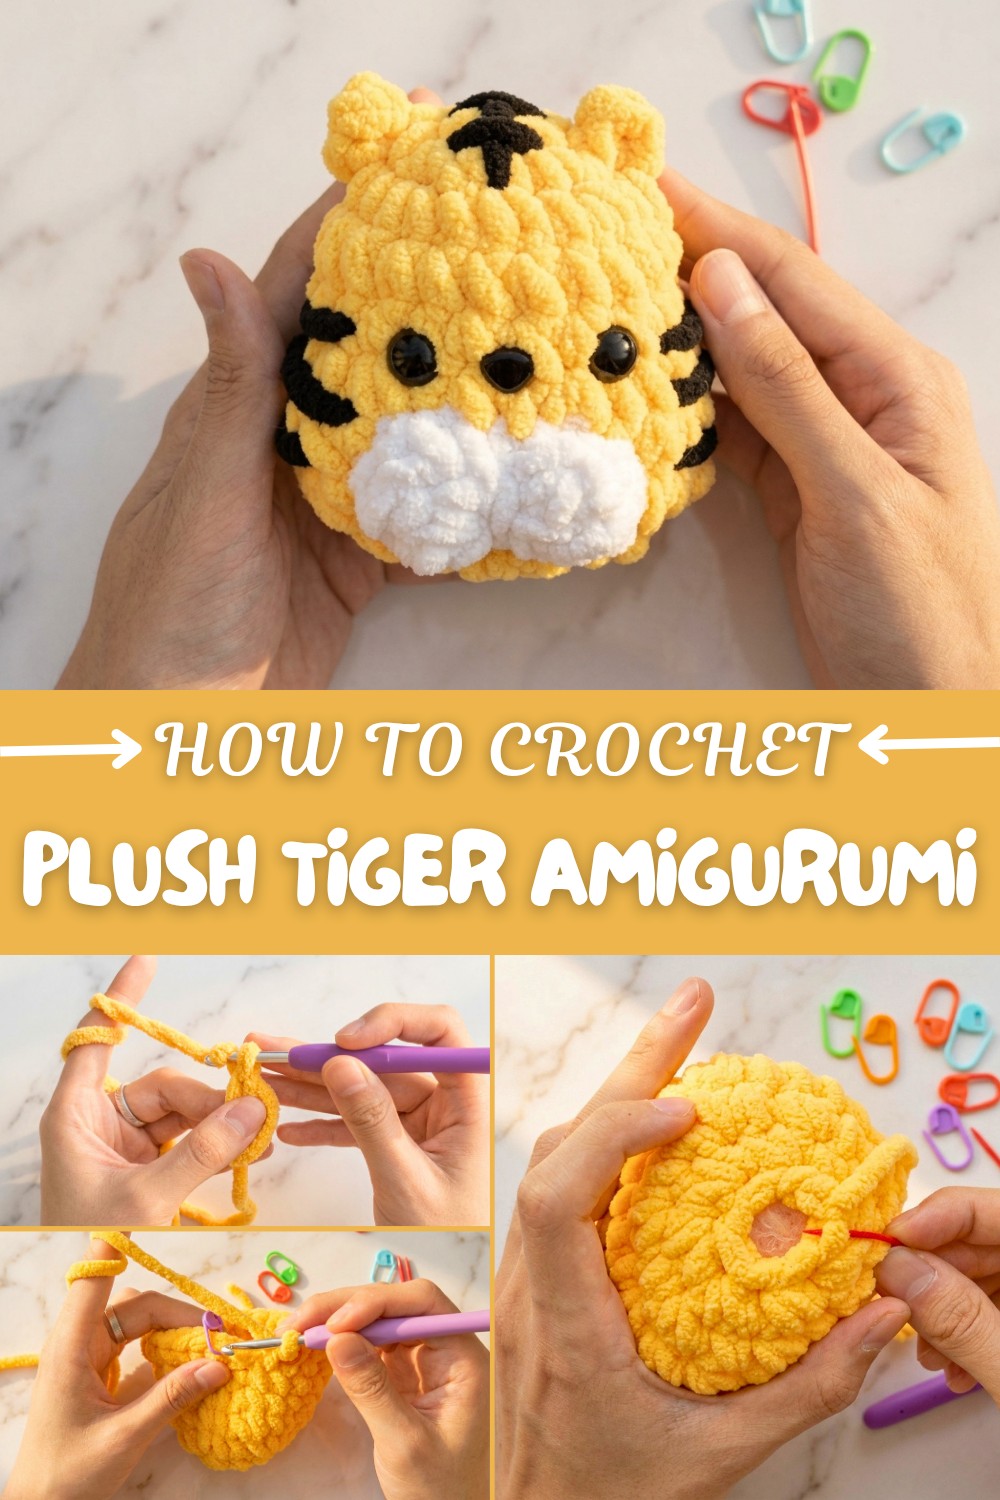
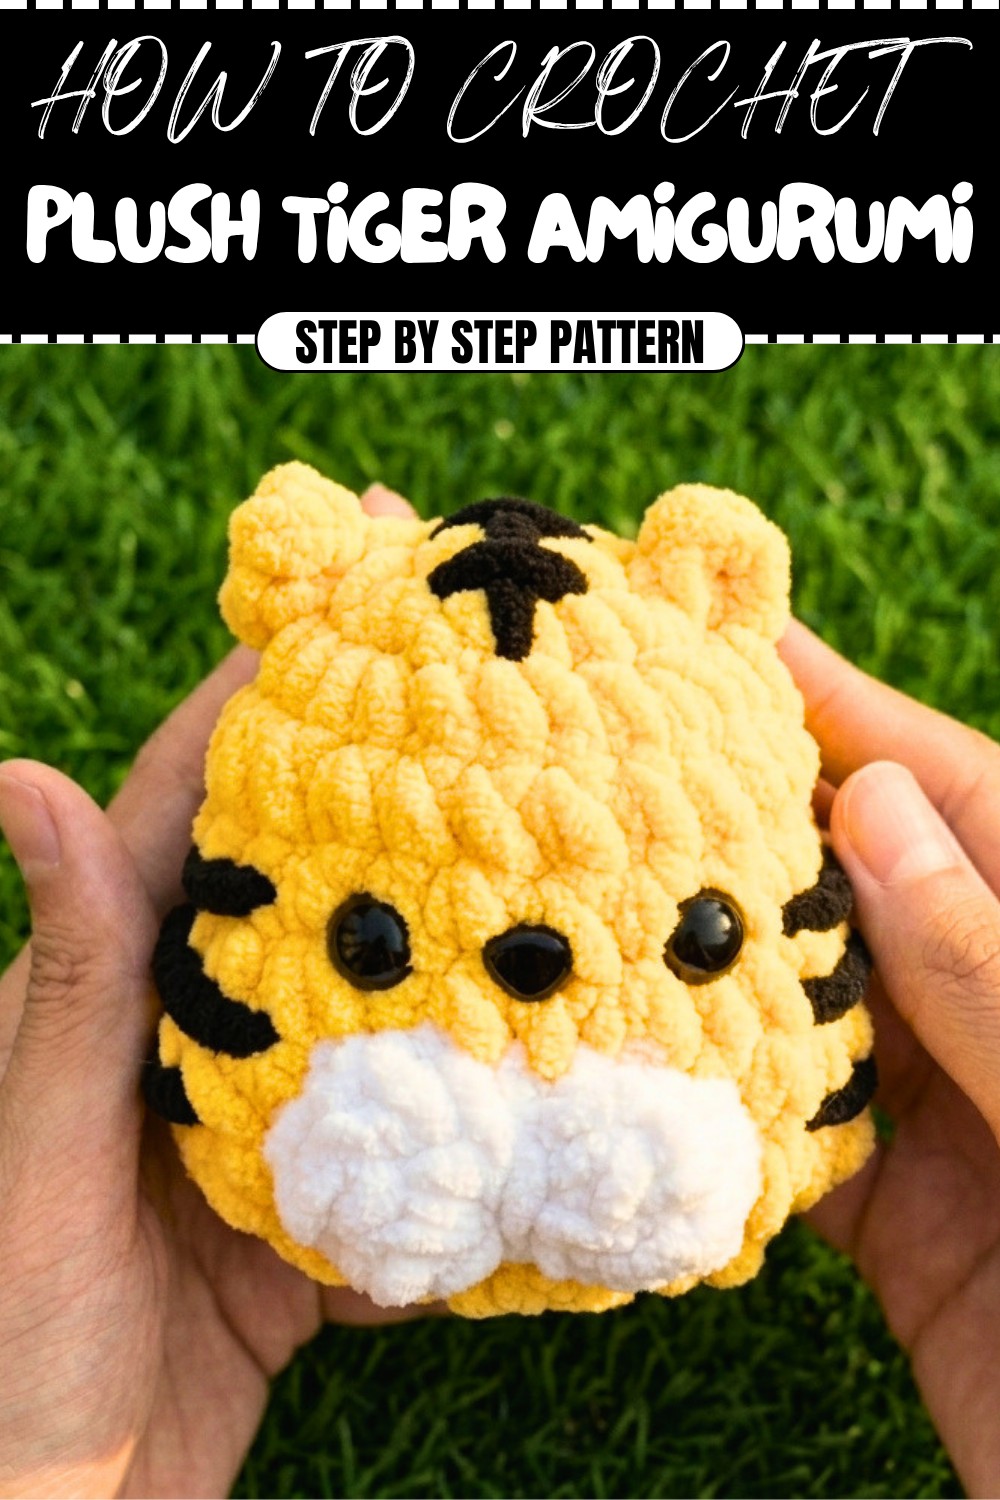
Free Tiger Amigurumi pattern with Cute Striped Details
Treasure playful jungle charm with Free Crochet Tiger Amigurumi Pattern featuring adorable striped features and cuddly appeal for display.
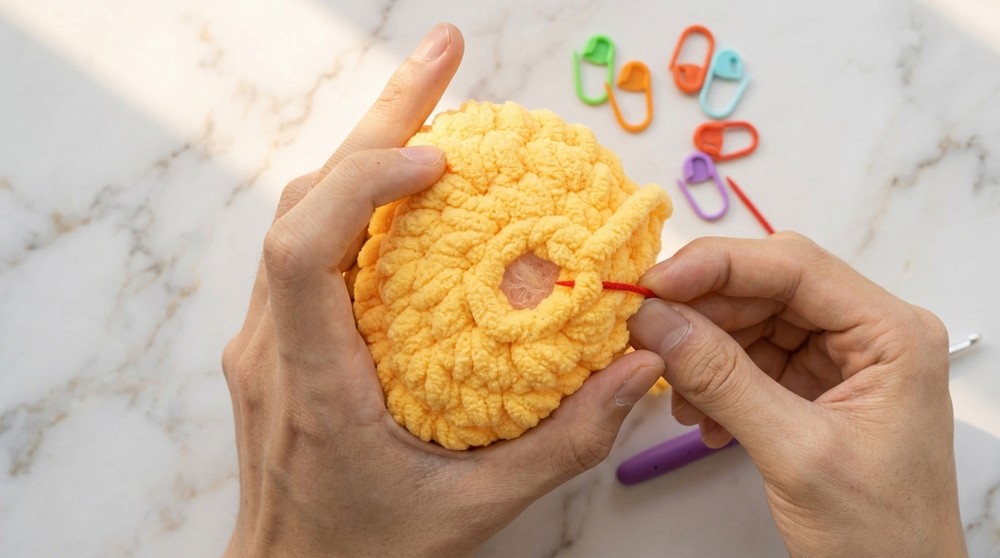
Cute animal projects are always a favorite in my crochet collection, and the Free Crochet Tiger Amigurumi pattern is one of those designs that instantly brings personality to a handmade toy. This amigurumi project features a charming tiger with a rounded shape, small ears, expressive facial details, and distinctive stripes that give it a playful look. The texture is smooth and neat, making the finished piece both attractive and enjoyable to display.
What I like most about this pattern is that it can suit a wide range of skill levels. Beginners can practice shaping techniques while more experienced crocheters can experiment with details and color placement. The size can easily be adjusted by changing the yarn weight or hook size, allowing you to make anything from a small desk companion to a larger cuddly toy.
Free Tiger Amigurumi pattern for Fun Crochet Time
The project is usually worked in separate pieces that are joined together near the end. Taking time to position the facial features carefully can make a big difference in the tiger’s personality. Yarns with good stitch definition work especially well because they help highlight the stripes and shaping details, while slightly plush yarns can give the toy a softer and more cuddly appearance.
The design captures the charm and playful spirit of tigers while keeping the overall look friendly and approachable. It makes a wonderful gift for birthdays, baby showers, nursery decorations, animal lovers, or anyone who enjoys handmade toys. Feel free to customize the colors, facial expressions, or accessories to make your tiger truly one of a kind and a reflection of your own creativity.
Free Crochet Plush Tiger Amigurumi Pattern with Details
Welcome to this detailed step-by-step crochet pattern for crafting an adorable tiger amigurumi. This amigurumi tiger is worked mainly in single crochet stitches with shaping through increases and decreases. You’ll learn how to create the entire tiger body, features like eyes and nose, as well as embroider the face details. The project is perfect for emoji lovers, children’s toys, or decorative pieces.
Skill Level & Terminology
- Skill Level: Beginner to Intermediate
- Terminology: US crochet terms used throughout the pattern.
Materials & Tools
- Medium weight cotton or acrylic yarn (main tiger color: orange or similar)
- Black yarn for nose, eyes, and facial features
- Crochet hook size 2.5 mm (or size suited to your yarn and tension)
- Stitch markers
- Yarn needle for sewing and weaving ends
- Polyester fiberfill or stuffing
- Scissors
Gauge
To maintain proper sizing, make a gauge swatch:
- Approximately 20 single crochet stitches and 22 rows in a 10cm x 10cm square
- Adjust hook size if necessary to match gauge.
Abbreviations
- ch = chain
- sc = single crochet
- inc = increase (2 sc in one stitch)
- dec = decrease (2 sc stitches crocheted together)
- sl st = slip stitch
- st(s) = stitch(es)
Special Stitch Instructions
Magic Ring (Magic Circle)
Create a loop with the yarn, insert hook, yarn over, pull through, and chain 1 to secure. This allows you to crochet in rounds without a hole in the center.
Increase (inc)
Work 2 single crochet stitches into the same stitch.
Decrease (dec)
Insert hook into the next stitch and the following stitch, yarn over, pull through — yarn over and pull through two loops twice to complete one stitch combining two.
Slip Stitch (sl st)
Insert hook into stitch, yarn over, pull through both loop on hook.
Finished Size
The completed tiger doll will measure approximately 7 - 8 cm (height), perfect for a small handheld toy.
Pattern Instructions
Starting the Body
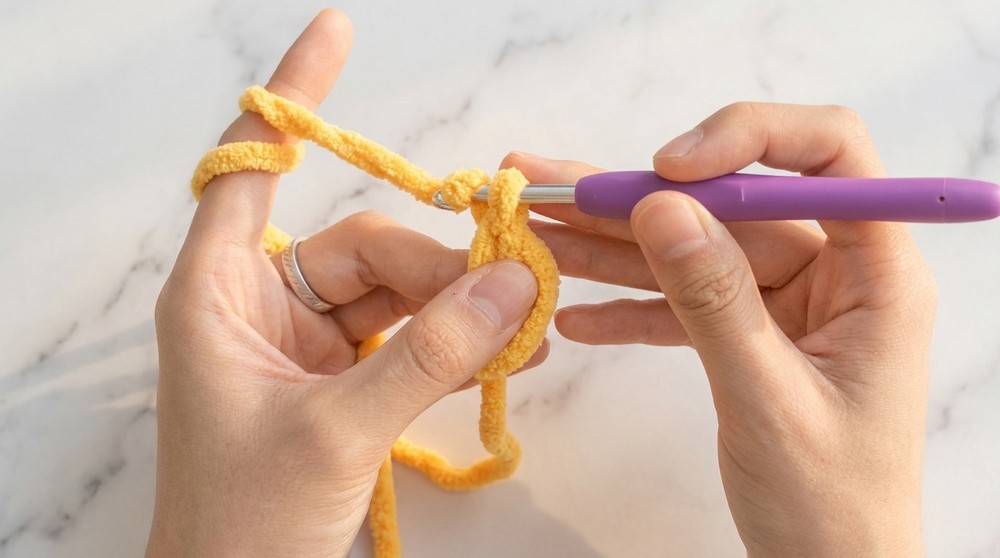
- Step 1: Magic Ring Creation
Hold yarn on left hand, wrap yarn around fingers to create a loop. Insert hook into loop and pull yarn through. Chain 1 to begin. - Step 2: Round 1
Crochet 7 single crochets (sc) into the magic ring. Mark the first stitch of the round.
(Total 7 sts)You just formed the base of the tiger’s body. Seven stitches create a small circle as the foundation.
- Step 3: Close the ring
Pull the yarn tail to close the ring tightly in the middle of your circle.
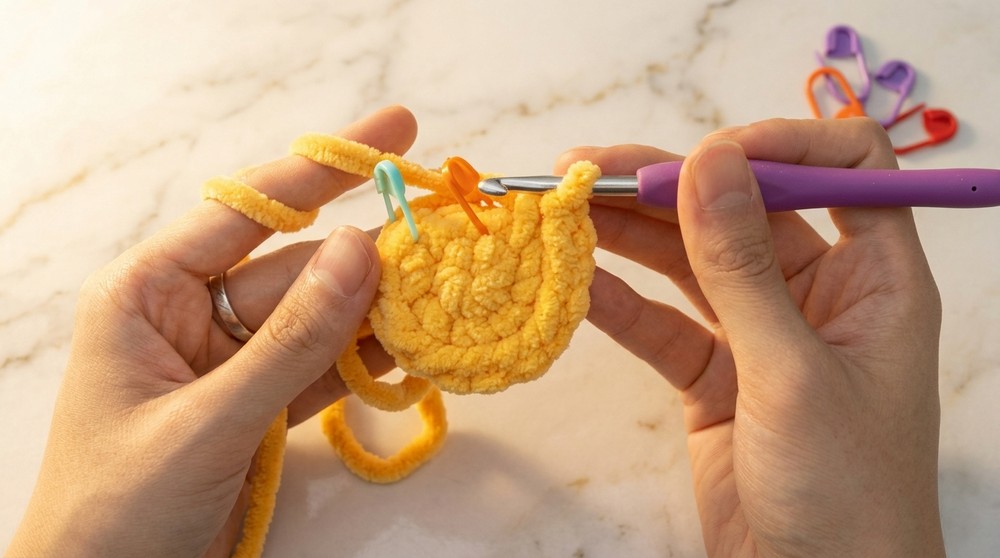
Round 2
- Crochet a slip stitch (sl st) into the first stitch to join the round. Chain 1 to start round 2.
- Crochet 7 increases (inc) evenly spaced around—each increase equals 2 sc in one stitch.
(Total 14 sts) - Mark your first stitch again.
The tiger’s body grows evenly, doubling the stitch count for shaping.
Round 3
- Crochet 1 sc in the first stitch marked, then 1 inc in the next stitch. Repeat this group 7 times.
(Total 21 sts) - Join with a slip stitch, chain 1, mark the start.
This alternate increase and single crochet helps the body widen steadily.
Rounds 4 & 5
- Crochet 1 sc in each stitch around (21 stitches per round).
- Join each round with a slip stitch and chain 1.
- Remember to mark the first and last stitches.
These rounds maintain the body’s size and create height.
Round 6
- Crochet 3 single crochets (sc), then 1 increase (inc), repeat this six times.
(Total 27 stitches)
Round 7
- Crochet 1 sc in each stitch around (27 sts).
- Join with slip stitch and chain 1.

Round 8
- Crochet 6 sc, then 3 decreases (dec), repeat pattern to end round.
(Back to 21 sts)- To do a decrease, crochet two single crochets together as described earlier.
Round 9
- Crochet 1 sc, 1 dec repeat 7 times (14 sts).
- Join and chain up.
Round 10
- Crochet 7 decreases (dec) evenly (7 stitches).
- Join with slip stitch, chain 1.
At this stage, you have shaped the tapering top of the tiger’s head and body. Work on keeping stitch count precise to maintain symmetry and shaping.
Assembly of Features
Eyes and Nose Placement
- Place the eyes between rounds 5 and 6, spaced 4–5 stitches apart. Eyes can be sewn or safety eyes attached.
- Stitch the nose directly in the center between the eyes with black yarn, embroidering a small inverted triangle shape for the nose tip.
Proper placement of facial features brings expression to your tiger. Take your time positioning for symmetry.
Stuffing the Body
- Use fiberfill to stuff the tiger firmly but not overly tight. This adds shape and holds form.
- Leave a small opening at the bottom to insert stuffing.
Closing the Body
- Use whip stitch or continuous slip stitch to close the opening.
- Work the yarn through the front loop of each stitch to create a neat seam.
- Pull yarn tight and weave in the ends inside the body.
Carefully closing and stuffing your tiger adds durability and a clean finish to the project.
Mouth and Beard Embroidery
- Crochet the mouth separately: chain 3, work 2 double crochets (dc), slip stitch (sl st), chain 2, 3 dc, sl st.
- Sew this mouth piece onto the lower face area with matching yarn.
- Using black yarn, embroider tiger’s whiskers/beard on each side beneath the mouth for detail.
Ears (Make 2)
- Chain 3, work 1 sc and 1 dc back along the chain for ear shape.
- Join with slip stitch, cut yarn leaving tail.
- Sew ears symmetrically between rounds 3 and 4 on the head.
The ears complete the tiger’s head silhouette and should be matched carefully for symmetry.
Finishing Touches
- Weave in all remaining yarn ends inside the body to avoid unraveling.
- Add any additional details such as stripes by embroidering with black yarn or attaching small felt pieces.
- Your tiger doll is now complete!

Summary: How to Start and Stitches Used
Begin with creating a magic ring (slip knot), then crochet single crochets (sc) in rounds for a seamless body shape. The main techniques are increases (inc) to widen, decreases (dec) to taper, and slip stitches (sl st) to join rounds or close openings. The ears utilize double crochet (dc) stitches for shape contrast. Embroidery adds facial features, making your tiger unique and expressive.
Key Stitches Recap:
- magic ring for foundational loop
- single crochet (sc) as the primary stitch
- increase (inc) for expanding
- decrease (dec) for shaping/tapering
- slip stitch (sl st) for joining and finishing
- double crochet (dc) for ears and mouth details