
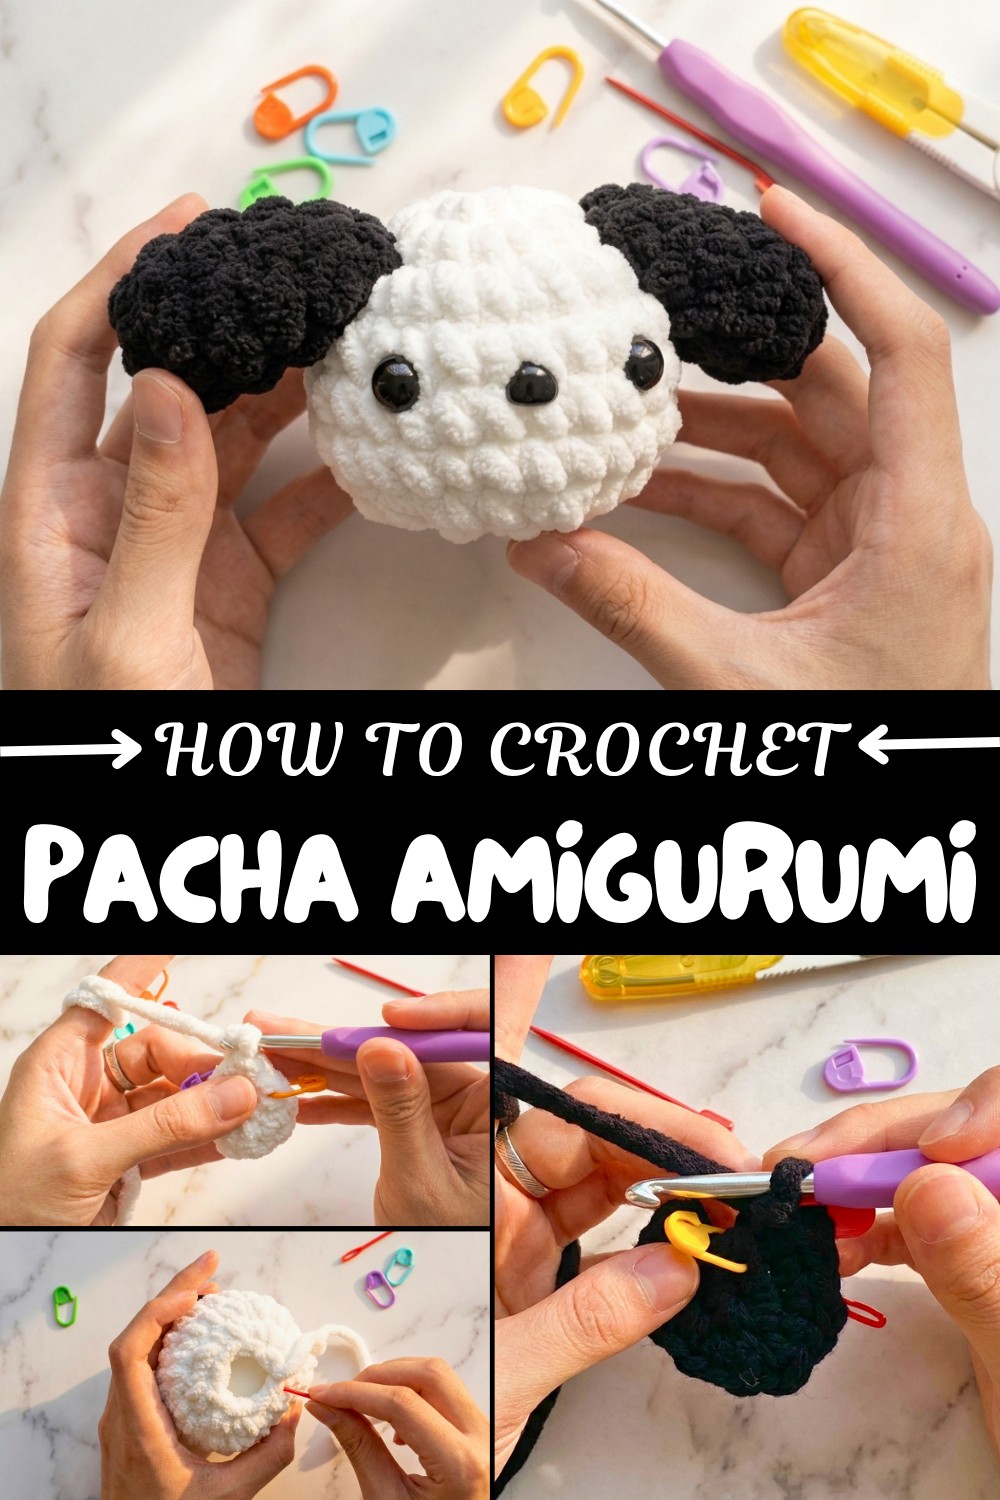
Free Crochet Pacha Amigurumi Pattern for Fun Home Accessories
Maximize your creativity through a free crochet Pacha amigurumi pattern that's bold, lovable, and perfect for any handmade enthusiast.
Do you love the thought of crocheting cute, personalized creations that bring a smile to anyone’s face? Meet Pacha, your next favorite crochet project! This adorable amigurumi pattern combines charm and simplicity, making it perfect for beginners who are looking to fall into the wonderful world of crochet toys. Crocheted with soft pastel or earthy tones, Pacha can be made to resemble just about any character you dream of! Whether it’s for a gift, a keychain, or a delightful decoration, this little doll will quickly become a must-have in your handmade collection.
Lovable Free Crochet Pacha Amigurumi Pattern for Creative Adventures
The beauty of the Pacha pattern lies in its simplicity. Its rounded head, expressive face, and tiny ears lend it a charm that’s hard to resist. The pattern relies on the single crochet stitch, a fundamental yet mighty stitch that’s easy to learn and execute. You’ll also master techniques like the magic ring for seamless starts and increases and decreases to shape Pacha’s head and features. These techniques not only help you create Pacha but will also be building blocks for many other amigurumi projects, such as creating animals, miniature characters, or even seasonal decorations.
What You Can Crochet Next Using These Skills
With the techniques you’ll master from this pattern, here are some ideas for your next project:
- Tiny Animals: Think bears, rabbits, or baby chicks.
- Accessories: Create adorable keychains, bag charms, or hanging pendants.
- Seasonal Décor: Use the same skills to make pumpkins, snowflakes, or bunnies for festive occasions.
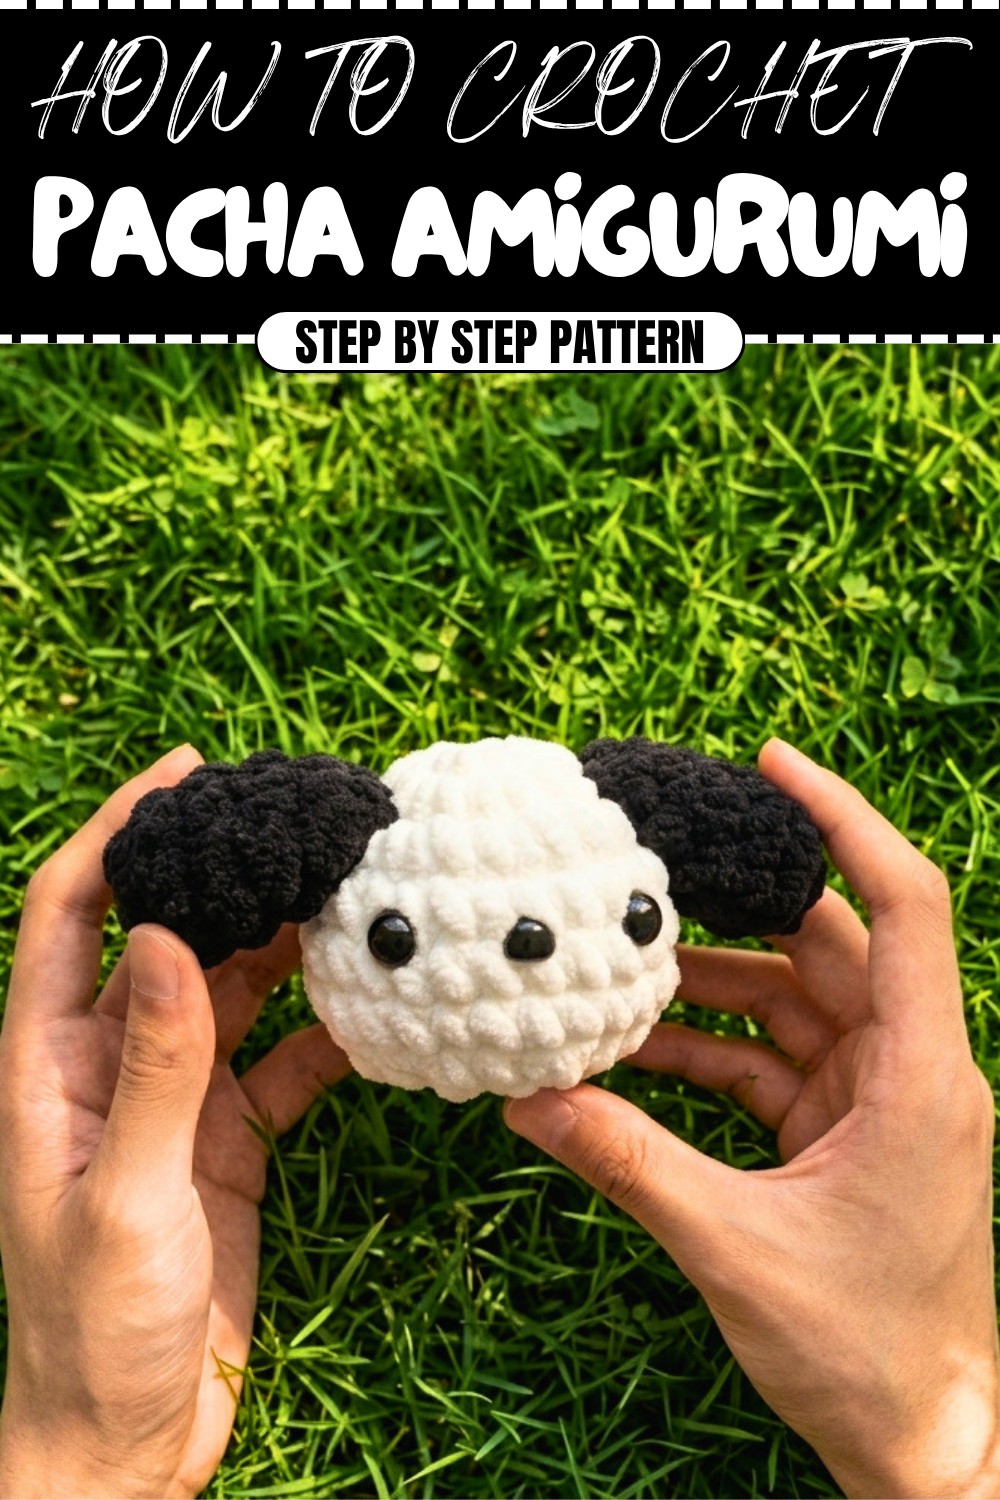
Lovely "Pacha" Doll Crochet Pattern
This step-by-step pattern will show you how to crochet a cute "Pacha" doll, featuring a simple yet adorable structure. Designed for beginners, this pattern utilizes basic crochet stitches and techniques like the magic ring, single crochet, and decreases. It is perfect as a gift, decoration, or keepsake.
Key Takeaways from This Pattern
- Easy and fundamental techniques that build your crochet skills.
- A quick and rewarding project that makes excellent gifts.
- Endless opportunities to customize, from colors to embellishments.
- A cute keepsake to cherish or share with loved ones.
Skill Level & Terminology
- Skill Level: Beginner
- Terminology: US Crochet Terms
Materials & Tools
- Yarn: Medium-weight yarn:
- White for the head.
- Black for the ears.
- Hook Size: 2.5 mm crochet hook.
- Stuffing: Polyester PP cotton.
- Safety Eyes and Nose: Optional, or you can embroider the details.
- Tapestry needle: For sewing parts together.
- Scissors.
- Stitch markers (Optional, for marking round starts).
Gauge
While gauge isn’t essential for this soft doll, aim to keep even tension. Your stitches should be tight enough to ensure no stuffing peeks out but soft enough for shaping the rounded forms.
Abbreviations List
- MR: Magic Ring
- Ch: Chain Stitch
- Sc: Single Crochet
- Inc: Increase (2 Single Crochets in one stitch)
- Dec: Decrease (Combining two stitches into one)
- Slst: Slip Stitch
Special Stitch Instructions
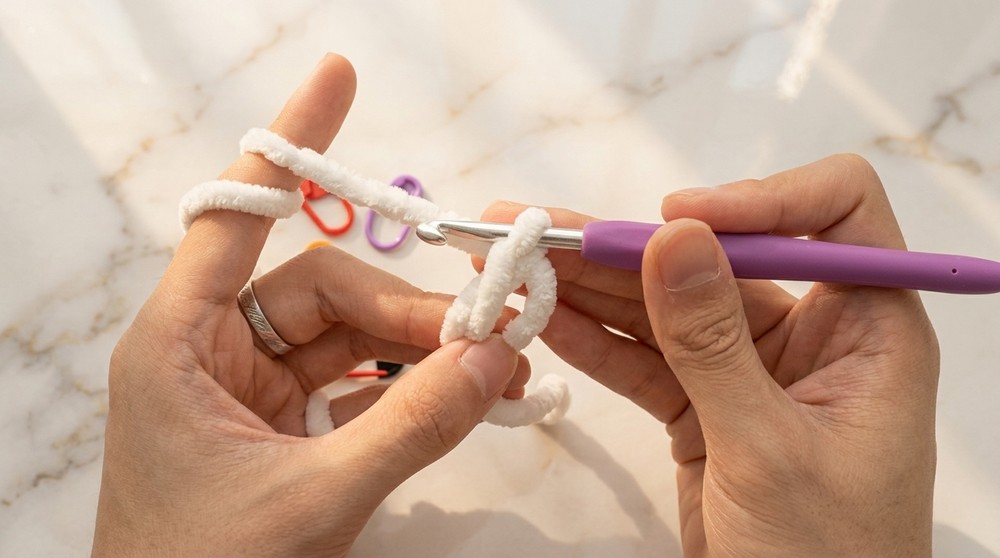
Magic Ring
- Wrap the yarn around your index and middle fingers once to create a loop.
- Insert the crochet hook into the loop, pull up a loop of yarn, and chain 1 to secure.
Decrease (Dec)
- Insert the hook into the first stitch and pull up a loop.
- Repeat for the next stitch (two loops on the hook).
- Yarn over and pull through all loops on the hook.
Finished Size
Final dimensions depend on yarn and hook used, but typical size is approximately 4 inches in height.
What You’ll Learn from this Pattern
This project is beginner-friendly but packed with essential crochet techniques. From Pacha, you’ll learn how to:
- Create an amigurumi head and ears using the classic spiral crochet technique.
- Shape your project using increases and decreases to form a balanced and rounded structure.
- Add cute details like the embroidered face, noses, and eyes, giving Pacha its personality.
- Assemble pieces seamlessly and secure them for a polished finish.
The Pattern Itself
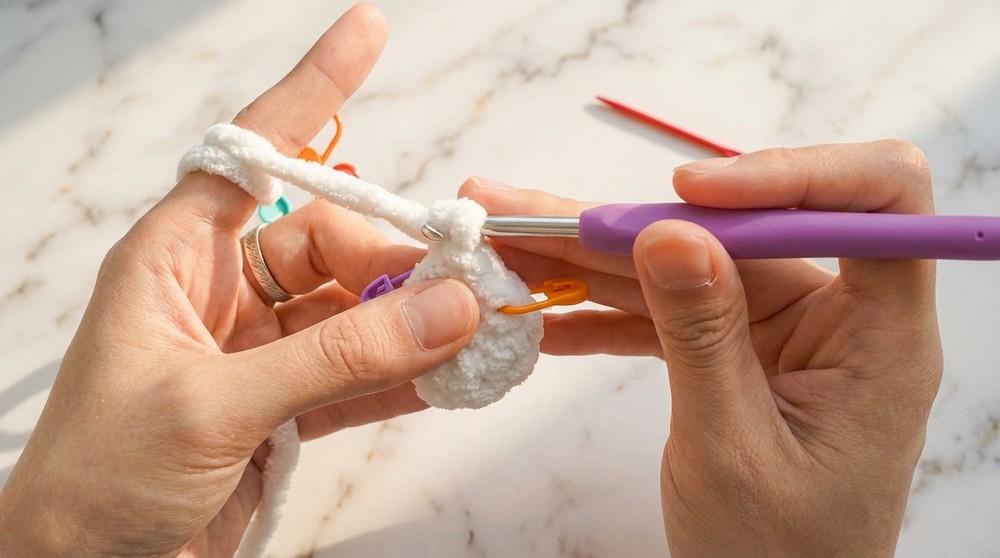
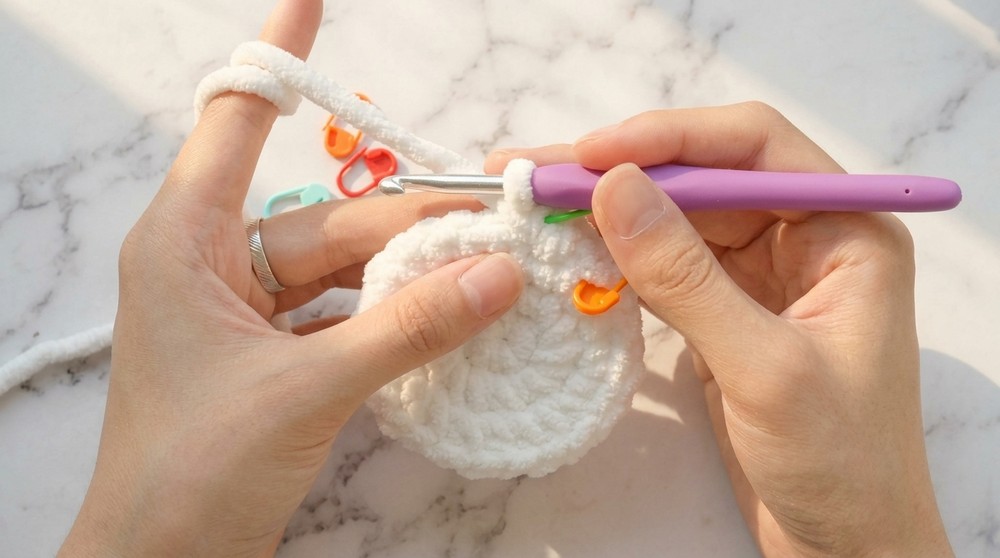
Head (White Yarn)
- Start with a Magic Ring: Wrap yarn around your fingers and follow the special instructions above.
- Round 1: Ch 1, work 8 Sc into the Magic Ring. Pull the yarn tail tight to close the ring. Mark the first stitch. (8 stitches total).
- Round 2: Work 8 Inc into each stitch (2 Sc per stitch). (16 stitches total).
- Round 3: Sc 1, Inc 1, repeat around. (24 stitches total).
- Rounds 4–6: Work 1 Sc into each stitch around. (24 stitches total per round).
- Round 7: Sc 1, Dec 1, repeat around to decrease. (16 stitches total).
- Round 8: Work 8 Dec (merge two stitches into one stitch) continuously. (8 stitches total).
Stretch the loop out, leaving about 10 cm of yarn. Cut the yarn, stuff the head with PP cotton, and sew to close.
In this section, you start with a basic circular base using a magic ring. The pattern uses increasing rounds for shaping and decreasing rounds to close the head.
Eyes and Nose Placement
- Placement: Install the eyes and nose between the fourth and fifth rounds. Position the eyes six stitches apart for a balanced look.
- For safety eyes, insert them into the fabric gently. Use the plastic pad behind the head to secure them.
- For the nose, position it in the middle of the face. Press the plastic pad gently to secure.
For beginners: The eyes and nose create "Pacha’s" personality! You can embroider details for a personalized touch or use store-bought safety features.
Stuffing
- Before sealing the head, fill it with PP cotton stuffing.
- Soft texture: Use less stuffing.
- Firm texture: Use more stuffing.
Tightly close the opening using a tapestry needle, sewing through the last round of stitches and pulling tight.
For beginners: Adjust the amount of stuffing to achieve the desired firmness for your creation.
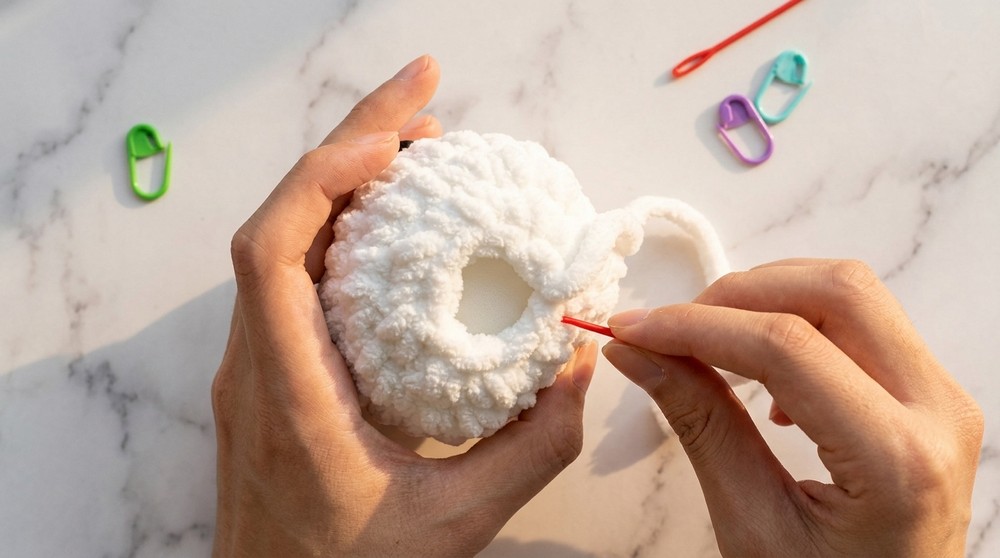
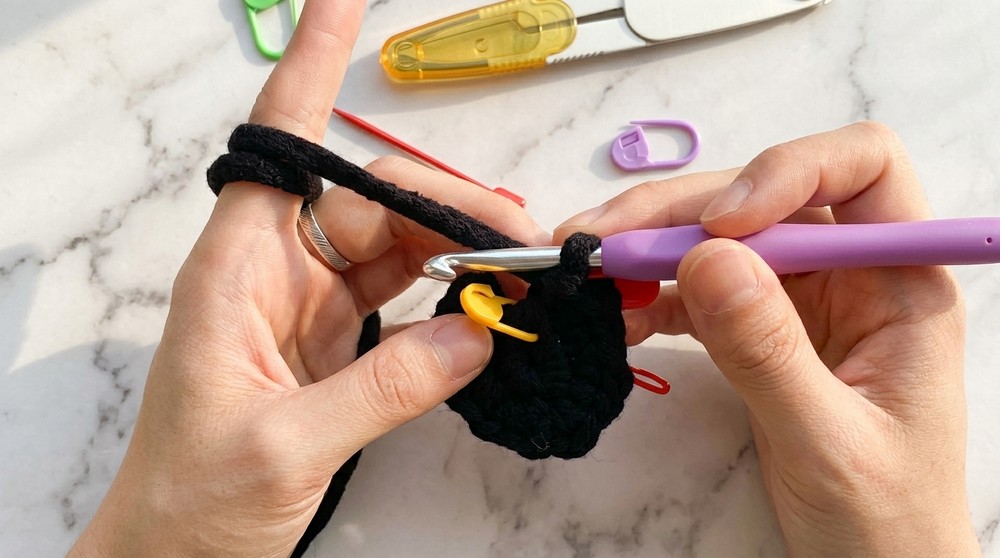
Ears (Black Yarn)
- Start with a Magic Ring: Follow previous instructions for creating a loop.
- Round 1: Work 8 Sc into the Magic Ring. Pull yarn tail tight and mark the last stitch (8 stitches total).
- Rounds 2–3: Work 1 Sc into each stitch around. (8 stitches total per round)
- Round 4: Sc 2, Dec 1, repeat twice. (6 stitches total).
- Round 5: Sc 1, Dec 1, repeat around. (4 stitches total).
Leave 10 cm of tail and cut yarn. Use the tapestry needle to hide excess thread by weaving inside the fabric.
Repeat process for the second ear.
The ears add character to the doll and are crocheted as small, tapered circular pieces using decreases for shaping.
Assembly & Finishing
Attaching the Ears
- Flatten the ears, squish them slightly at the base, and sew three stitches back and forth to hold firmly.
- Position the ears between the second and third rounds of the doll’s head.
- Attach securely by stitching along the edges. Hide excess thread within the fabric and trim any remaining yarn.
Repeat for the second ear, ensuring symmetry.
For beginners: Use basic sewing techniques to attach the ears sturdily, making sure the placement matches on both sides.
How to Start and Stitches Used
To begin this pattern, start with the head section using white yarn and a Magic Ring for a small circular base. The pattern progresses by working Single Crochet (Sc) for basic shaping and includes Increases (Inc) for expanding rounds and Decreases (Dec) for tapering or closing shapes. The doll is assembled by sewing the ears, eyes, and nose onto the head, followed by closing the opening with stuffing.
Conclusion
The "Pacha" doll crochet pattern is a delightful project for beginners! Its simple structure and familiar stitches make it approachable while allowing room for personalization in colors, features, and sizes. Focus on each part step-by-step, and before you know it, you’ll have a lovely crocheted doll ready to brighten anyone's day!