
Free Amigurumi Crochet Mini Demogorgon Pattern for Halloween
Crochet your own mini Demogorgon with this free amigurumi pattern, featuring simple steps to bring this iconic creature to life in a fun and creative way.
Fans of spooky and cute creations will love crocheting this mini Demogorgon amigurumi! The moment you finish the last stitch, you’ll notice how charming and unique the design looks. Its most striking feature is the round, soft body paired with a dramatic, flower-like head that really stands out. Each little petal opens up, giving it both an adorable and slightly mysterious appearance, which is perfect for anyone who enjoys something a bit different.
Beginner-Friendly Free Crochet Mini Demogorgon Amigurumi Pattern
The soft texture and simple shape are a pleasure to work with, even for those who are new to amigurumi. Basic stitches come together to form tiny arms, legs, and the head, so there’s no need to worry about complicated techniques. The subtle details on each petal add a special touch without being tricky to make. Switching up yarn colors can help you create a whole group of these little creatures, each with its own style and personality.

Making this pattern is quick and fun—ideal for crocheters who want a bite-sized project with a big impact. It’s also easy to add your own creative flair: turn your Demogorgon into a keychain, a bag charm, or a playful desk buddy by attaching a small chain or hook. These mini figures make fantastic gifts for friends who love fantasy stories, or as decorations for your own space.
Whether you’re looking to create something special for a fan or add a fun collectible to your amigurumi collection, this project is sure to bring a smile. Its quirky, memorable look makes it stand out wherever you use it!

Mini Demogorgon (Stranger Things) Amigurumi Pattern
This fun and creepy-cute amigurumi is designed to be small—ideal for using as a keychain, bag charm, or a quirky addition to your Amigurumi collection. This project is especially satisfying for intermediate crafters, but new amigurumi artists can also follow along.
The construction is flexible and modular, so you’ll quickly see your Demogorgon come to life piece by piece. Each major section has a non-pattern explanation to assist beginners. Enjoy the process and make your own pocket-sized monster!
Skill Level & Terminology
Skill Level: Confident Beginner to Intermediate
Terminology: US Crochet Terms
You’ll need to know how to make a magic ring, basic increases and decreases, color changes, and how to crochet in continuous rounds.
Materials & Tools
- Yarn: 100% cotton preferred for shape; colors needed:
- Gray (body, head, back of petals)
- Red (mouth interior/star)
- Black (mouth)
- White (petal spots & teeth)
- Hook: 2.5mm (or size suitable for yarn weight)
- Stuffing: Polyester fiberfill
- Notions: Scissors, tapestry needle, stitch marker
- (Optional): Sewing or hot glue (for assembling mouth parts)
Gauge
Gauge is not critical for amigurumi, but aim for a firm fabric so stuffing will not show through. With 2.5mm hook and cotton, you should achieve about 7–8 sc per inch.
Abbreviations List
| Abbreviation | Meaning |
|---|---|
| MR | Magic Ring |
| ch | Chain |
| sc | Single Crochet |
| inc | Increase (2 sc in same st) |
| dec | Decrease (sc2tog) |
| sl st | Slip Stitch |
| BLO | Back Loop Only |
| st(s) | Stitch(es) |
| FO | Fasten Off |
Special Stitch Instructions
- Magic Ring: Form a ring, secure with your hook, and work required stitches into the ring.
- Increase (inc): Work two single crochets into the same stitch.
- Decrease (dec): Insert hook into the next stitch, yarn over (YO), pull through (2 loops on hook), insert into the next stitch, YO, pull through (3 loops on hook), YO, pull through all three loops.
- Slip Stitch (sl st): Insert hook, YO, pull through all loops on hook.
Finished Size
Your mini Demogorgon will measure approximately 8–9 cm (3–3.5 inches) tall when worked with the above yarn and hook.
How to Start & Stitches Used
Start each part with the magic ring for a neat center. All main pieces are crocheted in the round using single crochet, increases, and decreases. The petals and mouth use rows and shaping. Final assembly is completed by sewing or joining with a tapestry needle, including adding embroidered details.
Pattern
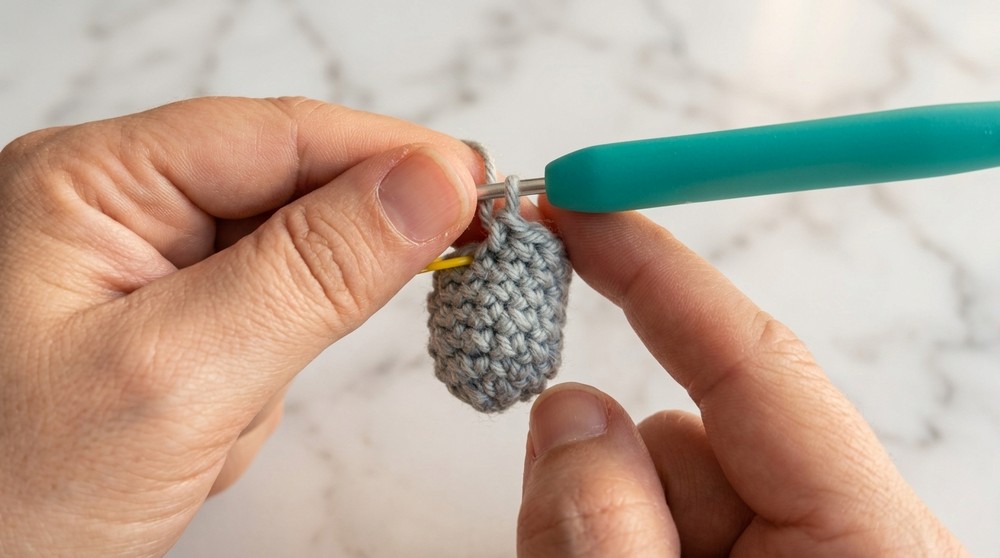
A. Legs (Make 2)
- Round 1: With gray, MR, 6 sc into ring. (6)
- Round 2: 6 inc (2 sc in each stitch). (12)
- Rounds 3–7: sc in each st around. (12)
- FO first leg. Do NOT FO second leg; leave on hook for body join.
Beginner Explanation:
Make two small tubes—one for each leg. First leg, cut the yarn; second leg, keep going for the body.
B. Body
- Join legs: From second leg, ch 1, sc in each of the 12 sts of the first leg, sc in ch, continue in each of the 12 sts of the second leg. (24)
- Place a marker for the start of the round.
- Rounds 2–4: sc in each st around. (24)
- Round 5: sc 2, dec around. (18)
- Round 6: sc in each st around. (18)
- Round 7: sc 2, dec, sc 3, dec twice (14)
- Rounds 8–9: sc in each st around. (14)
- Sl st, FO. Stuff the body firmly.

Beginner Explanation:
Attach both tubes (legs) together at top and crochet in continuous rounds up for the body. Add stuffing before closing.
C. Arms (Make 2)
- Round 1: With gray, MR, 6 sc. (6)
- Rounds 2–6: sc in each st around. (6)
- FO, leaving a tail for sewing.
Beginner Explanation:
Make two more small tubes for the arms.
D. Head (Back - Gray Ball)
- Round 1: With gray, MR, 5 sc. (5)
- Round 2: 5 inc. (10)
- Round 3: sc, inc around. (15)
- Round 4: sc 2, inc around. (20)
- Round 5: sc 3, inc around. (25)
- Round 6: sc 4, inc around. (30)
- Rounds 7–12: sc in each st around. (30)
- Round 13: sc 4, dec around. (25)
- Round 14: BLO, sc 3, dec around. (20)
- Round 15: sc in each st around. (20)
- Round 16: sc 2, dec around. (15)
- Round 17: sc, dec around. (10)
- Stuff well.
- Round 18: 5 dec. (5)
Sl st to close and FO, leave long tail.

Beginner Explanation:
You are making a ball, working increases to make it round, then decreasing to close. At round 14, work only in the back loop (BLO) to leave loops available for petal attachment.
E. Petals (Make 5 - Gray, attached to head)
Each petal is worked along the front loops left unworked in head Round 14.
Repeat for each petal:
- Attach gray yarn to FLO of Round 14, ch 1, sc in same st and in next 5 sts (6).
- Ch 1, turn, sc in 6 sts.
- Ch 1, turn, dec in first st (skip this st), sc in next 4, dec in last (skip last st) (4).
- Ch 1, turn, sc in 4.
- Repeat previous row twice more (total: three rows of 4 sc).
- Ch 1, turn, dec in first st, sc in next 2, dec in last st (2).
- Ch 1, turn, sc in 2. Repeat previous row.
- Ch 1, sc, FO.
Repeat steps for each petal (5 petals total).
Beginner Explanation:
You make five “triangles,” which start wide and decrease to a tip. Work each on the front loops left earlier.
F. Red Flower (Mouth / Star - Start as for head, work as flat piece)
- Round 1: With red, MR, 5 sc. (5)
- Round 2: 5 inc. (10)
- Round 3: sc, inc around. (15)
- Round 4: sc 2, inc around. (20)
- Round 5: sc 3, inc around. (25)
- Round 6: sc 4, inc around. (30)

Petals (make 5):
- Each will be like gray petals (6 sc wide at base, decrease to tip).
After finishing, work a round of sc in gray along its edge to add thickness and definition.
Beginner Explanation:
This “star” shape is worked the same as the gray head petals—make a red circle, then work out 5 triangles.
G. Black Mouth
- Round 1: With black, MR, 5 sc. (5)
- Round 2: 5 inc. (10)
- Round 3: sc, inc around. (15)
- Round 4: sc 2, inc around. (20)
- FO, leave a tail for sewing.
Optional:
Add a round of sl st or sc in red for a fleshy edge.
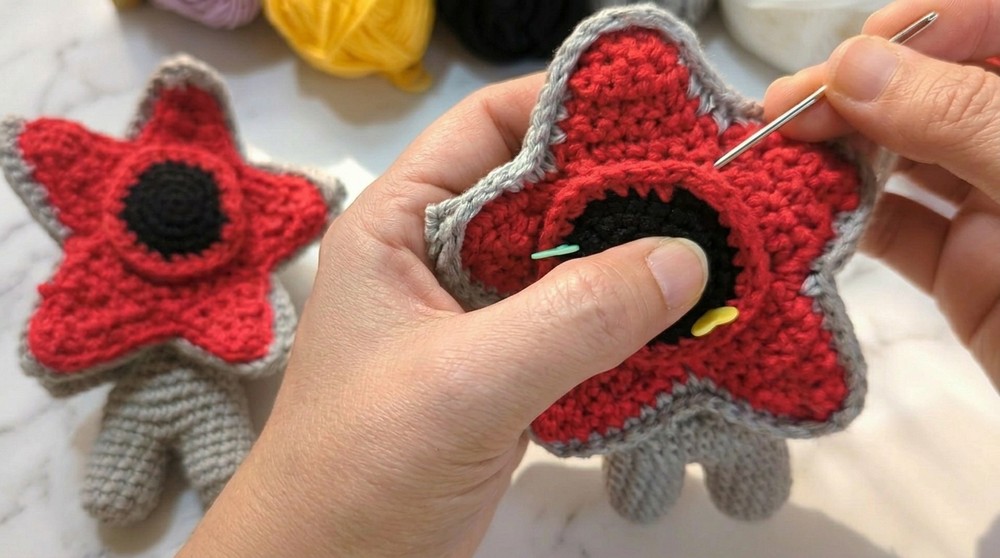
H. Assembly & Finishing
- Petals:
- Edge petals of “head” with sc in gray for definition.
- Align the red star inside the gray petal crown and sew together using sc or sl st all the way around.
- Align black mouth circle at the center and sew or glue in place.
- Body:
- Stitch head unit to body tube.
- Attach arms on both sides of the body.
- Embroider small white “teeth” around the mouth, and white dots on the petals using white yarn/thread.
- Keychain:
- If desired, sew a keychain ring at the top of the head.
- Hide all ends securely inside.
For non-pattern readers:
Make the body/legs and arms as little tubes. The head is a ball with five “flaps” or petals. Inside, sew a red star and black disk for the mouth. Add embroidery. Finally, sew all the parts together!
Conclusion
Congratulations! You have created your own mini Demogorgon amigurumi—perfect for Stranger Things fans! By making this project, you practiced amigurumi basics, color changes, working in pieces, and beginner-friendly embroidery. Don’t hesitate to use your creativity—add more spots, make bigger petal flares, or attach your Demogorgon to a zipper or bag. Have fun scaring your friends with this miniature creature!
Start: Use a magic ring and single crochet in spirals for each part.
Stitches Used: sc, inc, dec, sl st, BLO/FLO, embroidery
Pattern Focus: Modular construction, shaped petals, layered assembly, expressive finishes.