
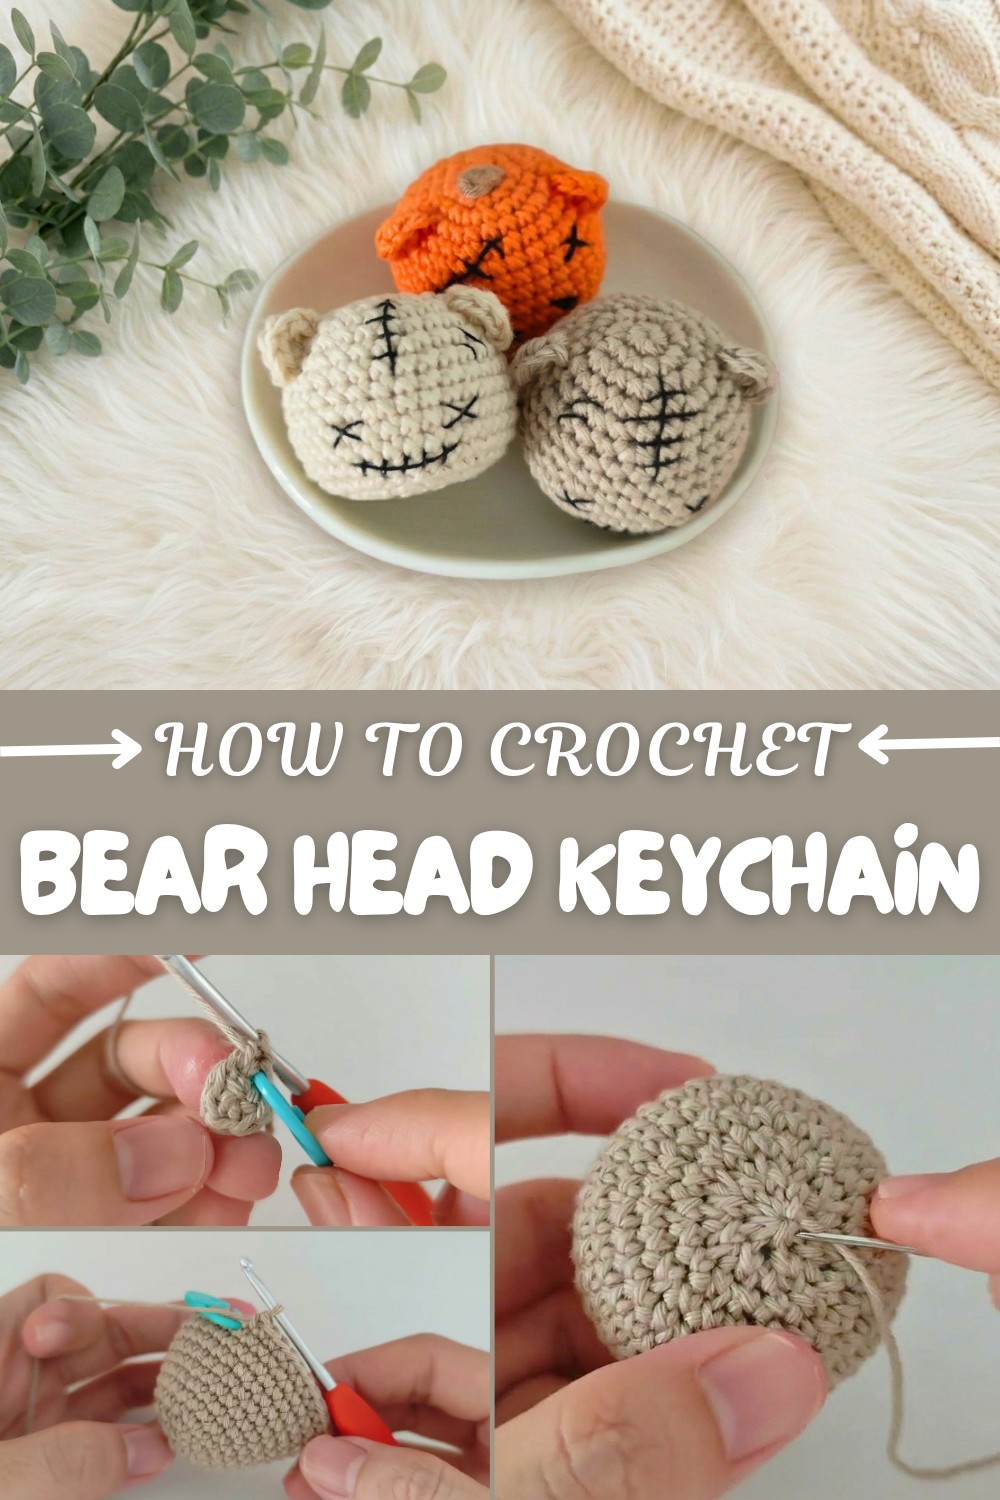
Crochet Bear Head Keychain Pattern That Beginners Will Love
Create accessories with this Free Crochet Bear Head Keychain that's for all skill levels and a charming addition to your collection.
Looking for a fun little project that’s both cute and easy? The Bear Head Keychain pattern will make you smile from start to finish! This tiny bear is round, soft, and has a sweet face with fuzzy ears—everyone who sees it will want one. It fits right in your hand and can be made in any color you like. Try brown, white, pink, or even rainbow stripes! You can make a whole bunch for your family, friends, or teachers.
Crochet Bear Head Keychain Pattern for Quick and Cute Gifts
The bear face pattern is made with a 2.5mm hook and soft DK cotton yarn. Each bear head is about 4 cm across when finished—just right for backpacks, keys, or as cute little bag charms. If you like, you can make animals like dogs, cats, pandas, or even bunnies from this pattern by changing colors and ear shapes.
The most important stitch you’ll use is the single crochet. You start with a magic ring and crochet in a circle, which makes the head nice and round. Add stuffing so your bear stays squashy! Ears and nose are sewn on with yarn, and you can add tiny eyes with thread or beads.
This pattern is easy enough for children or anyone new to crochet. It’s a great way to learn about shapes and stitches while making something adorable! You can change the bear’s expression, make it smile or wink, and use any color to match your style.
Keychains, bag charms, party favors, and gifts, so many things can be made from this pattern! So grab your hook, cotton yarn, and start crocheting your own bear buddy today. It’s quick to finish and perfect for any occasion!
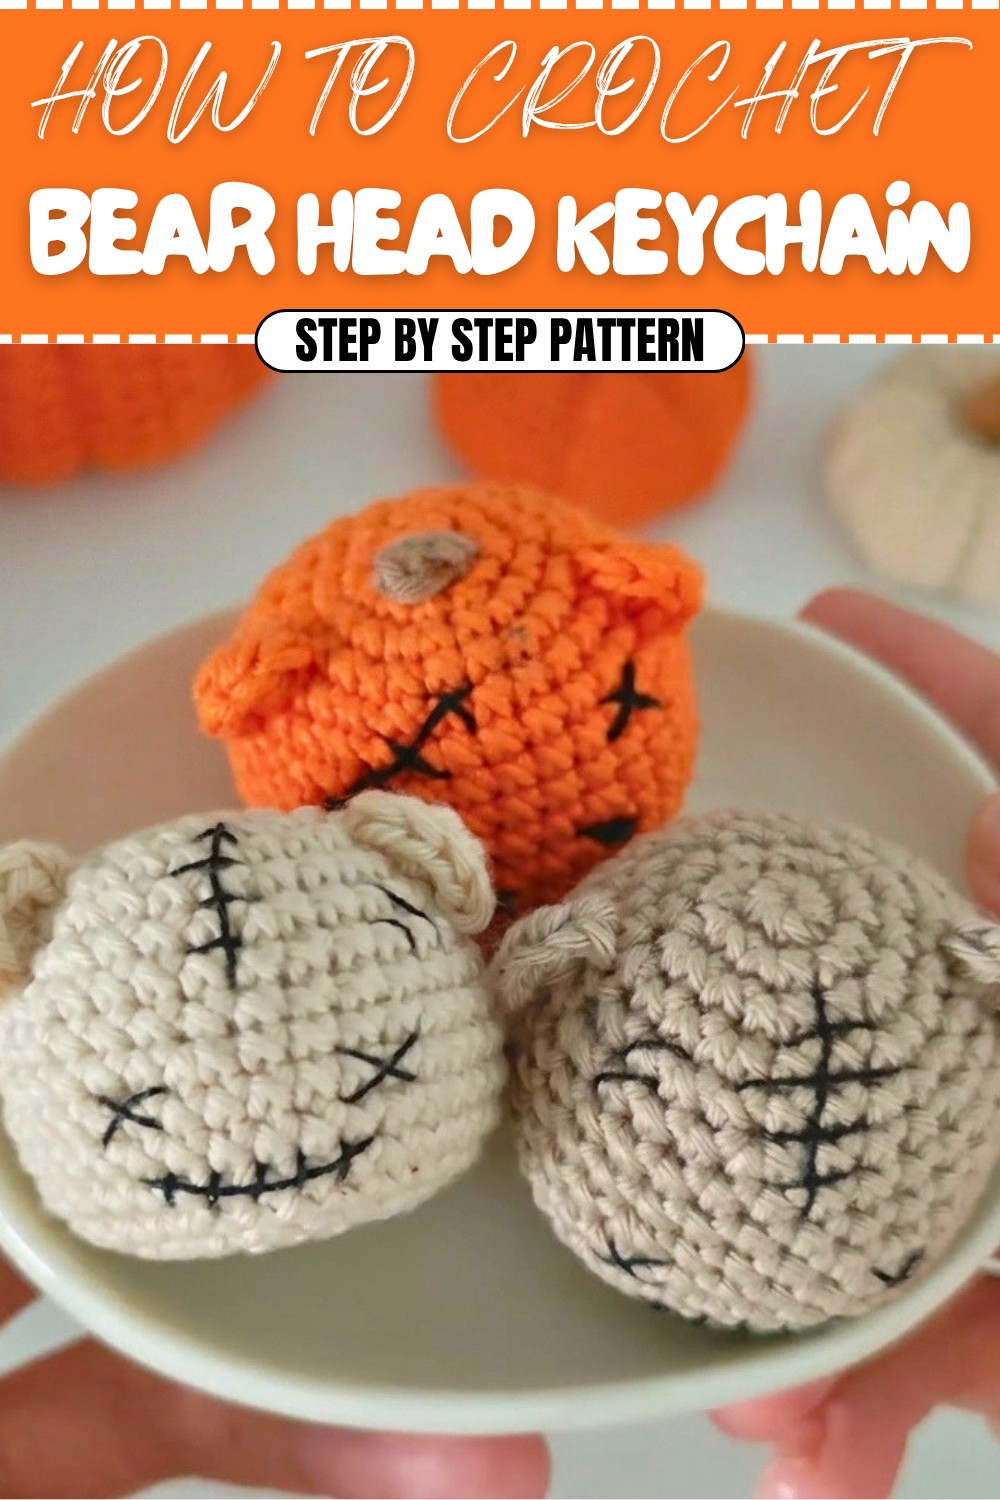
Spooky Halloween Bear Head Crochet Pattern
Get into the Halloween spirit with this quick and delightful Spooky Bear Head crochet pattern! This no-sew design features plush, directly-crocheted ears and is fully customizable with embroidered scars and stitches. Make it as scary or as sweet as you like by changing up the details. This pattern is perfect for amigurumi beginners and intermediate crafters alike, with comprehensive instructions and easy stitchwork.
Skill Level & Terminology
- Skill Level: Beginner
- Terminology: US Crochet Terms
The pattern includes basic stitches, increases, decreases, and simple embroidery for facial detailing.
Materials & Tools
- Yarn: Worsted or DK weight in Halloween-inspired shades (orange, black, grey, white, etc.)
- Hook: 3.0–4.0 mm (or as required for a tight stitch)
- Stuffing: Polyester fiberfill
- Tapestry needle: For closing the head and embroidery
- Safety eyes (8–10 mm) or black yarn for embroidery
- Scissors
- Stitch marker (optional, to keep track of rounds)
Gauge
Gauge is not crucial, but ensure your fabric is tight enough that stuffing does not peek through.
- Sample gauge: 14 sc and 16 rows = 2” (5 cm) square in single crochet with your yarn and hook
Abbreviations List
| Abbreviation | Meaning |
|---|---|
| MR | Magic ring |
| sc | Single crochet |
| inc | Increase (2 sc in same st) |
| dec | Decrease (single crochet 2 together) |
| hdc | Half double crochet |
| ch | Chain |
| sl st | Slip stitch |
| st(s) | Stitch(es) |
| rep | Repeat as directed |
Special Stitch Instructions
- Magic Ring (MR): Loop yarn around your finger, insert hook, yarn over and pull up a loop, ch 1, work the required number of sc into the ring. Pull tail to close.
- Increase (inc): Work 2 sc in the same st.
- Decrease (dec): Insert hook in next st, yo, pull up loop, insert hook in next st, yo, pull up loop, yo, pull through all loops.
- Half Double Crochet (hdc): Yarn over, insert hook in st, yarn over, pull up loop (3 loops on hook), yarn over, pull through all 3 loops.
Finished Size
With suggested yarn and hook, finished bear head measures approximately 3 to 4 inches (7.5–10 cm) across. If you use thicker yarn or a larger hook, your bear will be larger.
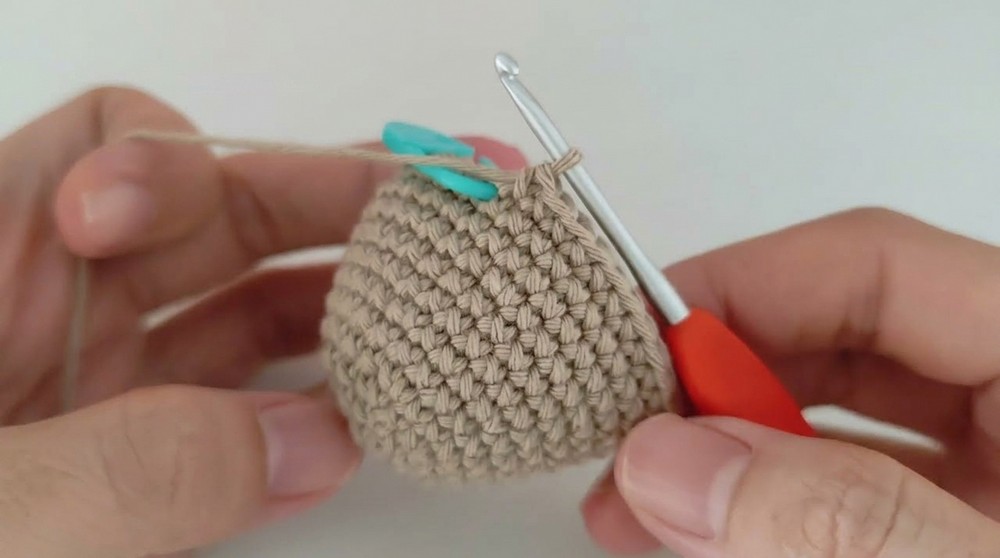
How to Begin & Stitches Used
Start with a magic ring for the head and work in continuous rounds (single crochet, increase, decrease). Ears are crocheted directly onto the head using half double crochet. Features are added with basic embroidery or safety eyes.
The Pattern
Head
- Rnd 1: MR, 6 sc (6)
- Rnd 2: inc in each st (2 sc in each st around) (12)
- Rnd 3: [sc, inc] 6 times (18)
- Rnd 4: [sc, inc, sc] 6 times (24)
- Rnd 5: sc in each st (24)
- Rnd 6: [3 sc, inc] 6 times (30)
- Rnd 7–8: sc in each st (30 for 2 rounds)
- Rnd 9: [2 sc, inc, 2 sc] 6 times (36)
- Rnd 10–12: sc in each st (36 for 3 rounds)

Explanation for Beginners:
Start from a small circle, increase steadily to form a round head, and work several rounds evenly for fullness.
Shaping and Closing the Head
- Rnd 13: [2 sc, dec, 2 sc] 6 times (30)
- Rnd 14: [3 sc, dec] 6 times (24)
- Rnd 15: [sc, dec, sc] 6 times (18)
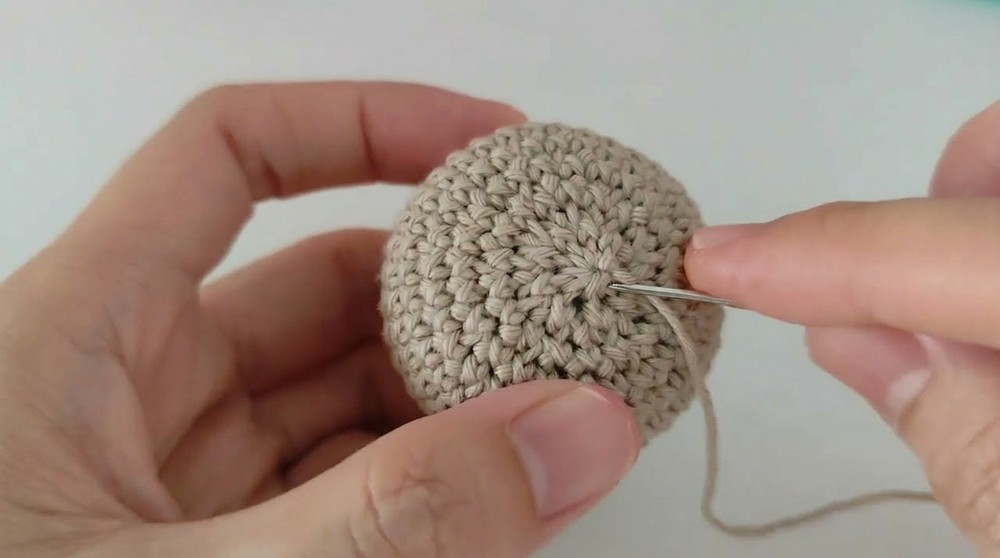
Begin stuffing the head firmly with small bits of fiberfill.
- Rnd 16: dec 9 times evenly around (9)
- Continue stuffing as you work.
- Closing:
- Fasten off, leaving a long tail.
- Use the yarn needle to sew through the front loops of the remaining 9 sts, pull to close, knot, and hide the tail inside the head.
Explanation for Beginners:
Decrease step by step to make the bottom flat. Stuff the head as you go so it's plump, and use the leftover yarn to sew the opening tight.
Eyes, Mouth & Embroidered Details
Eyes:
- Attach safety eyes or embroider eyes around Round 10.
- Leave about 4 stitches space between the eyes for the best look.
Mouth:
- Using black or dark yarn, embroider a mouth approximately on Round 12.
- Use straight or scar-like lines for a Halloween effect.
Scars & Stitches:
- With a contrasting color, embroider “scars” on the bear’s face.
- Make small, slanted, or X-shaped stitches for a spooky look.
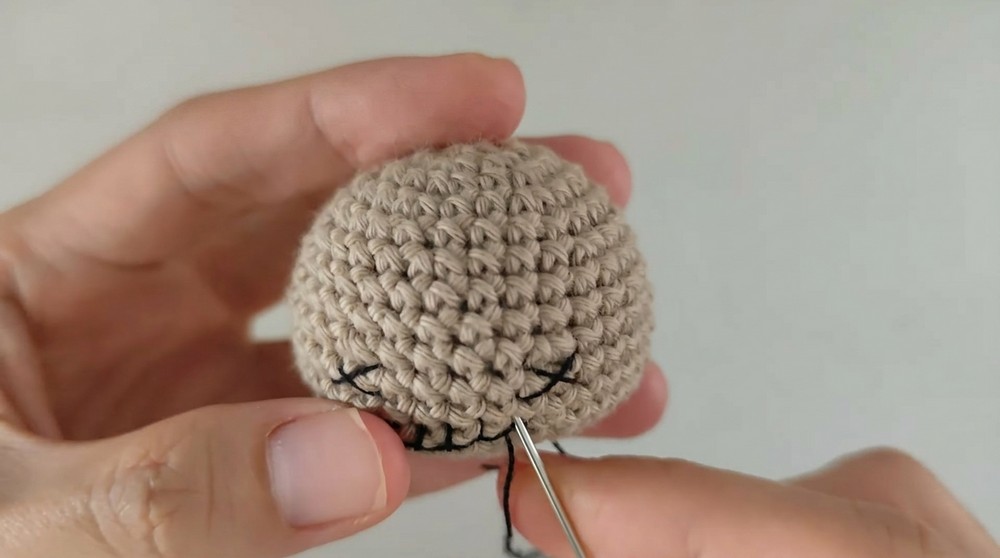
Explanation for Beginners:
Add the eyes before the head opening gets too small. Use yarn and a needle to sew on a simple mouth and extra ‘Halloween’ decorations anywhere you like.
Ears (Crocheted Directly On the Head)
Find placement for ears on each side of head at the same round level (use Round 5–6). Mark with pins if desired for symmetry.
Repeat for each ear:
- Attach yarn at chosen spot, ch 1.
- 5 hdc into the next stitch (all in same stitch).
- Sl st in the next stitch to anchor ear.
- Cut yarn, pull through, and hide ends inside head.
- Make the second ear on the opposite side, working in reverse for symmetry.
Explanation for Beginners:
With your hook, join yarn to the side of the head, crochet a small “fan” shape for each ear, and anchor them close to the top. Hide yarn tails neatly inside.
Final Assembly & Finishing
- Make sure all embroidery ends and ear tails are securely hidden inside the head.
- Adjust stuffing for even shape if needed.
- Optional: Use a felting needle or glue a scrap of red yarn for an extra “bloody scar” effect.
Explanation for Beginners:
Double check that everything is secure. Hide any threads inside, and press the head gently to shape.
Pattern Notes & Extra Tips
- Customization: Change up colors, eyebrow placement, or number of scars for extra personality.
- No-sew: Ears are crocheted directly onto the head–no separate sewing!
- Stitches used: All single crochet, with some half-double crochet for the ears and basic embroidery for spooky features.
Conclusion
Congratulations! Your Spooky Halloween Bear Head is complete and ready to haunt your Halloween celebrations. This fast and fun pattern introduces essential amigurumi techniques and creative surface embroidery. Make several in different colors for a whole haunted bear army, or add a keyring for a seasonal accessory. Happy crocheting and have a spooky, crafty Halloween!
Pattern Start Info:
Start by crocheting the head from a magic ring and working increases. Continue straight rounds, then decrease, stuff, and embroider all details. The ears are crocheted directly onto the head using half double crochet for an extra-sweet (and easy!) finish. All stitches are single crochet except for the ears and embroidery.