
Versatile Crochet Daisy Hat Pattern to Use for Picnics or Travels
Create a unique and stylish daisy granny square bucket hat with this crochet pattern that’s fun, easy to follow, and great for sunny weather.
Inspiration From angela christine
Soft petals, sunny vibes, and trendy style come together beautifully in the Crochet Daisy Hat Pattern. This daisy inspired bucket hat isn't just an accessory, it’s a statement that brings effortless charm to your outfit. Perfect for warmer days, it’s light, breathable, and adds a fresh pop of floral elegance. Whether heading to a picnic, a day at the beach, or a casual stroll, this hat offers a delightful balance of practicality and flair, keeping you stylish and shaded at the same time. It pairs seamlessly with summery dresses, denim shorts, or even a simple tee, making it a wardrobe staple.
Free Crochet Daisy Bucket Hat Pattern for All Season Fashion Use
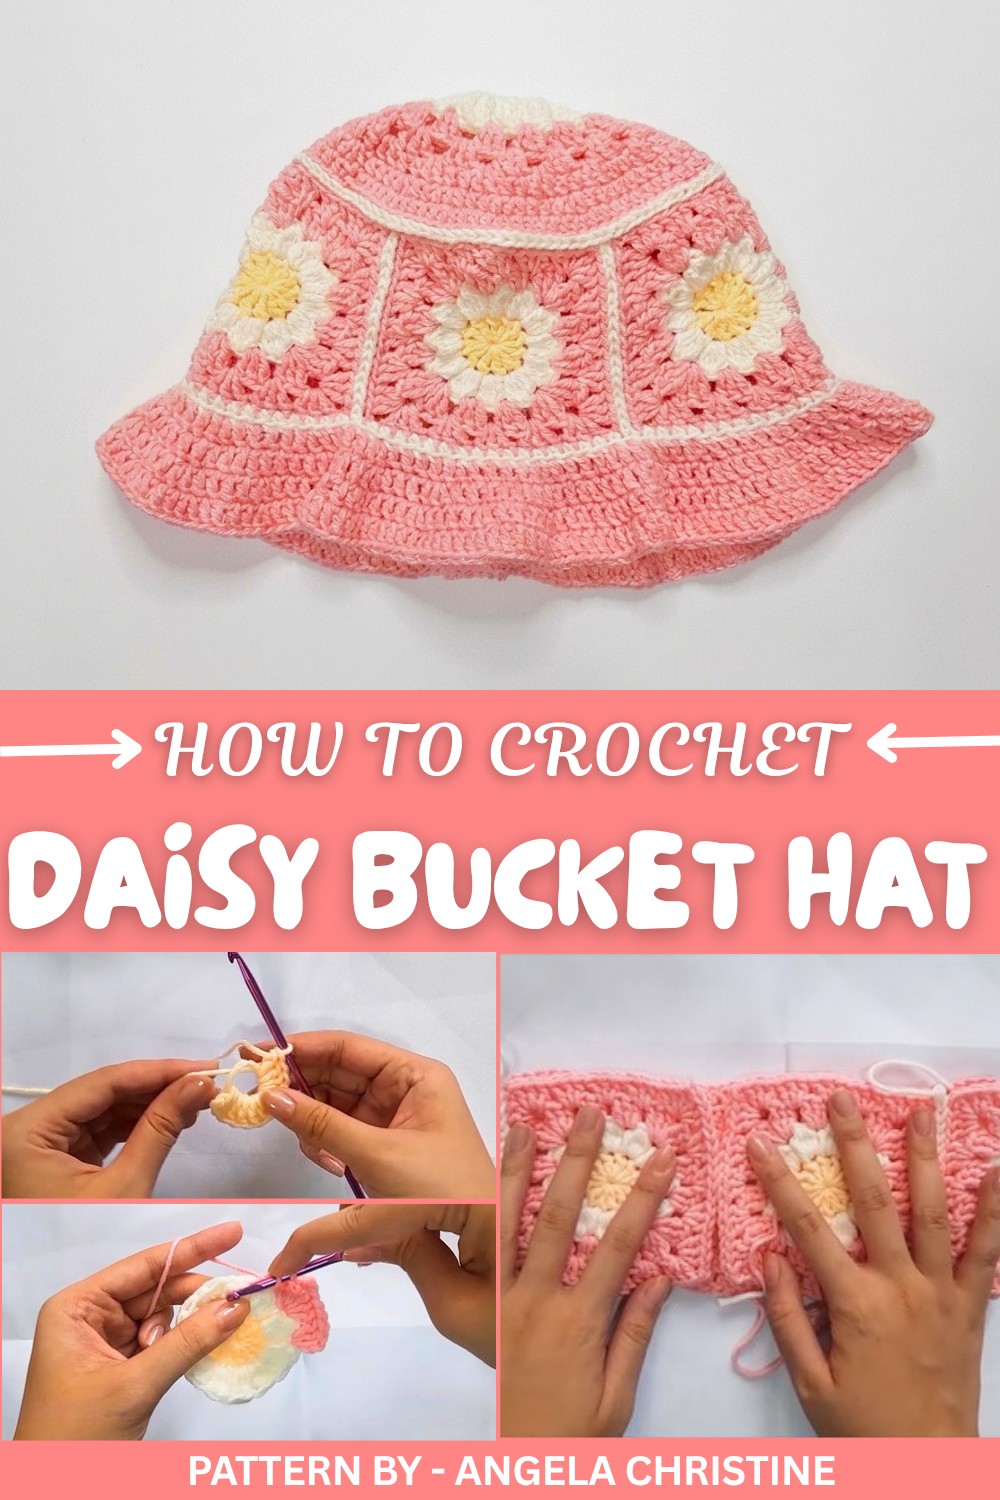
The daisy granny squares showcase intricate flower motifs in vibrant colors, bringing cheerful energy to every stitch. The soft, comfortable yarn makes it easy to wear for long hours, while the subtly flared brim provides style and sun protection in one go. Every detail speaks of thoughtful design, from the perfectly joined petals to the symmetry of the shaping.
This daisy hat is more than just a crochet piece, it’s a wearable work of art that elevates everyday wear. Treat yourself to this playful yet sophisticated addition to your wardrobe, and enjoy the compliments that are sure to follow. Keep reading to explore the full pattern and bring this beauty to life.
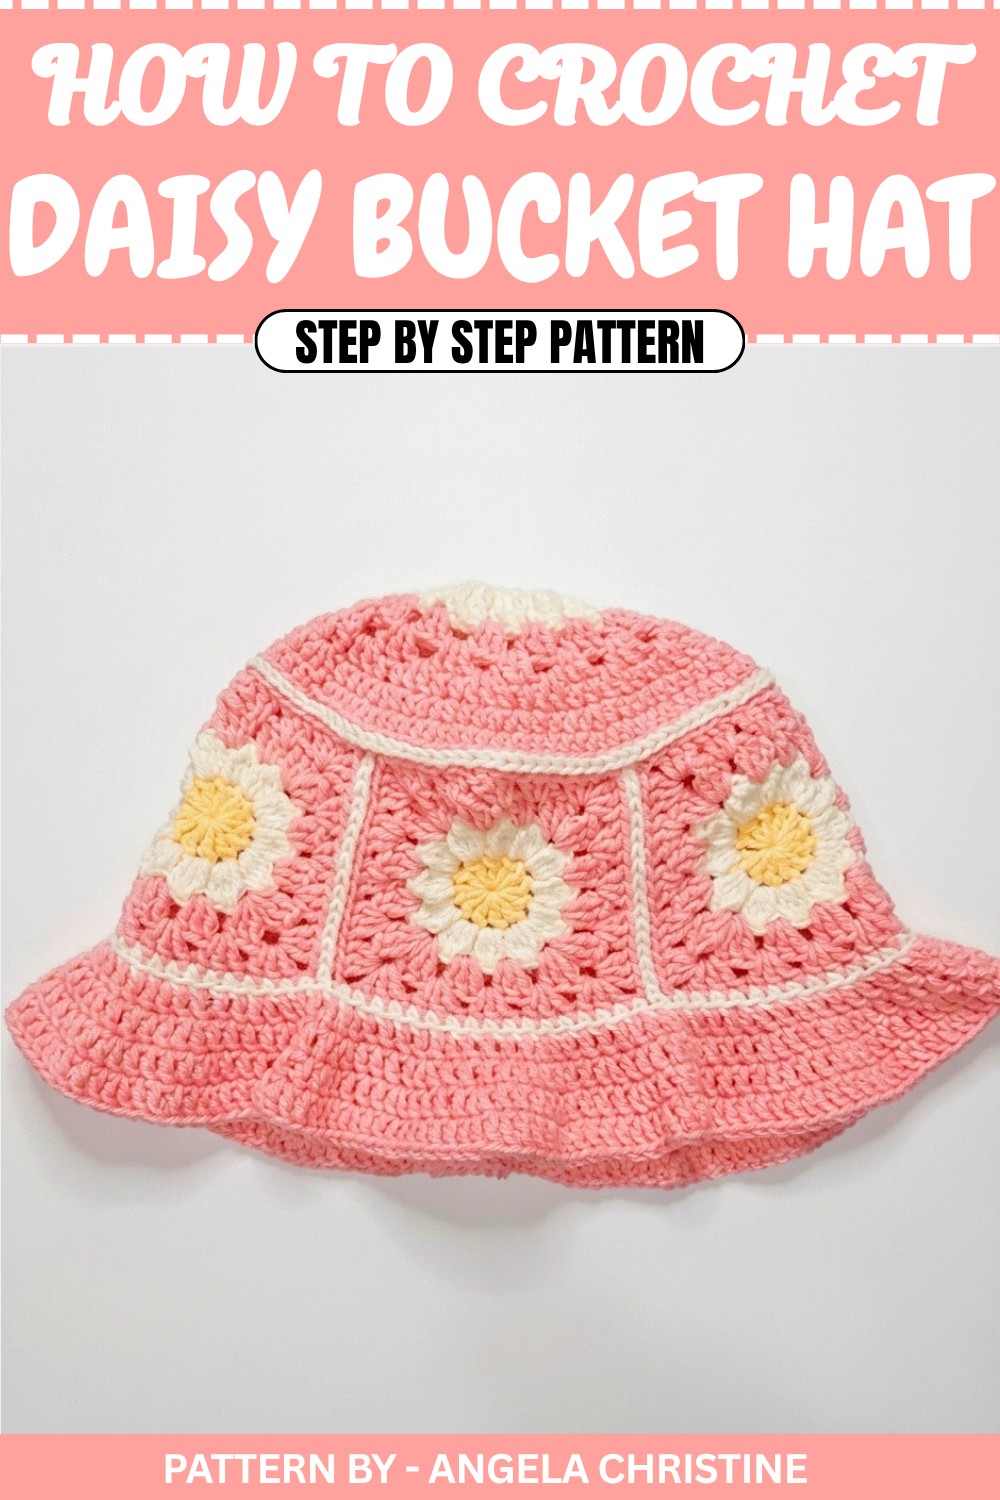
Daisy Granny Square Bucket Hat Crochet Pattern
This tutorial guides you through creating a Daisy Granny Square Bucket Hat using dainty flower shaped granny squares, a circular top, and a flared crochet brim. The project is ideal for beginners to intermediate crocheters who want to make a stylish and cheerful accessory. Follow each step carefully to ensure a clean, perfectly shaped hat.
Quick Overview of Pattern
- Project Type: Daisy Granny Square Bucket Hat
- Skill Level: Beginner to Intermediate
- Key Features: Flower granny squares, circular top, flared brim
- Time to Complete: Approximately 4–6 hours
Notes
- The bucket hat consists of 5 daisy granny squares, an attached top, and a flared brim.
- Use the magic ring technique for easy circular starts and flat slip stitch join for a seamless, polished assembly.
- Adjust the brim or circumference in smaller increments to customize the hat’s fit and flare.
Skill Level
Beginner to Intermediate: You will practice basic stitches (SC, HDC, DC, TC) and assembly techniques like the Flat Slip Stitch Join.
Materials
- Yarn: 5 ply milk cotton yarn in yellow, white, and pink (~150 grams total).
- Hook: 4mm crochet hook (or desired size based on gauge).
- Darning Needle: For weaving in ends and joining squares.
- Scissors: For precise yarn cutting.
Measurements / Sizing
- Finished Size: Fits an average adult head circumference (56–58 cm / 22–23 inches).
Gauge
Gauge is flexible for this project. However, ensure each daisy granny square measures approximately 4 inches across.
Stitch Abbreviations
- MR: Magic Ring
- Ch: Chain
- Sl St: Slip stitch
- SC: Single crochet
- HDC: Half double crochet
- DC: Double crochet
- TC: Treble crochet
- BLO: Back loop only
Special Stitches
- Magic Ring (MR): Create a small adjustable loop with yarn. Work all stitches into the loop and pull the tail tight to close.
- Unfinished Stitches (Petals): For a daisy petal effect, work indicated stitches partially, leaving loops on the hook, and pull through all loops at once.
The Crochet Pattern
Section 1: Daisy Granny Squares (Make 5)
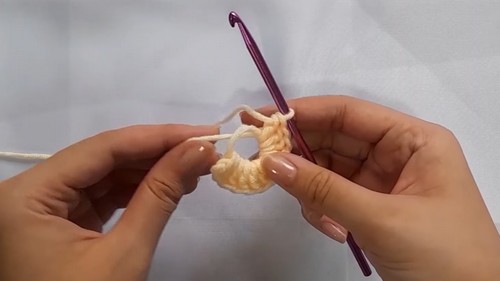
Round 1 (Center - Yellow Yarn):
- Magic Ring: Wrap your yarn around your fingers and form an adjustable loop.
- Ch 2 (counts as one DC).
- Make 11 DCs into the ring.
- Sl St into the top of the starting Ch 2 to close the round. You’ll have 12 stitches total.
Round 2 (Petals - White Yarn):
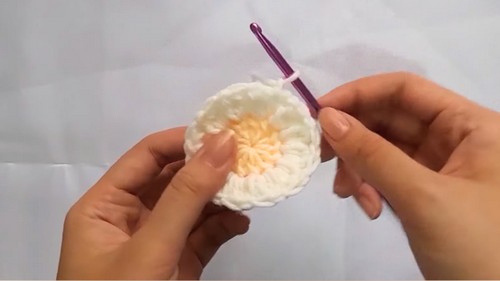
- Join white yarn into any stitch and tie a knot.
- Ch 2 and make 3 unfinished DCs into the same stitch. Leave loops on the hook from each stitch; you’ll have 4 loops total.
- Yarn over and pull through all the loops; Ch 1 to secure the petal.
- Move to the next stitch and repeat: 4 unfinished DCs, pull through 5 loops, and Ch 1.
- Repeat for all 12 stitches, creating 12 petals total.
- Sl St into the top of the starting Ch 2 to finish. Cut off yarn.
Round 3 (Border - Pink Yarn):
- Join pink yarn in any Ch 1 space between petals and Ch 3.
- In the same space, make 2 DCs.
- Move to the next space and make 3 DCs. For corners, work: 3 DC, Ch 2, 3 DC into the same space.
- Repeat around. Sl St to the top of the starting Ch 3.
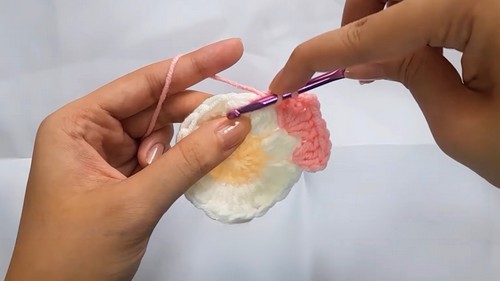
Repeat Round 3 for Round 4:
- Add an additional round of border following the same process: 3 DCs in regular spaces; corners: 3 DC, Ch 2, 3 DC.
- After completing the round, Sl St to the top of the starting Ch 3, Ch 1, and cut off yarn.
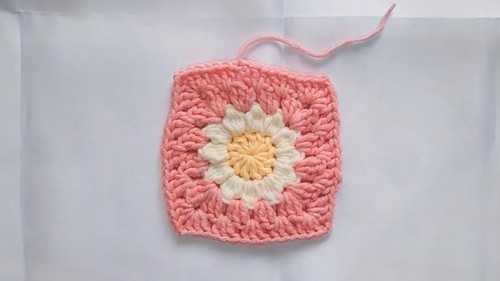
Section 2: Assembly (Flat Slip Stitch Join)
- Arrange your 5 granny squares (4 for the circular sides and 1 for the top).
- Use white yarn to connect the squares. Insert your hook into the inner loops of adjacent stitches from two squares.
- Yarn over and pull through both loops on the hook; make a Sl St.
- Continue using the inner loops only for a flat join.
- Repeat until the squares form a connected circle.
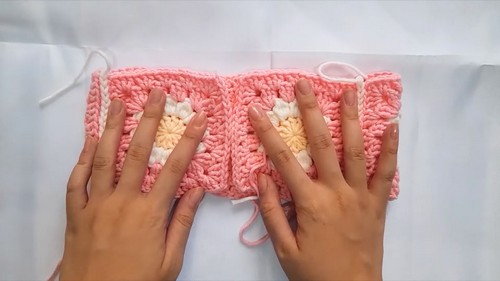
Section 3: Top of the Hat
Round 1 (Yellow Yarn):
- Begin with a Magic Ring, Ch 2, and make 7 HDCs into the ring.
- Sl St to the top of the starting Ch 2.
Round 2:
- Ch 2, make 1 DC in the next stitch.
- Make 2 DCs (increase) in every stitch around.
- Sl St to the top of the Ch 2.
Round 3 (White Petals):
- Join white yarn into any stitch, Ch 4, and make 2 unfinished TCs into the same stitch.
- Yarn over and pull through all loops, Ch 1.
- Make 3 unfinished TCs in every stitch around. You’ll have 16 petals total. Sl St into the starting Ch 4, Ch 1, and cut yarn.
Rounds 4–8:
Follow provided instructions, expanding your stitches evenly until the top piece reaches 95 stitches in circumference (34 minute mark).
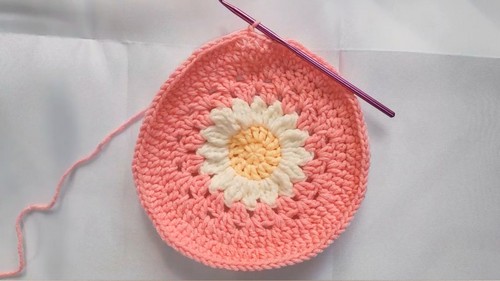
Section 4: Brim of the Hat
Joining the Top:
- Attach the circular top piece to the side squares using the Flat Slip Stitch Join method, ensuring the connections are neat.
Brim Construction:
- Start by SC into every stitch along the base of the hat for one round.
- For the next round, work DC into the BLO for each stitch, increasing on every 5th stitch for a flared brim effect.
- Repeat for 4 total rounds while continuing the increase pattern to achieve your desired brim size.
- Finish with an invisible join: Cut yarn, pull through, and use a darning needle to seamlessly join the end into the starting chain.
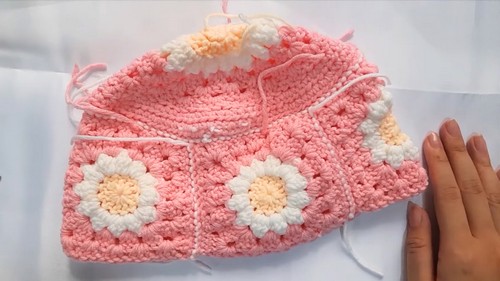
Assembly & Finished Size
- After completing the brim, weave in ends to secure all loose yarn tails.
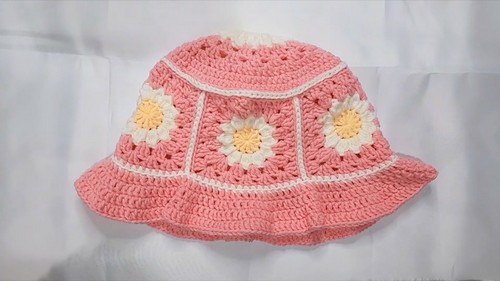
- The completed hat should fit an average adult and have a soft, flared brim perfect for sunny weather.
Conclusion
Congratulations on completing your Daisy Granny Square Bucket Hat. This charming design is perfect for spring or summer, and the combination of daisy squares and flared brim makes it a stand out accessory.