
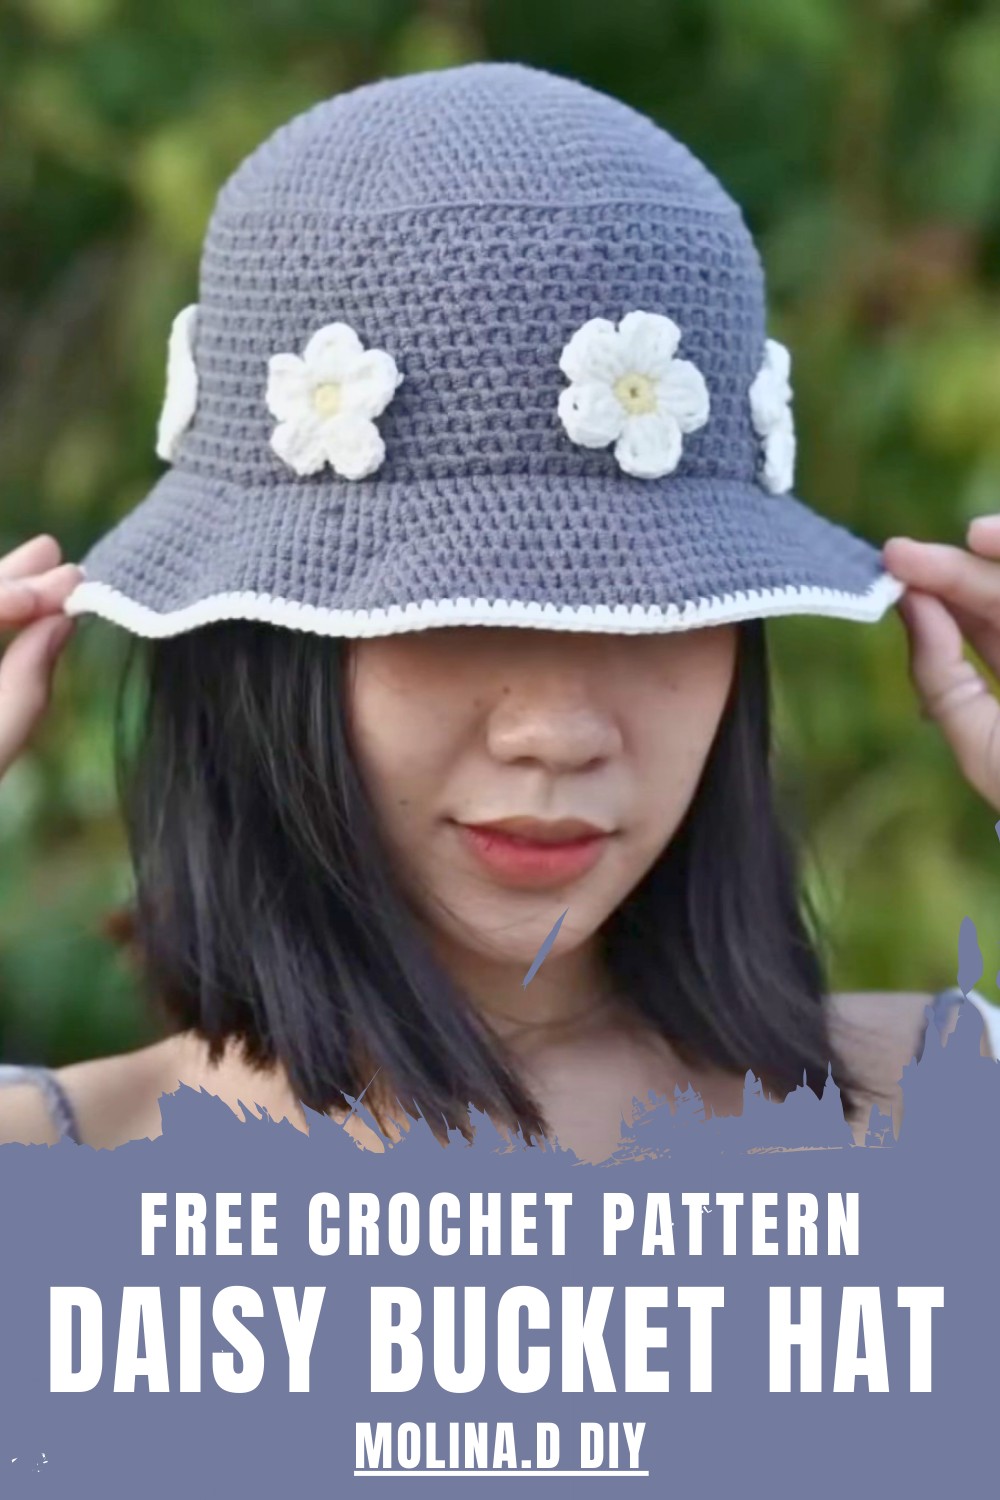
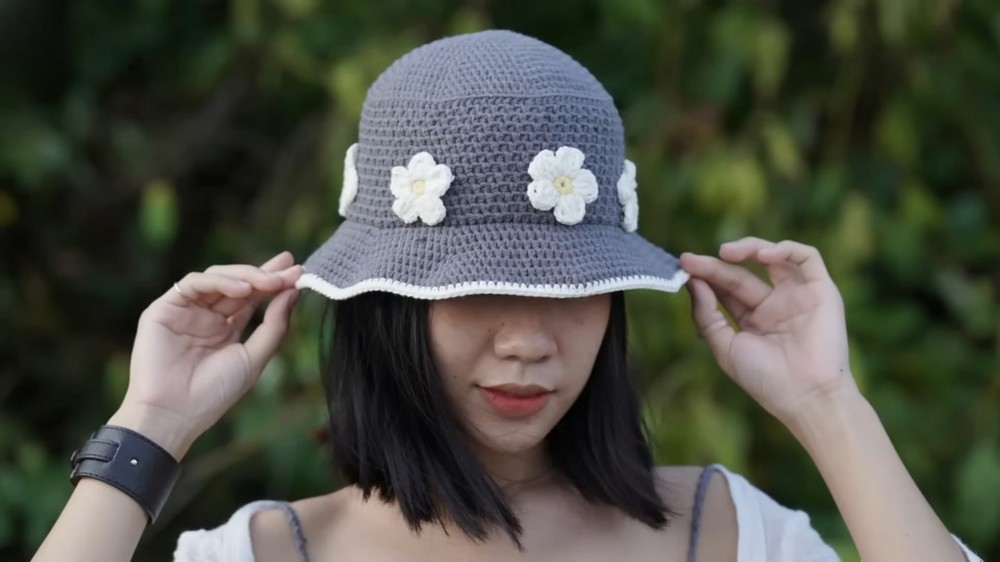
Bright Crochet Daisy Bucket Hat Pattern For Stylish Look
Embrace sunny vibes with this Crochet Daisy Bucket Hat Pattern for breathable, textured hats that add playful charm and cheerful summer style.
Refreshing a seasonal wardrobe with a touch of floral elegance starts with selecting a crochet daisy bucket hat pattern that perfectly bridges the gap between vintage charm and contemporary street style. This accessory utilizes premium, lightweight fibers to create a structured yet airy silhouette, providing essential shade during sunny garden parties or seaside excursions. The integration of cheerful, raised floral motifs offers a striking visual depth, ensuring the finished piece possesses a sophisticated, three-dimensional texture that remains soft to the touch.
Playful Crochet Daisy Bucket Hat Pattern You’ll Love Wearing
Practicality meets high fashion in this design, as the flexible construction allows the hat to be easily packed for travel without losing its signature shape. The ability to customize petal colors enables a seamless transition from muted, classic tones to bold, expressive palettes that reflect a unique personality.
As modern trends favor one-of-a-kind artisanal accents, working through this specific design ensures a professional, boutique-quality finish that radiates a joyful and breezy aesthetic for any outdoor occasion.
Step-by-Step Guide Crochet Daisy Summer Bucket Hat
Materials Required
- Yarn: Milk cotton yarn (5 ply). Use contrasting colors for the daisy embellishments.
- Hook Size: 3.5mm crochet hook (6/0).
- Accessories:
- Scissors
- Tapestry needle
- Stitch marker
Steps to Create the Daisy Summer Bucket Hat
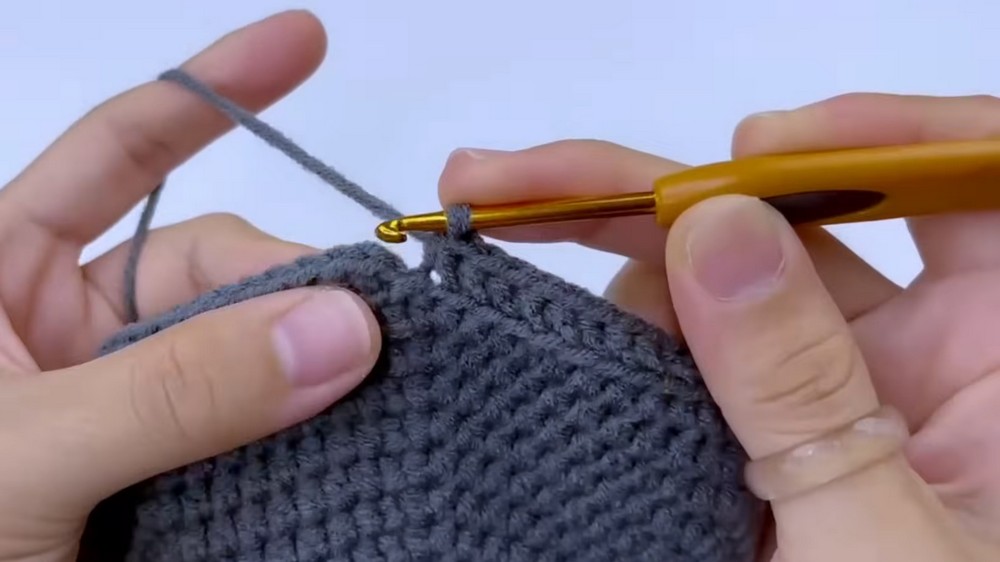
1. Top (Head) Part
Start with the magic ring to form the crown of the hat.
- Round 1: Create a magic ring, chain 1, and make 8 half double crochet (HDC) into the ring. Close with a slip stitch (8 stitches).
- Round 2: Chain 1 and make 2 HDC in each stitch (increase in every stitch), then slip stitch to join (16 stitches).
- Round 3: Chain 1, alternate between 1 HDC in the first stitch and 2 HDC in the next stitch. Repeat this pattern around and slip stitch to join (24 stitches).
- Round 4: Chain 1, make 1 HDC in the next 2 stitches and 2 HDC in the next stitch. Repeat the process 8 times and join with a slip stitch (32 stitches).
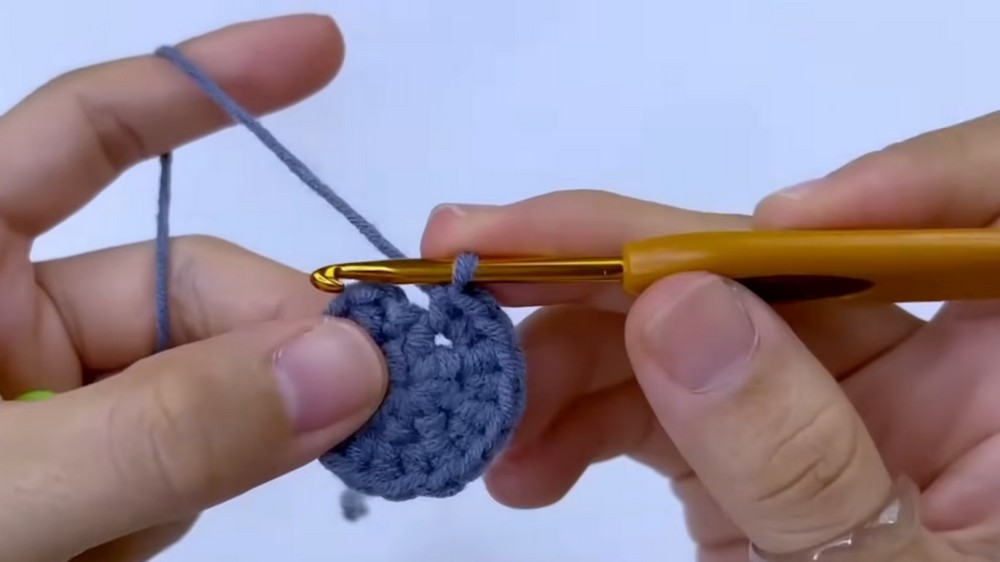
At this point, you've completed the crown/top of the bucket hat.
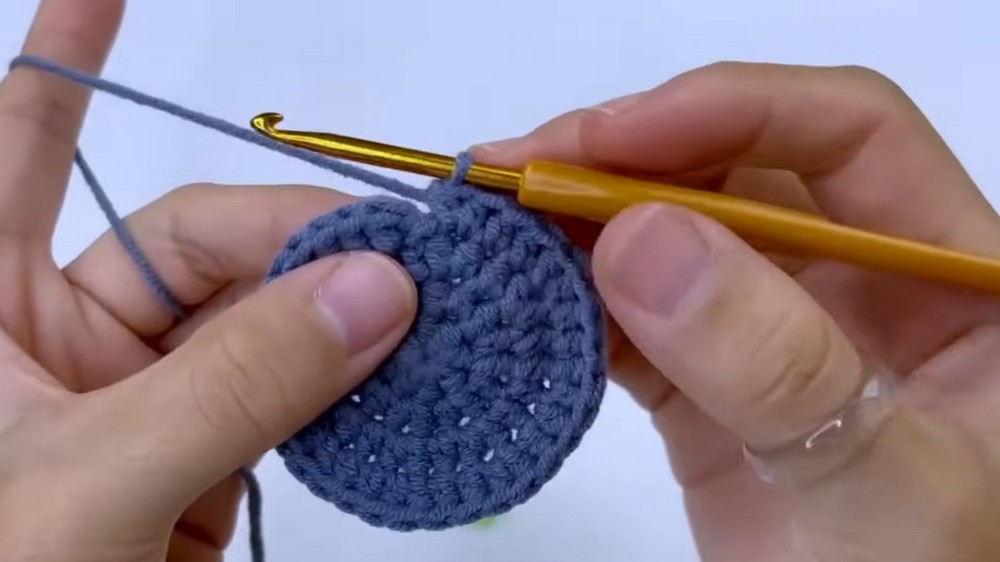
2. Middle Part
This section adds length to the hat’s body, using a combination of back loop-only (BLO) stitches for texture.
- Round 1: Chain 1 and crochet 1 HDC in the back loop only (BLO) of every stitch around. Slip stitch to join (total stitch count stays the same for every round).
- Round 2: Chain 1, alternate between 1 HDC and 1 HDC BLO. Repeat this process around and slip stitch to join (104 stitches).
- Maintain this stitch pattern:
- If the last stitch of the round is an HDC BLO, start the next round with HDC BLO.
- If the last stitch is a regular HDC, start the next round with a regular HDC.
- Continue this process until you complete 13 rounds in total.
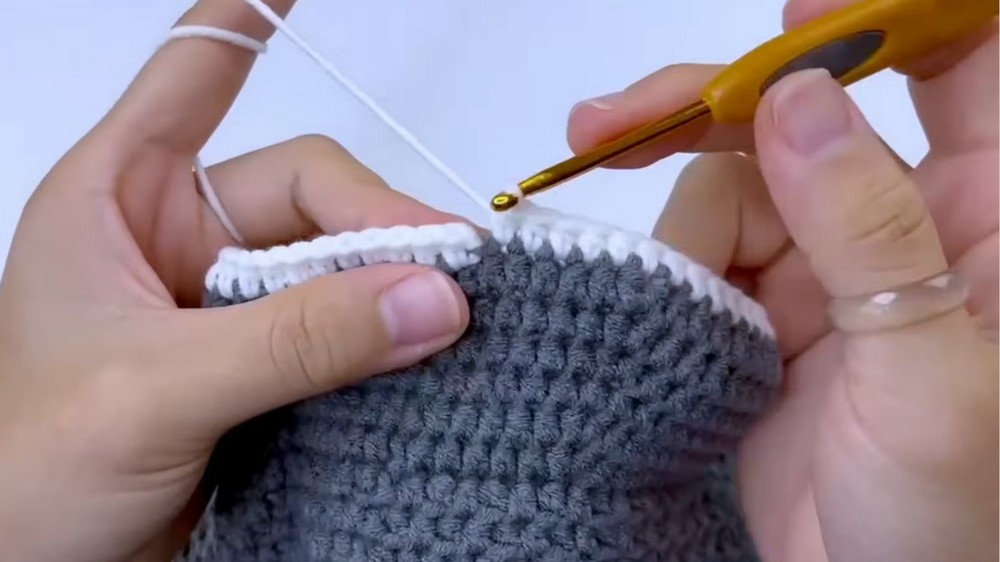
3. Brim
The brim flares out gradually to provide sun coverage and define the hat’s shape.
- Round 1: Chain 1, make 10 HDC in the next 10 stitches, then increase (2 HDC in the same stitch) in the next stitch. Repeat 9 times to create the flared pattern. Finish the round with 5 HDC and slip stitch to join (113 stitches).
- Round 2: Chain 1, make 11 HDC in the next 11 stitches, then increase in the 12th stitch. Repeat 9 times. End the round with 5 HDC and slip stitch to join (122 stitches).
- Continue the same technique, increasing stitches slightly on every round. Stop increasing after Round 7 (brim now at 149 stitches).
- Optional: Add contrasting white yarn for finishing the brim using slip stitches for extra flair.
The bucket hat main body is now complete.
4. Daisy Flower Embellishments
Add decorative daisies around the middle part for a summer vibe:
- Step 1: Create a magic ring and chain 1. Make 10 single crochets (SC) into the ring and close with a slip stitch.
- Step 2: Attach white yarn for the petals to the base stitch. To create one petal:
- Chain 4. In the same stitch:
- Make 2 triple crochets (TR), followed by 1 triple crochet, and chain 4.
- Slip stitch into the next stitch to form the next petal.
- Repeat this process until you have completed 10 petals.
- Chain 4. In the same stitch:
- Step 3: Sew the daisies around the middle part of the hat. Adjust placement for even spacing.
Special Features
- Textured Design: The hat uses back-loop stitches in the body to create depth and texture.
- Decorative Flowers: Daisies add a summer-inspired theme to the design.
- Flexible Sizing: Designed for small to medium sizes, with easy modifications possible.
- Customizable Style: You can use different yarn colors and embellishments for a unique look.
Level of Difficulty
The project is beginner-friendly with simple stitches like the magic ring, single crochet, half double crochet, and basic increases. While creating the daisy petals and working BLO may take practice, the clear step-by-step instructions make the process straightforward for all experience levels.
Tutor's Suggestions
- Hold the Yarn Comfortably: Use a yarn-holding technique that feels natural and maintains even tension for smoother stitches.
- Back Loop Practice: If you're new to back loop techniques, practice on scrap yarn before starting the middle section.
- Sew Securely: Carefully sew the daisy flowers for durability, especially if the hat will be exposed to frequent use or washing.
- Measure as You Go: Periodically check the size of the hat to ensure it meets your desired fit.
Uses for the Daisy Summer Bucket Hat
- Fashionable Accessory: Perfect for summer outings, beach trips, or garden parties.
- Handmade Gift: A thoughtful gift for friends and family, especially children and teens.
- Wardrobe Addition: Lightweight and breathable, making it ideal for protecting your face from the sun.
Tip
To keep the daisies from loosening over time, tie a secure knot and weave the ends through several stitches on the back side of the hat before cutting excess yarn.
Conclusion
The Daisy Summer Bucket Hat is a charming and practical project for crochet enthusiasts of all skill levels. With its combination of textured stitches, playful daisies, and versatile design, the hat is both functional and stylish. offers clear, beginner-friendly instructions, making it easy to follow along and create a unique accessory for the sunny days ahead.