
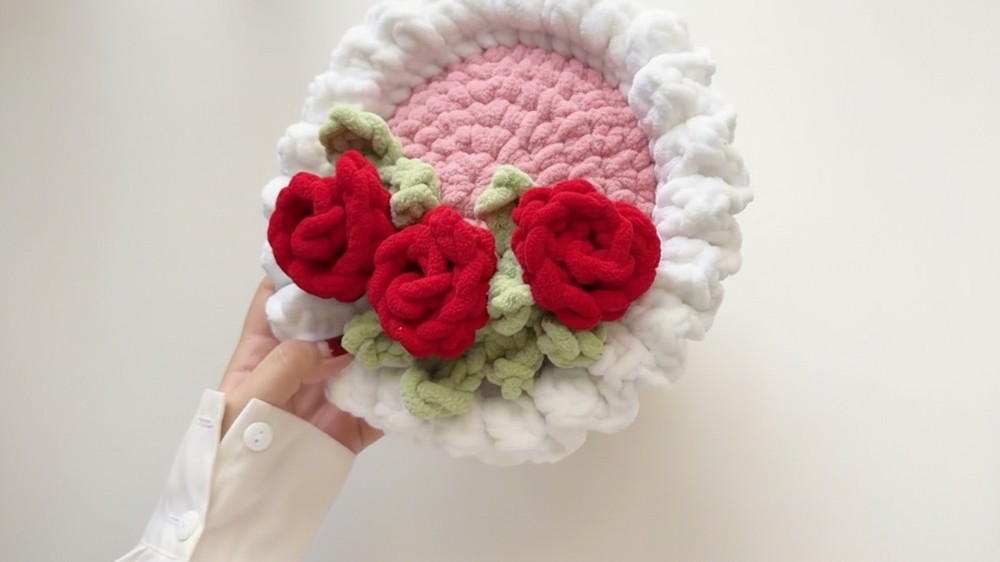
Blooming Crochet Jumbo Rose Bouquet Pattern for Any Occasion
Admire bold beauty with this Crochet Jumbo Rose Bouquet Pattern for oversized, textured blooms that impress displays and gift moments today.
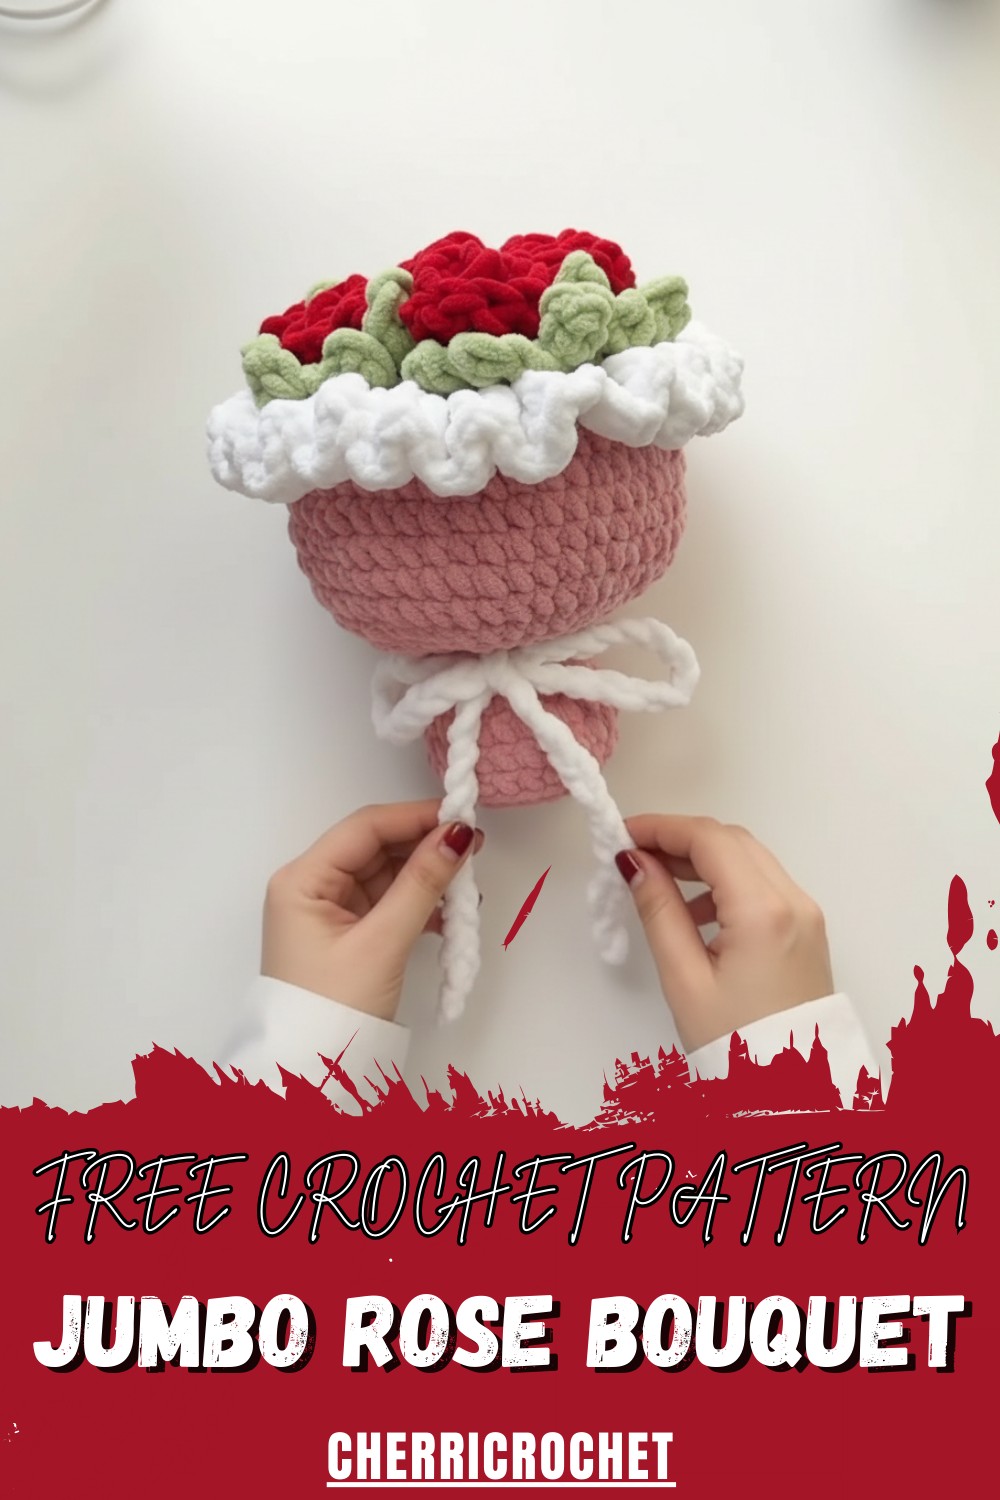
The pattern supports customization in color, stem length, and bouquet size, allowing endless creative expression. Clear instructions make the process enjoyable for both beginners and experienced crocheters while delivering impressive results. Lightweight but structured, the finished roses hold their form beautifully and require minimal care.
Beyond visual appeal, this project builds confidence, refines stitch control, and offers a satisfying sense of accomplishment. Blending creativity with practicality, the Crochet Jumbo Rose Bouquet Pattern transforms yarn into a striking decorative feature that adds warmth and charm to interiors.
Crochet Bouquet Pattern: Step-by-Step Guide
Materials Needed
- Yarn (any color and type of your choice)
- Crochet hook (size depends on your yarn, with a medium size recommended)
- Yarn needle
- Stuffing material
- Scissors
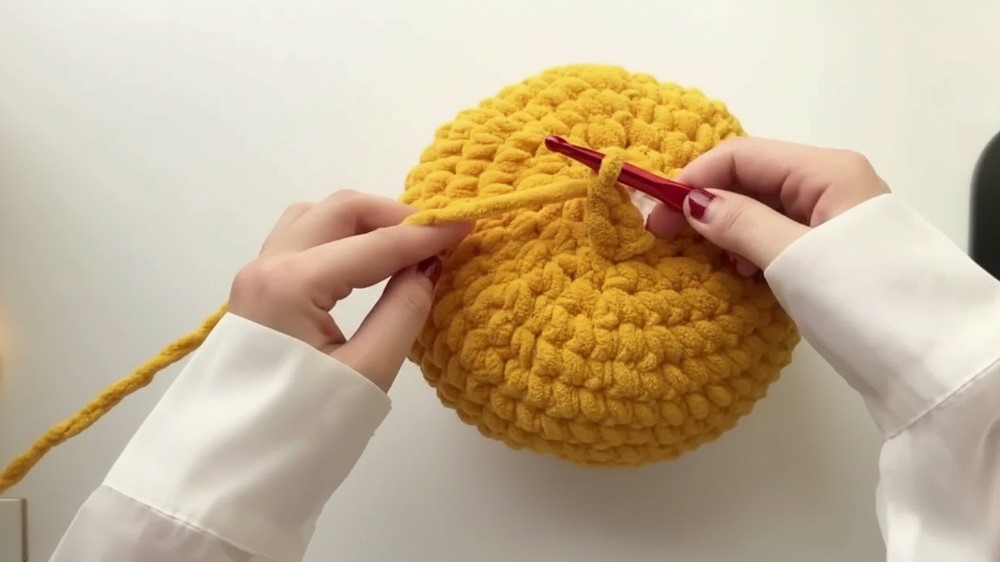
Body of the Bouquet
- Make a Magic Ring:
- Form a magic ring to begin. Ensure the ring intersects properly before chaining one.
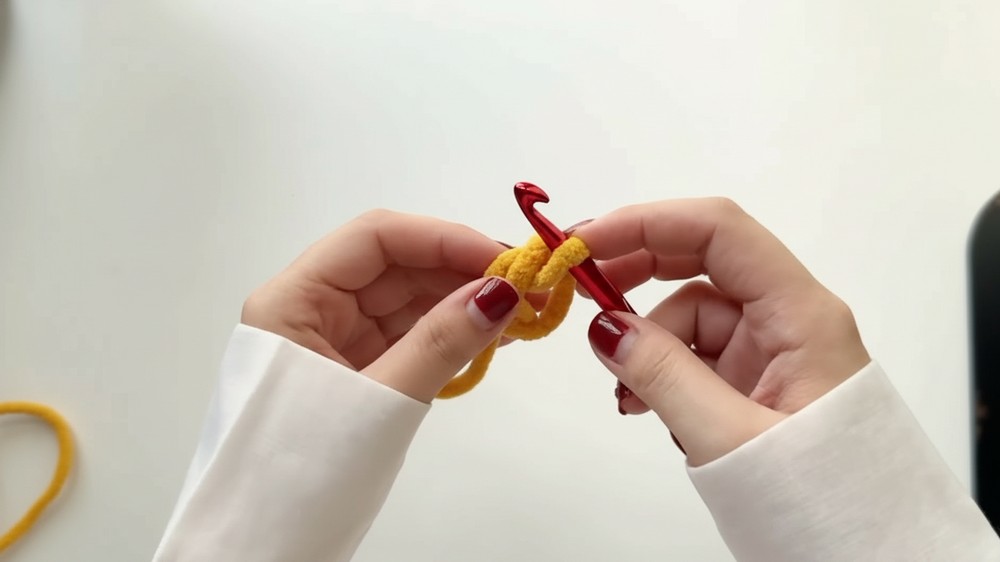
- Form a magic ring to begin. Ensure the ring intersects properly before chaining one.
- Round 1:
- Crochet eight single crochets into the ring. Count stitches to ensure the round has the correct total.
- Round 2:
- Crochet two single crochets into each stitch of the previous round. Use a marker to mark the start. This total round has 16 stitches.
- Round 3:
- Alternate one single crochet and two single crochets (one increase) into the stitches. Repeat the pattern until the round is complete.
- Alternate one single crochet and two single crochets (one increase) into the stitches. Repeat the pattern until the round is complete.
- Round 4:
- Make one single crochet into the first stitch and then two single crochets into the next stitch (one increase). Alternate between one and two single crochets by repeating this pattern to complete the round.
- Round 5:
- Alternate three single crochets into stitches and one increase (two single crochets into one stitch) to complete the round.
- Round 6:
- Alternate four single crochets and one increase, repeating the pattern to complete the sixth round.
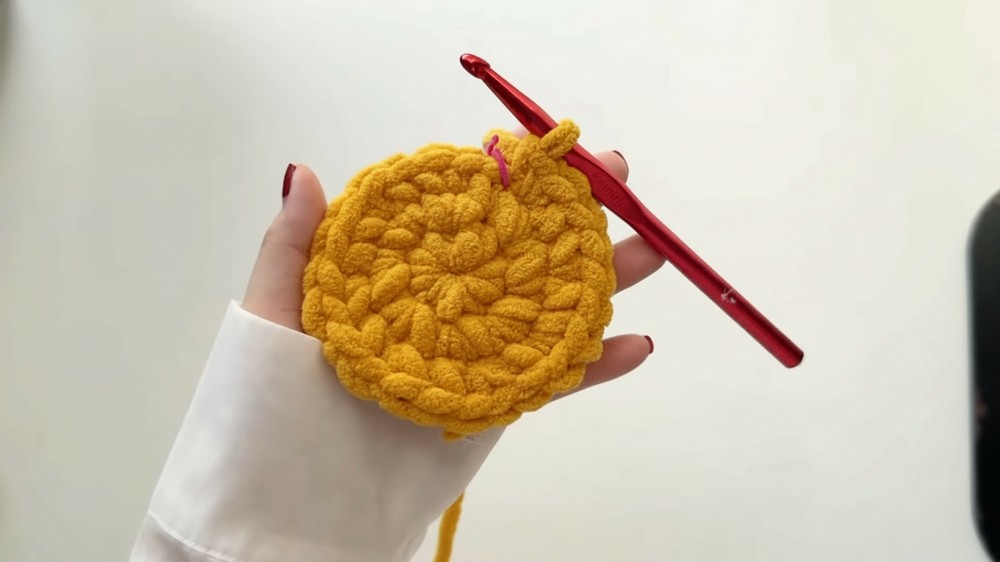
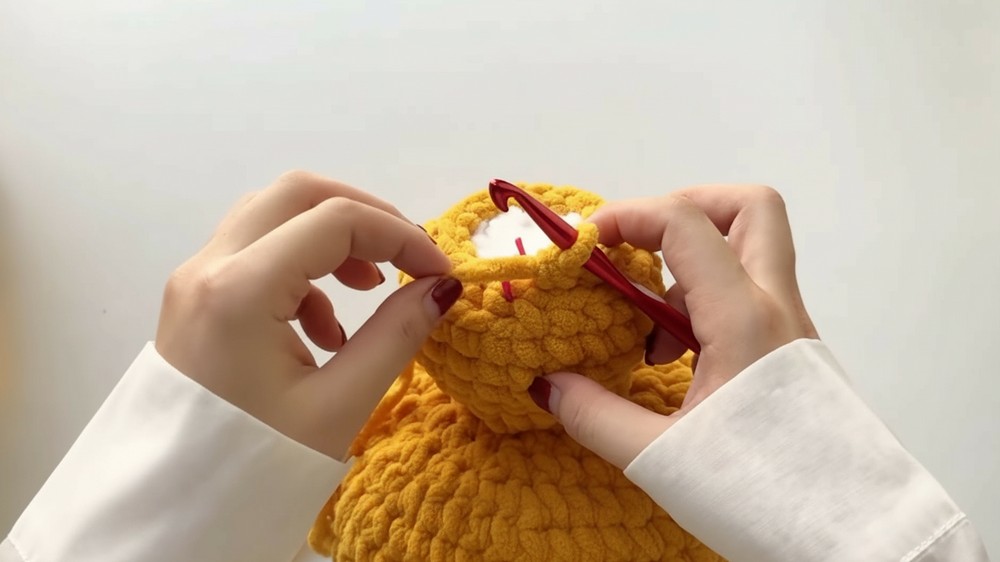
Add Texture to Round 7:
- Work only in back loops for the seventh round by crocheting one single crochet into each stitch. This creates an exposed line for adding ruffles later.
Round 8–12:
- Crochet one single crochet into each stitch for five rounds to build the body further.
Curving and Stuffing the Body
- Add shaping with:
- Round 13: Alternate two single crochets and one decrease into every pair of stitches.
- Round 14: Alternate three single crochets and one decrease.
- Round 15: Decrease all stitches; the body should curve inward.
- Stuff the body:
- Fill the inside with stuffing until firm and round.
- Fill the inside with stuffing until firm and round.
Adding Ruffles:
- Round 16:
- Decrease all stitches and finish with a slip stitch.
- Round 17:
- Use the exposed front loops from Round 7. Chain one and crochet one single crochet into each stitch.
- Round 18:
- Chain two. Work three double crochets alternating between back loops and front loops for a layered ruffled effect.
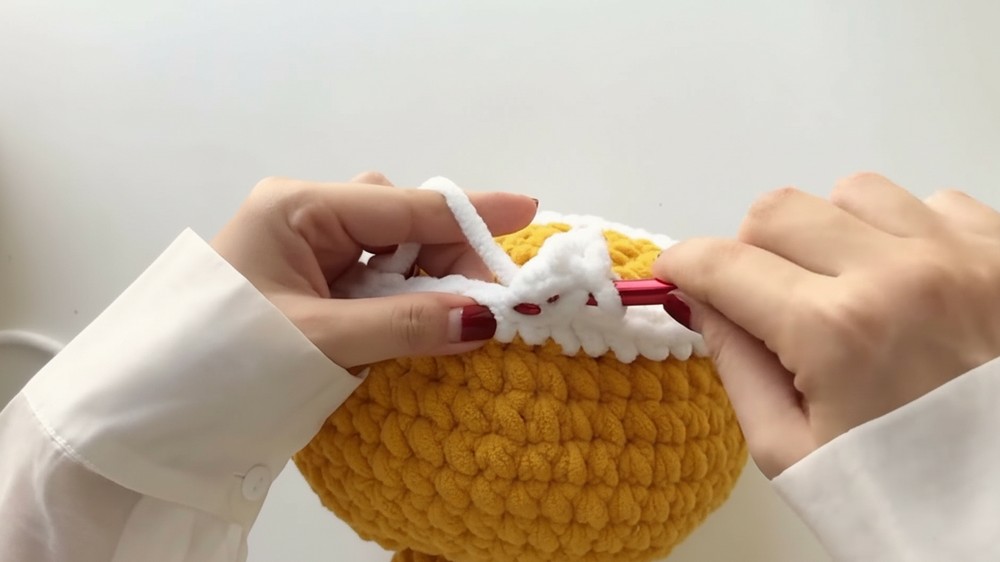
- Chain two. Work three double crochets alternating between back loops and front loops for a layered ruffled effect.
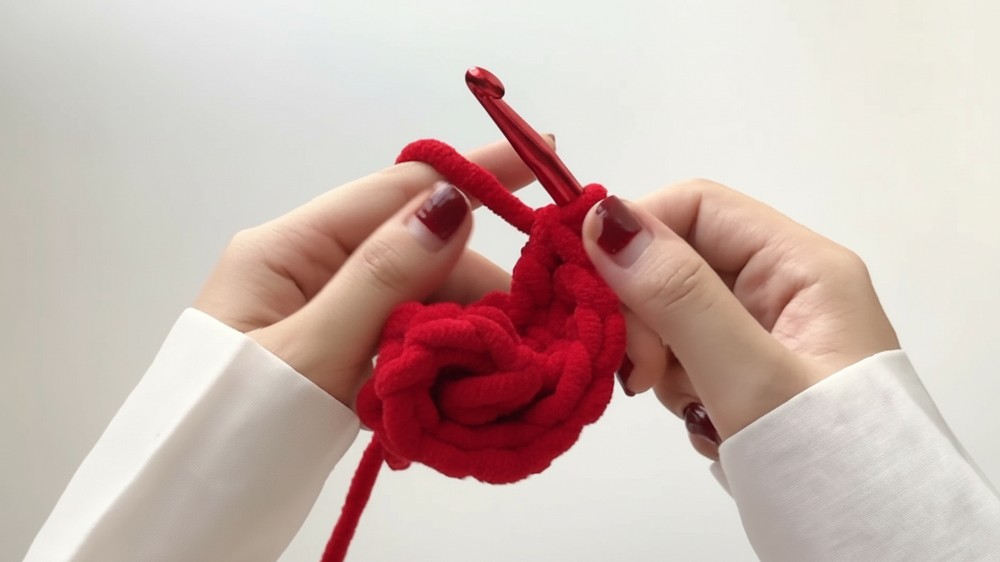
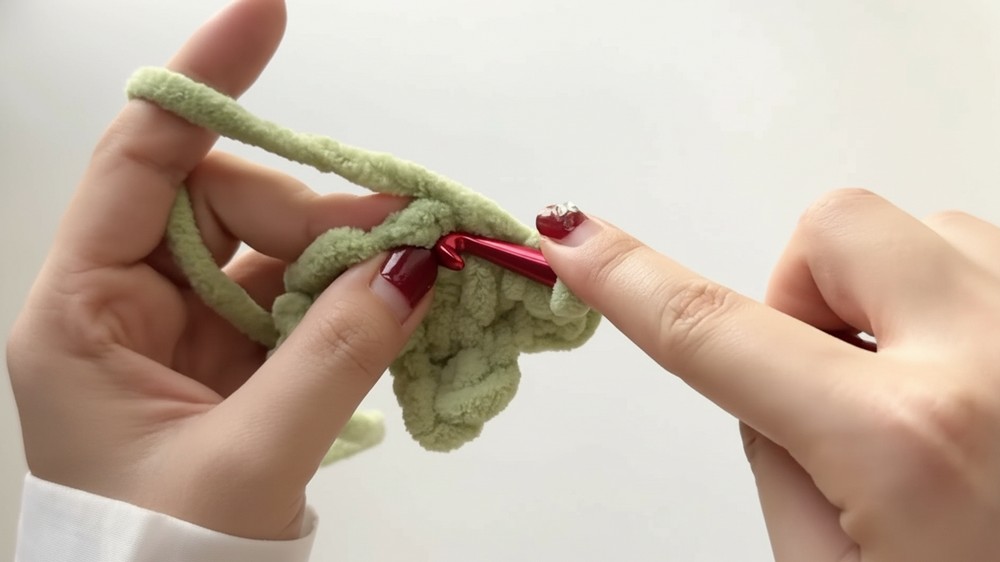
Creating Roses
- Start with a slip knot and chain six.
- Crochet one single crochet followed by an increase (two single crochets into one stitch).
- For the remaining stitches, crochet three double crochets into each stitch.
- Roll the completed piece into a rose shape and hide excess yarn.
Creating Leaves
- Use a magic ring and chain one. Add three single crochets into the ring and close it.
- Chain three, then crochet one single crochet, one half double crochet, and one slip stitch into the same stitch.
- Repeat these steps around the ring for multiple leaf sections.
- Cut off excess yarn once complete.
Attach Roses and Leaves
- Arrange roses and leaves on the bouquet body and line them up to ensure proper fit before attaching.
- Use glue or sew the pieces for a secure finish.
Make the Ribbon
- Chain 63 stitches and fix it securely around the bouquet for a polished appearance.
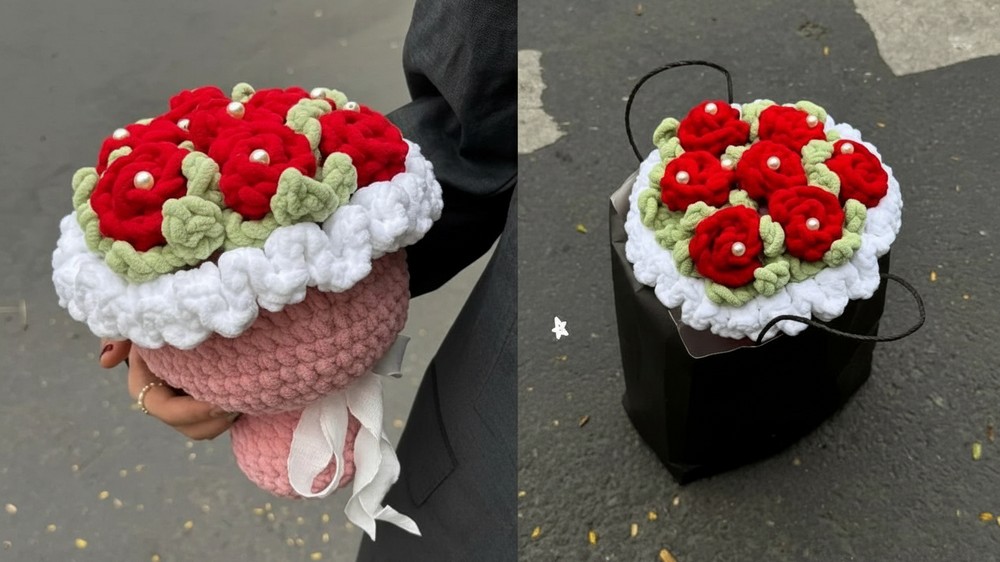
Special Features
- The bouquet body is textured with ruffles for an elegant design.
- Roses and leaves are individually crafted, allowing customization with different colors and quantities.
- The ribbon adds a decorative touch, completing the bouquet’s sophisticated look.
Level of Difficulty
This project is beginner-friendly but has intermediate-level details, such as shaping, texture creation with back loops, and decorative elements like ruffles and roses. It’s ideal for anyone looking to advance their crochet skills.
Tutor’s Suggestions
The tutor repeatedly emphasizes:
- Counting stitches for accuracy in each round.
- Using a stitch marker to identify the start and end of a round.
- Aligning roses and leaves on the bouquet body before gluing or sewing.
- Stuffing generously to maintain the bouquet’s shape.
Uses and Materials
Uses:
- Home décor centerpiece.
- Creative handmade gift for special occasions like weddings or birthdays.
- A unique crocheting project for self-expression.
Materials:
- Yarn of your choice (colors can be customized for roses, leaves, and ruffles).
- Crochet hook that matches your yarn size.
- Yarn needle.
- Stuffing material (polyfill recommended).
- Scissors.
Pro Tip
To create cleaner edges on roses and ruffles, keep your tension consistent for all stitches. This will ensure your bouquet looks polished and professional.
Conclusion
This crochet bouquet tutorial the process into clear steps, making it accessible for beginners and fun for advanced crocheters. With its special features and elegant design, the bouquet is perfect for decoration or gifting.