
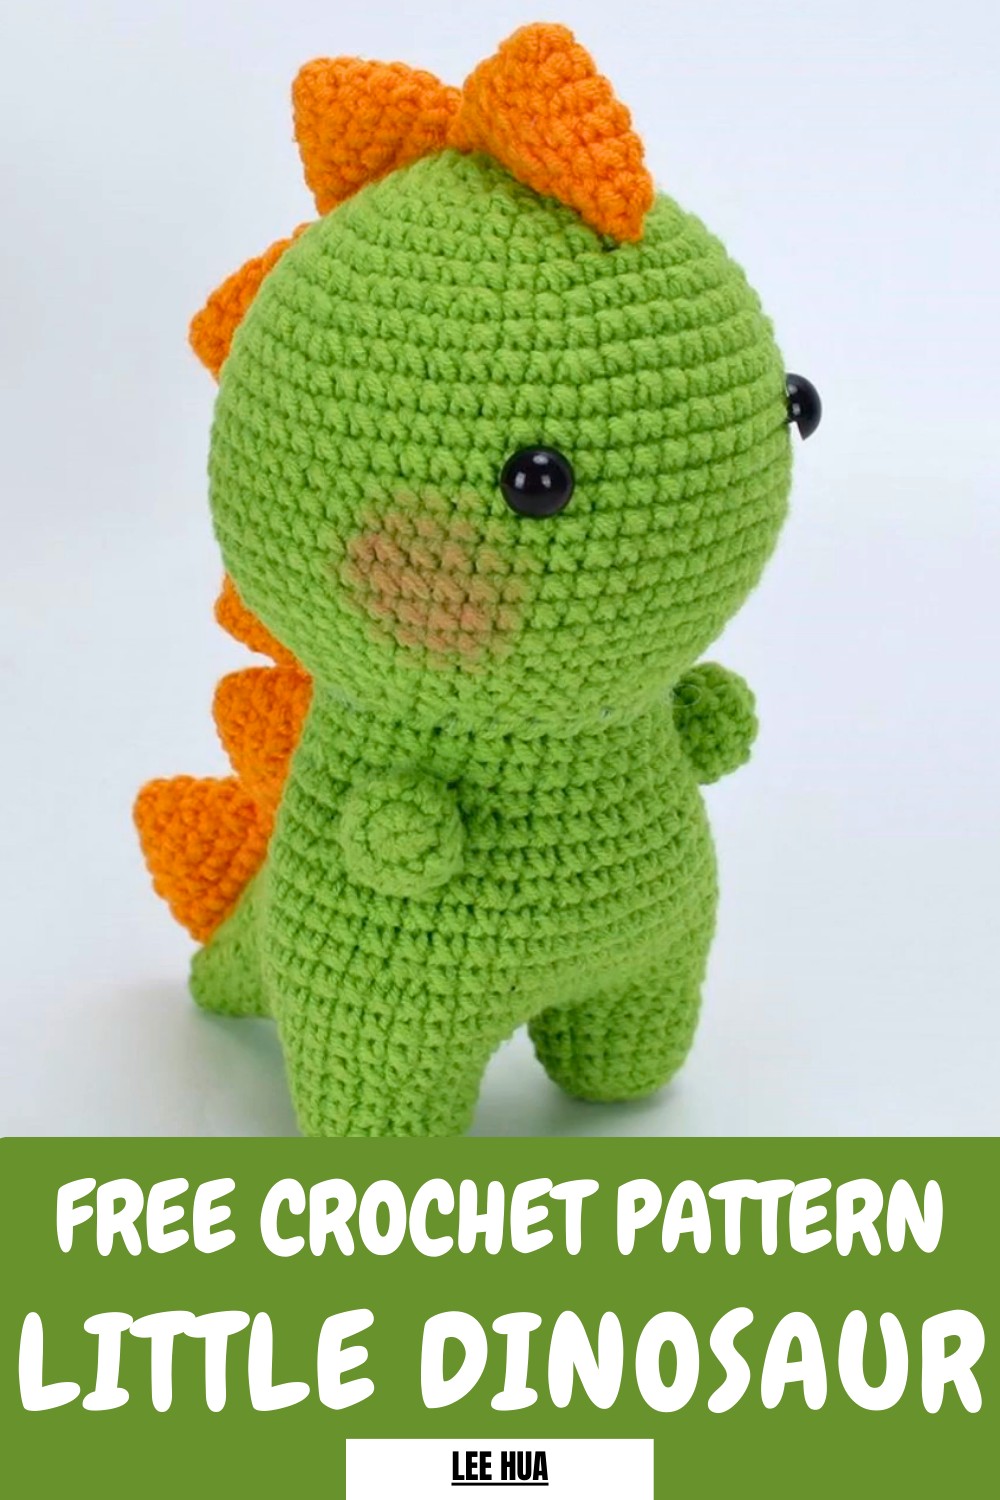
Delight kids and fans with this Free Crochet Dinosaur Pattern that forms a cute huggable toy perfect for playtime and display at home.
Vibrant colors and playful shapes bring a lively dinosaur to life, transforming yarn into an engaging and imaginative creation. The Crochet Dinosaur Pattern produces designs that are perfect for toys, decorative accents, or unique gifts, adding charm and personality to any space. Its rounded body, expressive eyes, and detailed features give it a joyful and friendly appearance that appeals to both children and adults.
Magical Crochet Dinosaur Pattern That Feels Like Fun
Each step in the process enhances focus, patience, and fine motor skills, offering a rewarding and enjoyable experience. The pattern encourages creativity through choices in colors, sizes, and textures, ensuring each dinosaur is unique and full of character.
Ideal for nurseries, playful décor, or memorable gifts, the finished piece combines aesthetic appeal, functionality, and charm. Every stitch contributes to a delightful, heartwarming creation, turning simple yarn into a cheerful companion that brings happiness and satisfaction to everyone who sees or receives it.
Step-by-Step Details
1. Materials Preparation
- Use five strands of milk cotton yarn.
- Choose a 3.0 mm crochet hook.
- Gather other essentials like fiberfill (for stuffing), a yarn needle, and stitch markers.
2. Hooking the Legs
- Start with a magic ring: Wrap the yarn around your finger, pinch the intersection, and crochet six single crochets in the ring.
- Pull the yarn tail to tighten, turning the fabric into a circular disc.
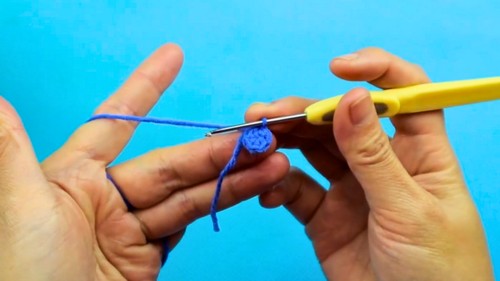
- Use slip stitches to connect the rounds.
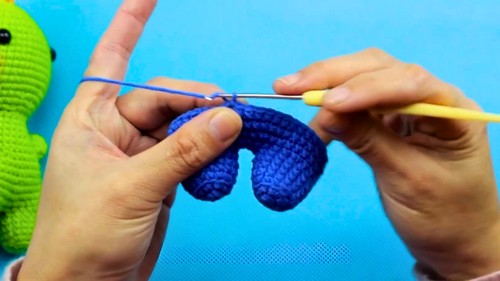
- Second Round: Begin with a chain stitch and increase by hooking two single crochets in each stitch, resulting in 12 single crochets in this round.
- Third Round: Work in the back loop only. Crochet three single crochets in a row, then make an increase (two single crochets in the same stitch). Repeat this group three times.

- For rounds 4-6, simply crochet one single stitch in each stitch (15 single crochets per round).
- Once the first leg is done, cut the yarn, and repeat the same steps to create the second leg without cutting the yarn after the sixth round.
3. Connecting the Legs
- Hook three chain stitches to connect the two legs. Then, continue hooking 15 single crochets in each of the leg stitches and three single crochets into each of the chain stitches, totaling 36 stitches for round 7.
4. Creating the Body
- For rounds 8 to 11, follow the pattern:
- Increase stitches as per the diagram provided in the video for uniform shaping.
- Use five single crochets followed by one increase for round 12 (repeated six times).
- Stuff the body evenly with fiberfill to ensure the doll has a sturdy structure.

5. Creating the Head
- Transition to the head by following the diagram from the video.
- Use similar techniques: single crochets, increases, and decreases to shape the head.
- Stuff the head with fiberfill while ensuring proper proportions with the body.
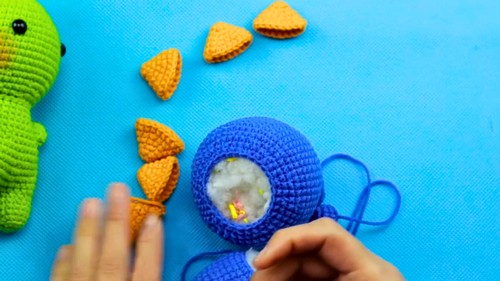
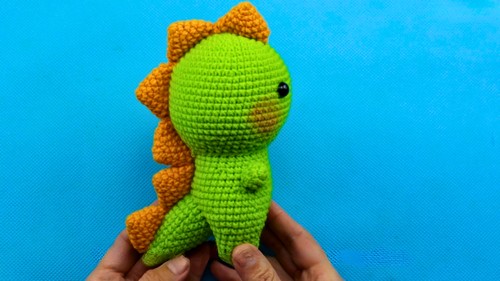
6. Making the Arms, Tail, and Dorsal Fins
- Use the same methods to create small arms, a tail, and six dorsal fins for the dinosaur’s back.
- No stuffing is needed for the dorsal fins.
- Follow the provided diagram for precise counts and placement.
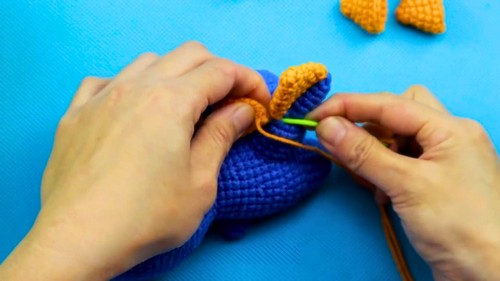
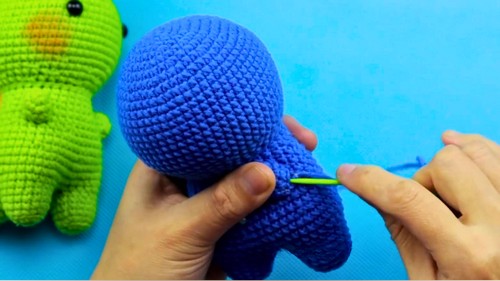
7. Assembling the Dinosaur
- Attach the head to the body: Sew the head and body together, stitch by stitch, ensuring proper alignment and symmetry.
- Sew the arms onto the body at round 14 of the body (approximately aligned with the legs). Ensure they are symmetrical.
- Attach the tail: Sew the tail to the lower part of the back of the dinosaur's body between the legs.
- Attach the dorsal fins: Evenly space the six dorsal fins along the back and tail and sew them securely to the body.
8. Adding the Final Details
- Attach the eyes: Place them between rounds 13 and 14 of the head with an interval of 12 stitches between the two eyes.
- Optionally, apply blushes to give the dinosaur a cuter appearance. Use a soft pink shade if available.
Special Features
- Magic Ring Technique: The tutorial extensively teaches this fundamental crochet technique, which is ideal for creating circular and tight beginnings.
- Back Loop Stitches: The use of the back loop only creates texture and detail for the dinosaur.
- Diagrams Provided: Clear crochet patterns and diagrams are shown in the video, assisting viewers in creating the perfect design.
- Versatility: While the project showcases a baby dinosaur, the same foundational techniques can be applied to other amigurumi (crochet doll) projects.
Level of Difficulty
The project is suitable for beginners to intermediate crocheters. While the techniques require some practice (e.g., magic ring, seamless stitching, increases, decreases), the instructor’s clear demonstration and detailed diagrams make it accessible for learners. Patience is the key to success for first-timers.
Tutor's Suggestions
- Use a stitch marker to track the first stitch in every round accurately.
- Pay close attention to the crochet diagrams provided in the video.
- Always ensure consistent yarn tension to make the doll look neat.
- Stuff the body and head evenly with fiberfill to avoid lumps.
- Take small breaks if the stitching feels repetitive or if your hands get tired.
Uses
- This baby dinosaur is the perfect gift for children or friends who love cute, handcrafted toys.
- Use it as home decor, a keychain, or a desk ornament to brighten your space.
- It can be a great handmade contribution to craft fairs or giveaways.
Materials
- Milk cotton yarn (5 strands in colors of your choice).
- 3.0 mm crochet hook.
- Fiberfill for stuffing.
- Stitch markers.
- Yarn needle for sewing pieces together.
- Optional: Blush powder for decorative touches.
Tip
When attaching pieces like the head, arms, or tail, ensure symmetry by counting the stitches carefully and using stitch markers to guide proper placement. This will help your dinosaur look neat and well-proportioned.
Conclusion
With the help of this detailed pattern, crocheting a kawaii baby dinosaur becomes a fun, creative, and rewarding process. Whether you're a beginner looking to learn new techniques or an experienced crocheter seeking inspiration, this project allows you to create something adorable and unique.