
Cuddle up with this Free Crochet Baby Piglet Amigurumi Pattern, perfect for beginners and adding a playful touch to any handmade gift.
Looking for a fun and charming project to brighten your crochet collection? This tiny piglet amigurumi brings instant cuteness with its round body, stubby legs, little snout, and curly tail. It’s crafted to make the process enjoyable, offering an approachable challenge while letting you personalize details like its ears, nose, and facial expressions.
Sweet Crochet Baby Piglet Amigurumi Pattern That Melts Hearts
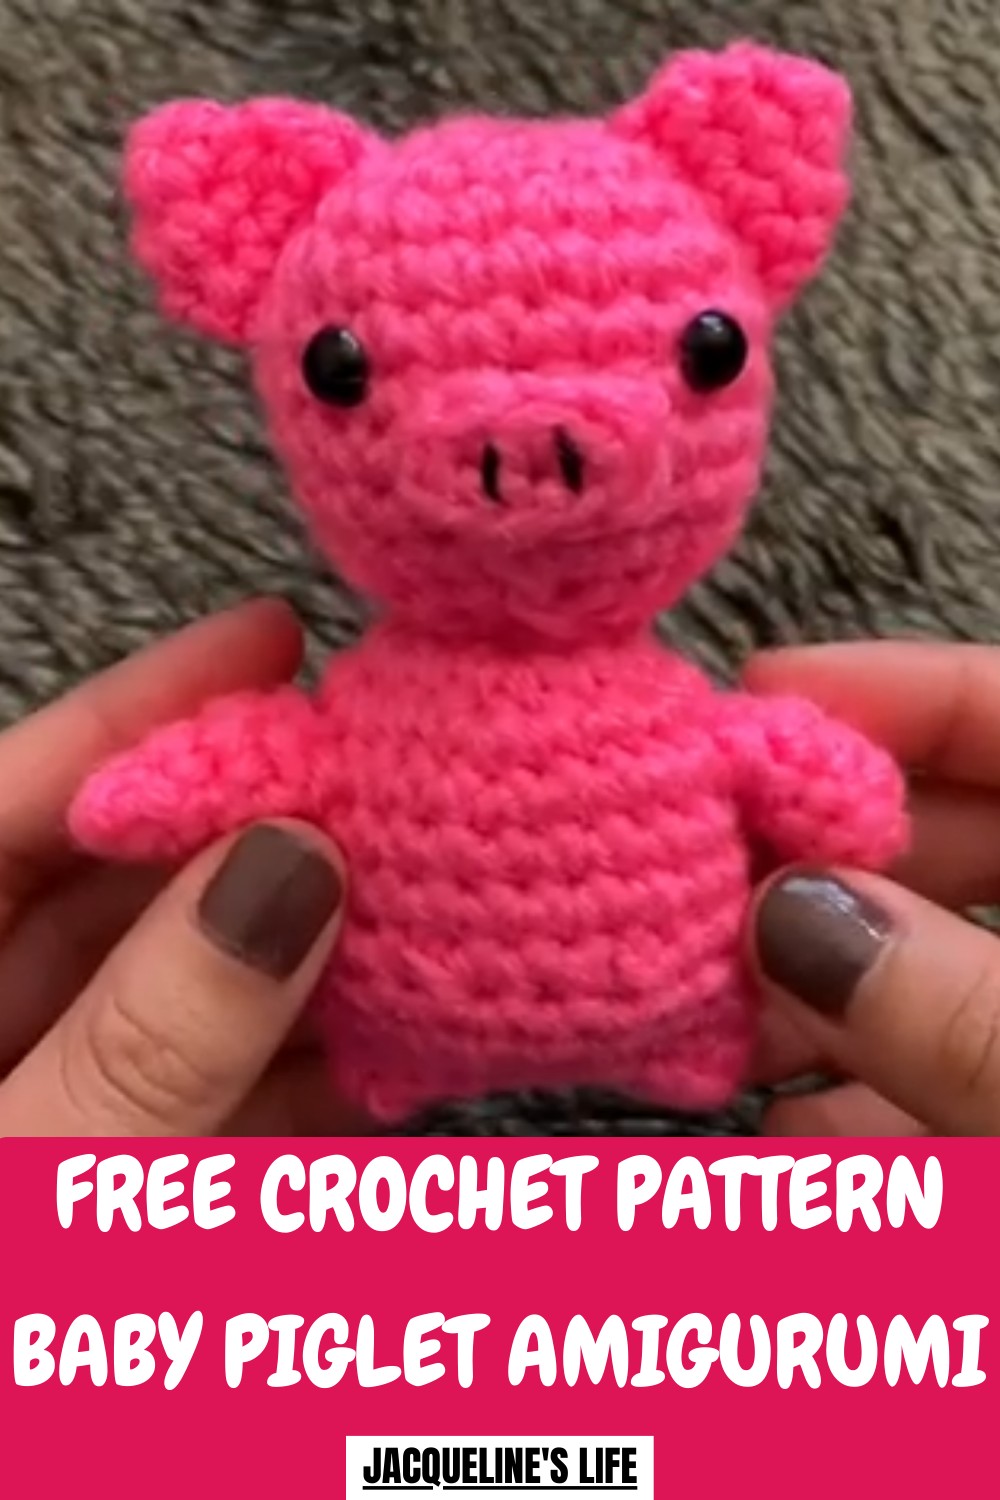
Using soft pastel or bright yarns enhances its playful appeal, making it perfect for nurseries, shelves, or as a cheerful desk companion. Beyond its adorable appearance, creating this little piglet promotes focus, patience, and creativity, turning a simple crochet session into a relaxing and rewarding activity. Its small size makes it ideal as a handmade gift or collectible, carrying a warm, personal touch. This delightful amigurumi combines charm, fun, and a handcrafted feel, bringing joy to crocheters and piglet lovers alike.
How to Crochet a Little Piglet – Step-by-Step Guide
Materials Used
To make this little piglet, you’ll need the following materials:
- Yarn: Pink yarn to crochet the piglet.
- Crochet Hook: Size 5mm crochet hook.
- Embroidery Thread: For sewing the piglet’s nose details.
- Threading Needle: To attach key parts.
- Safety Eyes: 8mm size for adding eye details.
- Glue Gun: Used to attach the nose and safety eyes securely.
- Stuffing: Fiberfill or any suitable material to stuff the head and body.
- Stitch Marker: To keep track of your rounds.
- Scissors: For cutting excess yarn/thread.
Uses for the Little Piglet
- Keychain Accessory: Add a keyring for practical use.
- Gift Idea: Perfect for gifting to children or fans of handmade crafts.
- Farm Animal Collection: Incorporate into a series of crochet farm animals.
- Home Decor: Use as a cute decoration for shelves, desks, or small spaces.
Special Features
- Full-Body Pig Design: Unlike the previous version, this piglet has a complete head, body, arms, ears, and tail.
- Compact Size: Small and lightweight, designed for convenience and aesthetic appeal.
- Customizable Details: Modify the size, color, or design. For example, you can sew or glue the eyes and nose according to your preference.
- Textured Detailing: The crunch stitch is used for the nose and other features, enhancing the design.
- Multiple Sewing Techniques: Sewing flat pieces (arms, ears) simplifies the process for beginners while ensuring durability.
Level of Difficulty
Beginner to Intermediate
- Beginner-friendly techniques such as single crochet (SC), invisible decreases, and the magic circle are explained step by step.
- Some parts (e.g., arms, ears, and small rounds) may be tricky for beginners but can be mastered with practice.
Tutor’s Suggestions
- Glue vs. Sewing: The tutor suggests gluing the nose and eyes for ease but gives the option to sew them if you prefer.
- Stuff Moderately: Avoid overstuffing the head and body to maintain shape integrity.
- Space Handles Thoughtfully: For the arms and ears, place them at appropriate positions to avoid awkward appearances (e.g., too high arms resembling a chicken).
- Work Gently into Small Rounds: Tight rounds like ears and arms require slow stitching to avoid unraveling.
- Customize Finishes: Add details such as embroidery thread for the snout and adjust sewing techniques as needed.
Step-by-Step Instructions
Pig Head
- Begin with a Magic Circle:
- Wrap pink yarn around your fingers, create an X, and insert the hook inside the circle. Pull yarn through and chain to secure.
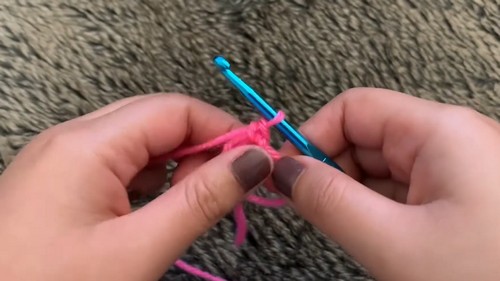
- Make 6 single crochets into the circle (SC 6). Pull yarn tail tight to close the circle. Slip stitch (SS) into the first stitch to complete Round 1. Add a stitch marker to mark the last stitch.
- Wrap pink yarn around your fingers, create an X, and insert the hook inside the circle. Pull yarn through and chain to secure.
- Round 2: Increase in Each Stitch:
- Crochet two single crochets (2 SC) into each stitch for a total of 12 stitches.
- Crochet two single crochets (2 SC) into each stitch for a total of 12 stitches.
- Round 3: Alternate Increases:
- Crochet 2 SC into the first stitch, then 1 SC into the next stitch. Repeat until you have 18 stitches.
- Round 4: Last Increasing Row:
- Crochet 2 SC into the first stitch, then 1 SC into the next two stitches. Repeat until you reach 24 stitches.
- Crochet 2 SC into the first stitch, then 1 SC into the next two stitches. Repeat until you reach 24 stitches.
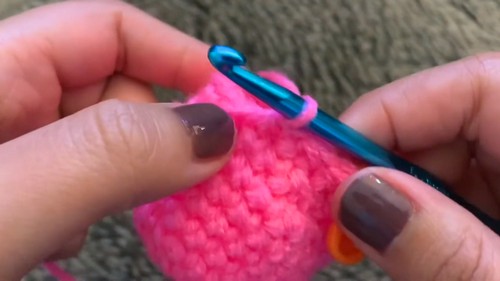
- Rounds 5–9:
- Single crochet into each stitch without increasing to create the head length. You’ll end up with 24 stitches per row.
- Prepare Decreasing Rows:
- Work invisible decreases (ID): Enter into front loops of two consecutive stitches, yarn over, and pull through all loops. Round 10 reduces to 18 stitches total.
- Round 11 further decreases to 12 stitches using ID.
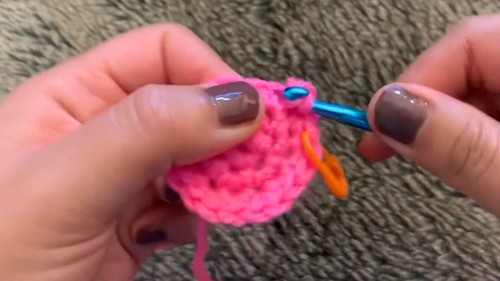
- Stuff the Head:
- Add fiberfill to maintain shape before finishing.
- Round 12: Close the Head:
- Regular decreases will reduce the stitch count to 6 stitches. Cut the yarn, leaving excess to sew the head to the body later.
Pig Nose
- Start with a Slip Knot and Chain 4.
- Single Crochet Back into Chain: Skip the first chain, SC into the next three chains.
- Turn and Repeat Rows: Chain 1 at the end, rotate work, and crochet SC 3 stitches in each row.
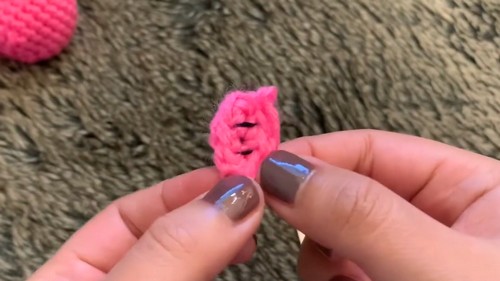
- Slip Stitch to Finish: Secure the yarn with a slip stitch (SS), and glue or sew excess thread to the back.
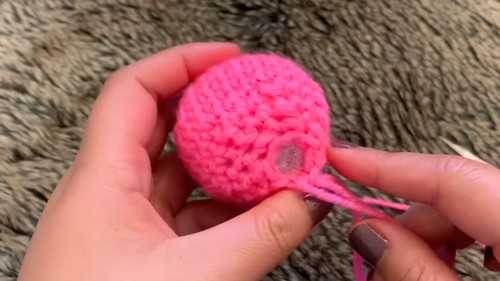
- Add Snout Details: Insert embroidery thread into the nose with a threading needle, sew it in place, and tie excess thread securely at the back.
Pig Ears
- Create Magic Circle: Crochet 4 single crochets into the circle, tighten, and slip stitch into the first stitch.
- Round 2: Increase into Each Stitch: Two single crochets into each stitch (total: 8 stitches).
- Round 3: Single crochet in each stitch without increasing.
- Cut the Yarn: Leave excess for sewing.
Pig Tail
- Chain 5: Crochet a chain of 5 stitches.
- Increase into Each Stitch: Crochet 2 SC into each chain to make the tail curl.
- Adjust Curl Shape: Twist the tail into the desired curve, then sew or securely attach.
Pig Body
- Magic Circle and Rounds 1–4: Begin the body using the same increasing technique as the head. Stop increasing after Round 4 (24 stitches).
- Rounds 5–7: Single crochet without increasing to create the body length.

- Round 8–11: Decrease gradually to shape the bottom. Close the body with a slip stitch and tuck leftover yarn into the stuffing.
Assemble the Piglet
- Attach Head to Body: Use leftover yarn from closing the head to sew it securely to the body.
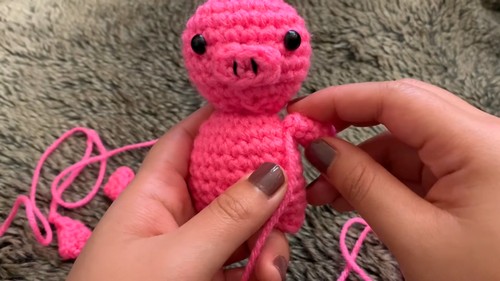
- Glue Nose and Eyes: Position the nose and safety eyes before gluing them on for best results.
- Sew Arms, Ears, and Tail: Flatten arms and ears before sewing for easy stitching. Attach the tail securely to the back.
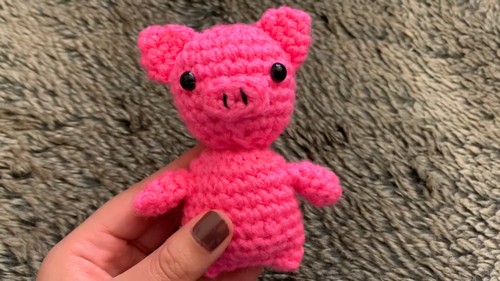
Conclusion
Your little piglet crochet project is complete! This adorable and versatile design can now become a keychain or part of a farm animal collection. The tutorial emphasizes customizable details like sewing versus gluing and adjusting placement for better aesthetics. This fun, lightweight crochet project is a perfect addition to your handmade creations.
Pro Tip
If you’re sewing with small rounds like the ears or arms, slightly loosen your stitches as you work—this will make it easier to handle and prevent tension that may distort the final shape.