
Share love with the Free crochet Heart Amigurumi Pattern, creating a cute and cuddly heart perfect for gifts, decor, or adding a sweet touch anywhere.
A tiny symbol of love and warmth comes to life, soft, huggable, and full of charm. Its smooth curves and vibrant colors create a cheerful, inviting look that brightens any space. Plump and perfectly shaped, it carries a playful yet heartfelt presence, adding a cozy and joyful touch to homes, bedrooms, or living areas. The durable yarn ensures it remains a lasting keepsake, while its gentle form radiates comfort and happiness.
Quirky Crochet Heart Amigurumi Pattern That Charms Everyone
Beyond its visual appeal, this little heart inspires feelings of joy and warmth wherever it is placed. Its versatile charm makes it perfect for gifting to someone special, enhancing festive décor, or adding a sweet, handmade accent to any setting. Compact, adorable, and full of character, this tiny heart brings a delightful mix of fun, warmth, and timeless appeal that can brighten any corner it inhabits.
How to Crochet a Cute Amigurumi Heart: Step-by-Step Guide
Materials Needed
Gather the following materials before starting:
- Yarn: Acrylic Weight-4 yarn (e.g., Big Twist Value yarn or Red Heart Super Saver)
- Popular colors: Red, pink, gold, or pastels (e.g., bubble gum or varsity gold).
- Crochet Hook: 4.5mm crochet hook.
- Stitch Markers: Four markers to join and track stitches. Substitute with bobby pins, safety pins, or scrap yarn if needed.
- Scissors: For cutting yarn or felt.
- Hot Glue Gun: To attach felt letters (optional for text features).
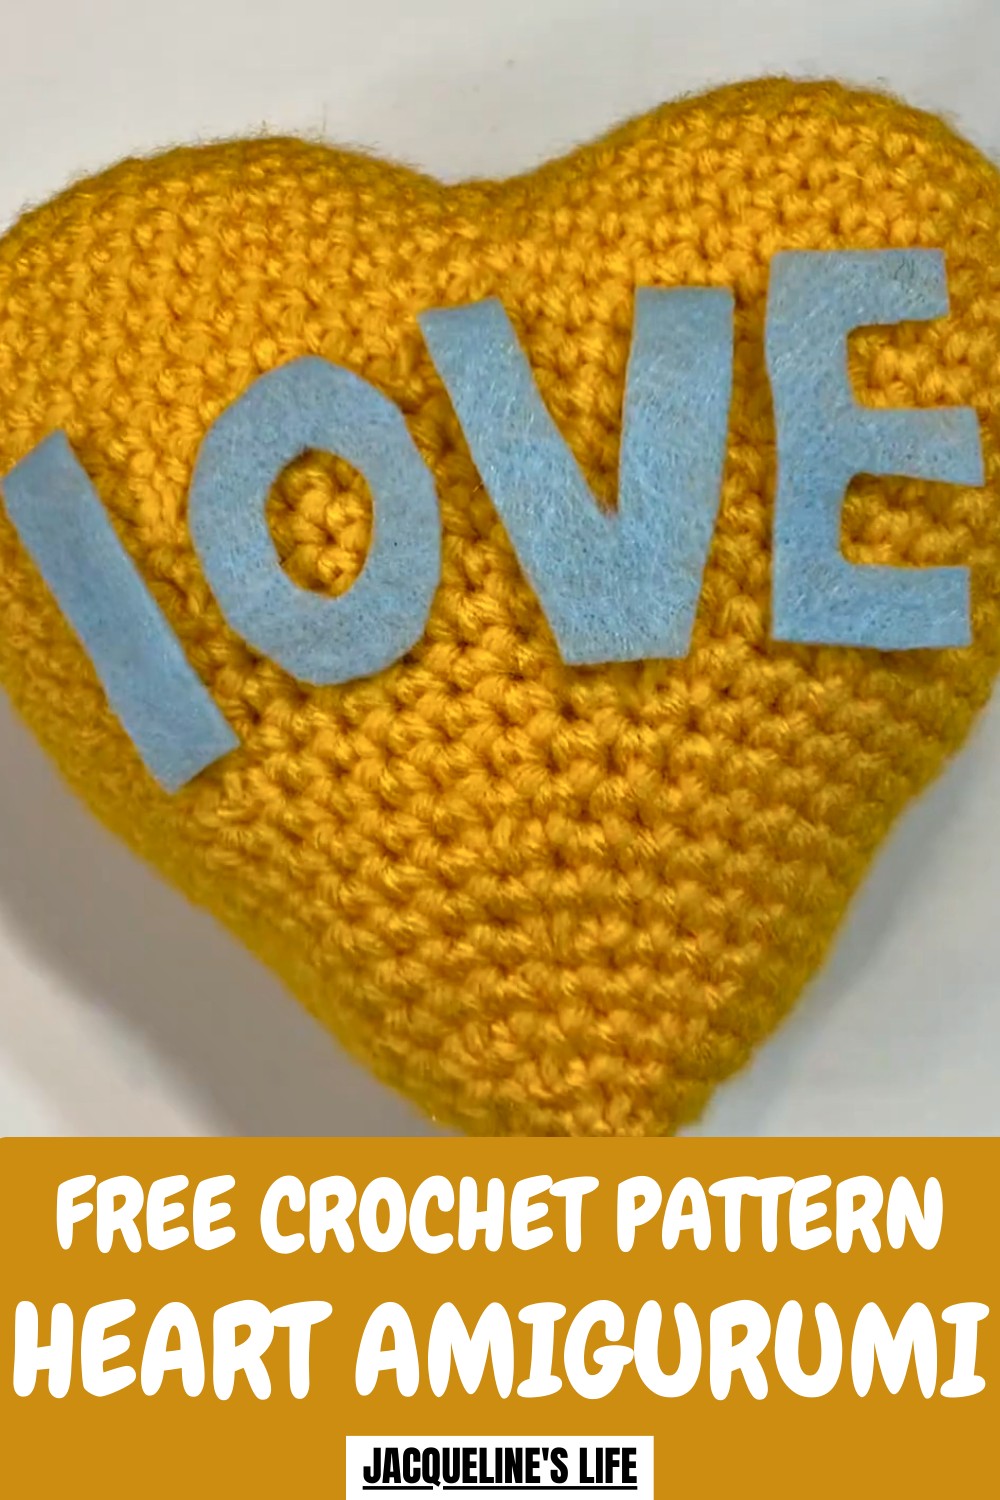
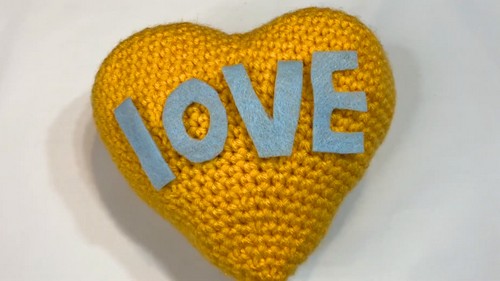
- Felt Sheets: Use felt to add text like "LOVE" or "XO." Any color works, but red and blue were demonstrated in this video.
- Stuffing: Fiberfill or spare yarn scraps work well for filling.
- Threading Needle: To sew any openings and securely join sections.
Uses
Once complete, you can use the crochet heart for various purposes, including:
- Valentine’s Day Gifts: Make a thoughtful keepsake or a festive token for loved ones.
- Decorative Pieces: Brighten up spaces with these hearts as table, room, or holiday decorations.
- Charity Projects: Share the love by donating these hearts, like the instructor does for hospice patients.
- Customizable Collectibles: Personalize them with felt letters, embroidery, or choose colors to fit different themes.
Special Features
- Customizable: Add felt or embroidery letters, use different yarn colors, or keep it plain for a clean look.
- Three-Dimensional Shape: The project uses two matching crochet pieces, joined to create a 3D form.
- Structured Design: Shape and stuff the heart to get the perfect bulge and curves, creating a professional finish.
- Amigurumi Technique: Practice decreases and shaping essential to creating other 3D crochet patterns.
- Valentine's-Inspired Details: The added felt lettering and cute color schemes make it perfect for February or any playful, loving occasion.
Level of Difficulty
Intermediate
- Although beginners can attempt it, the heart requires precise increases, decreases, and shaping.
- The placement of felt decorations and stitching of the two parts requires care and coordination.
- The invisible decrease technique is covered, adding difficulty but ensuring neat results.
Tutor’s Suggestions
The tutor shares important tips and insights to complete this project successfully:
- Use Stitch Markers: Place one on each side of the heart’s top pieces and one in the middle for symmetry when connecting the two sections.
- Practice the Magic Circle: Perfect the technique for a clean and adjustable start.
- Stuff Gradually: Add stuffing as you go, especially in smaller areas like the base and between sections of the heart. This ensures smooth shaping.
- Take Breaks When Cutting Felt: If free-handing felt letters for text, keep it simple to avoid mistakes. Trace shapes beforehand if you’re a beginner.
- Don’t Cut Yarn Incorrectly: On the second heart piece, leave the yarn uncut during the connection step to ensure the process works. The first piece gets tied off and set aside.
- Adjust Shaping: Gently reshape the heart after stuffing to remove unevenness or bumps, focusing on creating a round and symmetrical finish.
Step-by-Step Instructions
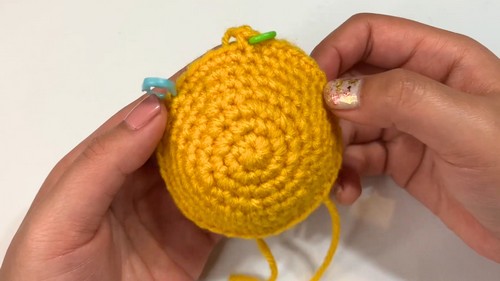
1. Create the Magic Circle and Foundation
- Wrap the yarn around three fingers to form an X. Insert the crochet hook under the first loop, pull the yarn, and create a working loop.
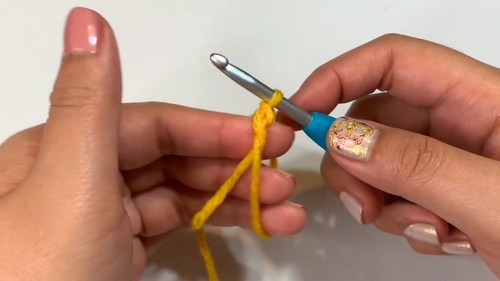
- Single crochet six stitches into the circle. Pull the tail to close the circle and tighten it.
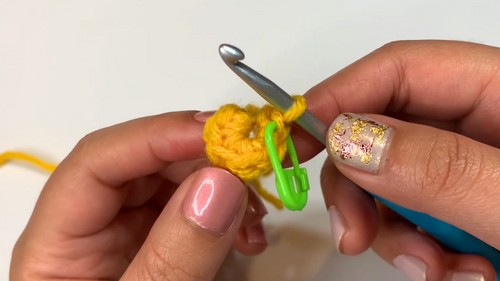
- Increase each subsequent round:
- Round 2: Single crochet 2 stitches into each (12 total).
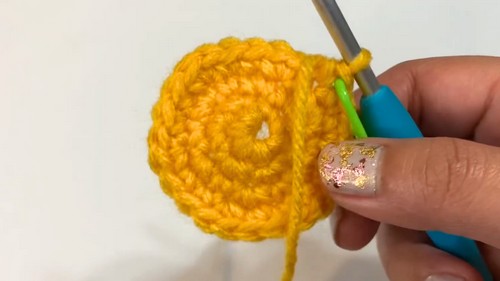
- Round 3: Alternate single crochet and increase (18 total).
- Continue increasing following the video’s instructions until you reach round 8 with 36 stitches.
- Round 2: Single crochet 2 stitches into each (12 total).
2. Make Two Separate Pieces
- Complete the first piece (8 total rounds) and tie off the yarn with a long tail for sewing.
- Begin the second piece using the same rounds but do not cut the yarn.
- Add markers 4 stitches apart when finishing each piece to simplify alignment for the joining step.
3. Join and Sew the Pieces Together
- Align the two finished pieces, matching the stitch markers.
- Single crochet the pieces together, starting with the marked stitches.
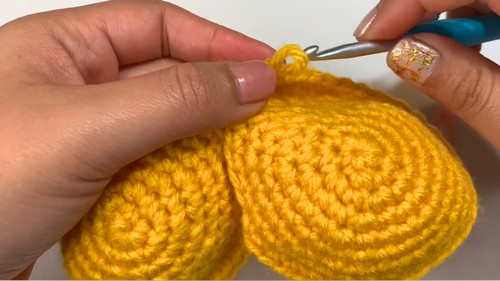
- Single crochet 31 stitches along one side, connect the two middle sections with stitches, and repeat 31 stitches on the other side. (You’ll have 64 stitches total).
- Sew the middle gap tightly, matching stitches for a seamless connection.
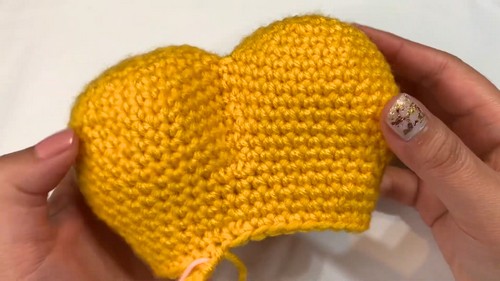
4. Begin Decreasing to Shape the Heart
- Start shaping by alternating rows of single crochets and decreases:
- Round 9: Single crochet 30 stitches between decreases on either side.
- Round 10 and onward: Gradually reduce single crochets between decreases, shaping the bulge.
- Work invisible decreases (front loop only) for a cleaner, neater structure.
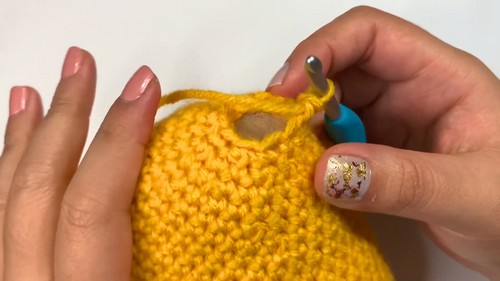
5. Stuff and Finish
- Add stuffing as you go, focusing on evenly filling both sides and the middle to counter gaps or dimples.
- Complete with three final decreases to close the base tightly.
- Pull the excess yarn through stitches, knot securely, and tuck it in.
6. Add Felt Lettering (Optional)
- Use felt sheets to cut out desired letters such as “LOVE,” “XO,” or “HUGS.”
- Optionally, trace letters onto the felt before cutting for cleaner results.
- Stick letters to the heart using a hot glue gun. Let it dry to ensure the design stays in place.
Conclusion
Crocheting this 3D heart is a fun and rewarding project that lets you celebrate love, creativity, and personalization. Whether you decorate it with felt letters, embroider names, or keep it simple, each heart will be unique and heartfelt. It’s a great way to explore amigurumi shaping while creating a perfect Valentine’s gift or charming year-round decoration.
Pro Tip
When decreasing in small spaces, switch to a smaller hook (e.g., 4mm), making it easier to maneuver through tight loops without unpicking your stitches.