
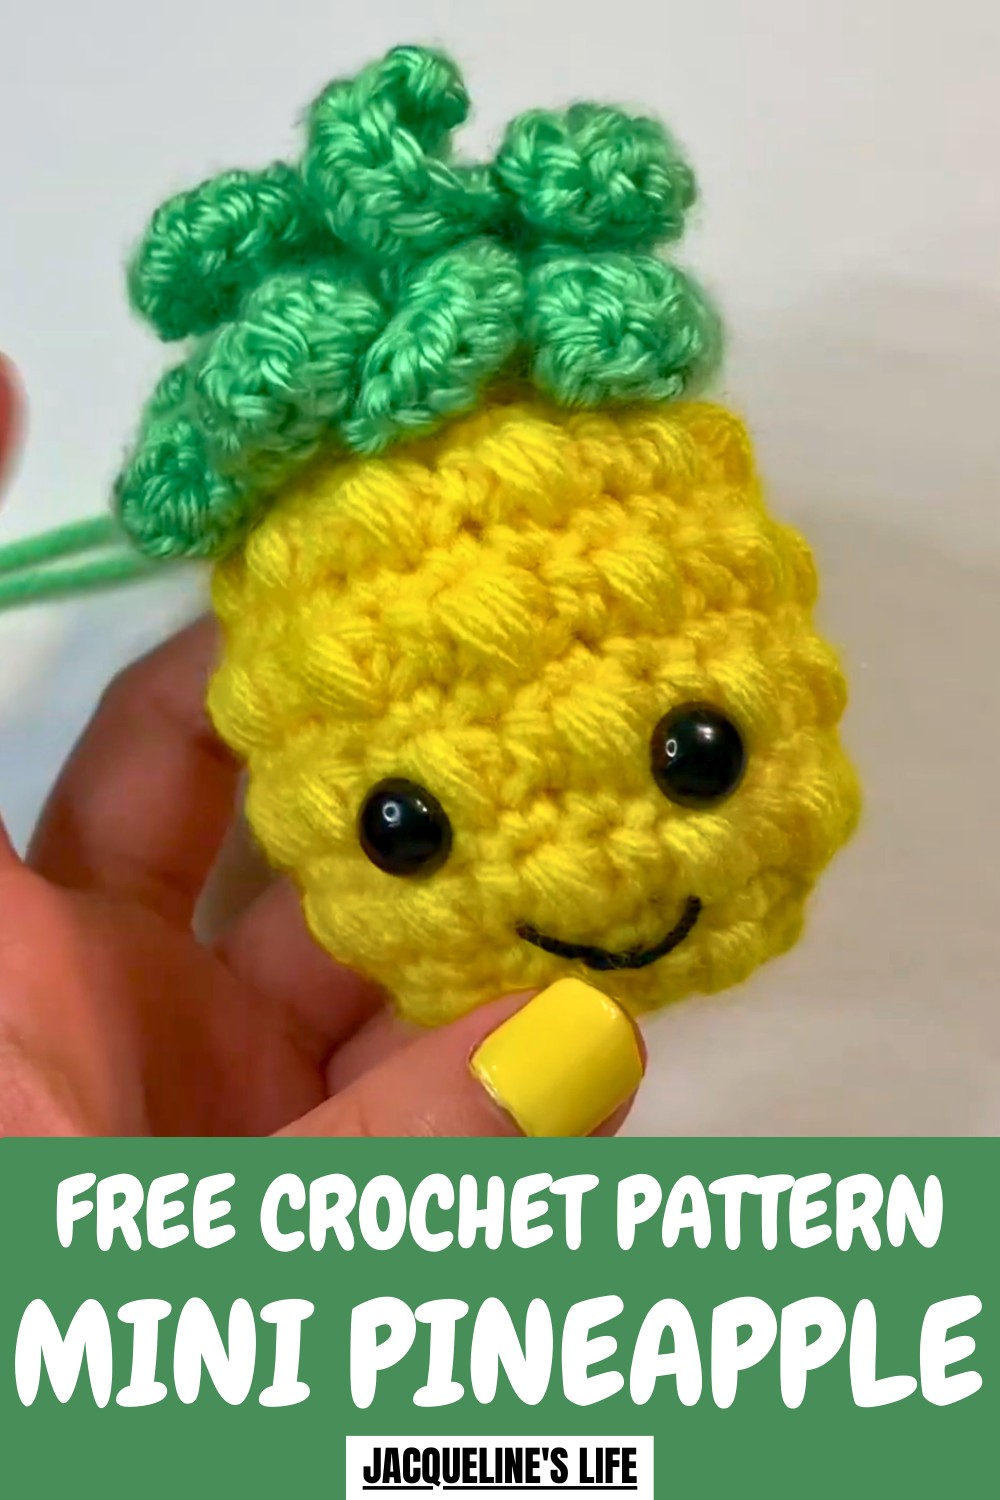
Brighten your space with this Free Crochet Mini Pineapple Pattern, adding a playful touch to décor, keychains, or cute handmade gift ideas.
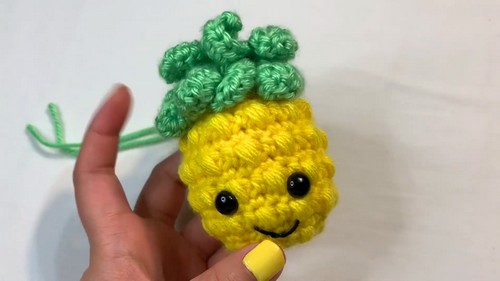
Created with simple techniques, this mini pineapple amigurumi brings a cheerful pop of color and charm to any space. Its golden-yellow body, detailed with textured stitches, and green leafy top capture the playful essence of a real pineapple in a compact form. It can also serve as a unique and thoughtful gift for friends, family, or fellow crafters.
Fun Crochet Mini Pineapple Pattern for Handmade Décor
Making it provides a relaxing way to practice essential crochet skills, including shaping, stitching, and finishing, suitable for beginners and more experienced makers alike. Its small size allows for versatile use, whether displayed alone or paired with other mini creations.
With clear, step-by-step instructions, this mini pineapple turns simple yarn into a vibrant, charming piece, combining skill-building, creativity, and a touch of fun in every stitch, making it a delightful addition to any handmade collection.
How to Crochet a Baby Pineapple Amigurumi – Step-by-Step Guide
Materials Used
Here’s everything you need to crochet the baby pineapple amigurumi:
- Yarn:
- Yellow Yarn: Used for the body of the pineapple (Big Twist Value line, bright yellow color).
- Green Yarn: Used for the leafy top (Caron Simply Soft yarn).
- Tools & Accessories:
- Crochet Hook: 4mm recommended (3.5mm or 3.75mm can also work for a smaller pineapple).
- 10mm Safety Eyes: Small black safety eyes for the pineapple’s face.
- Black Embroidery Thread: Used for the mouth (black yarn can also work).
- Stuffing/Fiberfill: To give the pineapple its rounded shape.
- Threading Needle: To sew and attach the mouth and weave in ends.
- Stitch Marker: Essential to mark the last stitch of each round.
- Scissors: To trim excess yarn.
Uses of the Baby Pineapple
- Car Decor: Add yarn to hang it in your car as a fun decorative piece.
- Keychain: Attach a keyring to make it into a small, personalized accessory.
- Gift Item: Hand this cute pineapple amigurumi as a gift for friends, kids, or craft enthusiasts.
- Fun Collectible: Create a full set of mini fruits or vegetables to add variety to your crochet collection.
Special Features of the Baby Pineapple
- Textured Puff Stitches: The body includes puff stitches that mimic the natural texture of a pineapple.
- Customizable Leafy Top: The green leaves on top can vary in size, thickness, and curliness based on your preference.
- Flat Bottom: Allows the pineapple to sit upright for display purposes.
- Multiple Styles of Leaves: Includes straight, curled, and thicker leaf options for variety.
- Beginner-Friendly Design: Uses simple yet effective stitches for crafting a realistic pineapple shape.
Level of Difficulty
Beginner-Friendly to Intermediate
- Easy Techniques: Single crochets, puff stitches, chain stitches, and slip stitches.
- Intermediate Techniques: Half-double crochet (HDC), double crochet (DC), and triple crochet (TC) are used for the leafy top.
- Assembly Skills: Beginners might find adding the face or creating a curved leafy top slightly challenging but manageable with practice.
Tutor’s Suggestions
- Adjust Hook Size for Customization: Use a smaller hook for a more compact pineapple or larger hooks for a softer, bigger design.
- Experiment with Yarn: Substitute yarns to alter texture or appearance. Thinner yarn creates a smaller pineapple; chunkier yarns result in bigger ones.
- Add Leaves to Preference: Don’t feel pressured to make the top overly full—skip leaves or adjust their size based on your liking.
- Take Your Time with Puff Stitches: Puff stitches use extra yarn, which can make your hook stuck. Pull gently and work slowly.
- Alternate Leaf Chains: Use chain lengths of 8, 9, or 10 stitches to make leaves look more varied and dynamic.
- Stuff Gradually: Add stuffing as you close the pineapple to ensure a smooth, rounded shape.
Step-by-Step Instructions
Step 1: Start the Pineapple Base
- Create a Magic Circle:
- Hold yellow yarn around your fingers to form an X. Wrap the yarn and pull the front strand under the back strand using your 4mm hook.

- Secure by chaining and pull tightly to create a smaller circle.
- Hold yellow yarn around your fingers to form an X. Wrap the yarn and pull the front strand under the back strand using your 4mm hook.
- Round 1:
- Work 6 single crochets (SC) into the magic circle. Close the circle by pulling the loose end. Place your stitch marker into the 6th stitch to mark the end of the round.
- Work 6 single crochets (SC) into the magic circle. Close the circle by pulling the loose end. Place your stitch marker into the 6th stitch to mark the end of the round.
- Round 2:
- Increase in every stitch: Crochet 2 SC into each stitch for a total of 12 stitches.
- Round 3:
- Alternate 1 SC and 1 increase (2 SC in one stitch). End with 18 stitches.
- Round 4:
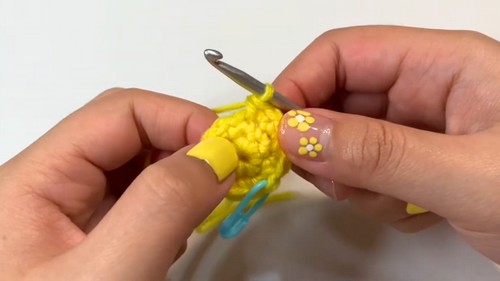
- Begin adding texture with puff stitches. Alternate between puff stitches and half-double crochets (HDC).
- Puff Stitch: Yarn over, insert hook into the stitch, grab yarn, repeat up to 7 loops on the hook. Yarn over and pull through all loops gently.
- Maintain 24 stitches by the end of the round.
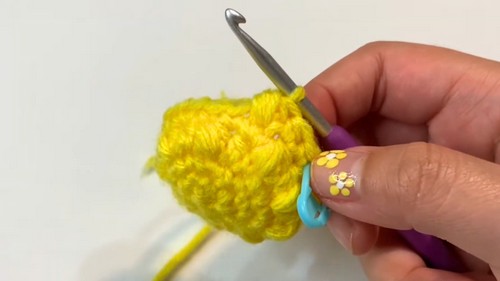
Step 2: Build and Shape the Body
- Rounds 5–12 (Alternating Rounds):
- Alternate puff stitch rows with rounds of single crochet.
- Puff stitches add texture, while single crochets create smooth spacing.
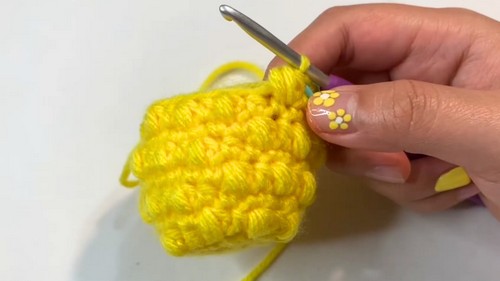
- Round 13 – Decreasing for Closure:
- Start invisible decreases: Insert hook into the front loops of two stitches, yarn over, and pull through.
- Alternate decreases with 1 single crochet into the following stitches. End with 18 stitches.
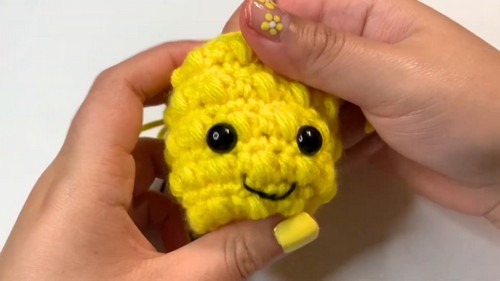
Step 3: Attach Face
- Add Eyes: Insert eyes between puff stitches on rounds closer to the bottom. Secure with safety backs.
- Embroider Mouth: Use black embroidery thread to sew a simple curved smile between the eyes.
Step 4: Make the Leafy Top
- Attach Green Yarn:
- Tie green yarn to the top edge of the pineapple. Insert hook and pull through.
- Create Leaves:
- Use chains of 8, 9, or 10 stitches for variation.
- Work down the chain with stitches like slip stitch (thin leaf), single crochet, half-double crochet, double crochet, or triple crochet (thicker, more curled leaf).
- Vary the number of stitches on each chain to customize leaf thickness and curliness.

- Fill the Top: Repeat the process around the top edge until the leafy crown is dense enough or matches your preference.
Step 5: Final Touches
- Stuff the Pineapple: Add fiberfill stuffing until desired fullness is achieved.
- Close the Top: Use your threading needle to weave through the remaining stitches and pull tightly to seal the opening.
- Optional Hanging Loop: Add a chain loop from green yarn or a keyring to hang the pineapple as decor.
Conclusion
Congratulations! You’ve completed your baby pineapple amigurumi. This miniature pineapple is cute, versatile, and showcases your ability to blend foundational crochet stitches with creative assembly. Whether you use it as decor for your car, a keychain, or part of a fruity crochet collection, this pineapple is sure to charm anyone who sees it. The puff stitches and curly green leaves make this project stand out as both fun and unique.
Pro Tip
When making puff stitches, angle your hook downwards to pull through the loops more smoothly, especially when working with tightly wound yarn. This ensures you avoid splitting the yarn and creates an even puff texture.