
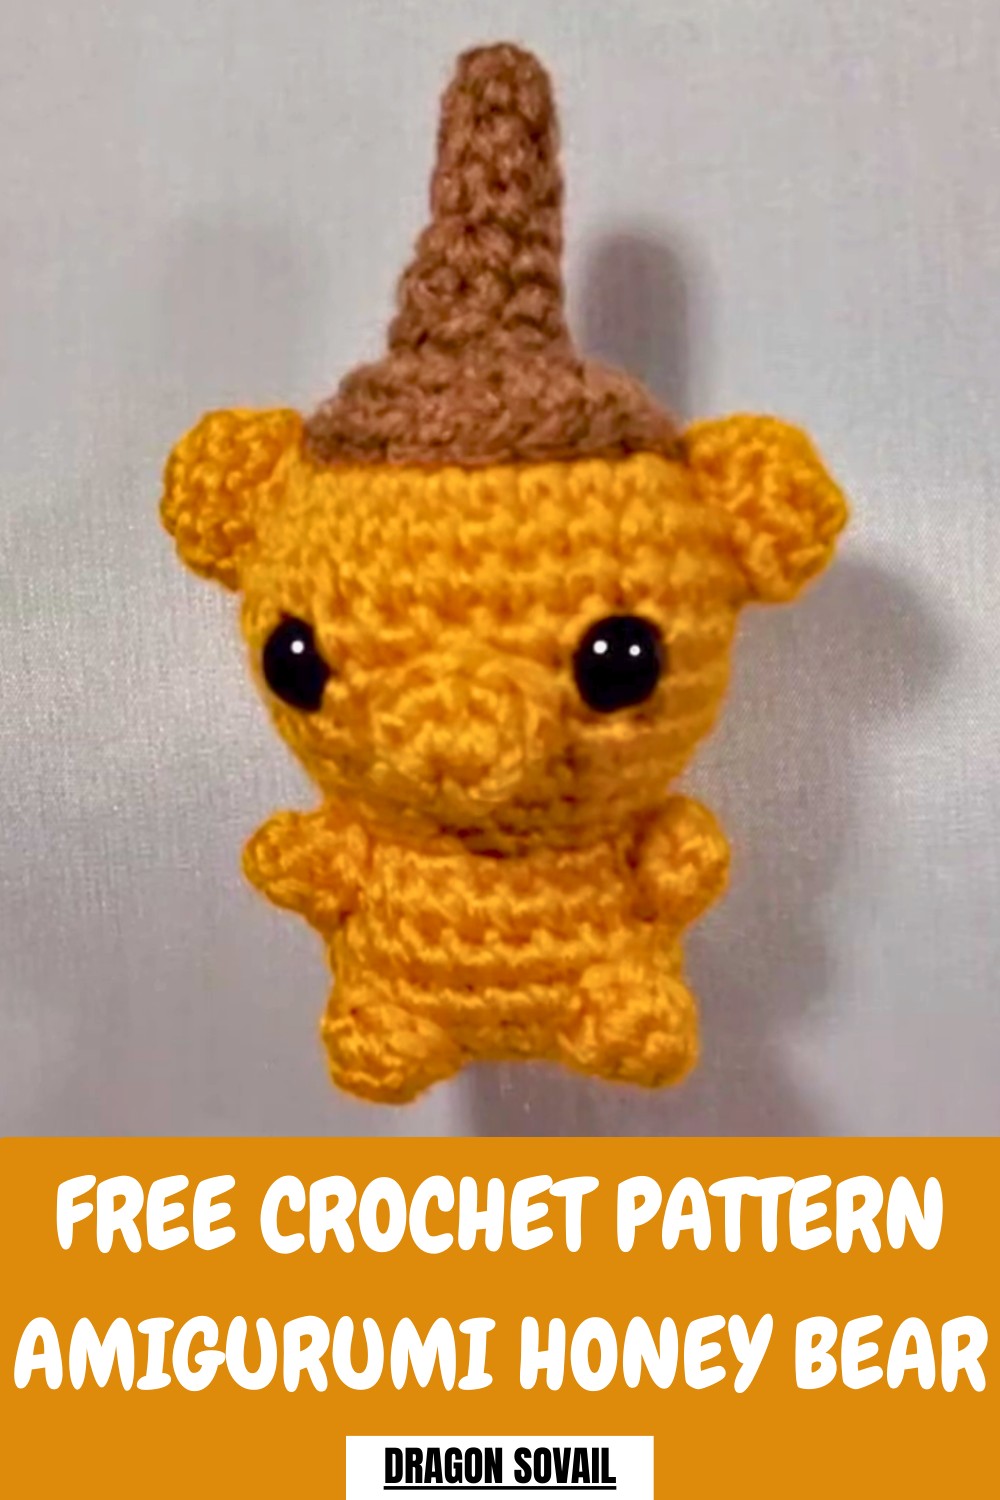
Buzz into cuteness with this Free Crochet Amigurumi Honey Bear Pattern, perfect for adding a playful and cheerful touch to décor or gifts.
Bringing charm and warmth into a space becomes a fun and creative experience. The Crochet Amigurumi Honey Bear Pattern allows you to create an adorable bear that can sit on a shelf, serve as a gift, or even become a playful keychain. Each honey bear can be customized in color, size, and facial expression, giving it a personality all its own.
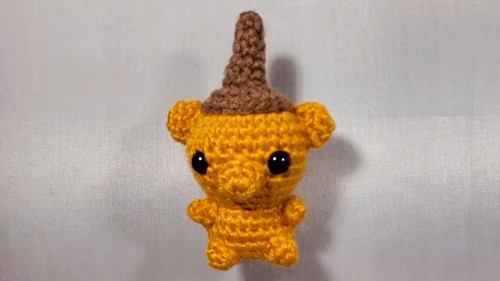
Charming Crochet Amigurumi Honey Bear Pattern for Sweet Décor
Following the pattern encourages focus, creativity, and a sense of accomplishment while producing a durable, high-quality item that mass-produced alternatives rarely match. Beyond decoration, a honey bear can be a comforting keepsake or a cheerful accent for any room. This pattern blends artistry, fun, and practicality, transforming simple yarn into a whimsical, heartwarming piece. Every stitch adds character, resulting in a unique creation that brings joy to both the maker and anyone who receives it.
How to Crochet a Honey Bear Amigurumi – Step-by-Step Guide
Materials Needed
- Yarn:
- Colors: Brown (for the bear's body, arms, legs, and ears) and gold/yellow (for the honey and cap).
- Crochet Hook:
- 3.25 mm crochet hook for tight, consistent stitches.
- Additional Tools:
- Scissors for cutting yarn.
- Yarn needle for sewing and finishing parts.
- Stitch marker to track rounds.
- Safety eyes (size depends on preference, usually small for amigurumi).
- Polyfill stuffing or leftover yarn for filling the bear’s body and head.
Uses of the Honey Bear
- Decor: Ideal as a quirky handmade decoration for your desk, shelf, or home.
- Gifts: Makes a thoughtful gift for crochet lovers, honey lovers, or children.
- Skill Practice: Provides an enjoyable opportunity to practice various crochet techniques like magic circles, invisible decreases, and small part assembly.
- Collectible: A great addition to your amigurumi collection.
Special Features
- Cute Design: The honey bear includes a bear-shaped body, a cap with a spout, and detailed features like facial expressions (snout, eyes, ears).
- Compact Size: Perfect for quick crochet crafting and stuffing.
- Customizable Options: You can adapt the design by adding details like a mini bee on the cap or adjusting colors to your liking.
- Polished Look: Techniques like working in back loops only and making an invisible decrease ensure a clean and seamless finish.
Level of Difficulty
Beginner to Intermediate
- The honey bear can be made by beginners with some experience in crocheting amigurumi.
- Techniques such as magic circle, working in the front/back loops, invisible decreases, and creating small parts offer intermediate-level challenges.
Tutor’s Suggestions
- Be Comfortable With a Magic Circle: The entire project begins with a magic ring for most parts, so ensure you're confident with the technique.
- Use Stitch Markers: Always mark the first (or last) stitch to follow your rounds accurately and avoid losing your place.
- Don’t Overstuff: Use small amounts of stuffing to keep proportions even, especially in the small parts like arms, legs, and tail.
- Be Precise Placing Safety Eyes: The tutor recommends placing the eyes between rounds 8 and 9 with about five stitches between them. Ensure the placement aligns with the snout before securing the safety backs.
- Adjust the Layers Carefully: Work slower through small sections like the snout, spout, or magic ring for an even shape and better visibility.
- Avoid Overcomplicating: Don’t worry about perfection – every bear will turn out slightly different, which adds personality.
Step-by-Step Instructions
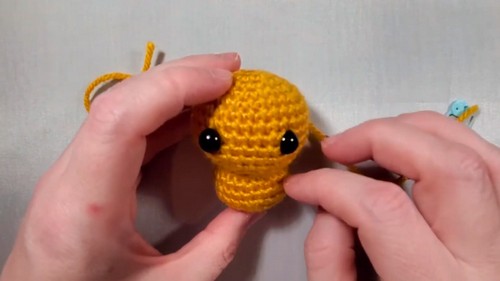
Step 1: Create the Head and Body
- Start With Yellow Yarn – Magic Circle (Round 1):
- Begin with a magic ring and crochet 6 single crochets (SC) into the loop. Pull the loop to tighten it, but not too tightly.
- Begin with a magic ring and crochet 6 single crochets (SC) into the loop. Pull the loop to tighten it, but not too tightly.
- Round 2:
- Increase in every stitch to go from 6 stitches to 12 stitches.
- Round 3:
- Increase in the first stitch and then make one SC in the next stitch (pattern: increase, SC). This increases the stitch count to 18 stitches.
- Increase in the first stitch and then make one SC in the next stitch (pattern: increase, SC). This increases the stitch count to 18 stitches.
- Round 4:
- Follow the pattern: Increase, SC, SC (increase in the first stitch, then a single crochet in the next two). You should have 24 stitches at the end of this round.
- Round 5:
- Similarly, increase from 24 to 30 stitches by using this pattern: Increase, SC, SC, SC.
- Rounds 6–10:
- Crochet 30 SC for 5 rounds to build the head.
- Crochet 30 SC for 5 rounds to build the head.
- Round 11 (Decrease):
- Decrease from 30 to 24 stitches using the pattern: Invisible decrease, SC, SC, SC.
- Add Safety Eyes:
- Place safety eyes between rows 8 and 9, leaving 5 stitches between them. Add the backs only after ensuring correct placement.
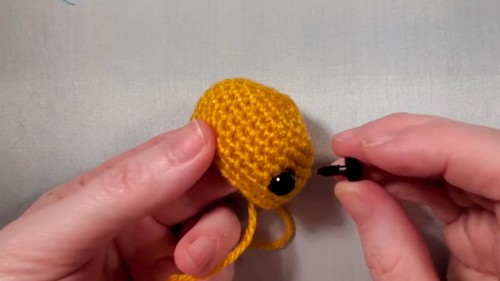
- Place safety eyes between rows 8 and 9, leaving 5 stitches between them. Add the backs only after ensuring correct placement.
- Round 12–13:
- Finish the head:
- Round 12: Decrease to 18 stitches (pattern: decrease, SC, SC).
- Round 13: Decrease to 12 stitches (pattern: decrease, SC).
- Finish the head:
- Add Stuffing to the Head:
- Begin stuffing the head before closing it off completely. Ensure there’s enough filling between the safety eyes for stability.
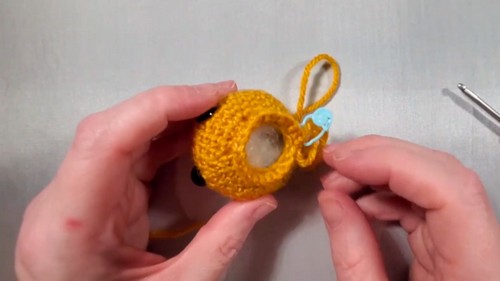
- Begin stuffing the head before closing it off completely. Ensure there’s enough filling between the safety eyes for stability.
- Round 14:
- Increase the body size (from 12 stitches to 24) by working 2 SC into every front loop only of each stitch.
- Rounds 15–17:
- Crochet 24 SC in each round to build the body.
- Round 18–19 (Decrease and Close Body):
- Round 18: Decrease to 18 stitches (pattern: decrease, SC, SC).
- Round 19: Decrease to 12 stitches (pattern: decrease, SC).
- Add more stuffing, ensuring the body is firm but not overstuffed.
- Final Round:
- Decrease to 6 stitches by making three invisible decreases. Use a yarn needle to close the body, weaving through the last stitches.
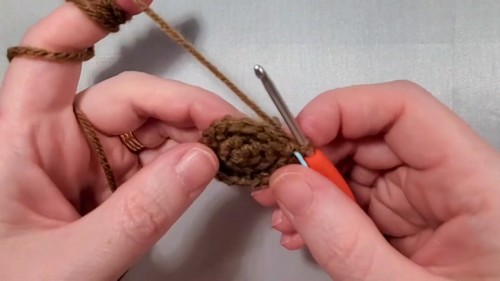
Step 2: Create the Arms, Legs, Tail, Snout, and Ears
For all smaller parts, use brown yarn unless stated otherwise.
- Arms:
- Magic ring with 4 SC in the first round.
- Increase to 6 stitches in the second round.
- Make two arms and attach them at the body-head join.
- Legs:
- Magic ring with 4 SC in the first round.
- Increase to 8 stitches in the second round.
- Make two legs and attach them at the bottom corners of the body.
- Tail:
- Magic ring with 3 SC. Pull the ring tight.
- Attach the tail at the center of the back.
- Snout:
- Magic ring with 6 SC.
- Increase to 8 SC with a pattern: increase, SC, SC.
- Attach the snout between the eyes, ensuring symmetry.
- Ears:
- Magic ring with 6 SC.
- Increase to 8 SC with a pattern: increase, SC, SC.
- Add an extra round of 8 SC.
- Set them aside and attach them after the cap and spout are sewn in place.
Step 3: Make the Cap and Spout
- Cap Base (Yellow Yarn):
- Magic ring with 6 SC.
- Round 2: Increase to 12 stitches.
- Round 3: Increase to 18 stitches.
- Round 4: Single crochet (back loops only) to give the cap a "lip" structure.
- Lightly stuff the cap and sew it onto the middle of the bear's head.
- Spout:
- Magic ring with 4 SC.
- Crochet another round of 4 SC.
- Increase to 6 SC, then to 8 SC.
- Add a final round of 8 SC.
- Lightly stuff the spout, then sew it to the center of the cap.
Conclusion
Your Honey Bear Amigurumi is complete! This fun and quirky project combines a bear with a honey jar aesthetic, making it a unique addition to your crochet projects. By following the tutorial step by step, you’ve sharpened your skills with magic circles, invisible decreases, and assembling intricate parts. Each bear is unique, and you can customize it further to add personal touches!
Pro Tip
When working with small parts like the ears or spout, consider using a smaller crochet hook or crocheting tightly to avoid gaps or loose tension in these delicate details. It ensures the parts retain their shape better!