
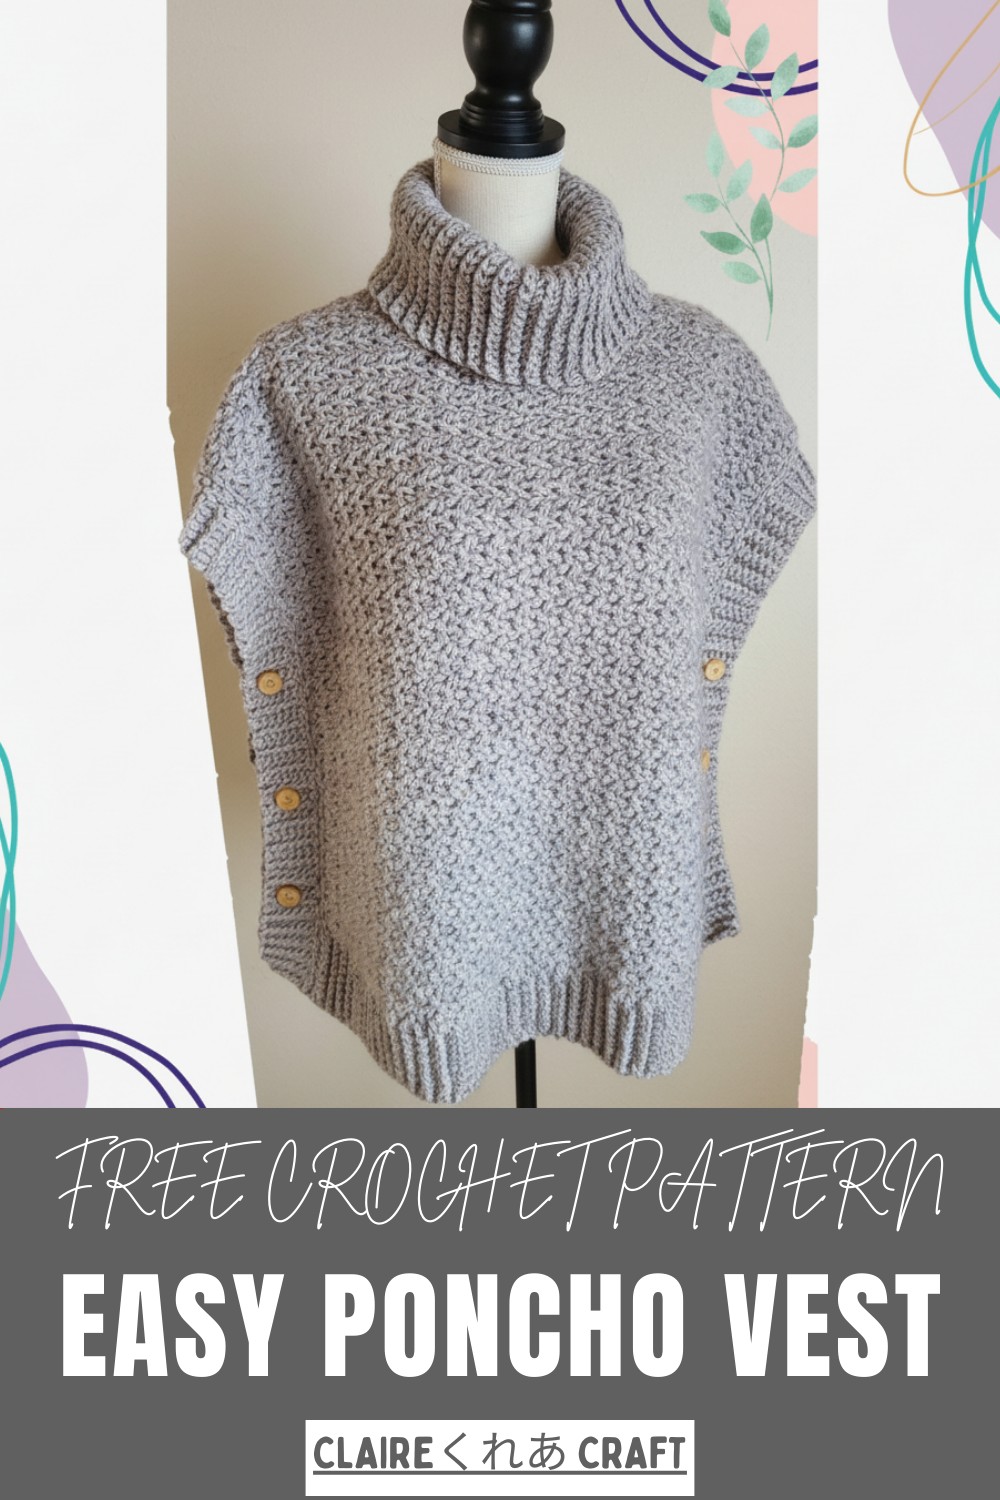
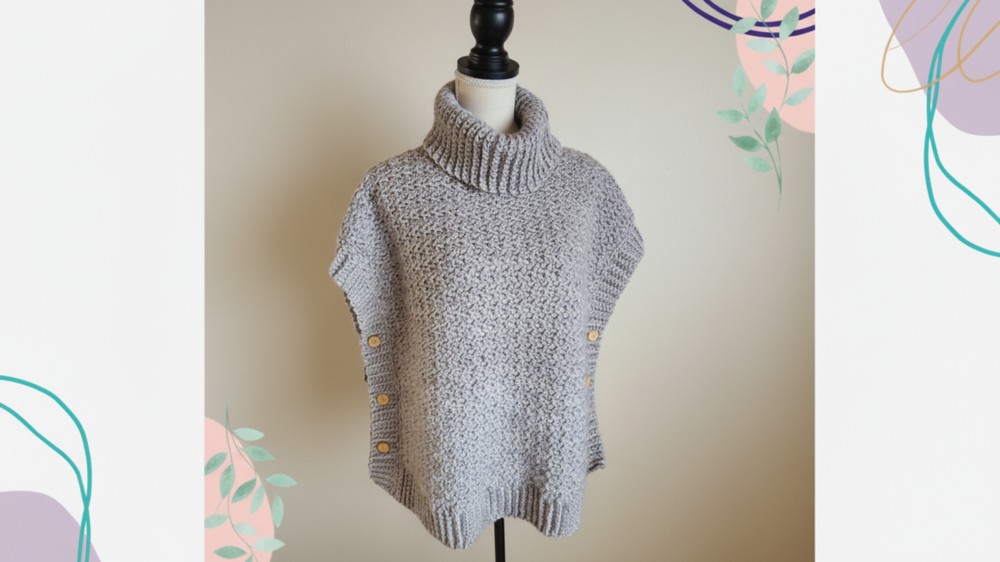
Relaxed Fit Crochet Poncho Vest Pattern For Comfort
Wear a Free crochet Poncho Vest Pattern with airy, lightweight stitches that offer a stylish and comfortable layer perfect for cool or breezy days.
A Cozy Layer with Easy Style
This poncho vest offers a relaxed, handmade vibe that feels both comfortable and stylish. Its gentle drape and open stitchwork let it sit softly over tops or dresses perfect for transitional weather, breezy evenings, or just a casual day out. Because it’s sleeveless and simply shaped, it brings a laid‑back elegance that suits many outfits without feeling bulky.
Cute Crochet Poncho Vest Pattern For Casual Style
Its design makes it flexible: you can choose colours and yarns you like, adjust the length or width, and end up with a piece that fits your style and comfort. As a layer, it’s versatile: add warmth without weight, and give simple outfits a handmade finishing touch.
Tip
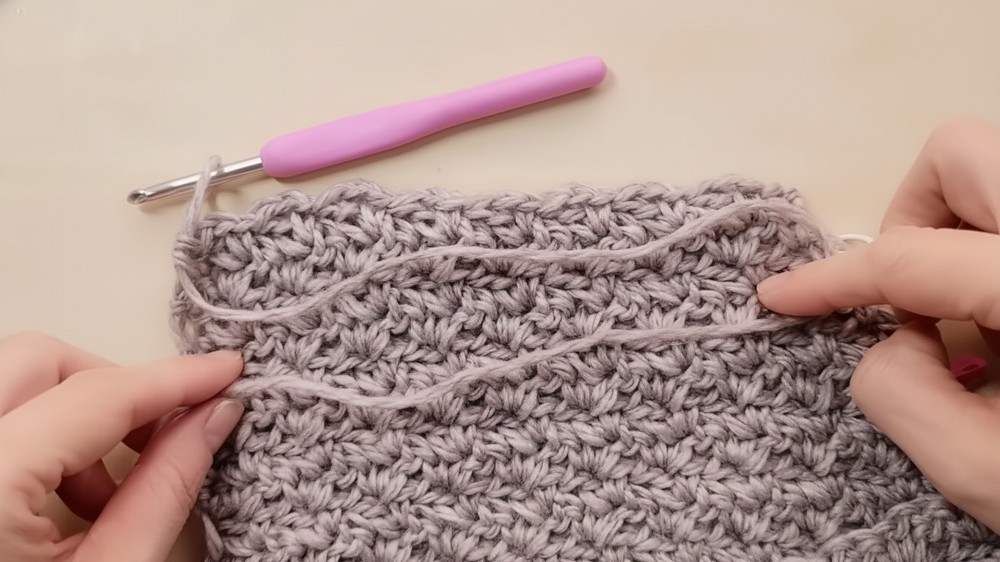
When you work the transition row (Row 1 of the body) along the side of the ribbing, insert your hook carefully into the vertical bar of the SC stitches rather than the large gaps. This creates a much sturdier foundation that prevents holes and maintains the shape of the poncho.
Materials
-
Yarn: Use Daiso "Soft Mix" yarn (color SM2 Gray), which is a medium-weight blend of 80% Acrylic and 20% Wool.
-
Crochet Hook: The yarn label recommends a 10/0 hook (6.0 mm), but the tutor opts for a smaller 8/0 hook (5.0 mm) to achieve a tighter gauge.
-
Buttons: Select six large wood buttons (around 20mm or larger) from Seria or similar, as larger buttons draw more attention and are easier to fasten.
-
Tools: Gather stitch markers, a tapestry needle (darning needle), scissors, and knit pins for placement.
Uses and Special Features
-
Uses: Wear the finished item as a poncho or as a stylish vest.
-
Special Features:
-
Textured Fabric: The main body uses a combination of single crochet (SC), chain (Ch), and double crochet (DC) stitches to create a distinctive, textured pattern.
-
Side Openings: Instead of sewing the sides closed, the pattern incorporates buttons and buttonholes, which allows for a flattering drape and makes the garment easy to wear.
-
Ribbed Hem: The piece begins with a solid, ribbed band made by working single crochet in the back loop only, providing a stretchy base.
-
Why It’s a Great Choice for Makers
The pattern is beginner-friendly — you just need to know chain and double‑crochet stitches — and it works up quickly, which is ideal if you want a wearable project without a huge time commitment.
How to Start Making It
Begin with a foundation chain long enough to cover the back plus front panels.

Level of Difficulty
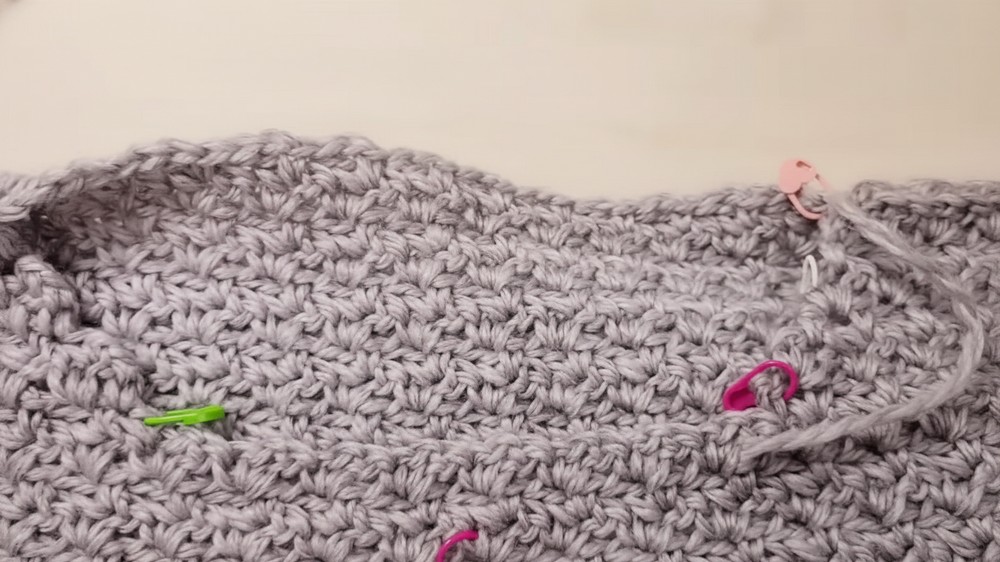
Intermediate. While the individual stitches are simple, the project requires counting many rows, working complex decreases for the neckline shaping, and accurately seaming the shoulder pieces.
Tutor's Suggestions
-
Hook Adjustment: Do not automatically follow the hook size listed on the yarn label. The tutor deliberately selected the 8/0 hook (5.0 mm) instead of the recommended 10/0 hook, finding the larger size too loose.
-
Button Size: Choose buttons that are 20mm or larger; smaller buttons may get lost or be difficult to secure in the fabric.
-
Check Your Tension: Note that your personal tension will heavily influence the final measurements. The completed back panel measured 57 cm, but a looser hand could result in a width closer to 60 cm.

Then work rows of mesh-style double‑crochet (for example, a v‑stitch or block‑stitch mesh) until the piece reaches your desired length.
After that, fold and seam the sides leaving an opening for armholes to form the poncho‑vest shape. Optionally, add a simple border or ribbing around the edges for a neat finish.
Conclusion
You have successfully completed the main body construction of the poncho! You created the ribbed hem, the full back panel, and the shaped front panel, and then seamed the shoulders to form the body and neck opening. The next steps will involve adding the high collar and securing the side button closures.