
Free Boho Crochet Plant Pot Cover Pattern to Beautify Your Space
Spruce up your space using this free crochet plant pot cover pattern, bringing beauty and a personalized charm to your pots effortlessly.
Adding a handmade touch to your décor has never been so satisfying. With a crochet plant pot cover pattern, you can turn plain pots into stunning, textured pieces that effortlessly elevate any space. These covers bring warmth and personality to your home, letting you match your plant décor with your style, be it minimalist neutrals or vibrant, playful colors.
Crochet Plant Pot Covers Pattern That Add Charm to Any Room
Beyond aesthetics, crochet pot covers also serve practical benefits. They protect surfaces from accidental scratches, reduce the risk of water stains from pots, and can even act as insulating layers for your plants. A variety of stitches can be used to create eye-catching patterns, making each project customizable and unique. Whether you’re showcasing natural greenery or artificial plants, these covers add a handmade, cozy charm that store-bought options just can’t replicate.
Crochet Plant Pot: Step-by-Step Details
Special Features
- Eco-Friendly Design: Uses recycled jars (e.g., old pickle jars).
- Highly Customizable: Adjust the design with colors, stitch patterns, or decorative edges to suit your personal style.
- Beginner-Friendly: Simplified instructions make this project accessible to novices, with room for advanced creators to get creative.
Level of Difficulty
Stefania explains this project step-by-step, making it beginner-friendly while encouraging advanced crocheters to experiment with additional customizations.
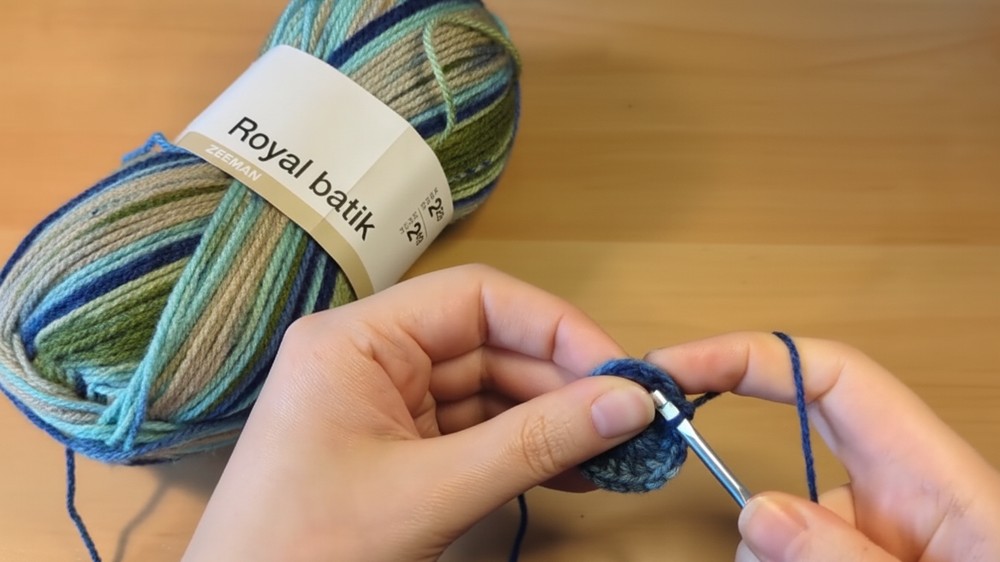
Materials Needed
- Recycled glass jar (e.g., kitchen jars like pickle jars).
- DK-weight variegated yarn (or any yarn of your choice).
- 4 mm crochet hook (adjust the size for your chosen yarn).
- Hot glue gun for attaching the soil piece.
- Scissors, yarn needle for weaving in ends, and optional embellishments.
Uses
- Stylish indoor décor for dark or low-light areas.
- Great gift idea for friends and plant lovers.
- Perfect project for using up leftover yarn scraps.
Step-by-Step Instructions
1. Begin with the Base of the Jar
- Start by making a magic ring with 8 single crochets (SC).
Note: Using 8 stitches makes the increases fit jars better, though 6 stitches can be used if preferred. - Pull the tail of the magic ring tight. In round two, increase in every stitch (16 SC).
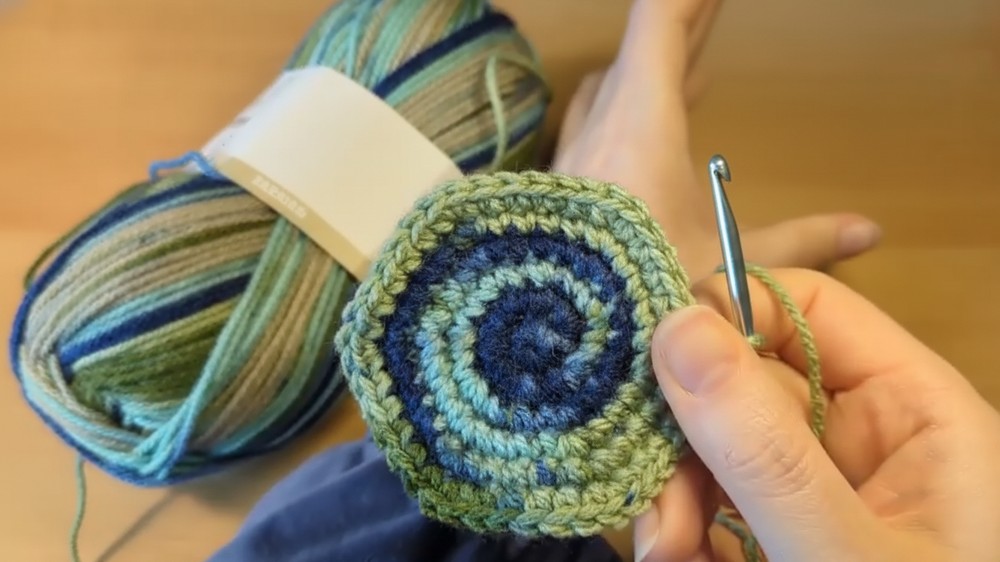
2. Increase for the Jar Base
- In round three: alternate 1 single crochet, then an increase. Repeat 8 times (24 SC).
- For round four (using 8 SC in the magic ring): alternate 3 single crochets, then an increase. Repeat 6 times (30 SC).
Note: Customize stitch increases based on whether you used 6 or 8 stitches in your magic ring. - Continue adding single crochets between increases in additional rounds until the circle's size matches the jar base. Aim for a circle slightly smaller than the jar base for a snug fit.
3. Build the Jar Cover’s Sides
- Use single crochet stitches all the way up to cover the sides of the jar, allowing the variegated yarn to stand out.
- Option: Customize the sides with different stitch patterns (e.g., bobble stitch, alternating SC and DC).
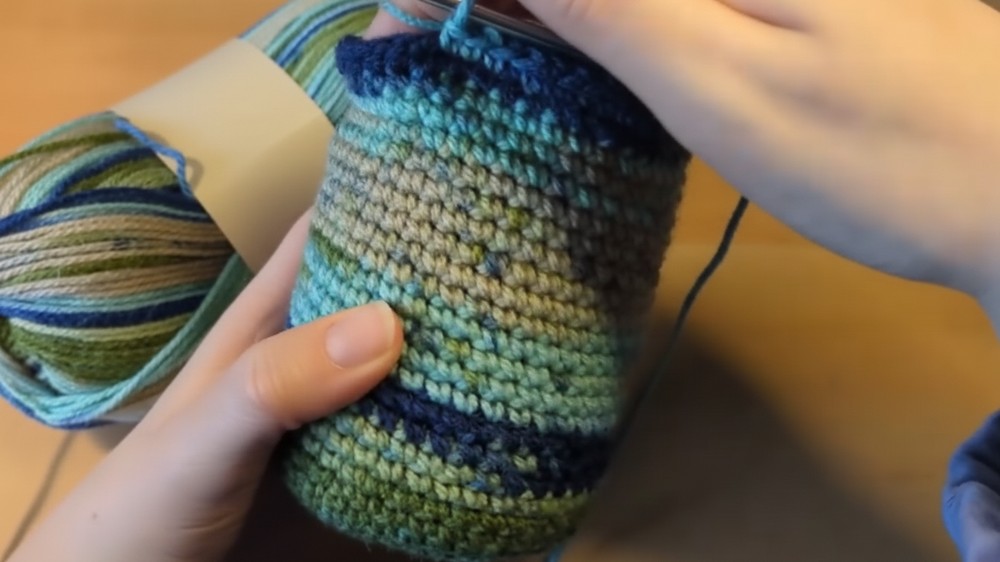
4. Finish the Top of the Jar
- Stop crocheting once the jar cover nearly reaches the jar’s top.
- Add optional flares or ruffles for aesthetic or a looser fit for easier handling.
- Ensure the cover slightly overlaps the jar rim to mimic a real soil-filled pot.
5. Add a Decorative Edge
- Finish with a simple slip stitch and chain one for subtle detail, or experiment with other finishing stitches to personalize your cover.
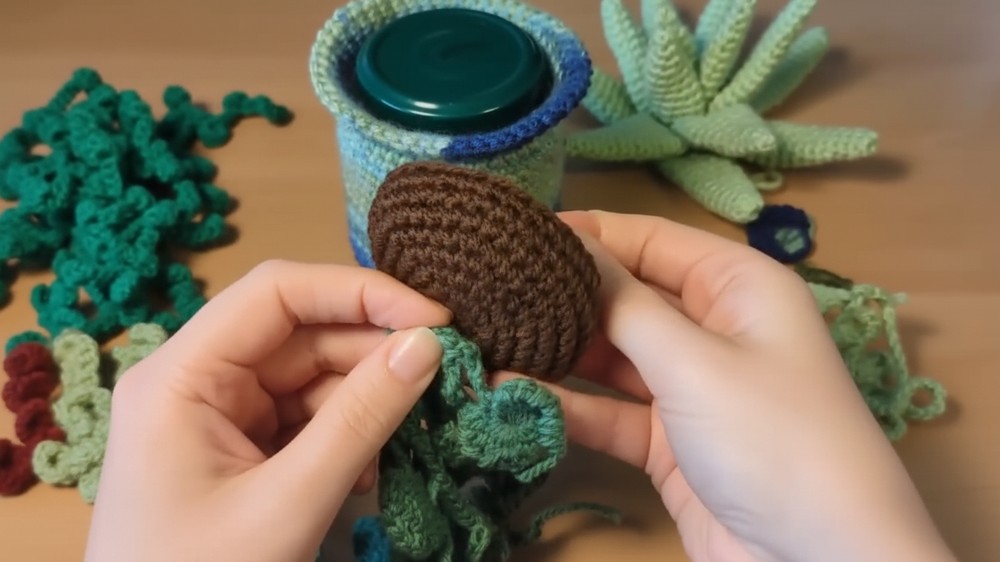
6. Make the Soil Piece
- Using dark brown yarn, crochet the soil circle:
- Begin with the same magic ring method as the base but create a circle that matches the jar’s lid size.
- Example: Work up to 36 SC or as needed.
- Continue single crocheting around the circle without increasing to create depth.
- Finish off with a secure tie-off. Weave in ends as this piece will be glued to the jar.
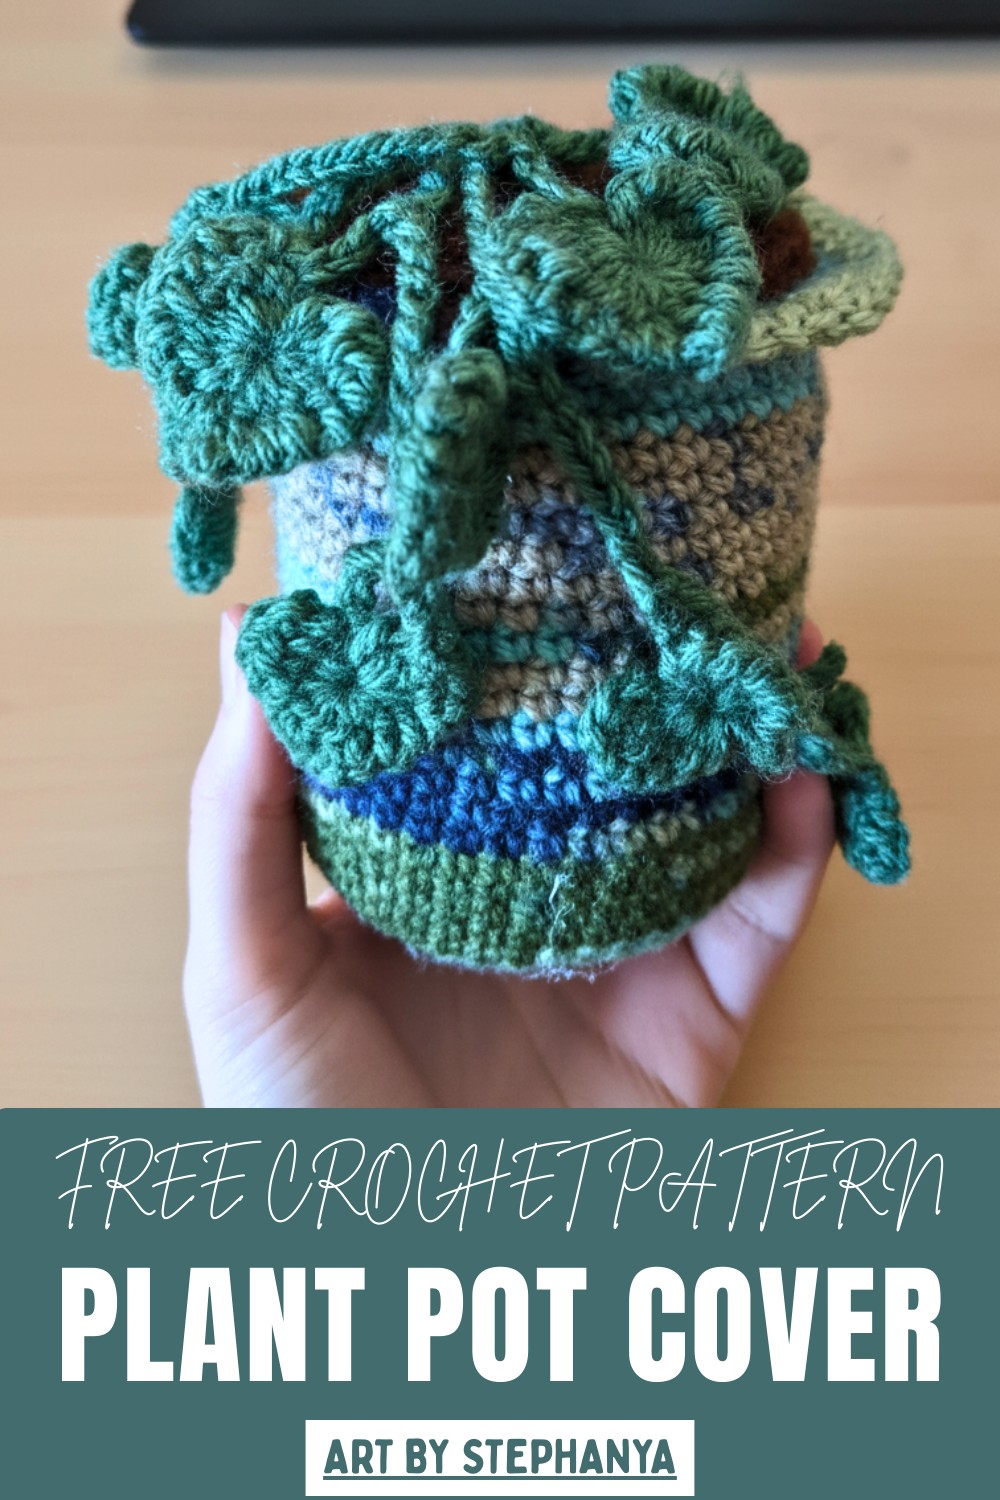
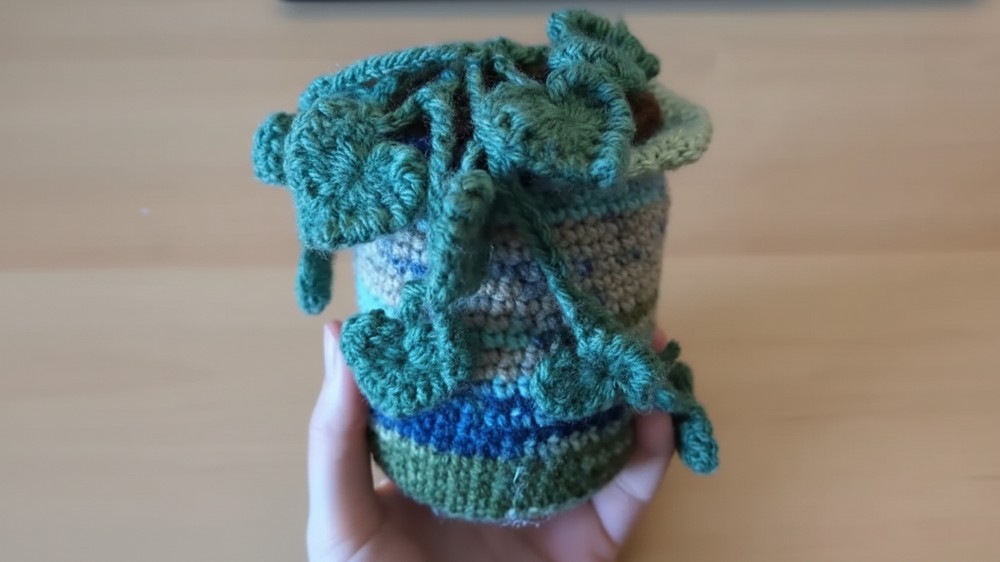
7. Attach the Crocheted Plant
- Pick from a variety of pre-made crochet plants or your own design. Stefania used a heartleaf vine for this project.
- Bring the yarn tail through the center of the soil piece and use a needle to secure the plant to the soil.
- Sew it tightly, tie off the yarn, and tuck in any loose ends.
8. Assemble the Final Plant Pot
- Use a hot glue gun to attach the soil piece to the jar lid:
- Start by adding glue to the center, pressing the soil into place.
- Add glue along the edges for extra security.
- Ensure the cover aligns neatly around the lid.
Conclusion
Congratulations! You’ve turned a simple recycled jar into a stylish crochet plant pot, complete with a soil cover and decorative plant. This project not only allows you to upcycle household materials but also adds a personal, handmade touch to your décor. Be creative with stitch patterns, yarn colors, and plant choices to make each piece uniquely yours!
Suggestions from the Tutor
- Customize your plant pots with various stitch techniques or patterns (e.g., bobble stitch or ruffled edges).
- Use yarn colors that complement your existing décor or the "plant" you’re crocheting.
- Make sure to hold the base against the jar to avoid making it too large.
Bonus Tip
When crocheting the base, always make it slightly smaller than the jar’s bottom. Crochet tends to stretch as you work the sides, ensuring a snug fit for your jar.